
Platform: Create Import Scenarios More Easily in the Modern UI
In MYOB Acumatica 2025.2.1, we've made it easier than ever to find the needed fields for an import scenario! Just search by the element’s UI name while mapping the scenario—no need to guess which field to pick. You can use the updated Element Inspector tool anytime you’re unsure about which element to select.
Selecting a Field for Scenario Mapping
You define the mapping of a scenario on the Mapping tab of the Import Scenarios (SM206025) or Import by Scenario (SM206036) form. In the Modern UI, here’s how you select the field or action you need:
- Click the magnifier button in the Field or Action column.
- In the Search box of the Select - Field or
Action dialog box (see below), type the name of the UI element. You’ll see
all the matching elements, grouped by their location on the form.
Figure 1. Searching for the element to be mapped 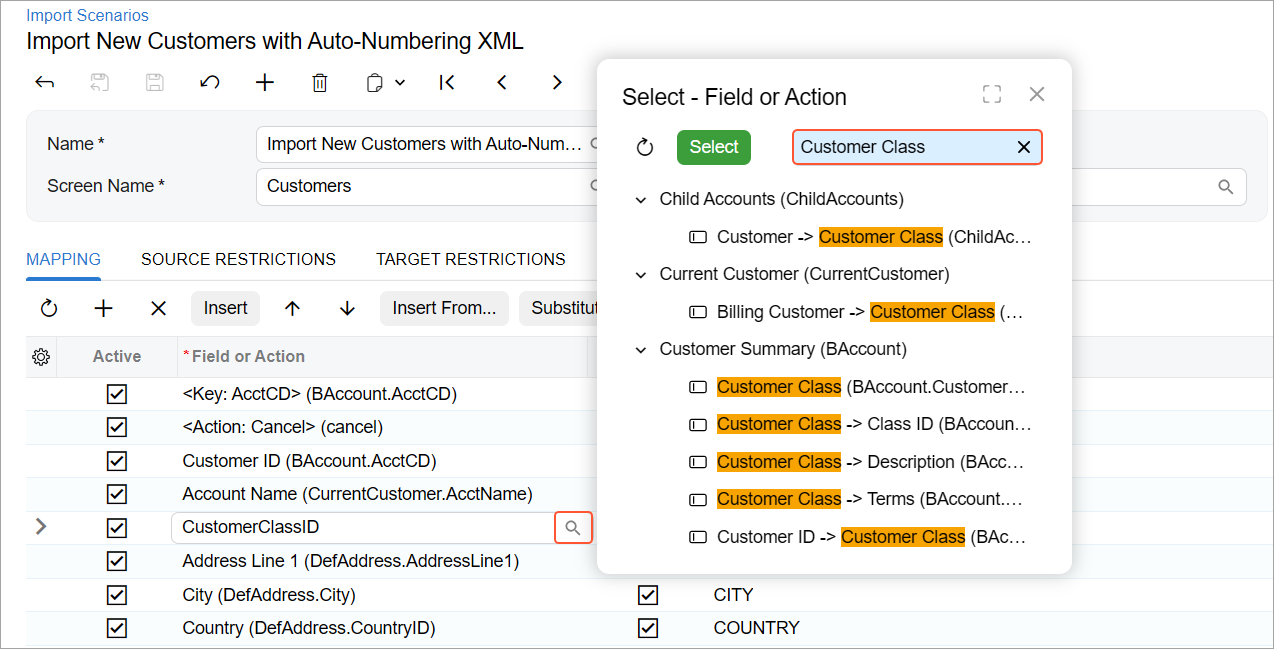
- Double-click the needed element to select it for mapping.
Verifying the Element with the Element Inspector
If you have doubts about which element to select in the mapping on the Import Scenarios (SM206025) or Import by Scenario (SM206036) form, use the Element Inspector tool to verify the element.
Imagine that you want to create an import scenario for the Customers (AR303000) form. You need to map the imported customer class to the Customer Class box. To verify which element you’ll select for this box in the scenario, you do the following on the Customers (AR303000) form:
- Click the Settings button on the form title bar and click Inspect
Element (see below).
Figure 2. Inspect Element command 
- Click the Customer Class box on the form.
- In the Element Properties dialog box, notice the data field and
view name: CustomerClassID and BAccount (see below).
Figure 3. The data field and view name in Element Inspector 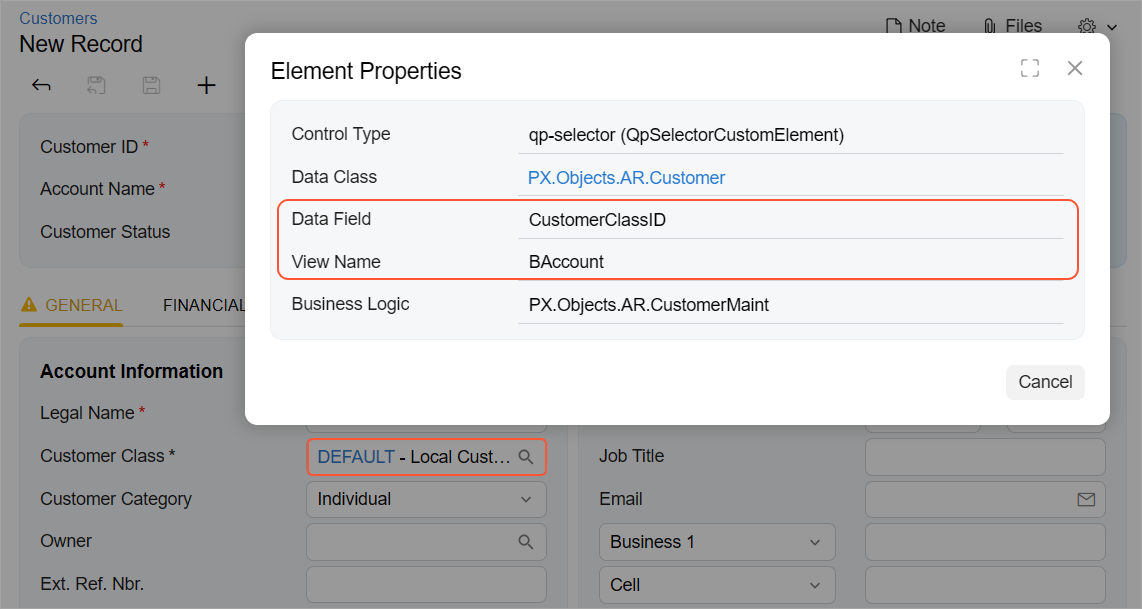
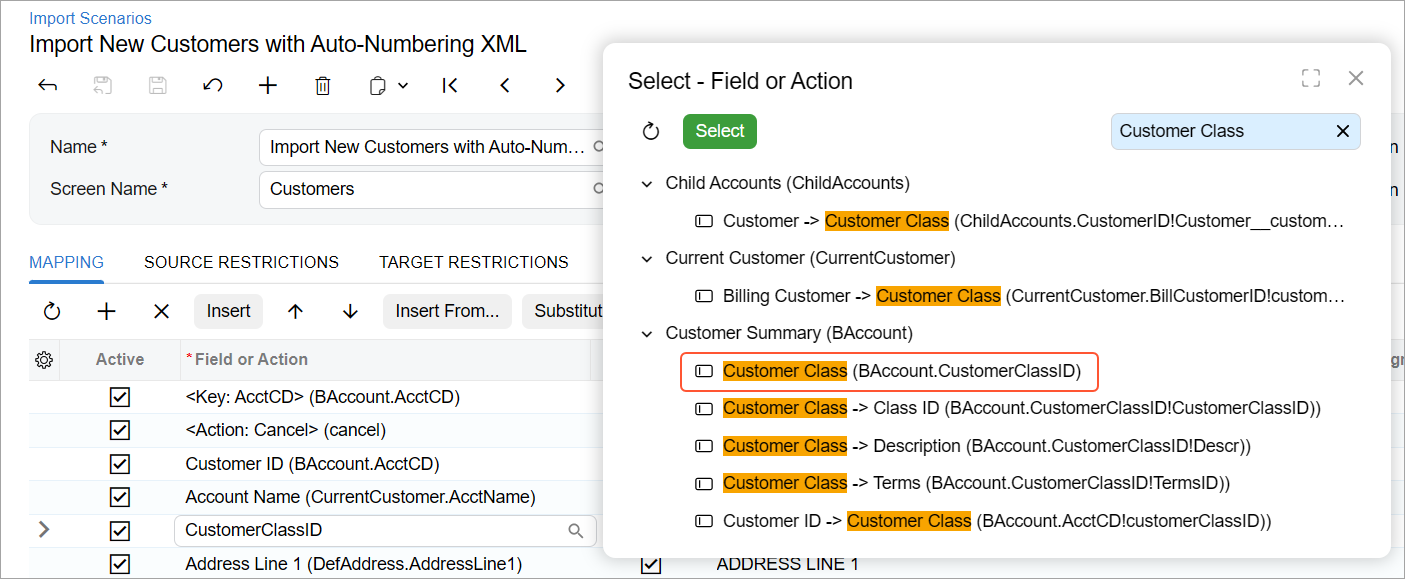
Now on the Import Scenarios form, you search for Customer Class in the Select - Field or Action dialog box and select the item that has CustomerClassID and BAccount in its description (shown below).
- The Customizer, Administrator, or ReportDesigner role
- At least View Only access to the Generic Inquiry (SM208000) or Import Scenarios form
Adding Custom Keys
Adding custom keys to a scenario mapping is now also much more convenient. You no longer need to prefix the key name with @@ and insert an extra line into the mapping.
Instead, you select the check box in the new Search column on the Mapping tab of the Import Scenarios (SM206025) form for the field. (This column is hidden by default.) To add a custom key:
- Add the field that you want to use as a custom key on the Mapping tab, as described in the sections above.
- Open the Column Configuration dialog box for the table, and select the check box for the Search column to make it visible.
- Select the Search check box for the added field (Item 1
below).
You select this check box for any field that you want to designate as a custom key. You can use the fields of the Summary object or unique fields of the detail objects.
Notice that the system automatically selects the Search check box for the Type and Reference Nbr. key fields (Item 2). For key fields, this check box is always selected and read-only.
Figure 5. The new Search column 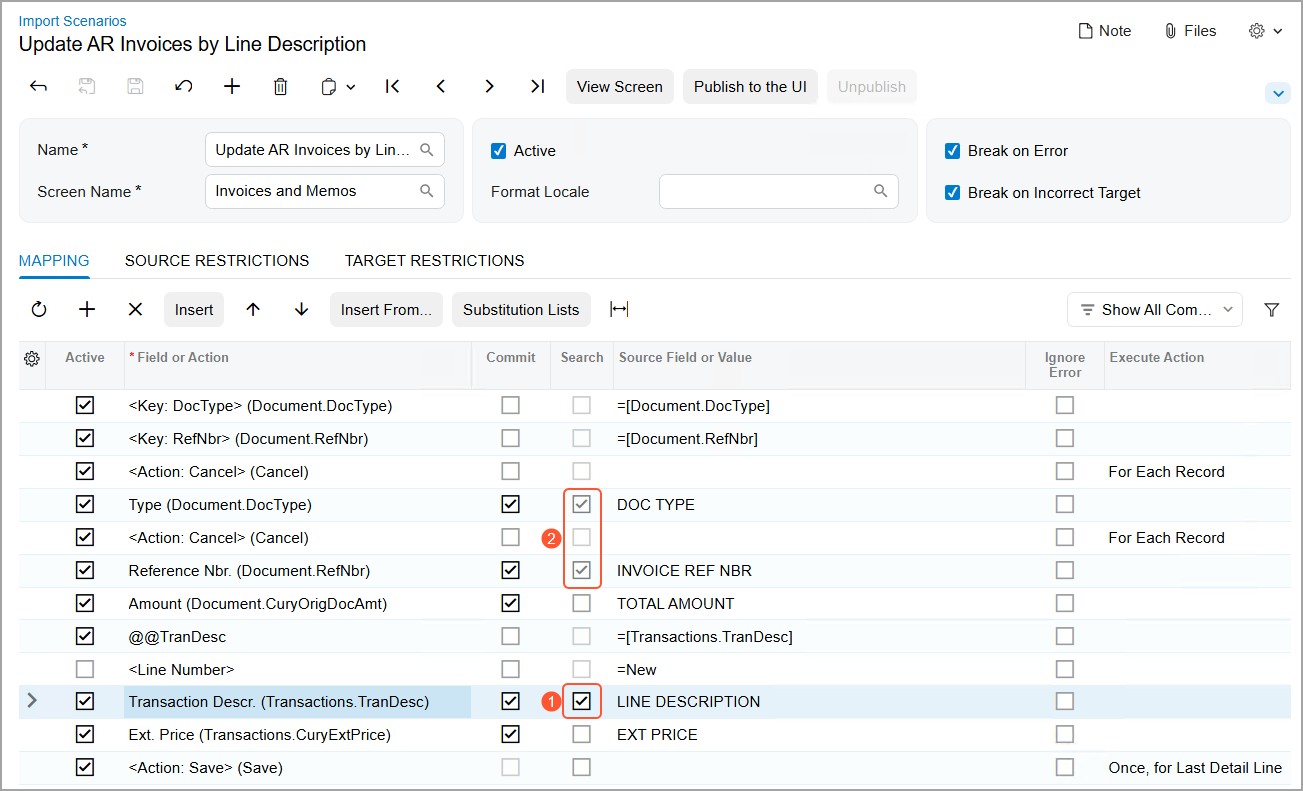
Learn More
You might find these topics helpful: Target Objects and Fields in Import Scenarios and Key Fields and Search in Import Scenarios.