
Customization: Including Your Screen Personalizations in Customization Projects
You've probably noticed that in the Modern UI, you can personalize a form in Form Configuration mode and save your personalized settings. You do this by clicking the Settings button on the form title bar and then clicking Screen Configuration.
Starting in MYOB Acumatica 2025.2.1, you can incorporate your personalized screen configurations in a customization project. You do this by using the new Screen Configurations (AU230010) page of the Customization Project Editor. This enhancement streamlines the deployment of tailored interfaces across your organization.
Personalization Settings
You can include these commonly personalized settings in your customization projects:
- Tabs, including their visibility and order
- Grid columns and their visibility, order, width, and tab stops
- Fields, as well as their visibility, order, tab stops, visibility in collapsed state
- Fieldsets and their captions
- User-defined fields linked to a form, including their location
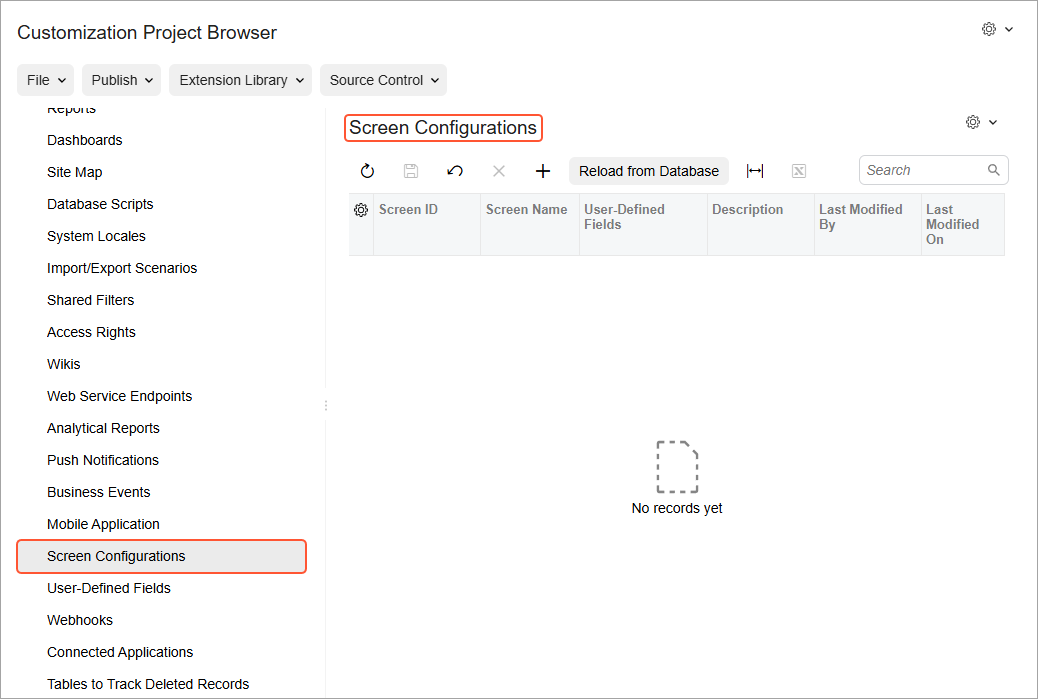
Accessing and Using the Screen Configurations Page
You open the Screen Configurations (AU230010) page, shown below, as follows:
- Open a customization project in the Customization Project Editor.
- Click the Screen Configurations node in the navigation pane.
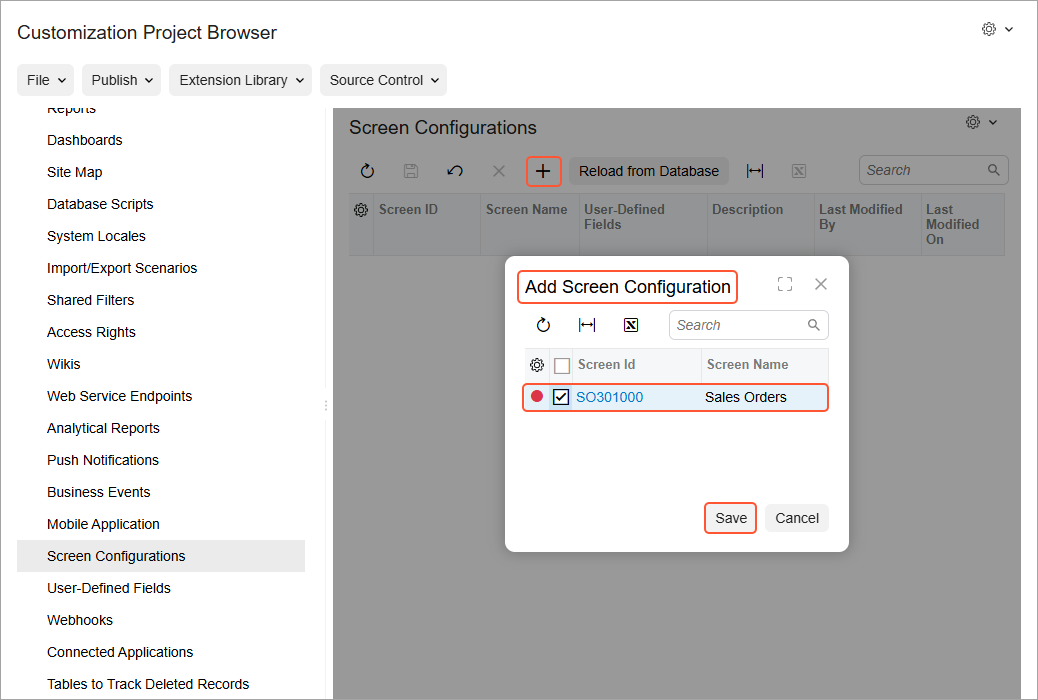
To add each saved screen configuration:
- On the page toolbar, click Add New Record.
- In the Add Screen Configuration dialog box, which opens, select the screen configuration and click Save (see below).
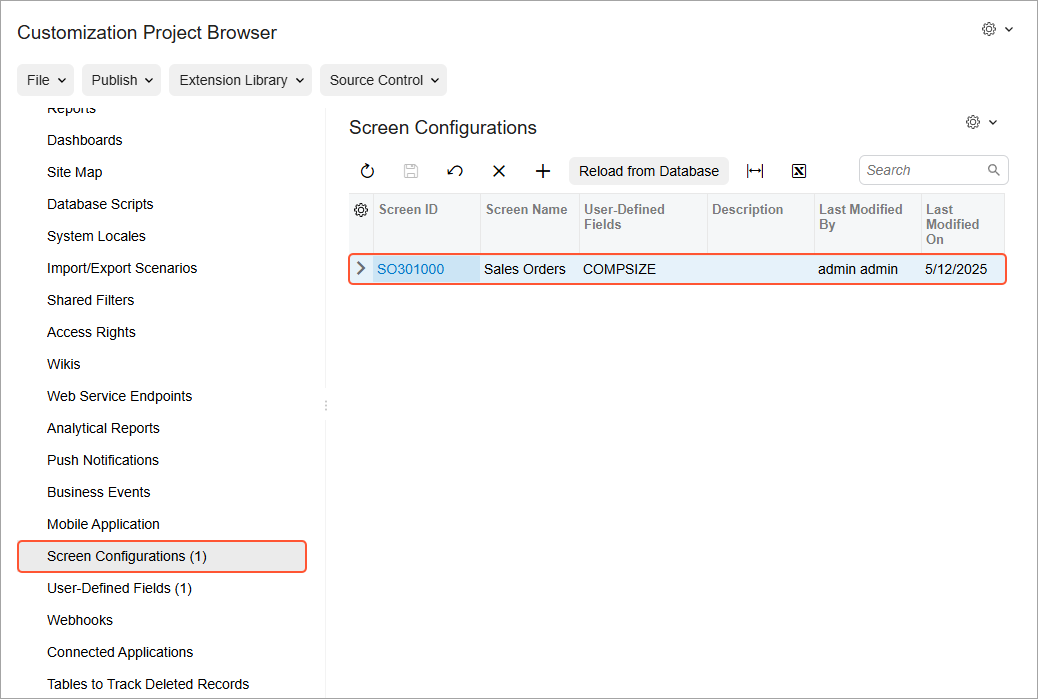
Once added, the screen configuration is listed on the Screen Configurations page, as shown below.
Access Rights to the Screen Configurations Page
By default, users with the Administrator or AcumaticaSupport roles can access the Screen Configurations (AU230010) page. However, you’ll also need to have the Customizer role since this role is required to access the Customization Project Editor.
Smart Merging of Form Personalizations
Imagine that you have created a shared personalization of a form. (That is, you’ve modified a form in Form Configuration mode and clicked Apply to All on the Form Configuration pane.) Later, your ISV has given you another customization project that contains personalization of the same form. After reviewing it, you’ve decided that it would be beneficial to apply changes from both projects.
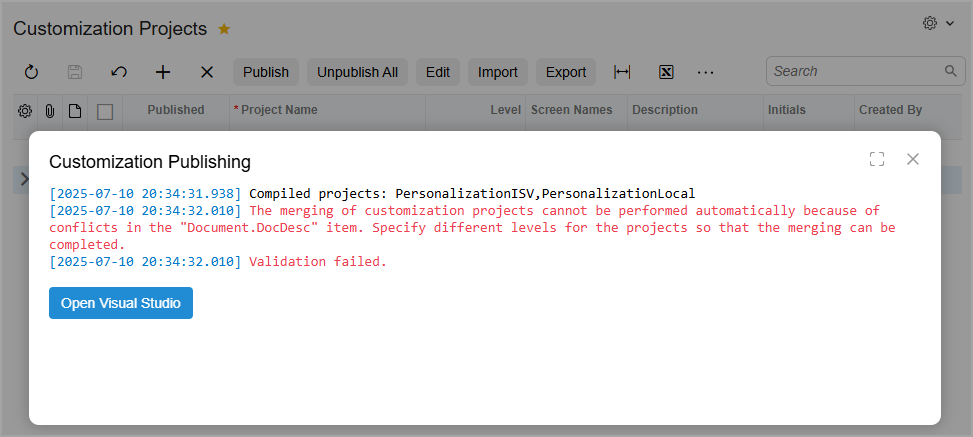
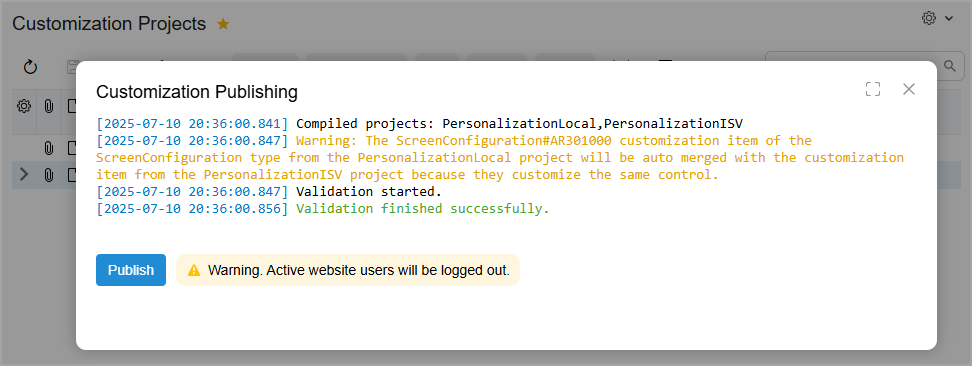
The Modern UI takes care of most of this process. You simply publish both projects—or any number of projects. The system merges the changes if they’re compatible, such as adding two different user-defined fields to the same fieldset.
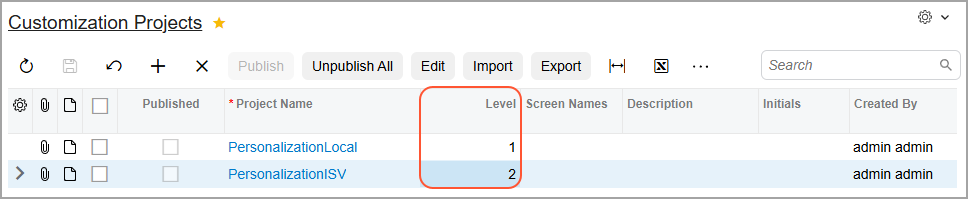
Some changes can't be merged, however—for example, when a tab or a table column is hidden in one project and visible in another. The system displays an error (shown below) and asks you to specify different priority levels for the projects.
To do this, go back to the Customization Projects (SM204505) form, assign the highest level to the most important changes, as shown below, and start the publication again.
The system applies to the form the changes from the project with a higher level and displays a message about the merging of changes (see below).
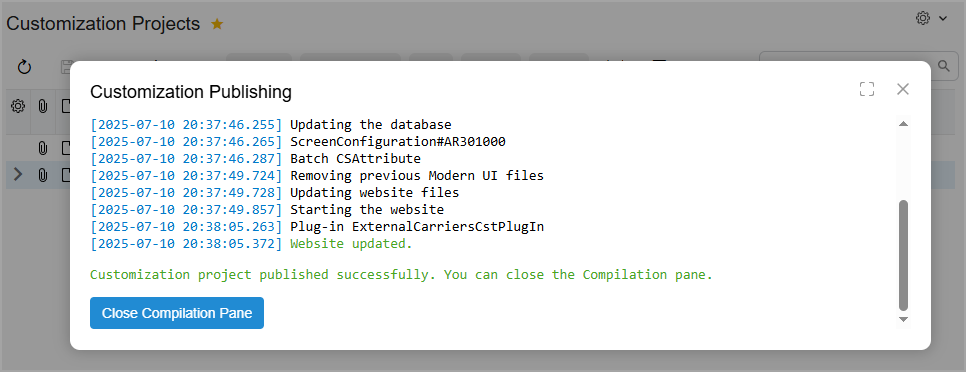
The publication then completes in the usual manner (shown below).
When certain changes are added based on the level of a customization project, you can manually reintroduce them. To do this, add the updated form personalization to the higher-level project and publish it in another instance.
If you later unpublish the project, the form personalization stays in place. You can reverse these modifications only in Form Configuration mode (by clicking Reset to Default on the Form Configuration pane).
What You Can Do Now
- Add form personalizations to customization projects
- Benefit from different personalizations applied to the same form
- Specify levels for customization projects if the system can’t merge changes
Learn More
For more information, see Customization Items: General Information and Project Publication: General Information.