
Route Management: Implementation Activity
In this activity, you will enable the Route Management feature to activate its functionality. You will review the system-wide settings that affect route management and generate a map key in your Azure Maps account. Finally, you will specify this key on the Service Management Preferences (FS100100) form.
Story
Suppose that you are an administrative user of the SweetLife Service and Equipment Sales Center. You are configuring the minimum required functionality to prepare the system for the route management functionality to be used.
Configuration Overview
In the U100 dataset, the following tasks have been performed for the purposes of this activity:
- The service management functionality has been prepared, as described in Basic Service Management Configuration: Implementation Activity.
- The order management configuration has been implemented, as described in Configuration of Order Management: Implementation Checklist.
- On the Numbering Sequences (CS201010) form, the numbering sequences to be used for equipment entities have been created.
- On the Enable/Disable Features (CS100000) form, the Service Management feature has been enabled.
Process Overview
On the Enable/Disable Features (CS100000) form, you will enable the Route Management feature. Then, on the Route Management Preferences (FS100400) form, you will review the basic route management settings. Finally, you will generate a map key on the https://portal.azure.com website and specify this key on the Service Management Preferences (FS100100) form.
System Preparation
Before you start setting up the route management functionality, do the following:
- On the MYOB Acumatica website, sign in to a company with the U100 dataset preloaded as a system administrator. You should sign in by using the gibbs username and the 123 password.
- On the Company and Branch Selection menu on the top pane of the MYOB Acumatica screen, select the SWEETEQUIP - Service and Equipment Sales Center branch.
Step 1: Enabling the Route Management Feature
Perform the following instructions:
- On the Enable/Disable Features (CS100000) form, click Modify.
- Under Service Management, select the Route Management check box.
- On the toolbar, click Enable.
Step 2: Reviewing the Route Management Preferences
Do the following:
- Open the Route Management Preferences (FS100400) form.
- On the General tab, review the settings as follows:
- In the Route Numbering Sequence box, ensure that
the FSROUTE numbering sequence is specified.
This numbering sequence will be used to assign identifiers to route executions.
- Ensure that the Calculate Route Statistics
Automatically check box is selected.
When this check box is selected, route executions are automatically calculated by the Azure Maps service.
- In the Route Numbering Sequence box, ensure that
the FSROUTE numbering sequence is specified.
Step 3: Creating the Map API Key
The distances and travel times for each executed route are calculated by using the Azure Maps service. If a user rearranges the order of appointments within a route, Azure Maps replots and recalculates the route automatically. Using Azure Maps, you can easily track executed routes and their associated appointments for specific days, as well as the staff members assigned to execute those routes. To create and specify an Azure map key, follow these steps:
- Sign in to your Azure account on the Azure portal. If you don’t have an account,
click Try Azure for Free at https://portal.azure.com/ to create
one. Important:You must have a Microsoft account to sign in and create an Azure account. If you already have an Azure account, use your credentials to log in.
- On the main page, click Azure Maps Accounts.
- On the Azure Maps Accounts page, click Create in the top left corner.
- On the Create an Azure Maps Account resource page, fill in all required fields. For Resource group, click Create new. At the bottom, click Review + create.
- On the screen that appears, review the provided details and click
Create (as shown in the following screenshot).
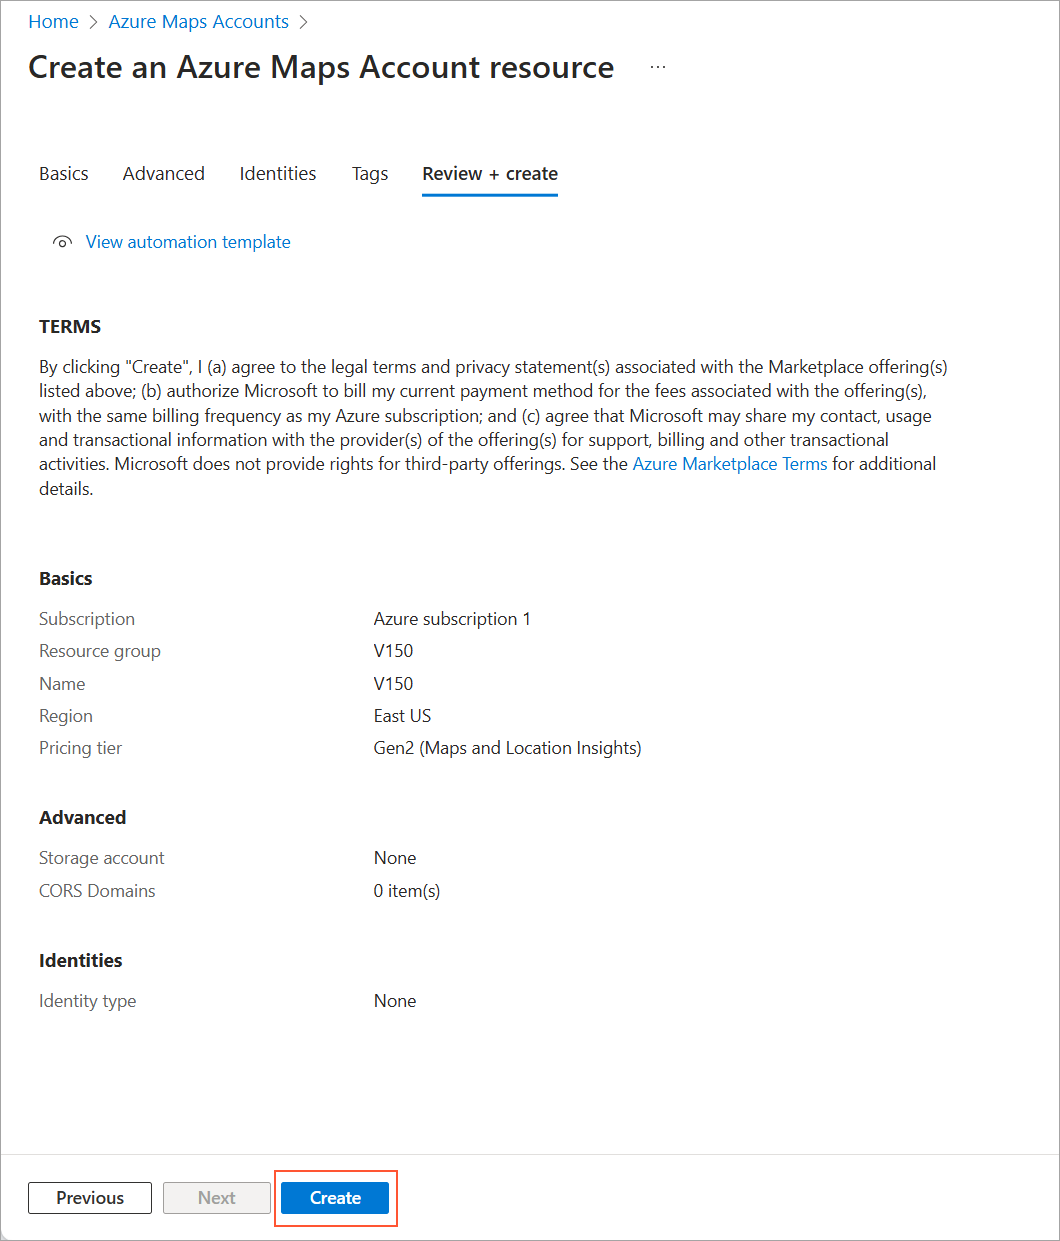
An informational message will indicate that the keys are being developed.
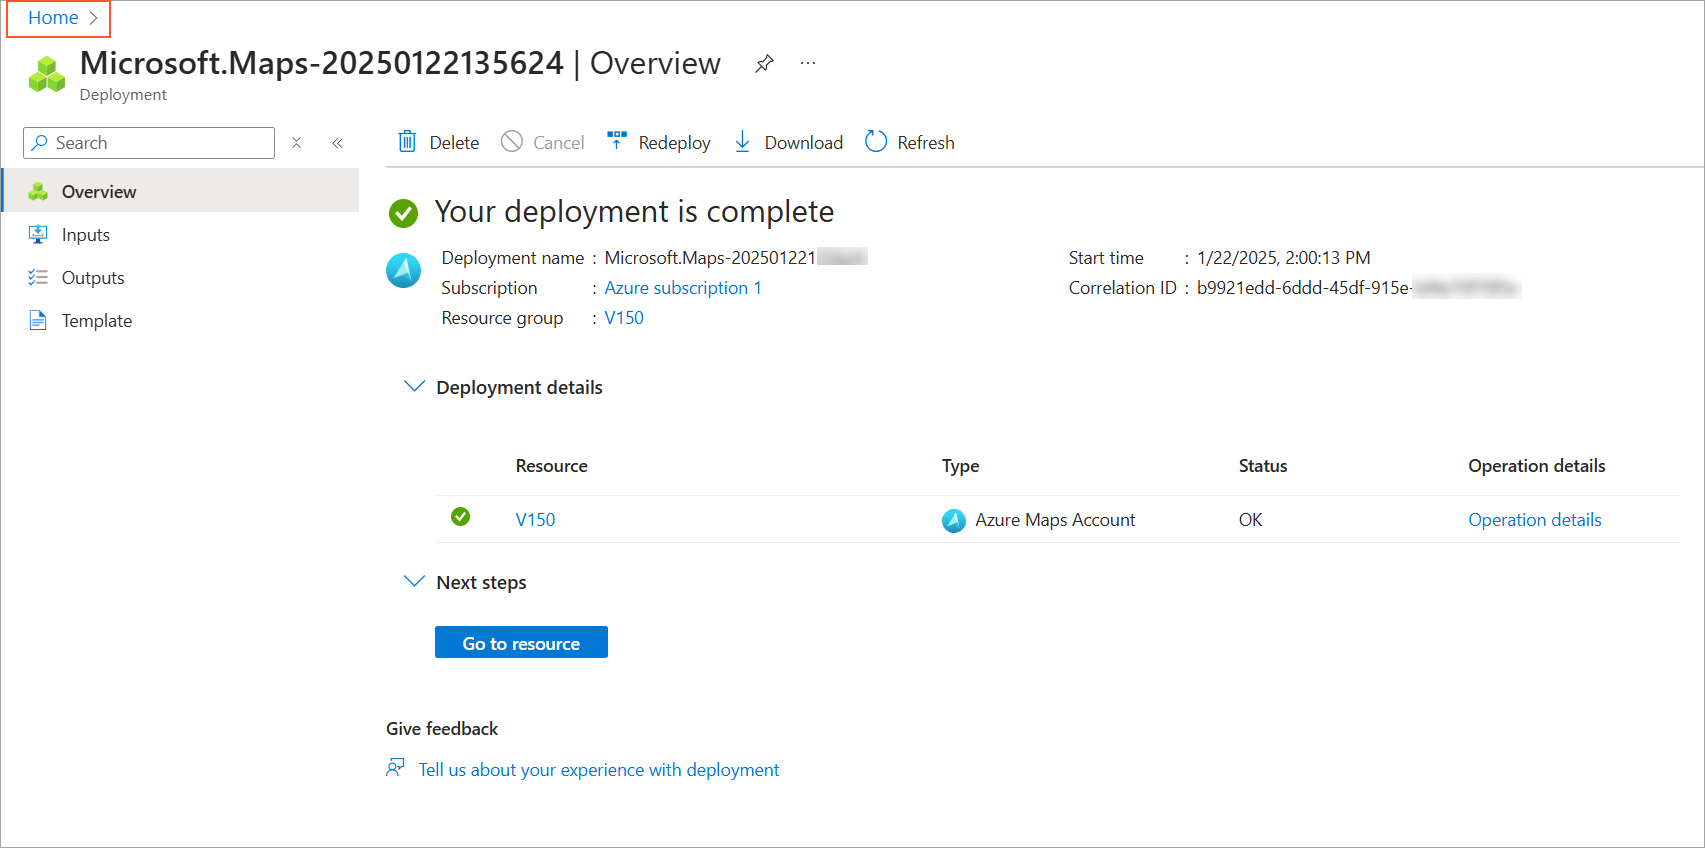
- Once the process is complete, click Home (shown in the
screenshot below), then Settings, and navigate to
Authentication.
On the page that opens, find the generated keys in the Shared Key Authentication section (shown in the following screenshot).
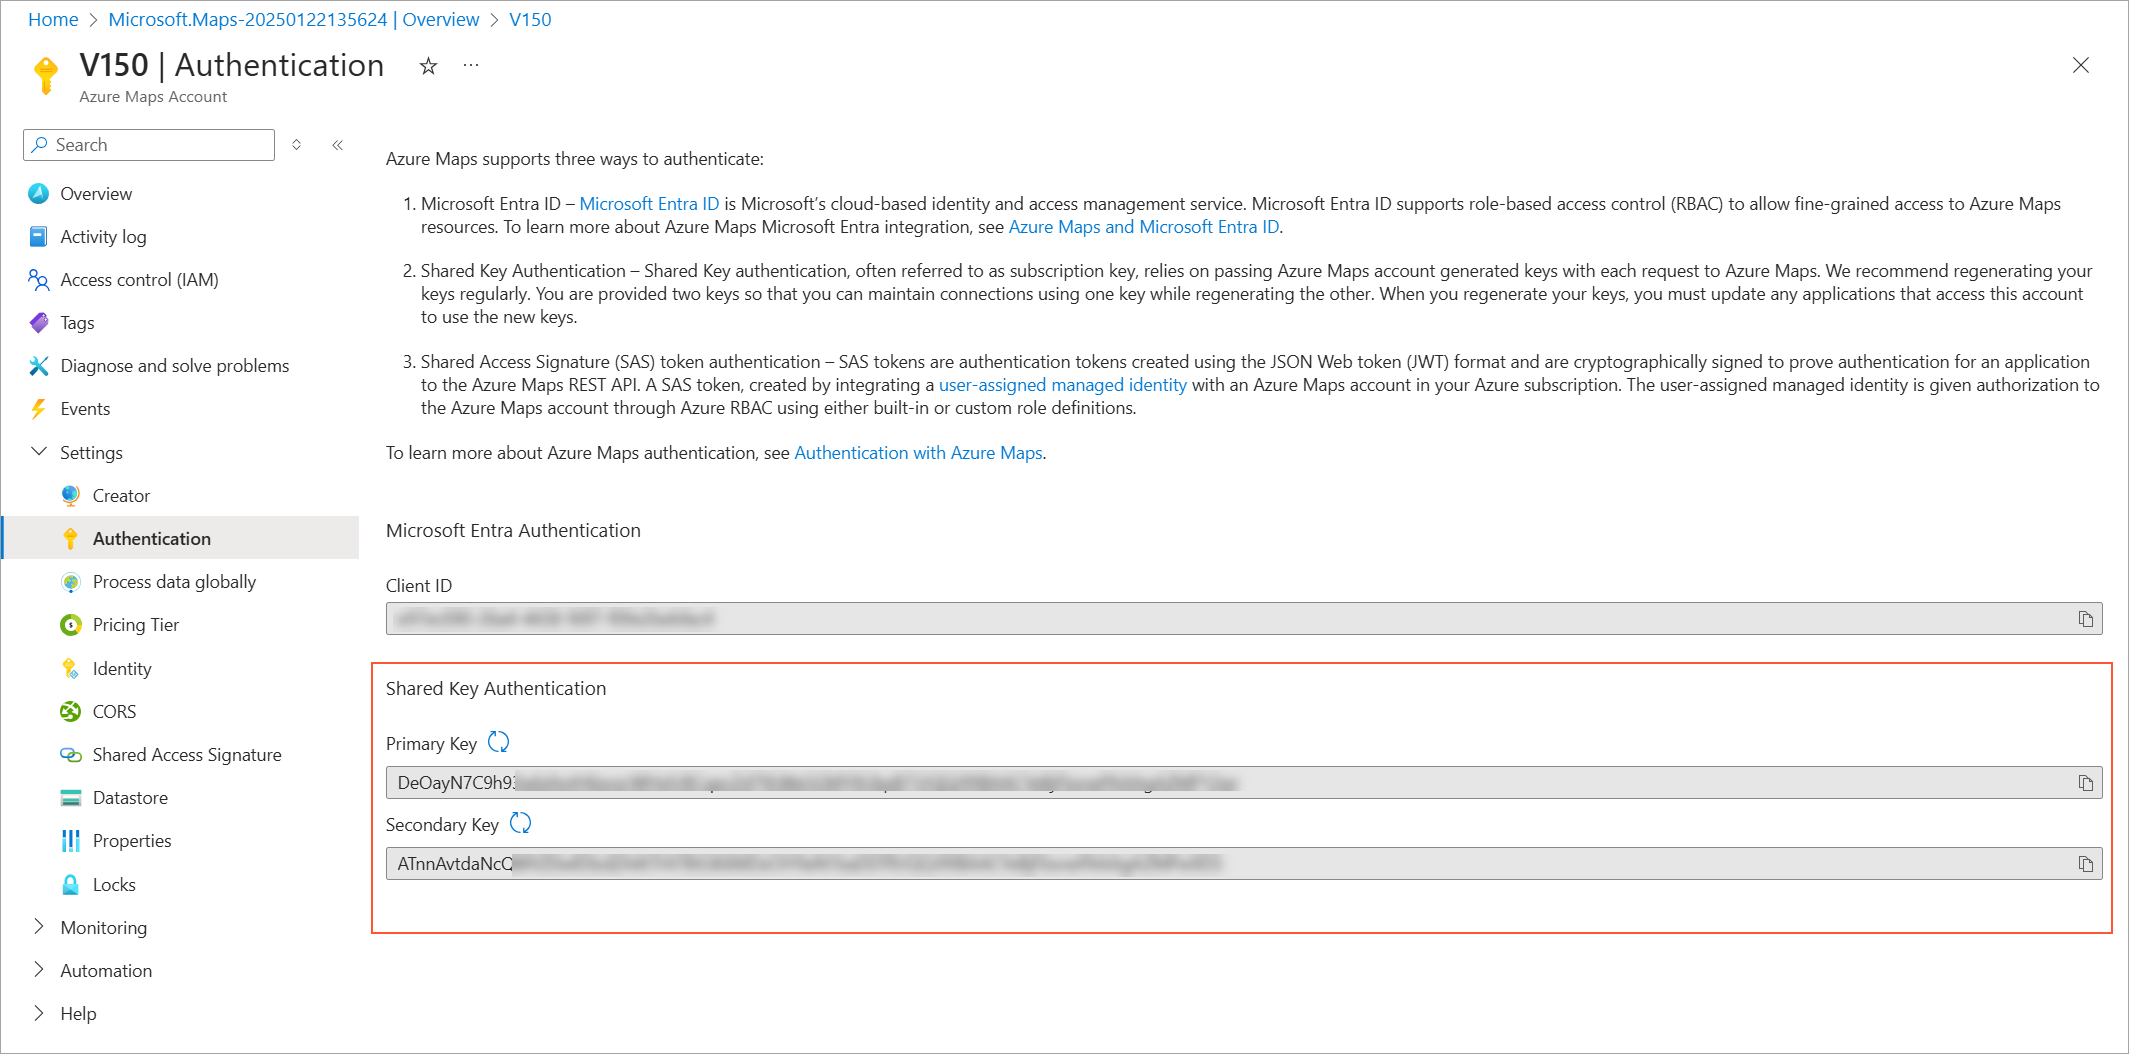
- Copy the value in the Primary Key box.
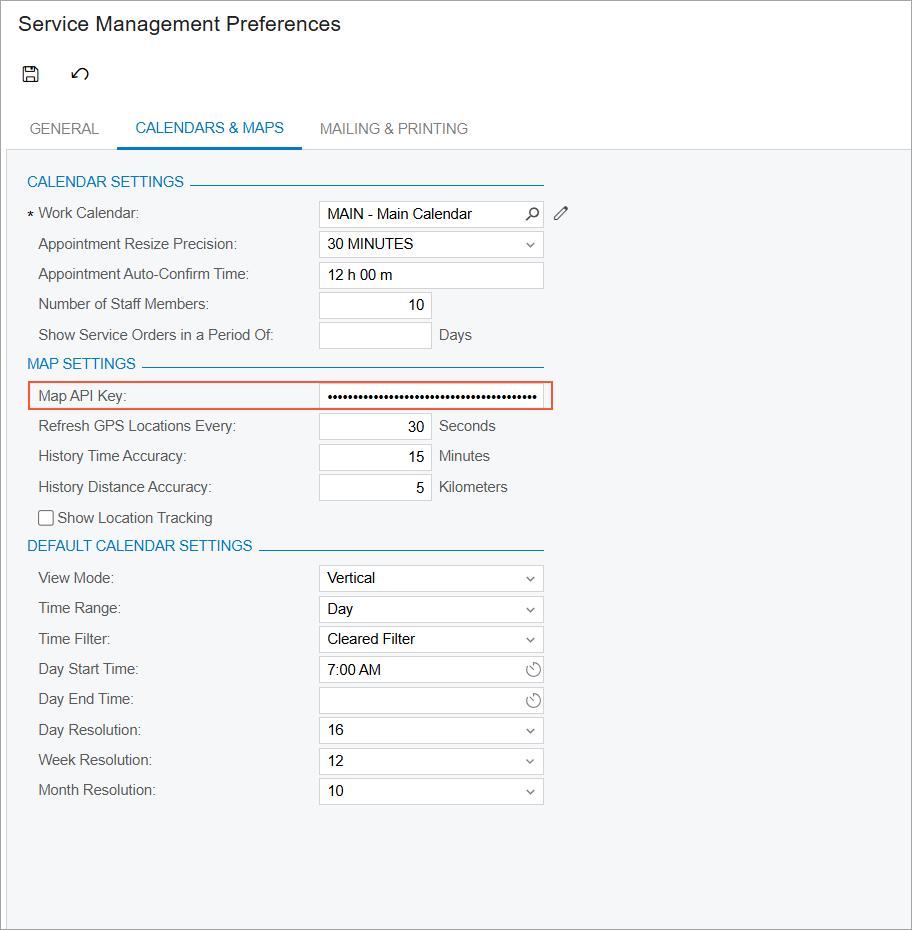
- Open the Service Management Preferences (FS100100) form. In the
Map API Key box of the Calendars &
Maps tab, paste the copied value (as shown in the following
screenshot).
- On the form toolbar, click Save to complete the setup.