- Contents
- Index
- Search

Display results with all search words
The Query Designer
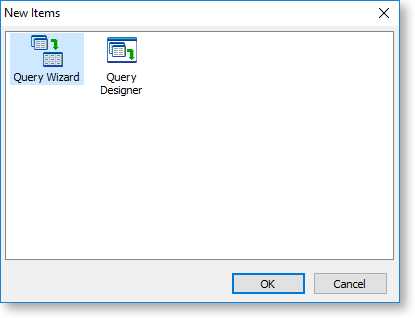
The Query Designer lets you set up a new data source. Unlike the Query Wizard, the Query Designer present all options to you from the start, providing a quicker way for an advanced user to create data sources. To create a new data source with the Query Designer, select New from the File menu on the Data tab, then select Query Designer from the window that appears.
The Query Designer presents options for setting up a data source on a single window, divided up into tabs:
Once a data source has been added, it appears in its own pane on the Data tab. You can access the Query Designer tabs to edit the data source using the toolbar buttons at the top of each pane. To remove a data source from the Data tab, right-click on it and select Delete.
Tables Tab
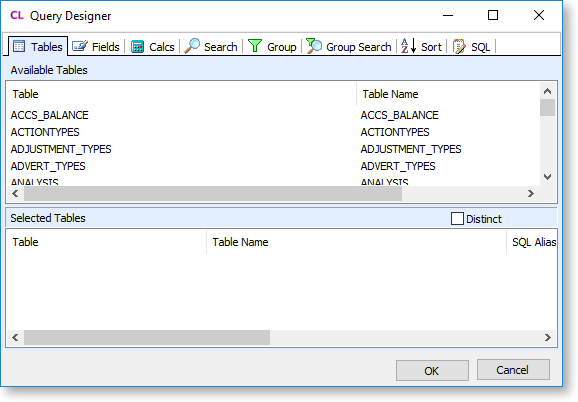
This tab specifies the tables that will be included in the data source. The Available Tables section lists all tables in the Exo Business database. Double-click on a table to add it to the Selected Tables section. (You can remove a table from the Selected Tables section by double-clicking on it again.)
Note: Any views set up in the Exo Business database are also available for section here.
When you add a second or subsequent table to the Selected Tables section, the Join Table window appears so you can create a join between the new table and one of the existing tables:
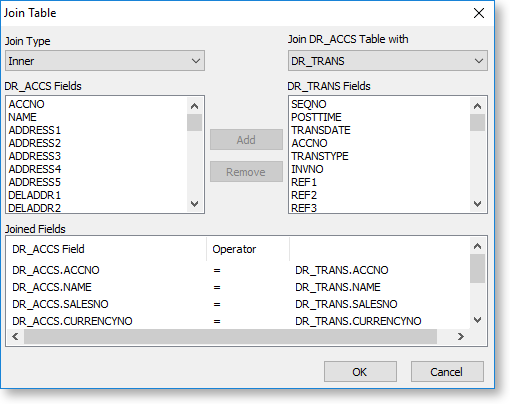
To create the join:
- Select the Join Type: Inner, Left Outer, Right Outer, or Full Outer.
- Use the Join Table with dropdown to select the table that the new table will be joined to. Only tables that are already part of the data source are available in the dropdown.
- Exo Clarity automatically adds joins between fields that have the same name in both tables. You can then add or remove joins as necessary:
- To add a new join, select a field from the Fields box on the left, select the field to join it to from the Fields box on the right, then click Add.
- To remove a join, highlight it in the Joined Fields section and click Remove.
- Click OK to create the join and close the Join Table window.
Fields Tab
This tab specifies which fields from the table(s) you selected on the Tables tab should be included in the data source. By including only a subset of the available fields, you can reduce the amount of data that has to be processed when the report is run. Ideally, you should include only those fields you need to run the report - you can always return to this tab later if you need to add more fields.
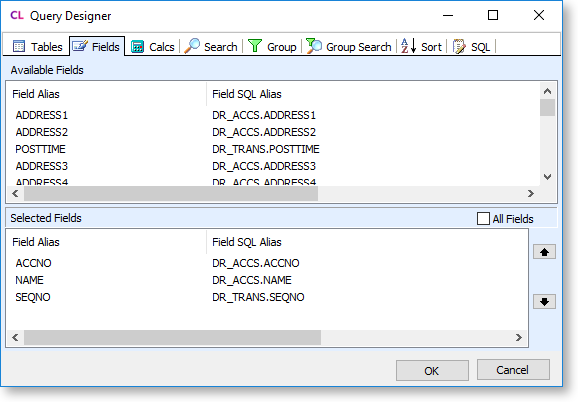
The Available Fields section lists all fields from the selected table(s). Move fields between this section and the Selected Fields section using the following methods:
- Double-click on a field in the Available Fields section to move it to the Selected Fields section (and vice versa).
- Select one or more fields, then drag them from one section to the other. You can select multiple fields using the CTRL and SHIFT keys.
- Tick the All Fields check box to move all fields into the Selected Fields section. Clear it to move all fields back to the Available Fields section.
You can click on a selected field's Field Alias to rename it (or right-click and select Rename).
Calcs Tab
This tab lets you add calculated fields to the data source. These fields perform simple mathematical calculations on the data - advanced calculations are set up on the Exo Clarity Calc tab.
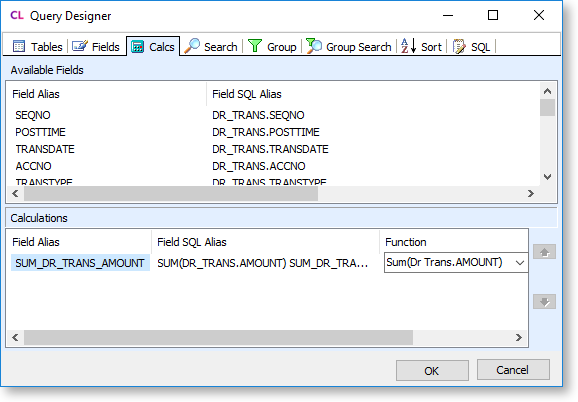
To add calculations, double-click on the field to perform the calculation on, or select multiple fields using CTRL or SHIFT, then drag them into the Calculations section. For each field, select a calculation function from the dropdown in the Function column. The following functions are available on this tab:
- Avg() - Average the values in the selected field.
- Count() - Return a count of the values in the selected field.
- Max() - Return the maximum value out of the values in the selected field.
- Min() - Return the maximum value out of the values in the selected field.
- Sum() - Sum the values in the selected field.
- Expression - Enter the formula for a more complex calculation manually. You can type the formula directly into the Function field.
An alias for the calculation is automatically generated based on the function - you can click in the Field Alias column to enter a new alias.
Search Tab
This tab lets you narrow down the selection of data for the report to keep the data set as small as possible. You can set restrictions like only including transactions later than a certain date, or only accounts with a balance greater than zero. Searching adds a WHERE clause to the SQL statement that retrieves the data.
Note: When working on a new report, you can use this tab to restrict the sample size to a small number so that the report runs faster while you are testing it. Remember to remove this restriction once the report is complete and ready for use on a live site.
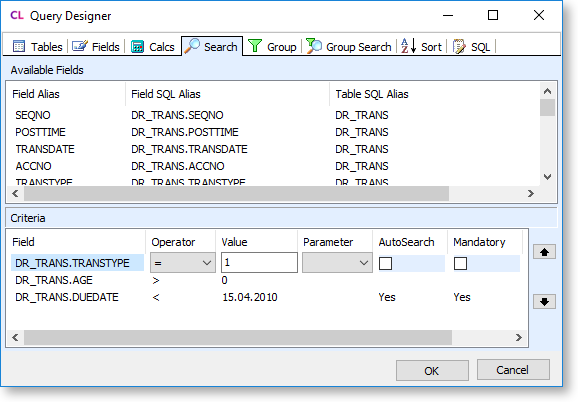
To add a search, double-click on the field to search on, or select multiple fields using CTRL or SHIFT, then drag them into the Criteria section. For each field in the Criteria section, set the search conditions using the controls in each column. You can set up more advanced search criteria using the options in the right-click menu, which include options to add NOT or OR conditions, and to add parentheses around groups of criteria.
Any search conditions that have the AutoSearch column set to "Yes" will appear in the Preview tab's Search window.
Group Tab
On this tab, you can select fields to group the data by. Grouping adds a GROUP BY clause to the SQL statement that retrieves the data - this is usually done when using calculated fields (set up on the Calcs tab) to aggregate data.
Note: As well as grouping data at the data source, you can also display data in groups on the report by using the Groups window, which is available from the Design tab.
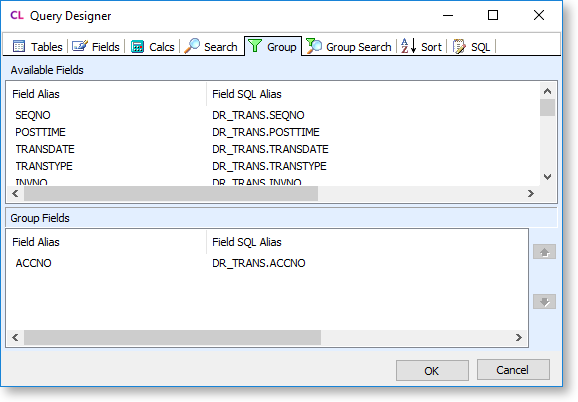
To add a grouping, double-click on the field to group by, or select multiple fields using CTRL or SHIFT, then drag them into the Group Fields section.
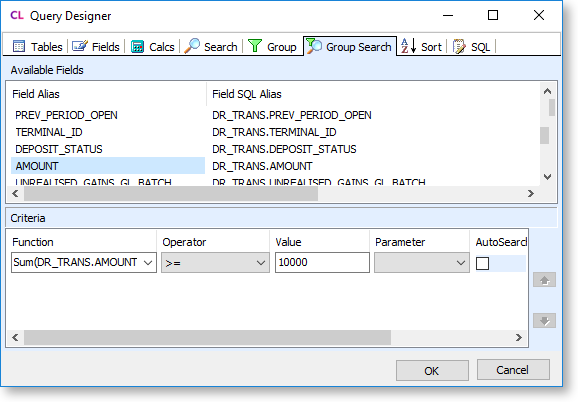
Group Search Tab
On this tab, you narrow down the selection of data for the report by searching grouped data.
Note: This is equivalent to using a HAVING clause in SQL, where a standard search uses a WHERE clause. In the screenshot below, data from the DR_TRANS table is being grouped by ACCNO - the search will restrict the data to accounts whose transactions total to $10,000 or more.
If one or more groups have been specified on the Group tab, this table will contain all available fields in the selected database table.
To add a search, double-click on the field to search on, or select multiple fields using CTRL or SHIFT, then drag them into the Criteria section. For each field in the Criteria section, set the search conditions using the controls in each column. You can set up more advanced search criteria using the options in the right-click menu, which include options to add NOT or OR conditions, and to add parentheses around groups of criteria.
Sort Tab
This tab lets you specify how the data should be sorted. This adds an ORDER BY clause to the SQL statement that retrieves the data.
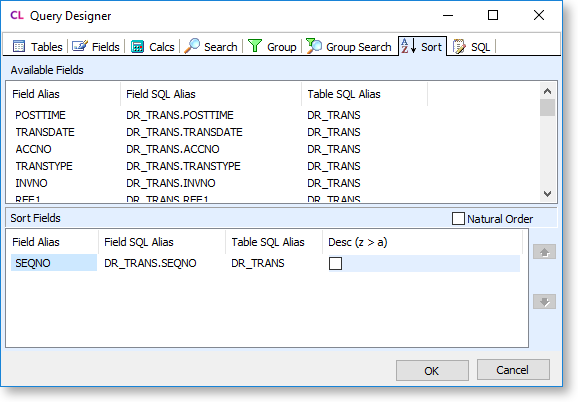
To add a sort field, double-click on the field to sort by, or select multiple fields using CTRL or SHIFT, then drag them into the Sort Fields section. Arrange the fields into the correct sort order using the arrow buttons on the right of the window. You can tick the box in the Desc (z > a) column to determine whether records should be sorted in descending (ticked) or ascending (unticked) order.
Ticking Natural Order clears the Sort Fields section, removing all sorting.
Note: If you are grouping fields using the Groups window, it is essential that the fields that you sort by are the same ones that you group by and in the same order, or your report will not make sense. Once these fields have been added in the correct order, any further fields can be added to sort records within the group. For example, in order to correctly group records in a report by Debtor account you must have the records sorted by Debtor account. You could then add a sort field for the invoice number to sort by invoice number within the Debtor account.
SQL Tab
This tab displays the selections you have made on the other tabs as SQL statements. If you are familiar with SQL, this tab provides a useful check to see that you have made the selections you intended.
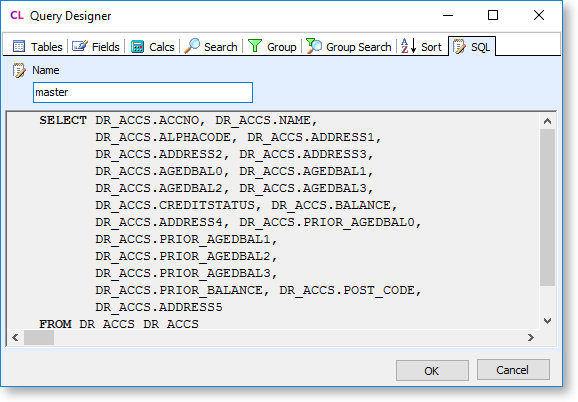
By default, the only editable part of the tab is the Name field, which you can use to give a new name to the data source. You can edit the SQL directly by right-clicking on the SQL statements and selecting Edit SQL. By editing the SQL manually, you can enter any SQL statement you want; for example, you could enter a query to take data from a function or stored procedure.
Note: Once you choose edit the SQL manually, this cannot be undone; the query can only be edited manually from now on. All of the other tabs on the Query Designer window are hidden.