- Contents
- Index
- Search

Show results that include all search words
Pay List
![]()
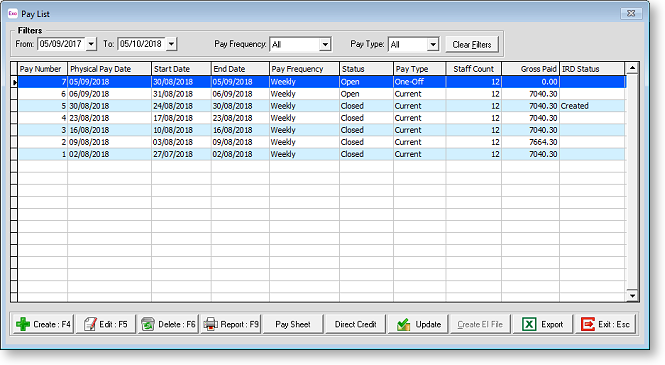
The Pay List window provides easy access to all pays in the system by displaying a filterable list of pay records, as well as action buttons that let you create, view, edit or report on pays. Open the Pay List by clicking the Pay List button on the main toolbar, by selecting Pay List from the Pay menu or by selecting Report Views > Pay List from the Reports menu.
NOTE: Video Help is available for this topic on the Exo Employer Services Education Centre.
Available Functions
Use the dropdowns at the top of the window to filter the list. Click
Clear Filters to reset all dropdowns
to their defaults. The Show/Hide Column button ( ![]() ) lets you choose which list columns to display and which to hide, and
the Custom Views section lets you save the current filtering settings
and column layout as a reusable view.
) lets you choose which list columns to display and which to hide, and
the Custom Views section lets you save the current filtering settings
and column layout as a reusable view.
NOTE: By default, only pays from the last 12 months are displayed - use the From and To date filters to show older pays.
Buttons at the bottom of the window provide easy access to common pay functions:
- Click the Create button to create a new pay.
- Click the View button to view or edit the selected pay.
- Click the Report button to open the Select Report window, which displays all Exo Payroll reports.
- Click the Pay Sheet button to open the Pay Sheet report directly.
- Click the ADP Exception button to display a report showing any leave transactions across all pays where the Hours Taken value does not match the Days to Reduce value. (If any such transactions are present in a pay, a warning message will appear when that pay is saved - the message will give the option of opening this report.)
- Click the Direct Credit button to open the Direct Credit Transfer window.
- Click the Update button to update the selected open pay. This button is not available for closed pays.
- A button for payday filing functions is available. This button changes, depending on the status of the filing:
- If no EI return file has been created, the button reads Create EI File - click this button to create an EI return file.
- If the EI return file has been created but not uploaded, the button reads Upload EI File - click this button to open a web browser to the myIR site where you can upload the file.
- If the EI return file has been uploaded, the button reads Upload Again - click this button to regenerate the EI return file so you can upload it again.
- Click the Export button to export the contents of the list to a CSV or Excel file (if Microsoft Excel is installed).
NOTE: All functions are available from the right-click menu as well.
Creating New Pays
Clicking the Create button opens the Create New Pay window:
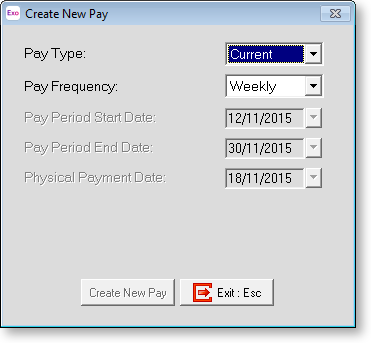
Select "Current" or "One Off" from the Pay Type dropdown, then enter details of the new pay as you would when creating a new Current Pay or creating a new One off Pay.
Click Create New Pay to create the Current or One off Pay and return to the Pay List window, where the new pay will be visible on the list.
Viewing and Editing Pays
Double-click on a pay, or select one and click the Edit or View button at the bottom of the window, to open the Pay Details window for that pay:
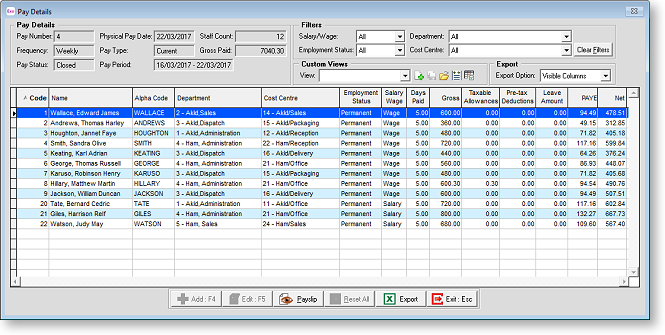
The Pay Details section displays header information of the pay, while
the main table displays the pay details of each employee in the pay. The
Filters section lets you restrict the list of employees displayed. Clicking
the  icon lets you select which columns to display on the main table.
For open pays, the Edit button can be used edit an employee’s pay, and the Add button can be used to add one or more employees to the pay - a selection window appears, showing all employees with the same frequency as the pay, and all Casual staff:
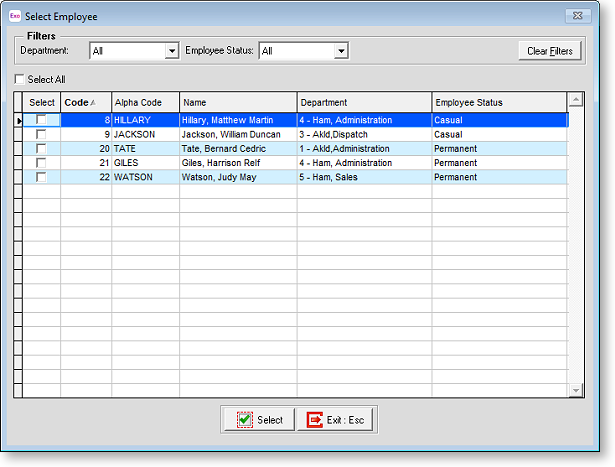
Select one or more employees and click Select to add them to the pay. For One Off Pays, you are given the option of copying their Standard Pay into the One Off Pay.
Clicking the Payslip button opens a Custom Payslip report showing the pay details for the selected employee.
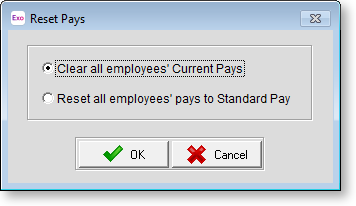
The Reset All button lets you clear or reset the pays of all listed employees (i.e. only those employees who match the current filter settings will be affected, which may not be all employees in the pay). You are asked to confirm the operation, and then select the operation to apply to the employees:
Note: While the Reset All button resets the pays of all employees in the list, the Reset Pay right-click menu option lets you reset the pay of the individual employee who was right-clicked on.
The Copy button copies all employees’ pay details to the clipboard, so that the data can be pasted into a spreadsheet or other third party application. If Microsoft Excel is installed, this button becomes Export, and exports the contents of the list to an Excel file. The Export Option dropdown controls whether to export all data, or only the data currently displayed on the list.