
To Register an MYOB Acumatica Instance with Google
For your users to be able to sign in with their Google accounts, you first have to register your MYOB Acumatica instance with Google and obtain credentials for configuring the OpenID provider. This is a necessary step in configuring single sign-on (SSO) for your MYOB Acumatica instance. For more information about registering applications in Google, see Google Developers Console Help.
Before You Begin
You should have a Google account that you will use to register your MYOB Acumatica instance.
- The procedure below is designed for the most common usage scenarios. If you are implementing a more complicated scenario and you encounter difficulties, contact MYOB Acumatica technical support.
- The vendor of the third-party software may change the user interface and settings. Therefore, the screen elements and setting names that you see may differ from the ones described in the procedure.
- The procedure will be updated to describe new common scenarios and changes in the user interface and settings.
To Register an MYOB Acumatica Instance with Google
Perform the following steps:
- Sign in to the Google Developers Console.
- Optional: If you have not created any projects yet and you see the Manage
resources page of the Google Developers Console, as shown in the screenshot
below, click Create
project.
Figure 1. Active projects 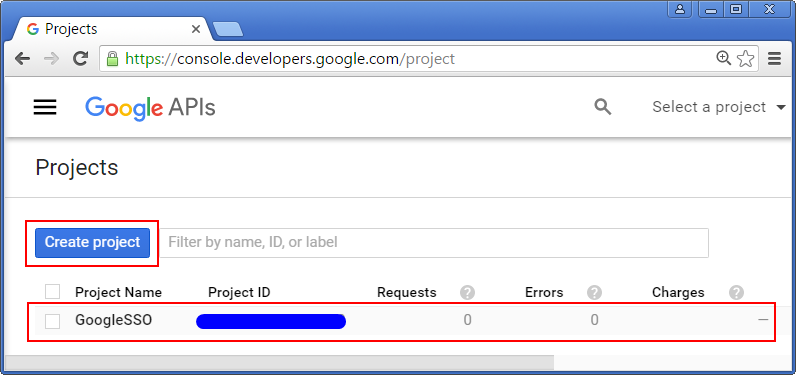
- In the New Project box that appears, type the project name and click Create.
- On the API & Services page that opens, click the Select from drop-down list at the top of the page. In the Select from box that appears, select the project.
- On the API
& Services page, configure the settings of the consent
screen as follows:
- In the sidebar on the left, click OAuth consent screen tab.
- Select the user type (Internal or External) based on your needs, and click Create.
- Enter at least the following settings, as shown in the screenshot below:
- App name shown to users
- User support email
- Developer contact information
Figure 2. Consent screen configuration 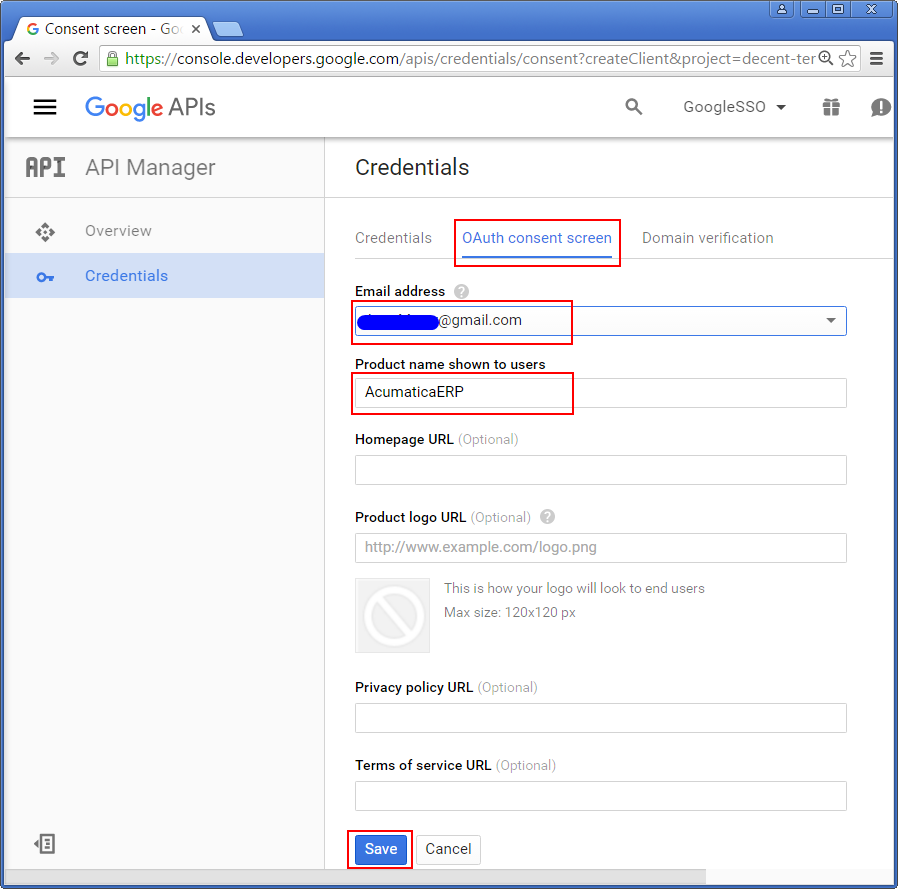
- Click Save and Continue.
- Add credentials for the project as follows:
- In the sidebar on the left, click
Credentials,and
then navigate to , as shown in the screenshot below.
Figure 3. Credentials creation 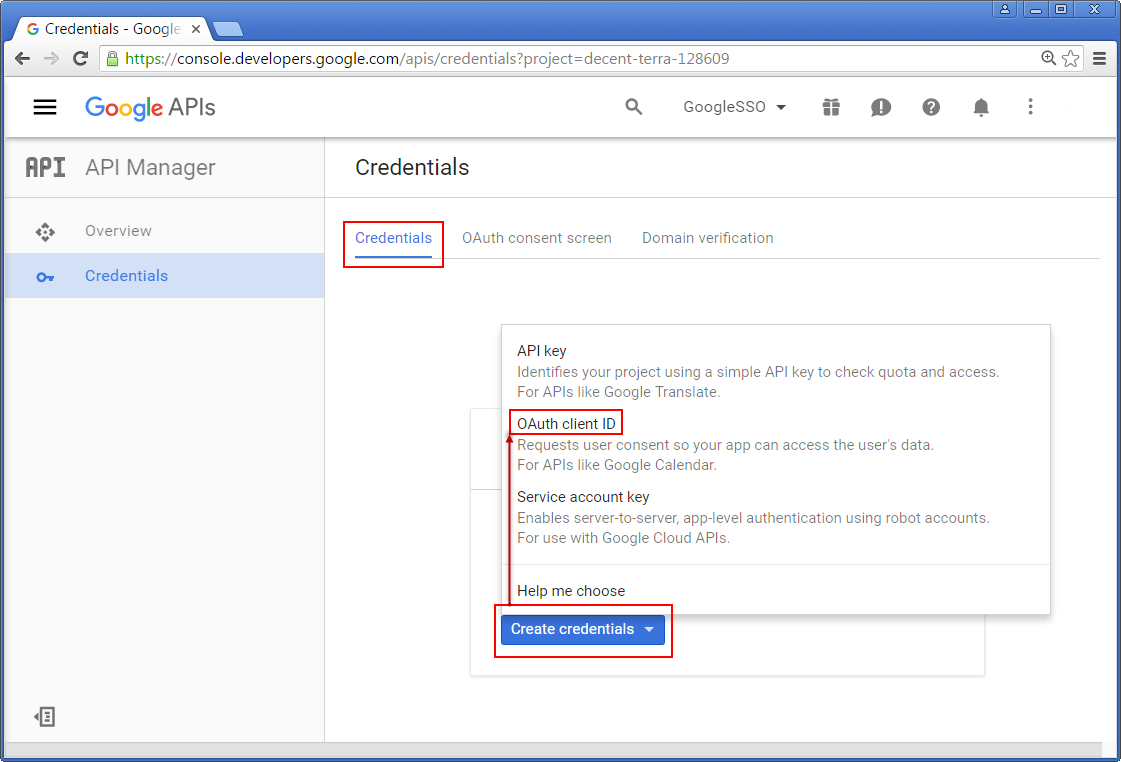
- On the Create
OAuth client ID page, shown in the screenshot below, enter the
information as follows, and then click Create:
- Application type: Select Web application.
- Name: Type your application name.
- Authorized JavaScript origins: Type the root domain of your application site—for example, https://app.site.net.
- Authorized redirect URIs: Type the redirect URL of your
instance.Attention:The box is case-sensitive.
This is the full URL of your instance with /oidc-login/redirect appended onto the end—for example, https://app.site.net/instance_name/oidc-login/redirect
Tip:To get this URL, in your MYOB Acumatica instance open the OpenID Providers (SM303020) form and on the form toolbar, click View Redirect URI. In the Redirect URI dialog box that opens click Copy.
Figure 4. Create Client ID page 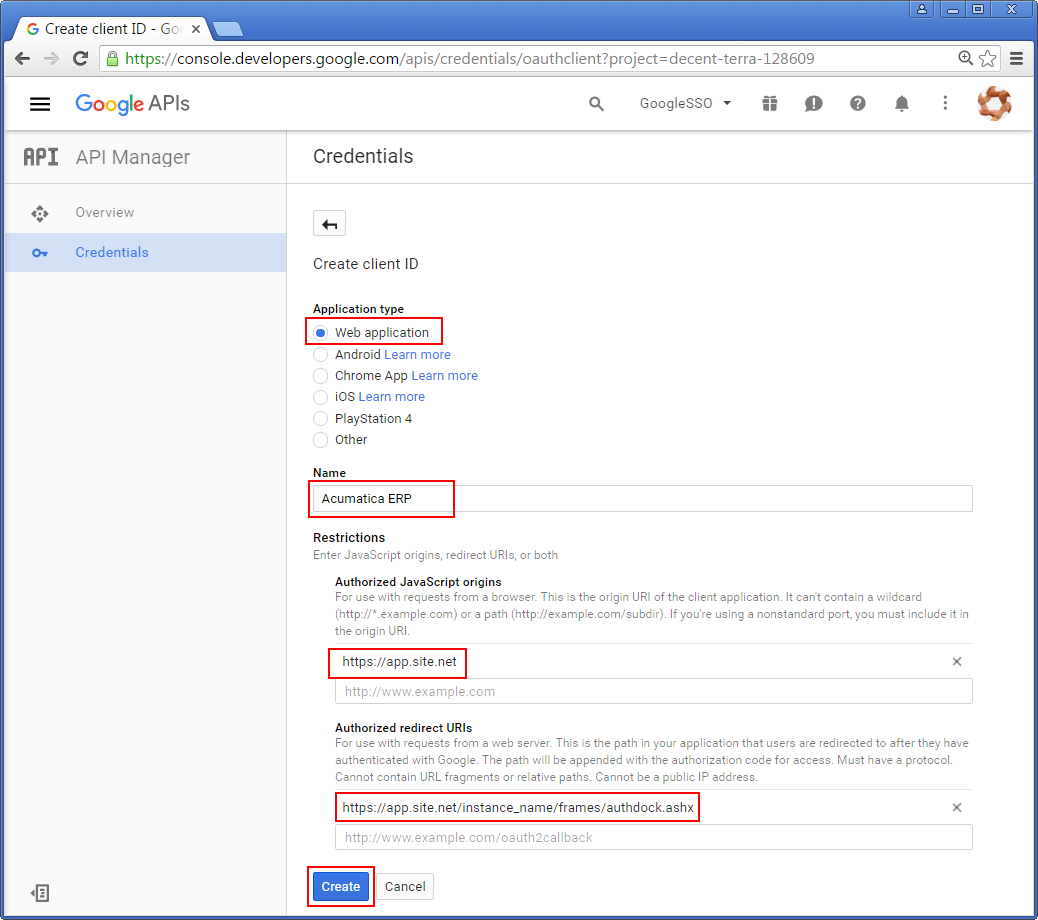
- In the sidebar on the left, click
Credentials,and
then navigate to , as shown in the screenshot below.
- In the dialog box that
opens, copy the client ID and the client secret for later retrieval (see
the screenshot below). You have to register these credentials in your MYOB Acumatica instance.
Figure 5. OAuth 2.0 credentials of the selected project 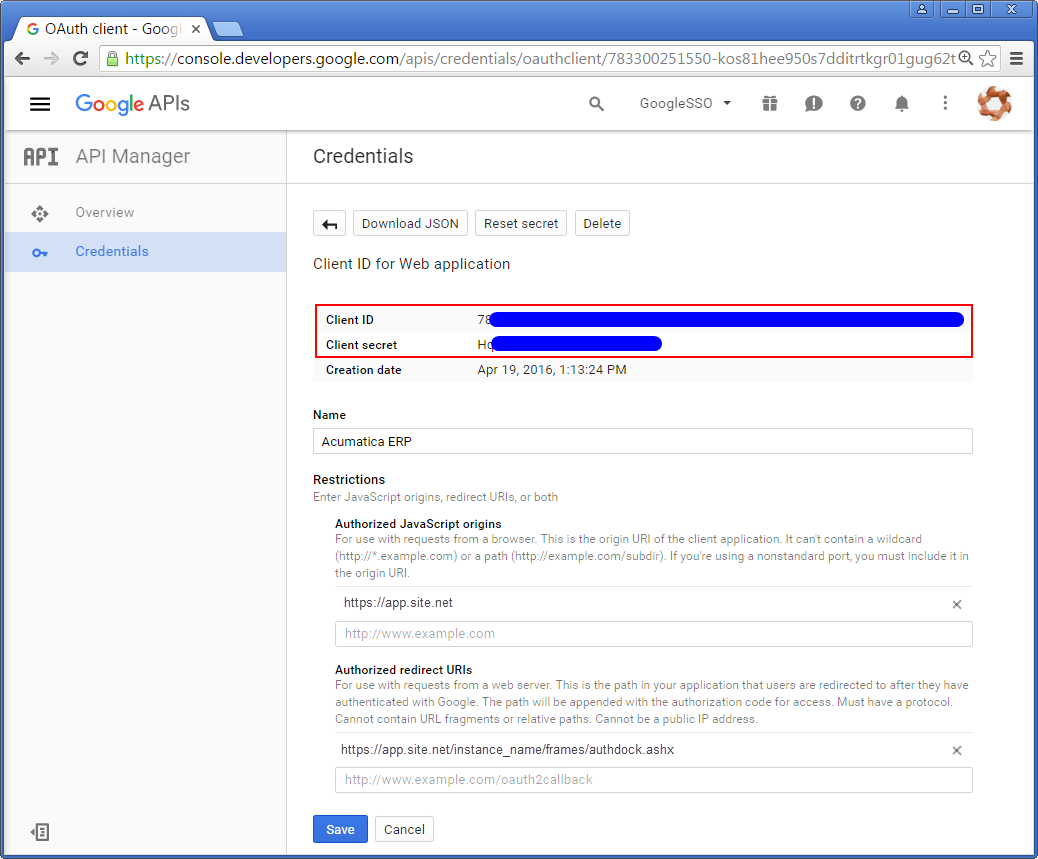
After you have registered your MYOB Acumatica instance with Google and obtained credentials, you have to configure OpenID provider in your MYOB Acumatica instance using these credentials, as described in Configuration of an OpenID Identity Provider.