Update of MYOB Acumatica: To Update an Instance by Using the Web Interface
The following activity will walk you through the process of updating an MYOB Acumatica instance by using the web interface.
Story
Suppose that your company has deployed MYOB Acumatica on-premises. You are the system administrator, and you have received notification that a new minor update is available. Your manager has approved the update installation.
Process Overview
You will download an installation package at the builds.acumatica.com website.
In your MYOB Acumatica instance, you will use the Apply Updates (SM203510) form to perform the following operations:
- Uploading the package with the update
- Scheduling system lockout
- Unlocking the system
For the purposes of this activity, you will not actually install the update. This is because system updates may take some time, and the instance and all its tenants will not be available during this time.
System Preparation
Launch the MYOB Acumatica website, and sign in to a company with the U100 dataset preloaded as the system administrator by using the gibbs username and the 123 password.
Step 1: Downloading an Installation Package
To download an installation package from the builds.acumatica.com website, do the following:
- Go to Amazon Storage.
- Open the Packages folder from the latest build number of the current MYOB Acumatica version (for example, builds/24.2/24.201.0052/Packages).
- Perform the necessary steps, which depend on your browser and settings, to locally save the ErpPackage.zip file.
Step 2: Uploading the Custom Package
To upload an MYOB Acumatica custom package, do the following:
- Launch the MYOB Acumatica website, and sign in to a company with the U100 dataset preloaded. You should sign in as the system administrator by using the gibbs username and the 123 password.
- Open the Apply Updates (SM203510) form.
- On the Updates tab, click Upload Custom Package on the table toolbar.
- In the Upload file dialog box, click Choose File, and select the installation package that you have downloaded earlier in this activity.
- Click Upload.
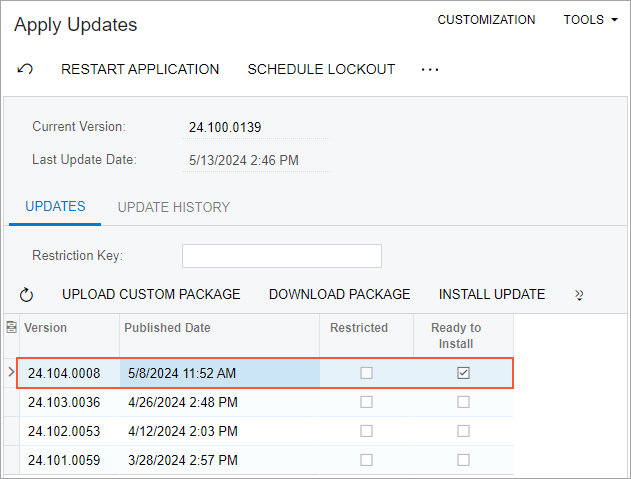
The system adds a new record to the table for the uploaded installation package with the check box in the Ready to Install column selected (see the following screenshot).
Figure 1. Uploaded installation package that is ready for installation 
Step 3: Scheduling the System Lockout
To switch on maintenance mode and lock the system, do the following:
- While you are still on the Apply Updates (SM203510) form, click Schedule Lockout on the form toolbar.
- In the Schedule Lockout dialog box, leave the default settings and click OK.
- Sign out of the system.
- On the Sign-In page, observe the maintenance warning.
- Open a new browser window in private mode.
- Launch the MYOB Acumatica website, and try to sign in to the system as a company accountant by using the johnson username and the 123 password.
- Notice that the system redirects you to the Maintenance page with the warning,
as the following screenshot demonstrates.
Figure 2. The maintenance warning 
Step 4: Unlocking the System
To stop the lockout of the system, do the following:
- In the browser tab that you used to sign in to the system as the system administrator, sign in by using the gibbs username and the 123 password. Notice that the home page of your MYOB Acumatica instance opens.
- Open the Apply Updates (SM203510) form.
- On the form toolbar, click Stop Lockout.
- Sign out of the system.
- On the Sign-In page, notice that the maintenance warning is not displayed.
In this activity, you have downloaded an installation package and uploaded it to the system. You have scheduled the system lockout and then stopped it.
