
Project Creation and Processing: To Process a Fixed-Price Project
This activity will walk you through the lifecycle of a fixed-price project.
Story
Suppose that the Lake Cafe customer has ordered a juicer from the SweetLife Fruits & Jams company, along with the site review and installation services. SweetLife's project accountant has created a fixed-price project to account for this work. In January 2025, the company employees have performed work related to the project tasks.
Acting as the project accountant, you need to support the project during the entire project lifecycle.
Configuration Overview
For the purposes of this activity, on the Enable/Disable Features (CS100000) form, the Projects feature has been enabled to support the project accounting functionality.
Process Overview
You will activate the project to indicate that it has been started. Then you will create and release a project transaction on the Project Transactions (PM304000) form to record the provided services. You will bill the project on the Projects (PM301000) form and review the prepared AR invoice on the Invoices and Memos (AR301000) form. Then you will close the project, and review the profitability report on the Project Profitability (PM624000) report form.
System Preparation
To sign in to the system and prepare to perform the instructions of the activity, do the following:
- Download the INSTLAKE01_Project_Transactions file to your computer.
- Create the INSTLAKE01 project, as described in Project Creation and Processing: To Create a Fixed-Price Project.
- Launch the MYOB Acumatica website, and sign in to a company with the U100 dataset preloaded; you should sign in as Pam Brawner by using the brawner username and the 123 password.
- In the info area, in the upper-right corner of the top pane of the MYOB Acumatica screen, make sure that the business date in your system is set to 1/30/2025. If a different date is displayed, click the Business Date menu button and select 1/30/2025 on the calendar. For simplicity, in this activity, you will create and process all documents in the system on this business date.
Step 1: Activating the Project
To indicate that the INSTLAKE01 project has been started, do the following:
- On the Projects (PM301000) form, open the INSTLAKE01 project, which you have created in Project Creation and Processing: To Create a Fixed-Price Project.
- On the form toolbar, click Activate. The system assigns the project the Active status.
Step 2: Uploading Project Transactions
To upload and process the transactions of this project, do the following:
- On the Project Transactions (PM304000) form, add a new record.
- In the Summary area, specify the following settings:
- Module: PM
- Description: The services for the INSTLAKE01 project
- On the table toolbar of the Details tab, click Load Records from File.
- In the File Upload dialog box, which opens, click Choose File, select the file path to the INSTLAKE01_Project_Transactions file, and click Upload.
- In the Common Settings dialog box, which opens, leave the default settings, and click OK.
- In the Columns dialog box, which opens, leave the current column mapping, and click OK.
- Make sure that the Total Amount in the Summary area is 1,600.00.
- On the form toolbar, click Save, and then click Release.
- On the Projects (PM301000) form, open the
INSTLAKE01 project, and make sure that the Actual
Expenses box in the Summary area now shows 1,600.00.
On the Cost Budget tab, notice that the system has updated the cost budget of the project—that is, three cost budget lines have been added based on the project transaction that you have released. Also, the Actual Quantity and Actual Amount columns have been populated with the amounts from the corresponding lines of the project transaction.
Step 3: Billing the Project
To create an accounts receivable invoice for the project, do the following:
- While you are still viewing the INSTLAKE01 project on the Projects (PM301000) form, on the Revenue
Budget tab, specify 100.00 as the
Completed (%) in each of three revenue budget lines
to indicate that the project tasks have been fully completed.
The system calculates the Pending Invoice Amount of the revenue budget lines as $100, $400, and $1,500. The Pending Invoice Amount Total in the Summary area is $2,000.
- Save your changes to the project. Because the project is billed on demand and has a nonzero pending invoice amount, you can now bill the project.
- On the form toolbar, click Run Billing. The system
creates an AR invoice, which should look like the one shown in the following
screenshot, and opens it on the Invoices and Memos (AR301000) form.
The system creates the invoice lines based on the revenue budget lines of the
corresponding project with amounts that are equal to the pending invoice
amounts. The invoice total, which is $2,000, is equal to the pending invoice
total.
Figure 1. The AR invoice created during the billing 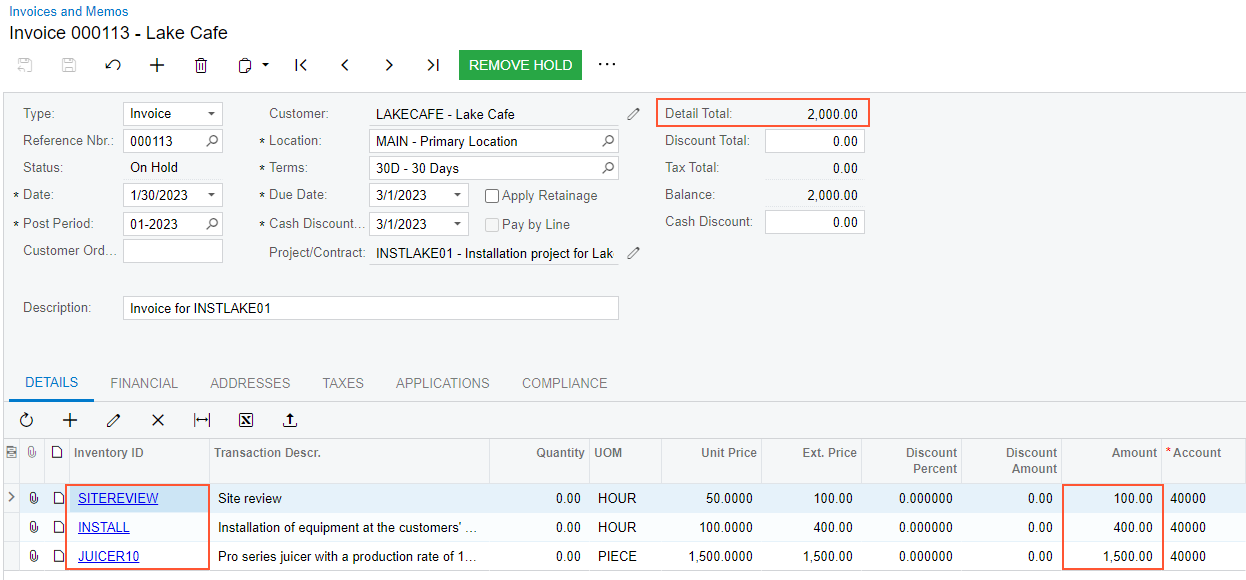
- On the form toolbar of the Invoices and Memos form, click Remove Hold to assign the Balanced status to the accounts receivable invoice, and then click Release.
- Return to the Projects form with the INSTLAKE01 project opened, and press Esc to refresh the details. In the Summary area, make sure that the Actual Income box now shows 2,000.00, which is the amount the customer has been billed.
Step 4: Closing the Project
To complete the project and analyze its profitability, do the following:
- While you are still viewing the INSTLAKE01 project on the Projects (PM301000) form, on the
Tasks tab, specify the following settings for both
lines in the table:
- Status: Completed
- Completed (%): 100 (inserted automatically when you change the task’s status to Completed)
- End Date: 1/30/2025 (inserted automatically when you change the task’s status to Completed)
- On the form toolbar, click Complete. In the Status box of the Summary area, the system changes the status of the project from Active to Completed.
- On the form toolbar of the Project Profitability (PM624000) report form, click Run Report, and review the line with the INSTLAKE01 project. The calculated profit margin is $400 (20%).
You have finished working with the project.