
The MYOB Acumatica UI: General Information
In the following sections, you’ll find information about the user interface and the ways you can browse the MYOB Acumatica website.
Learning Objectives
In this chapter, you’ll learn how to do the following:
- Identify and describe the basic elements of the MYOB Acumatica UI
- Recognize about the basic elements of an MYOB Acumatica form
- Explore the MYOB Acumatica online Help
Applicable Scenarios
You need to learn about the MYOB Acumatica UI if you are new to MYOB Acumatica and need to become familiar with the UI.
Basic Elements of the MYOB Acumatica User Interface
Every screen of MYOB Acumatica has basic UI elements that help users browse the system, enter data, and view, modify, and save information. The basic UI elements of the system are shown below.
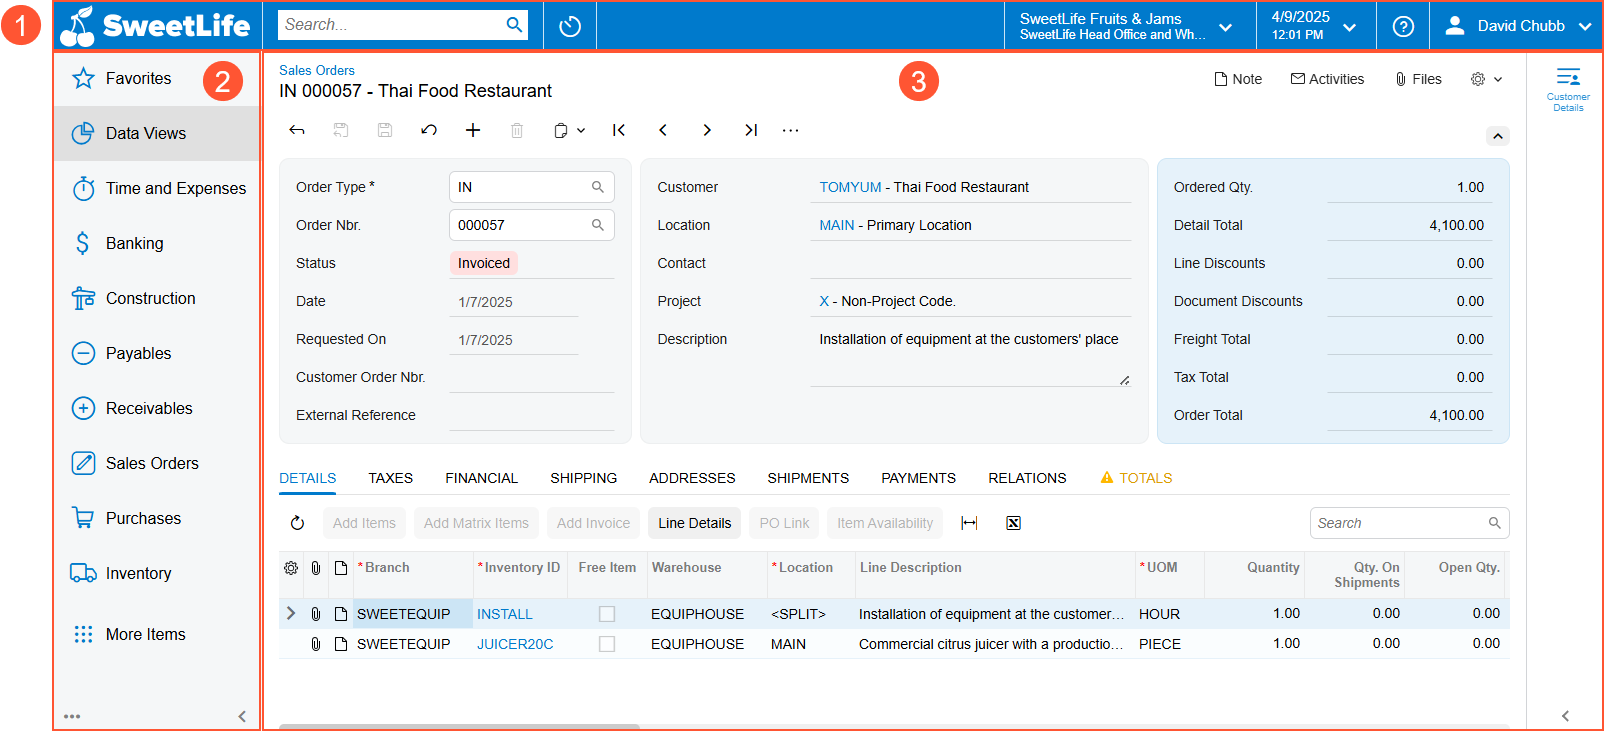
- Top pane. Here, you’ll find UI elements that help you easily perform searches, manage your session and user settings, and go to the home page and recently viewed items. For details, see The MYOB Acumatica UI: Top Pane.
- Main menu. You can use the elements on the menu to go to workspaces and open favorite forms, reports, and dashboards. You can also configure this menu. For details, see The MYOB Acumatica UI: Main Menu and The MYOB Acumatica UI: Workspaces.
- Working area. This area displays the form, report, or dashboard you’ve opened. If the form has a side panel, you can open it and view it here too. The area can also contain the Help menu or an infotip pane. For details, see The MYOB Acumatica UI: Working Area and The MYOB Acumatica UI: The Help System.