
To Create a System Email Account for Gmail with OAuth 2.0
To mitigate the possibility of access being turned off for less secure apps (LSAs) to Google Suite, MYOB Acumatica provides support for Modern Authentication (OAuth 2.0) authentication for IMAP, POP3, and SMTP protocols.
We recommend that customers change their settings to the OAuth2 method if they have configured email processing for Google services by using the username and password authentication method.
By using the Email Accounts (SM204002) form, you can create an email account for the Google Workspace or Gmail account using OAuth 2.0.
- The procedure below is designed for the most common usage scenarios. If you are implementing a more complicated scenario and you encounter difficulties, contact MYOB Acumatica Support.
- The vendor of the third-party software may change the user interface and settings. Therefore, the form elements and setting names you see may differ from the ones described in the procedure.
- The procedure will be updated each time information is made available about new common scenarios and changes in the user interface and settings.
Step 1: To Register Application with Google
To obtain credentials from Google, do the following:
- Open Google Cloud Platform Console and navigate to the Credentials page.
- On the Credentials page, click Configure Consent
Screen as shown in the following screenshot.
Figure 1. The Credentials page of Google Cloud Platform Console 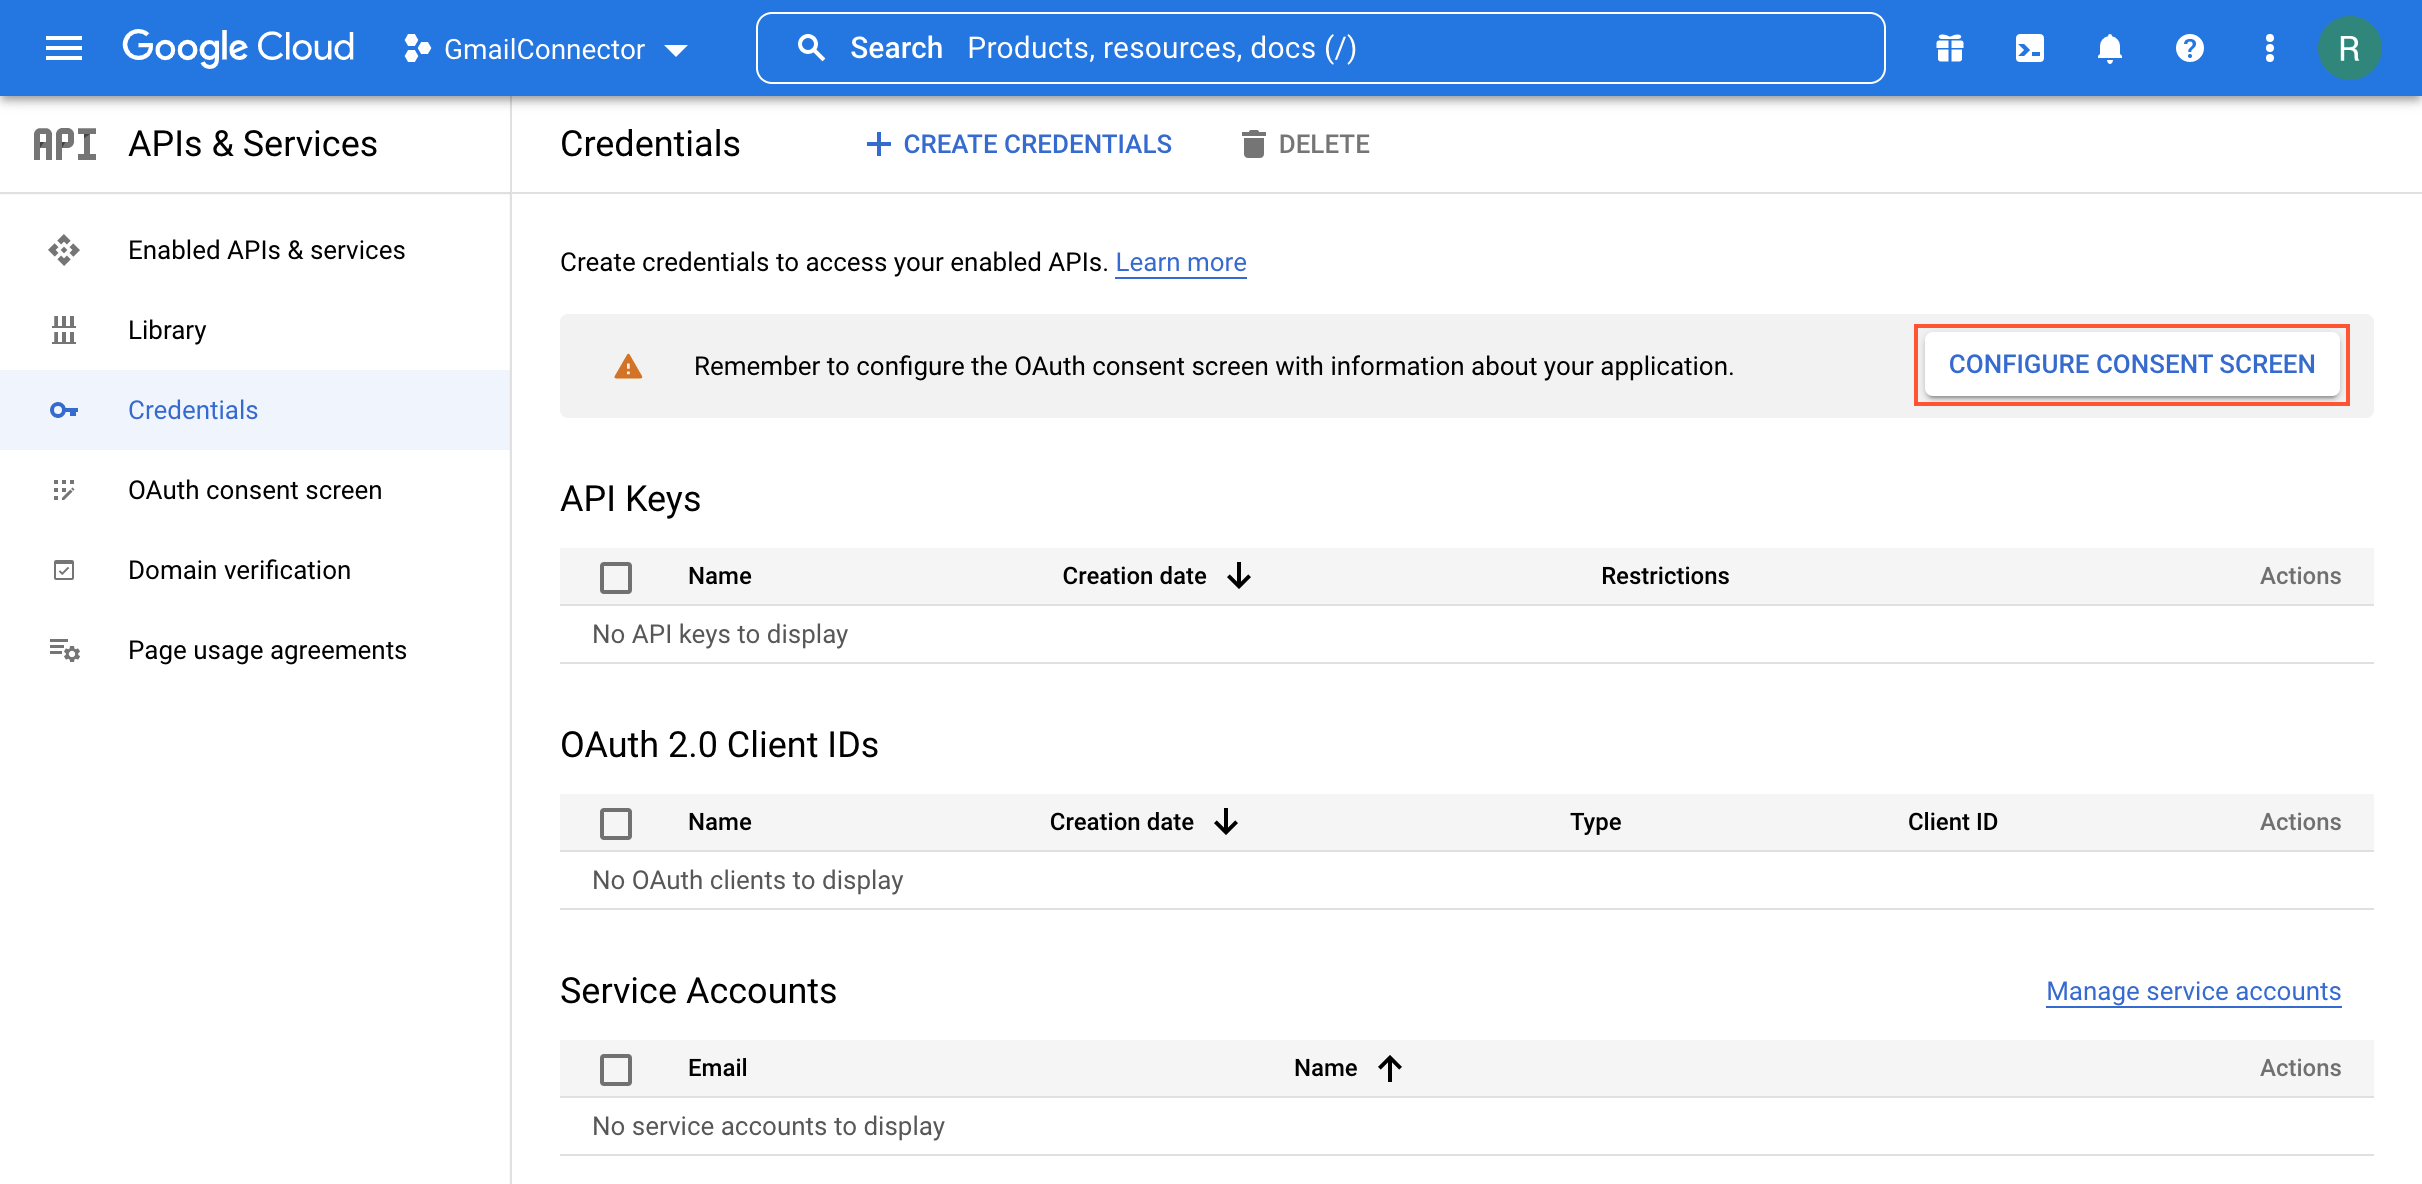
- On the OAuth consent screen page which opens, do the
following:
- Choose Internal or External user type depending on your needs
- Click Create.
Figure 2. Selection of user type 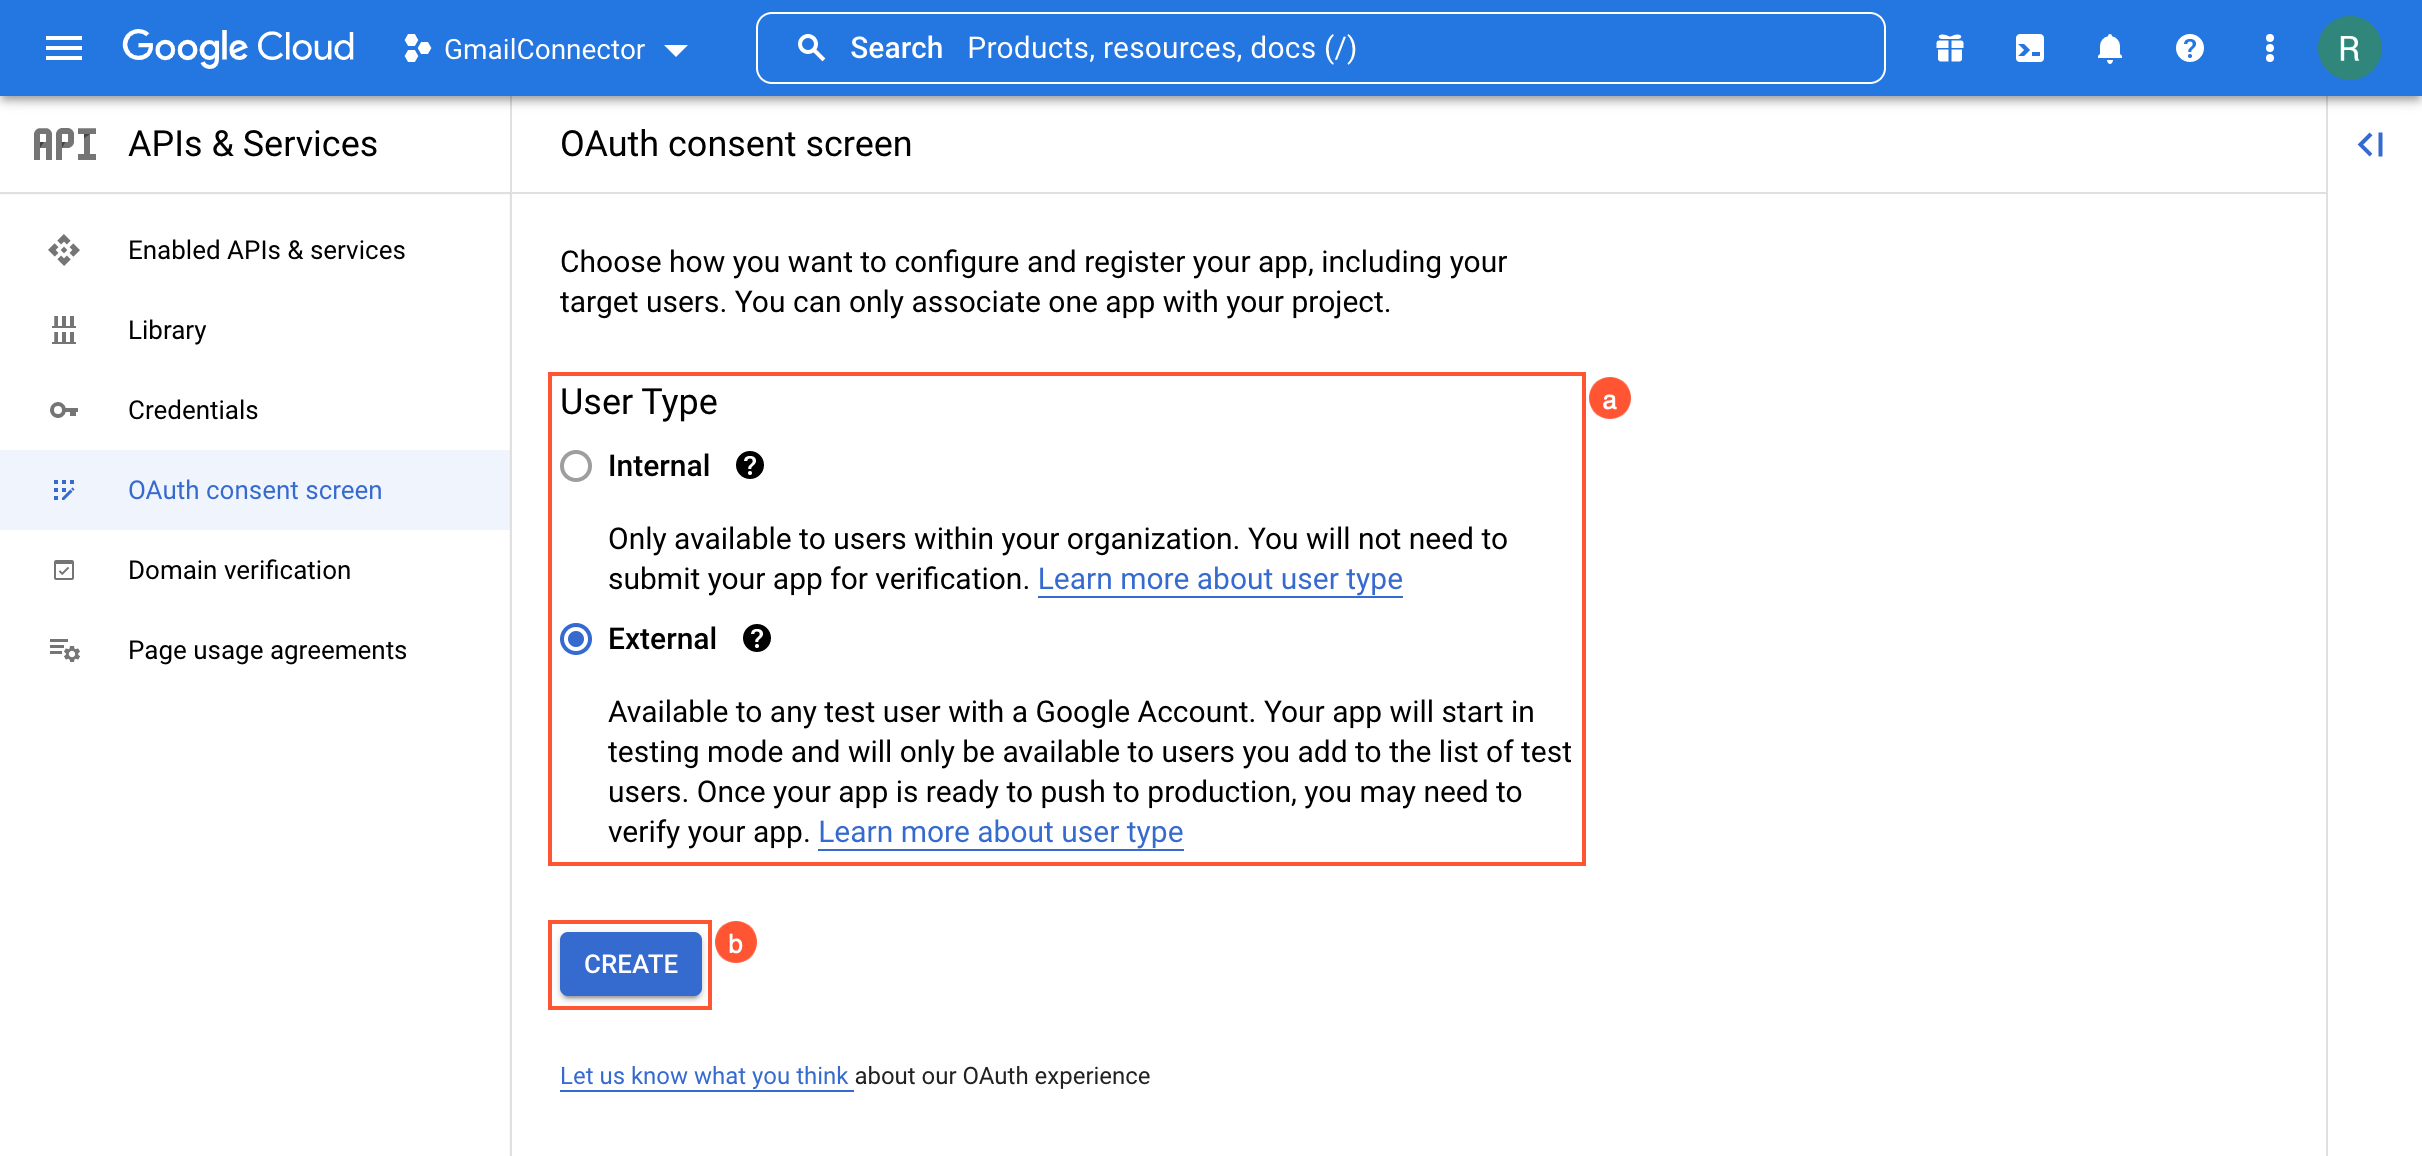
- On the OAuth consent screen step, do the following:
- Enter your app name and support email as shown in the following
screenshot.
Figure 3. App information 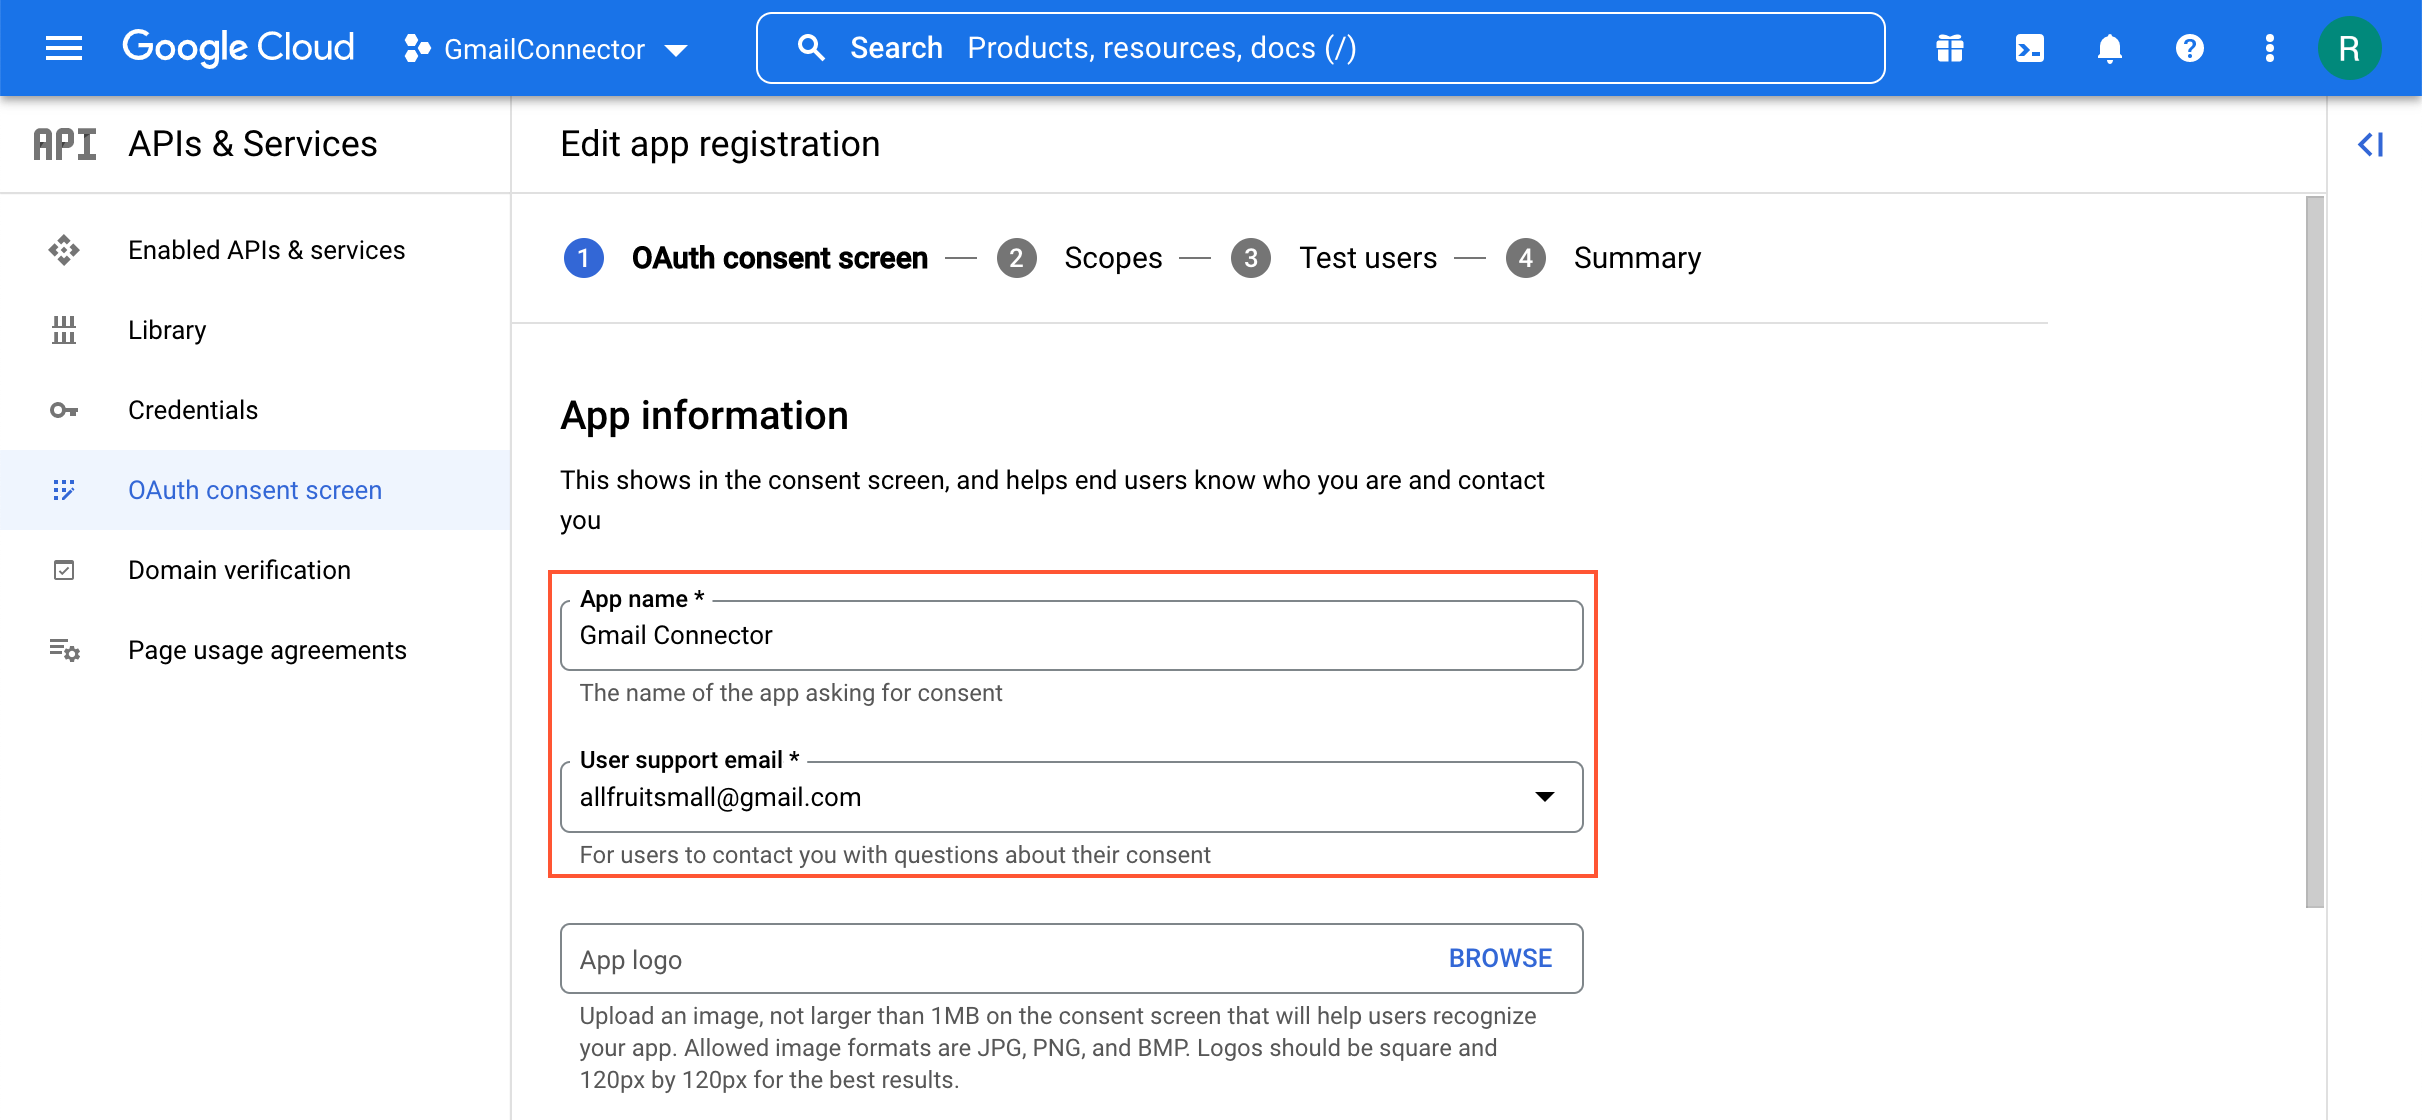
- Provide other additional information if needed.
- Enter developer email address as shown in the following screenshot.
Figure 4. Developer contact information 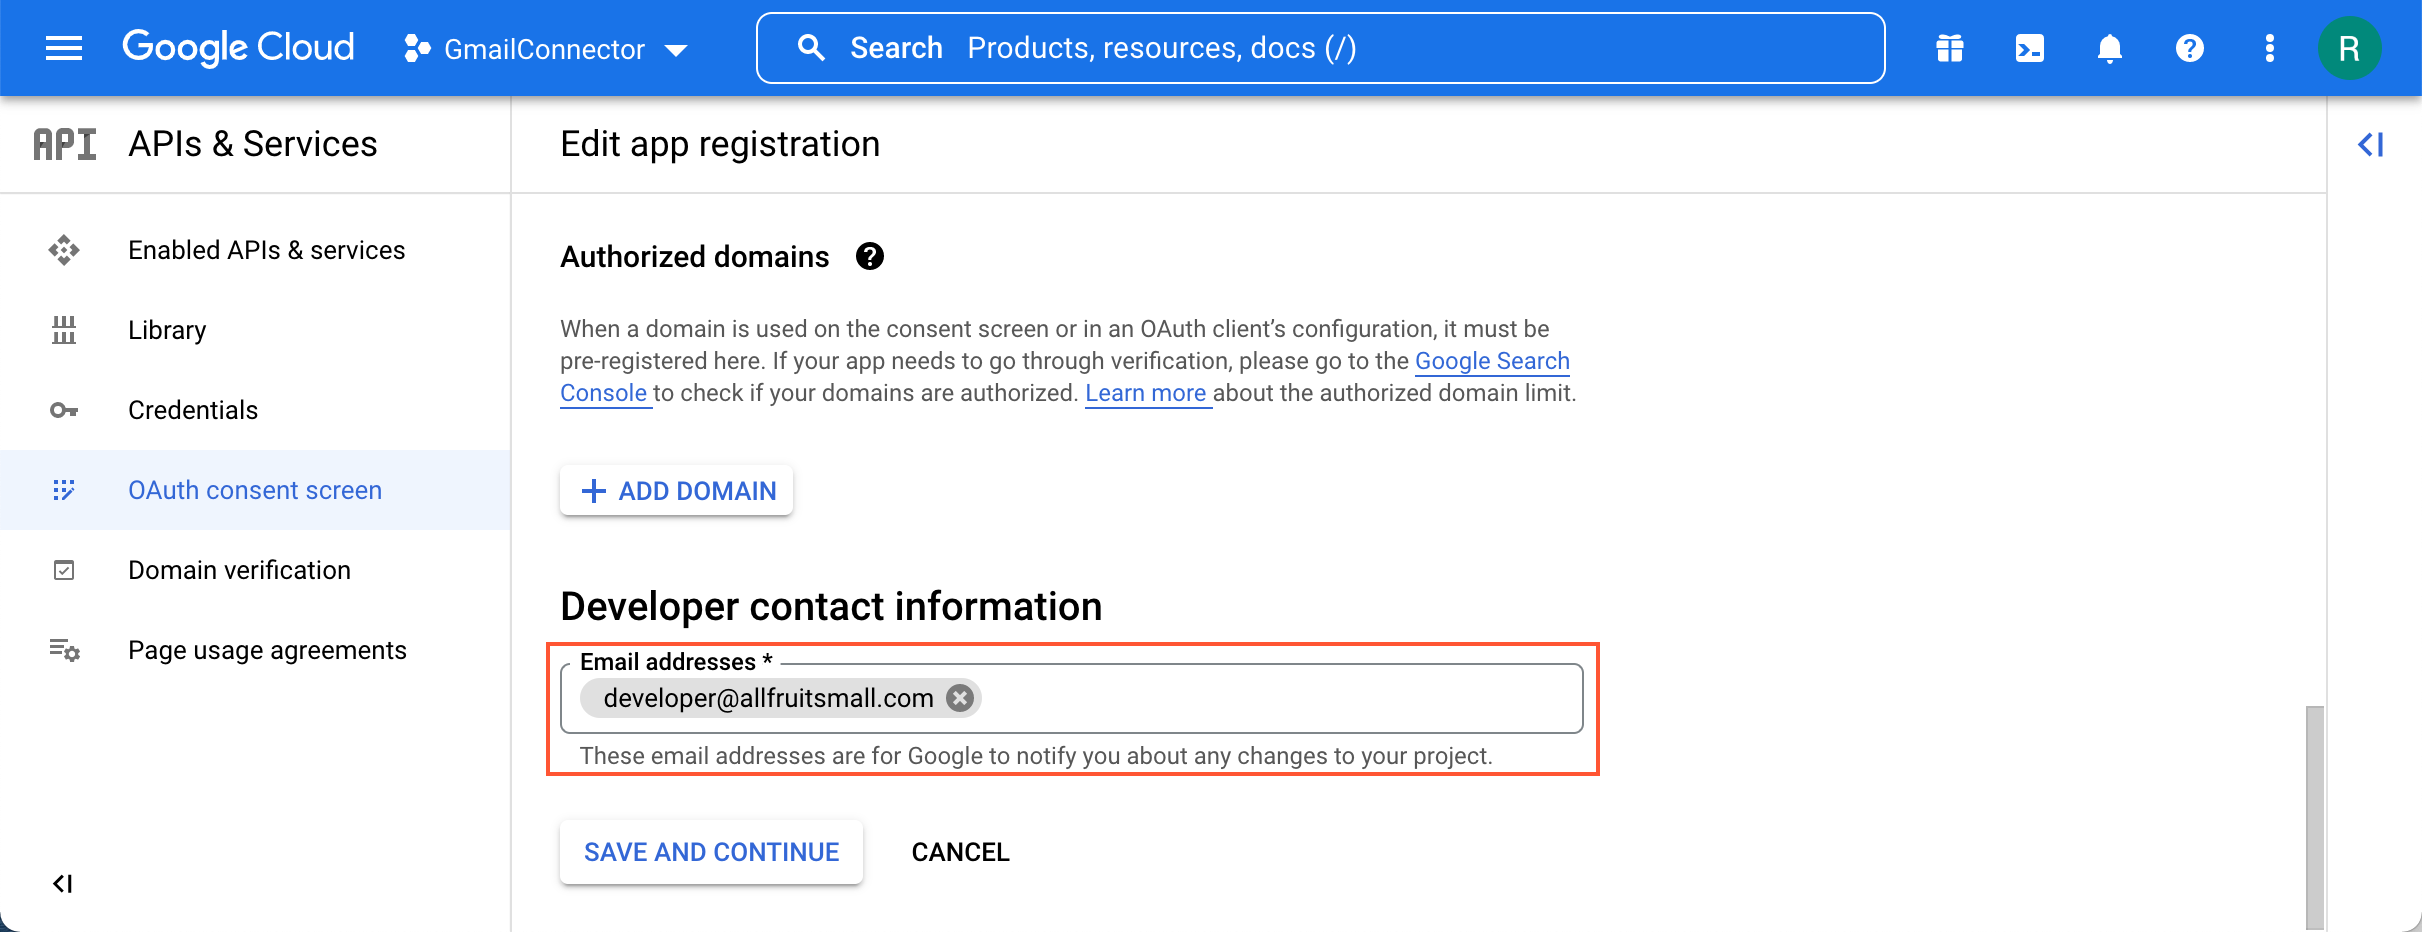
- Click Save and Continue.
- Enter your app name and support email as shown in the following
screenshot.
- On the Scopes step, click Add or Remove Scopes.
- In the Update selected scopes pane, do the following:
- Select the following scopes:
- userinfo.email
- userinfo.profile
- openid
- Click Update
Figure 5. Application scopes 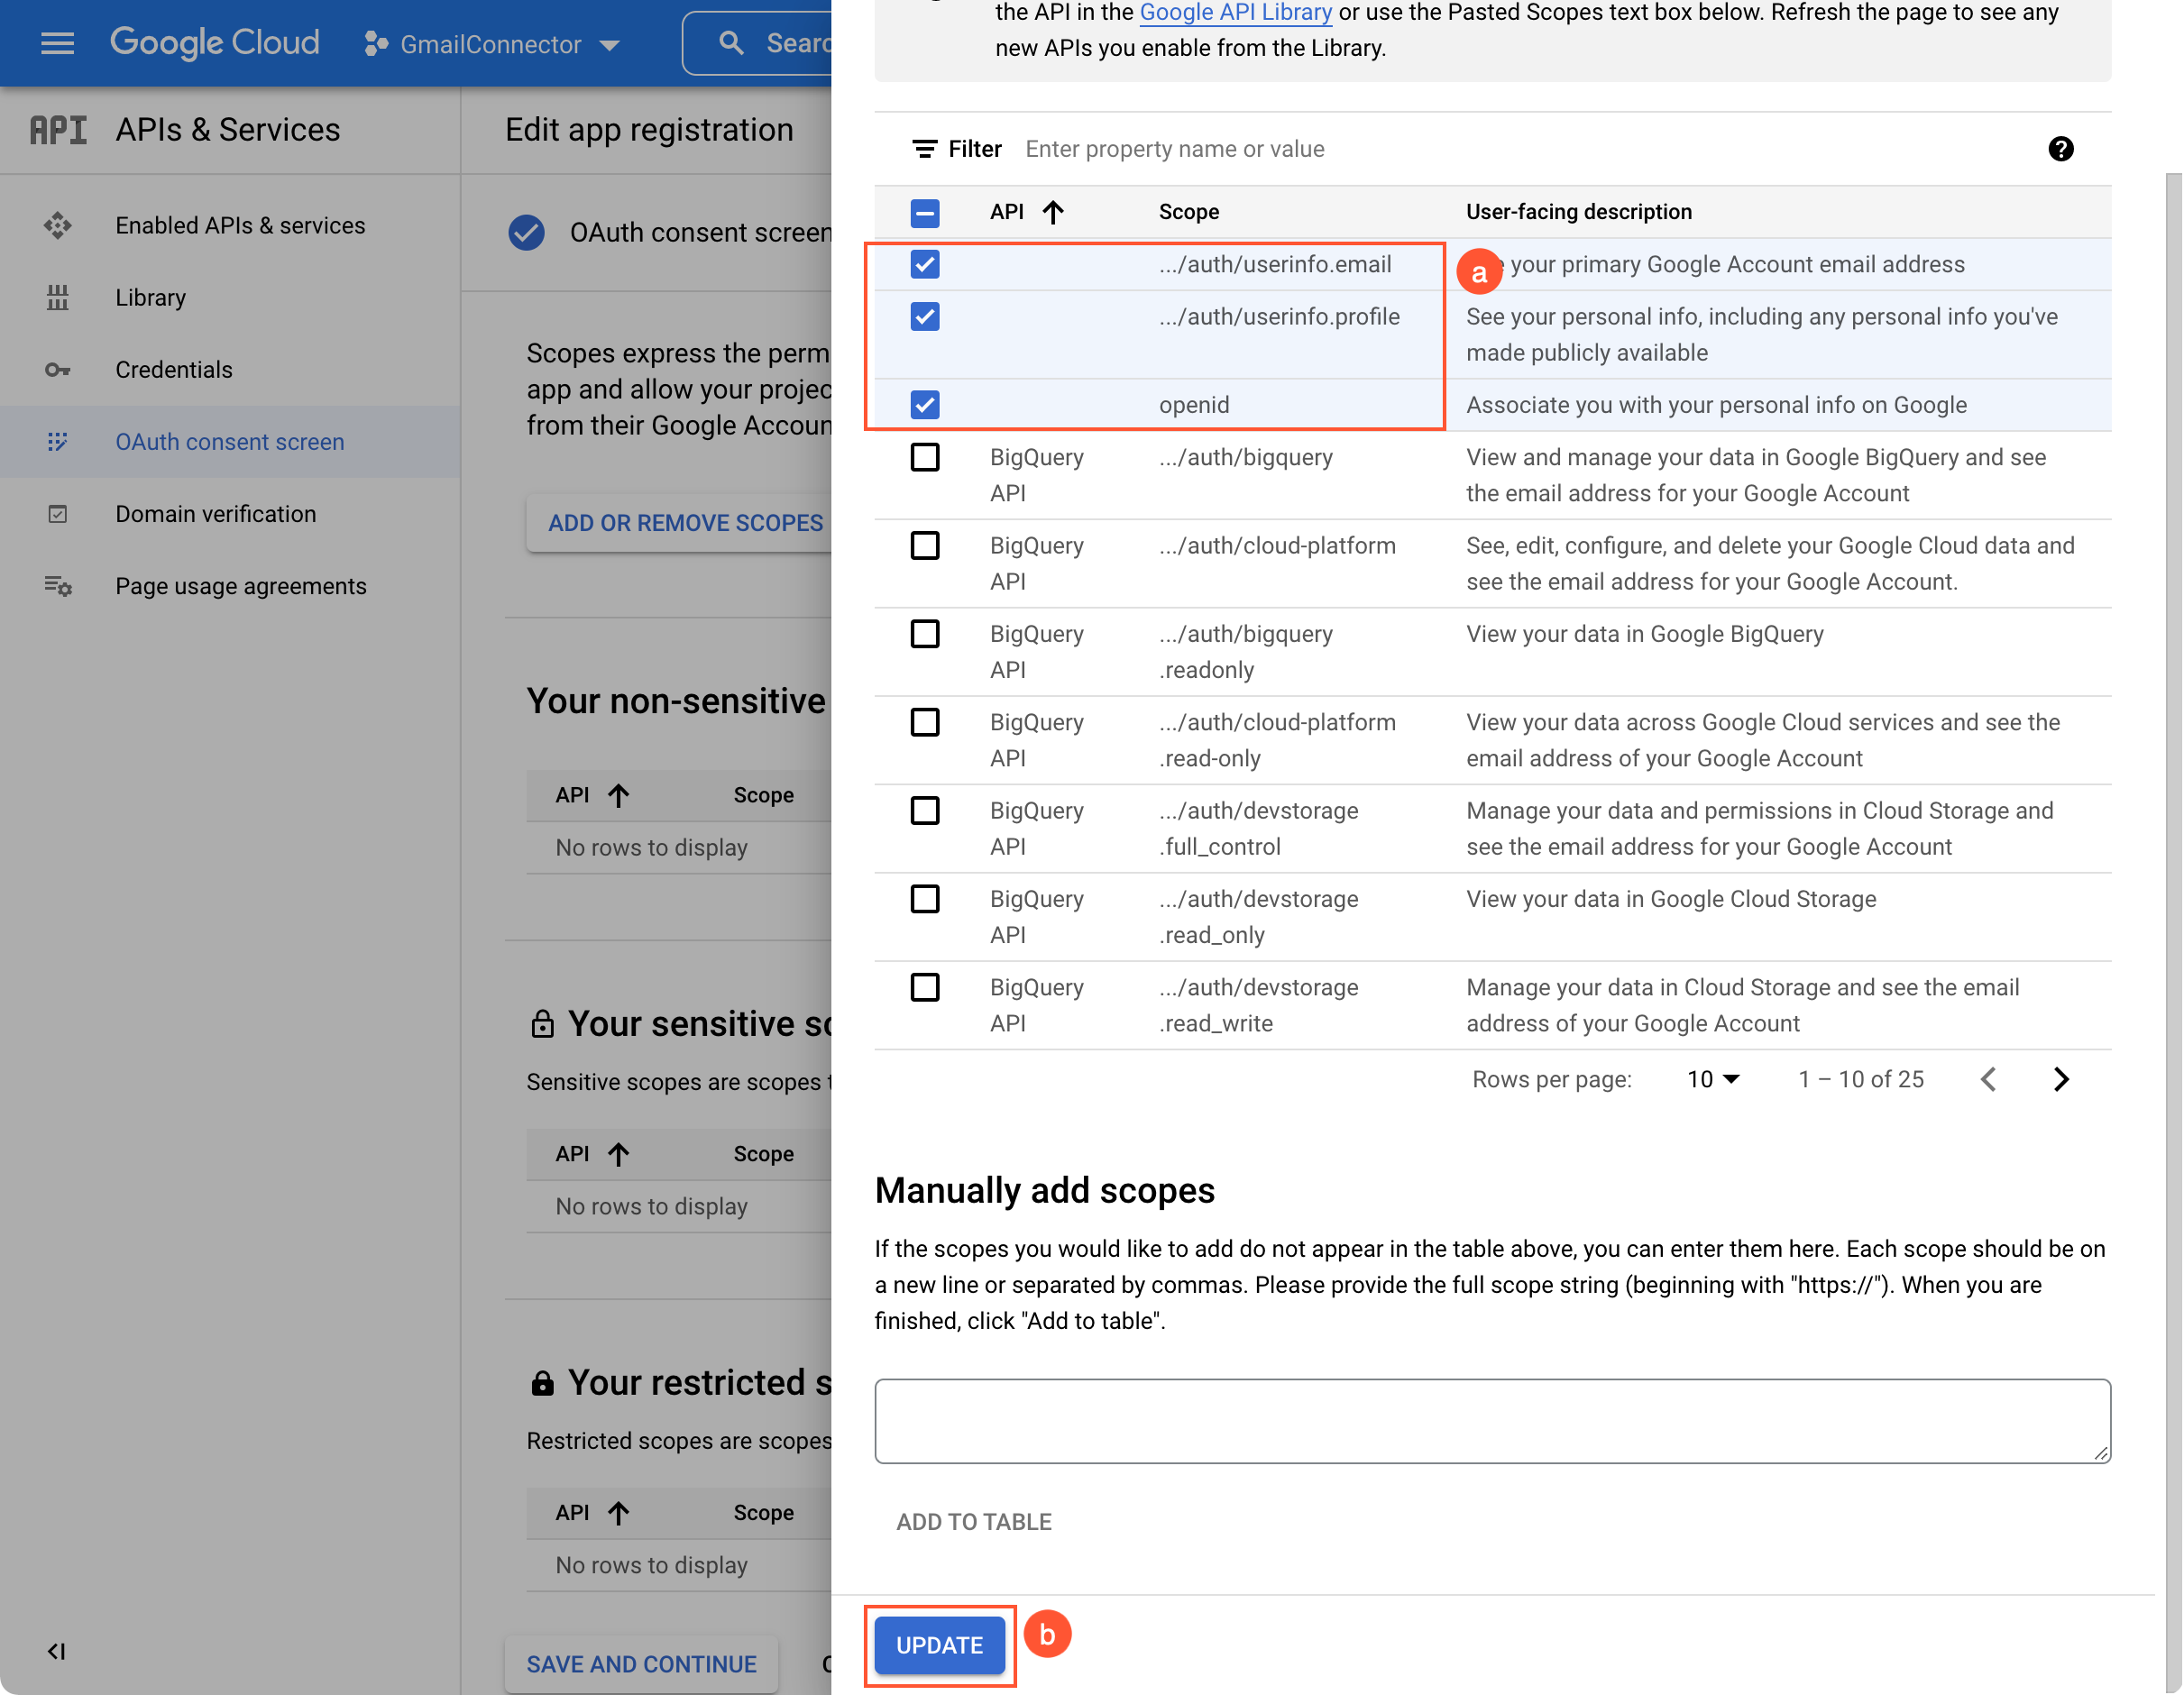
- Select the following scopes:
- Verify that the Your non-sensitive scopes section
contains scopes as in the following screenshot.
Figure 6. Verification of the added scopes 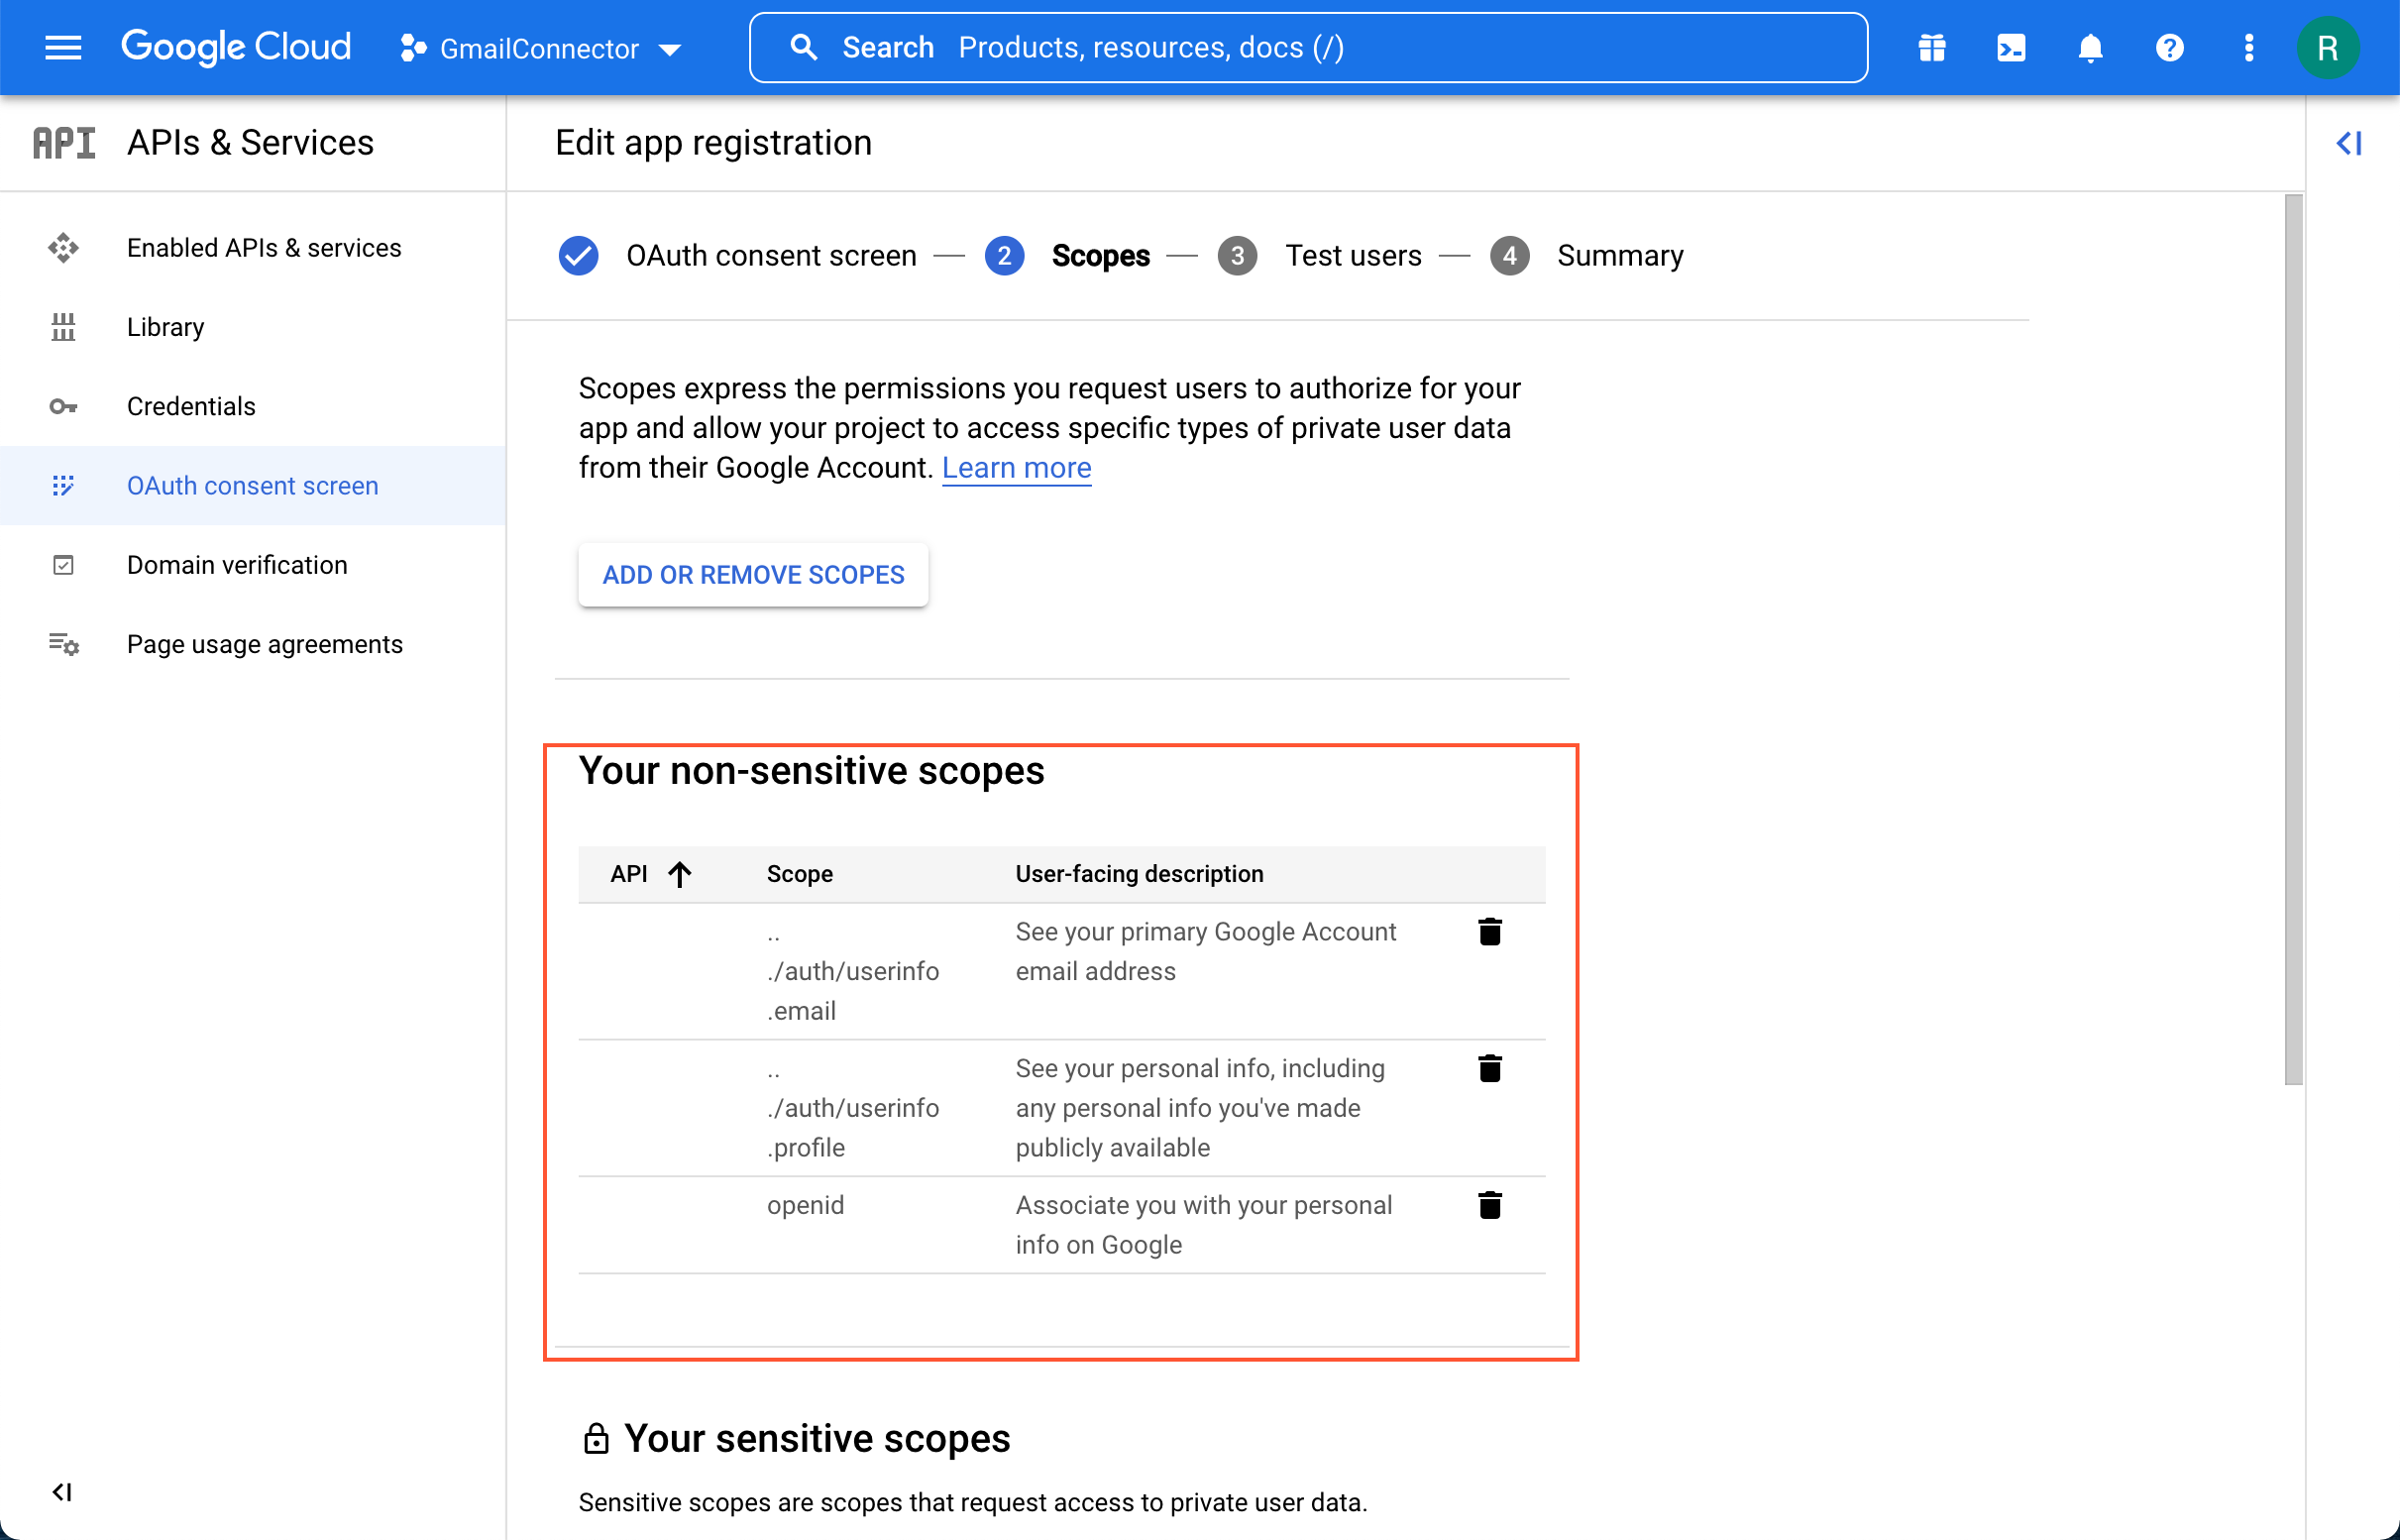
- Click Save and Continue.
- On the Test users step, add all the users you want authorized to use this
app as shown in the following screenshot. Click Save and
Continue.
Figure 7. Addition of authorized users 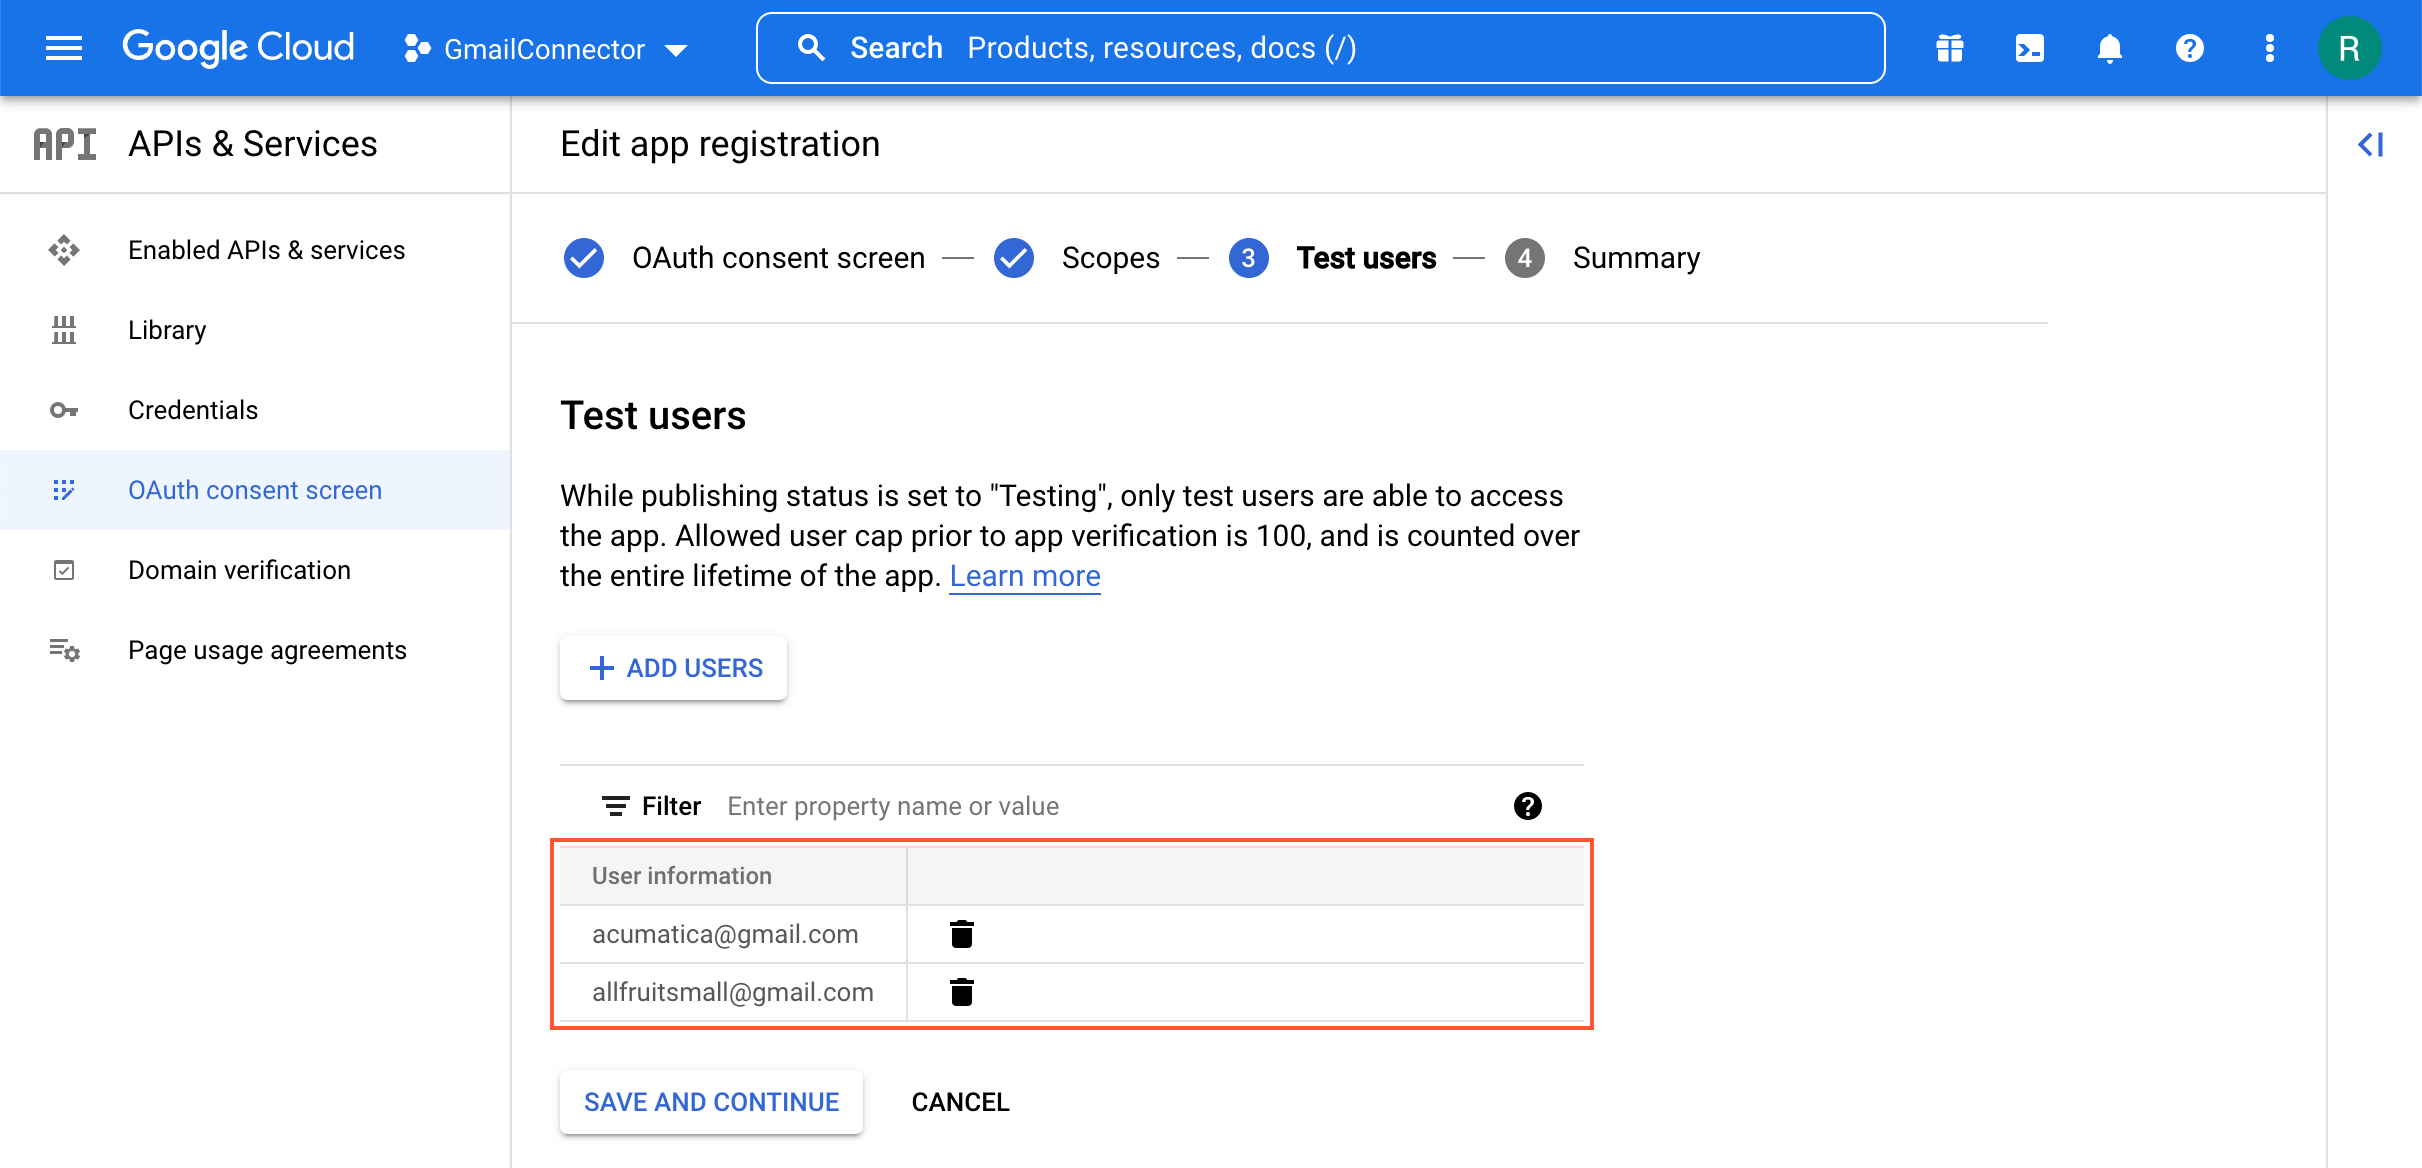
- On the Summary step, review all the information you added in previous steps. Click Back to Dashboard.
- On the OAuth consent screen page which opens, click
Publish as shown in the following screenshot and
confirm the publish.
Figure 8. Publication of the app 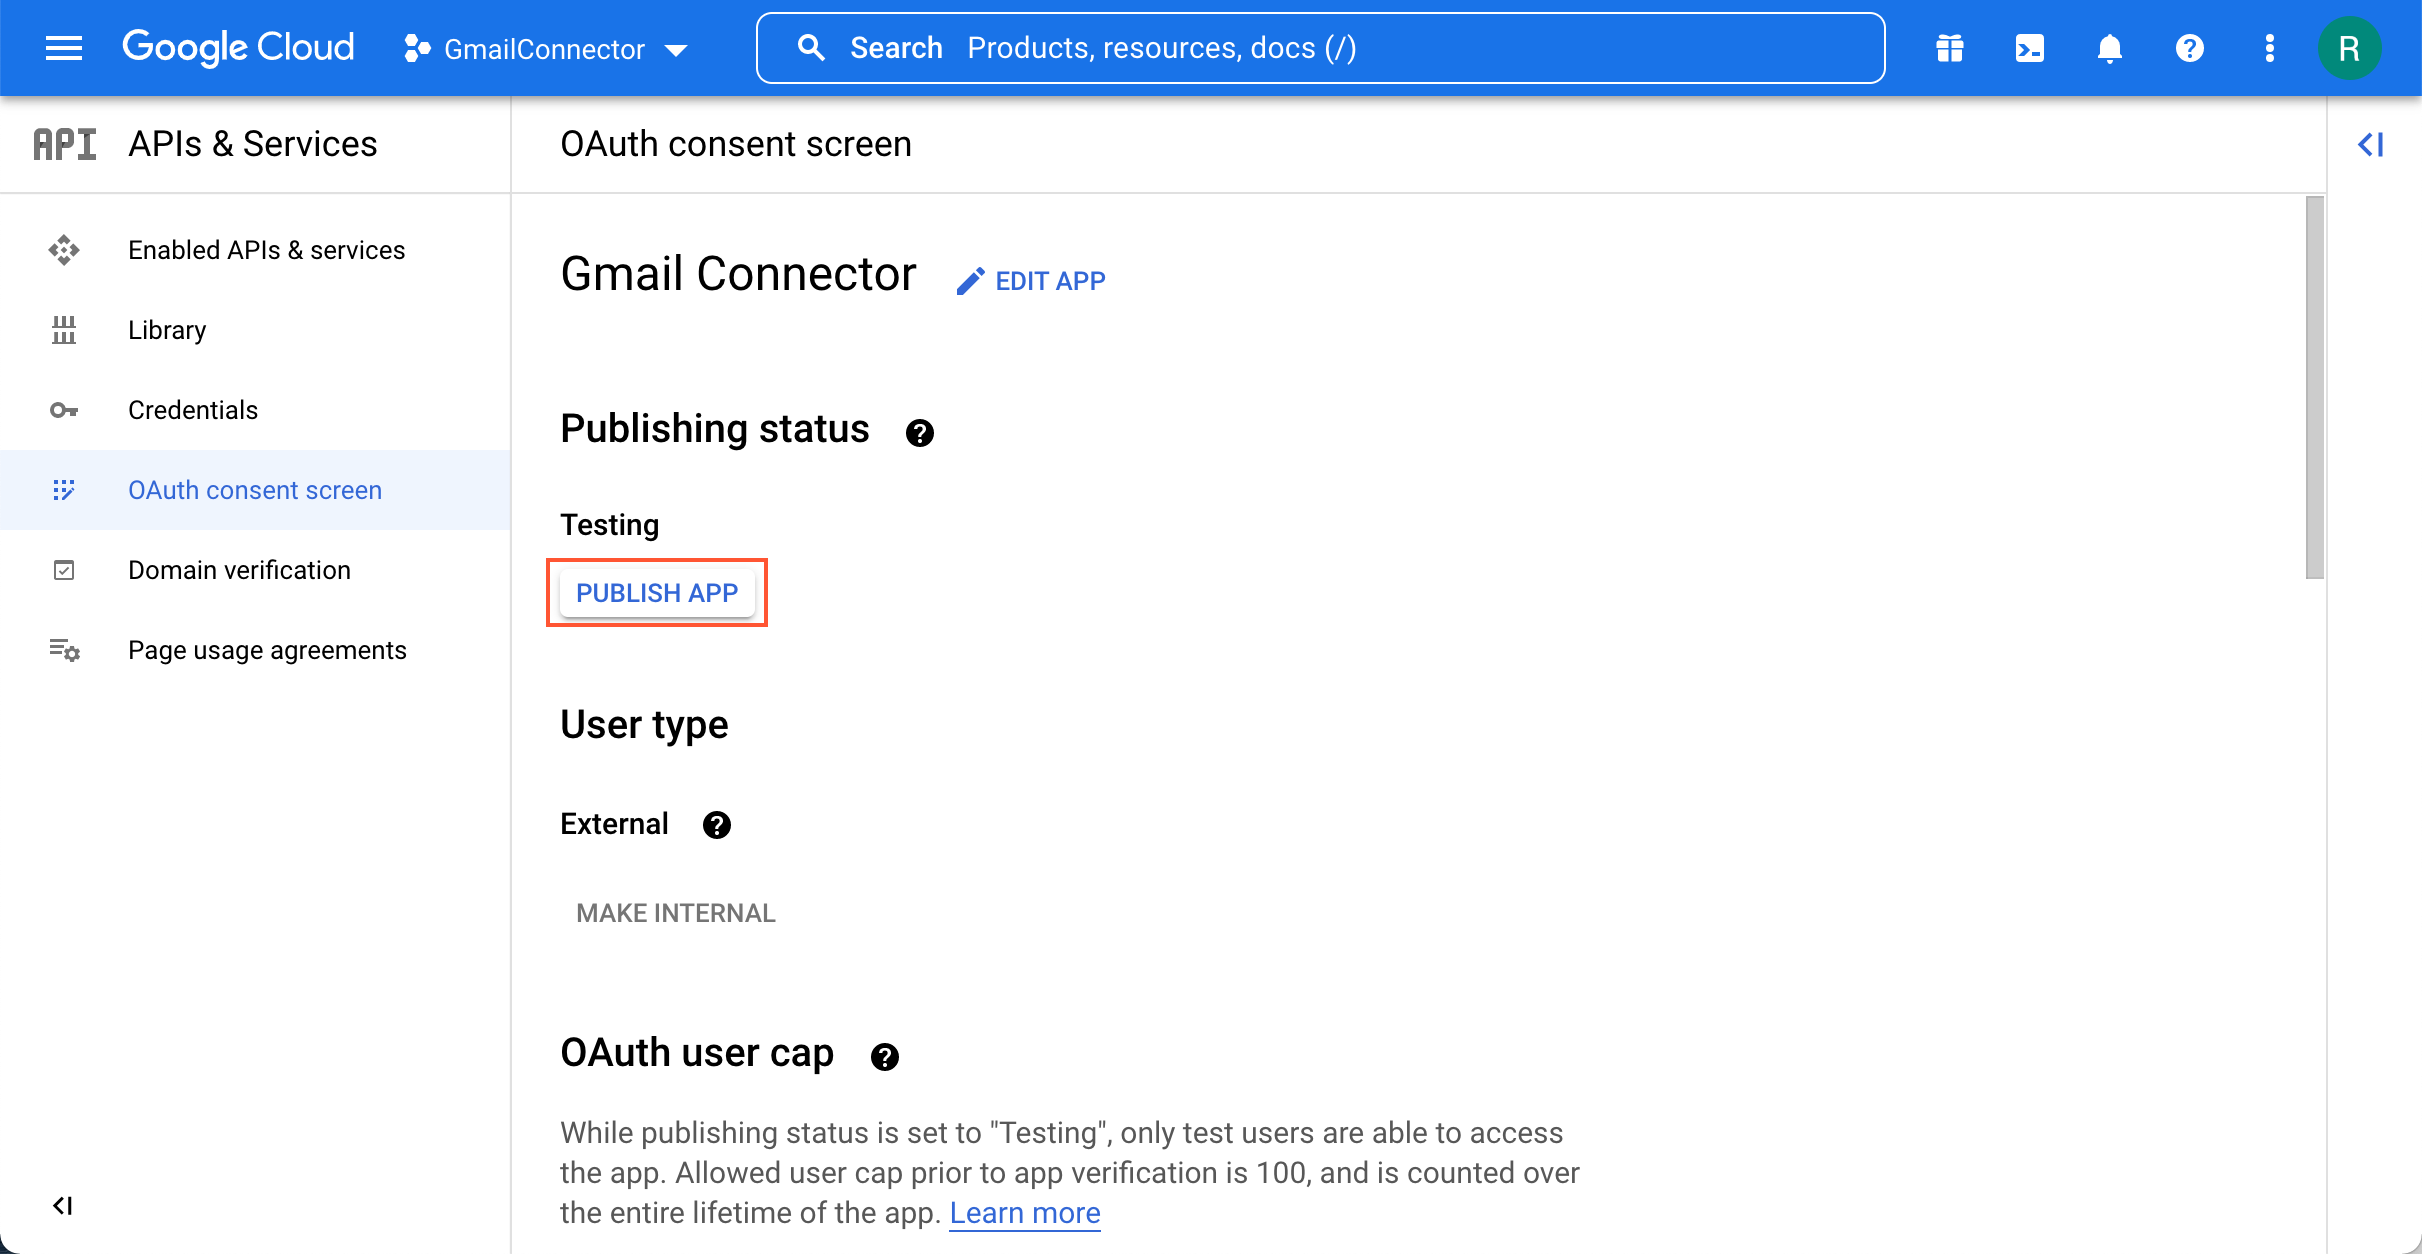
- Verify that the Publishing status changed to In
production as shown in the following screenshot.
Figure 9. Publishing status of the app 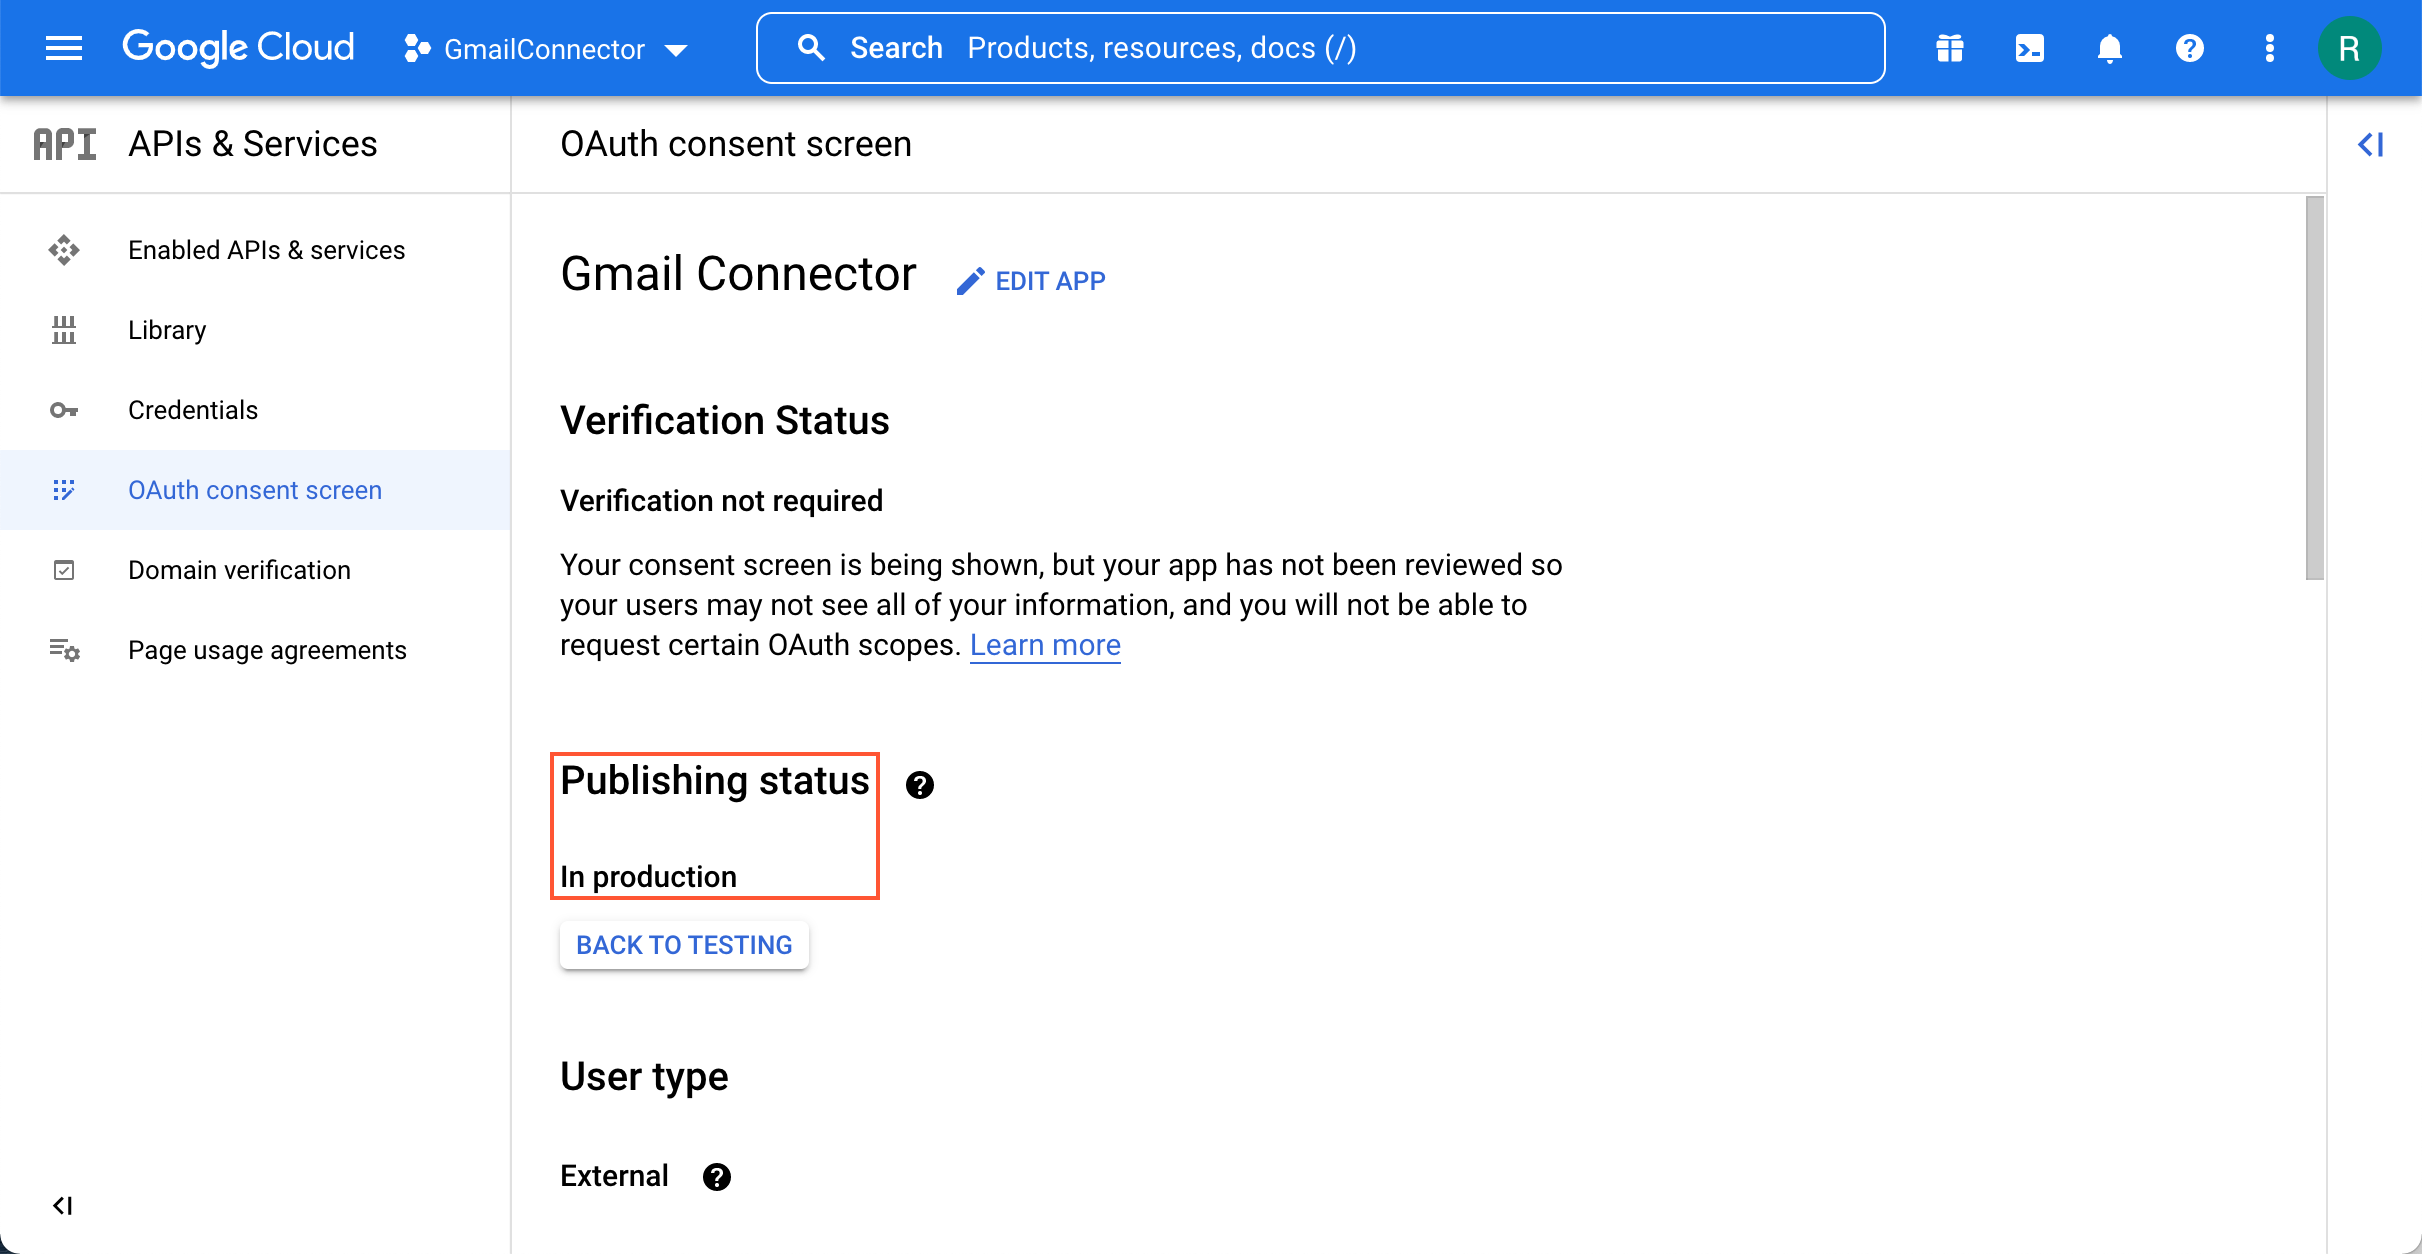
Step 2: To Obtain OAuth 2.0 Credentials from Google
After you registered the application with Google, you set up OAuth 2.0 credentials:
- While you are still have the Google Cloud Platform Console opened, navigate to
the Credentials page and click as shown on the following screenshot.
Figure 10. Creation of OAuth client ID 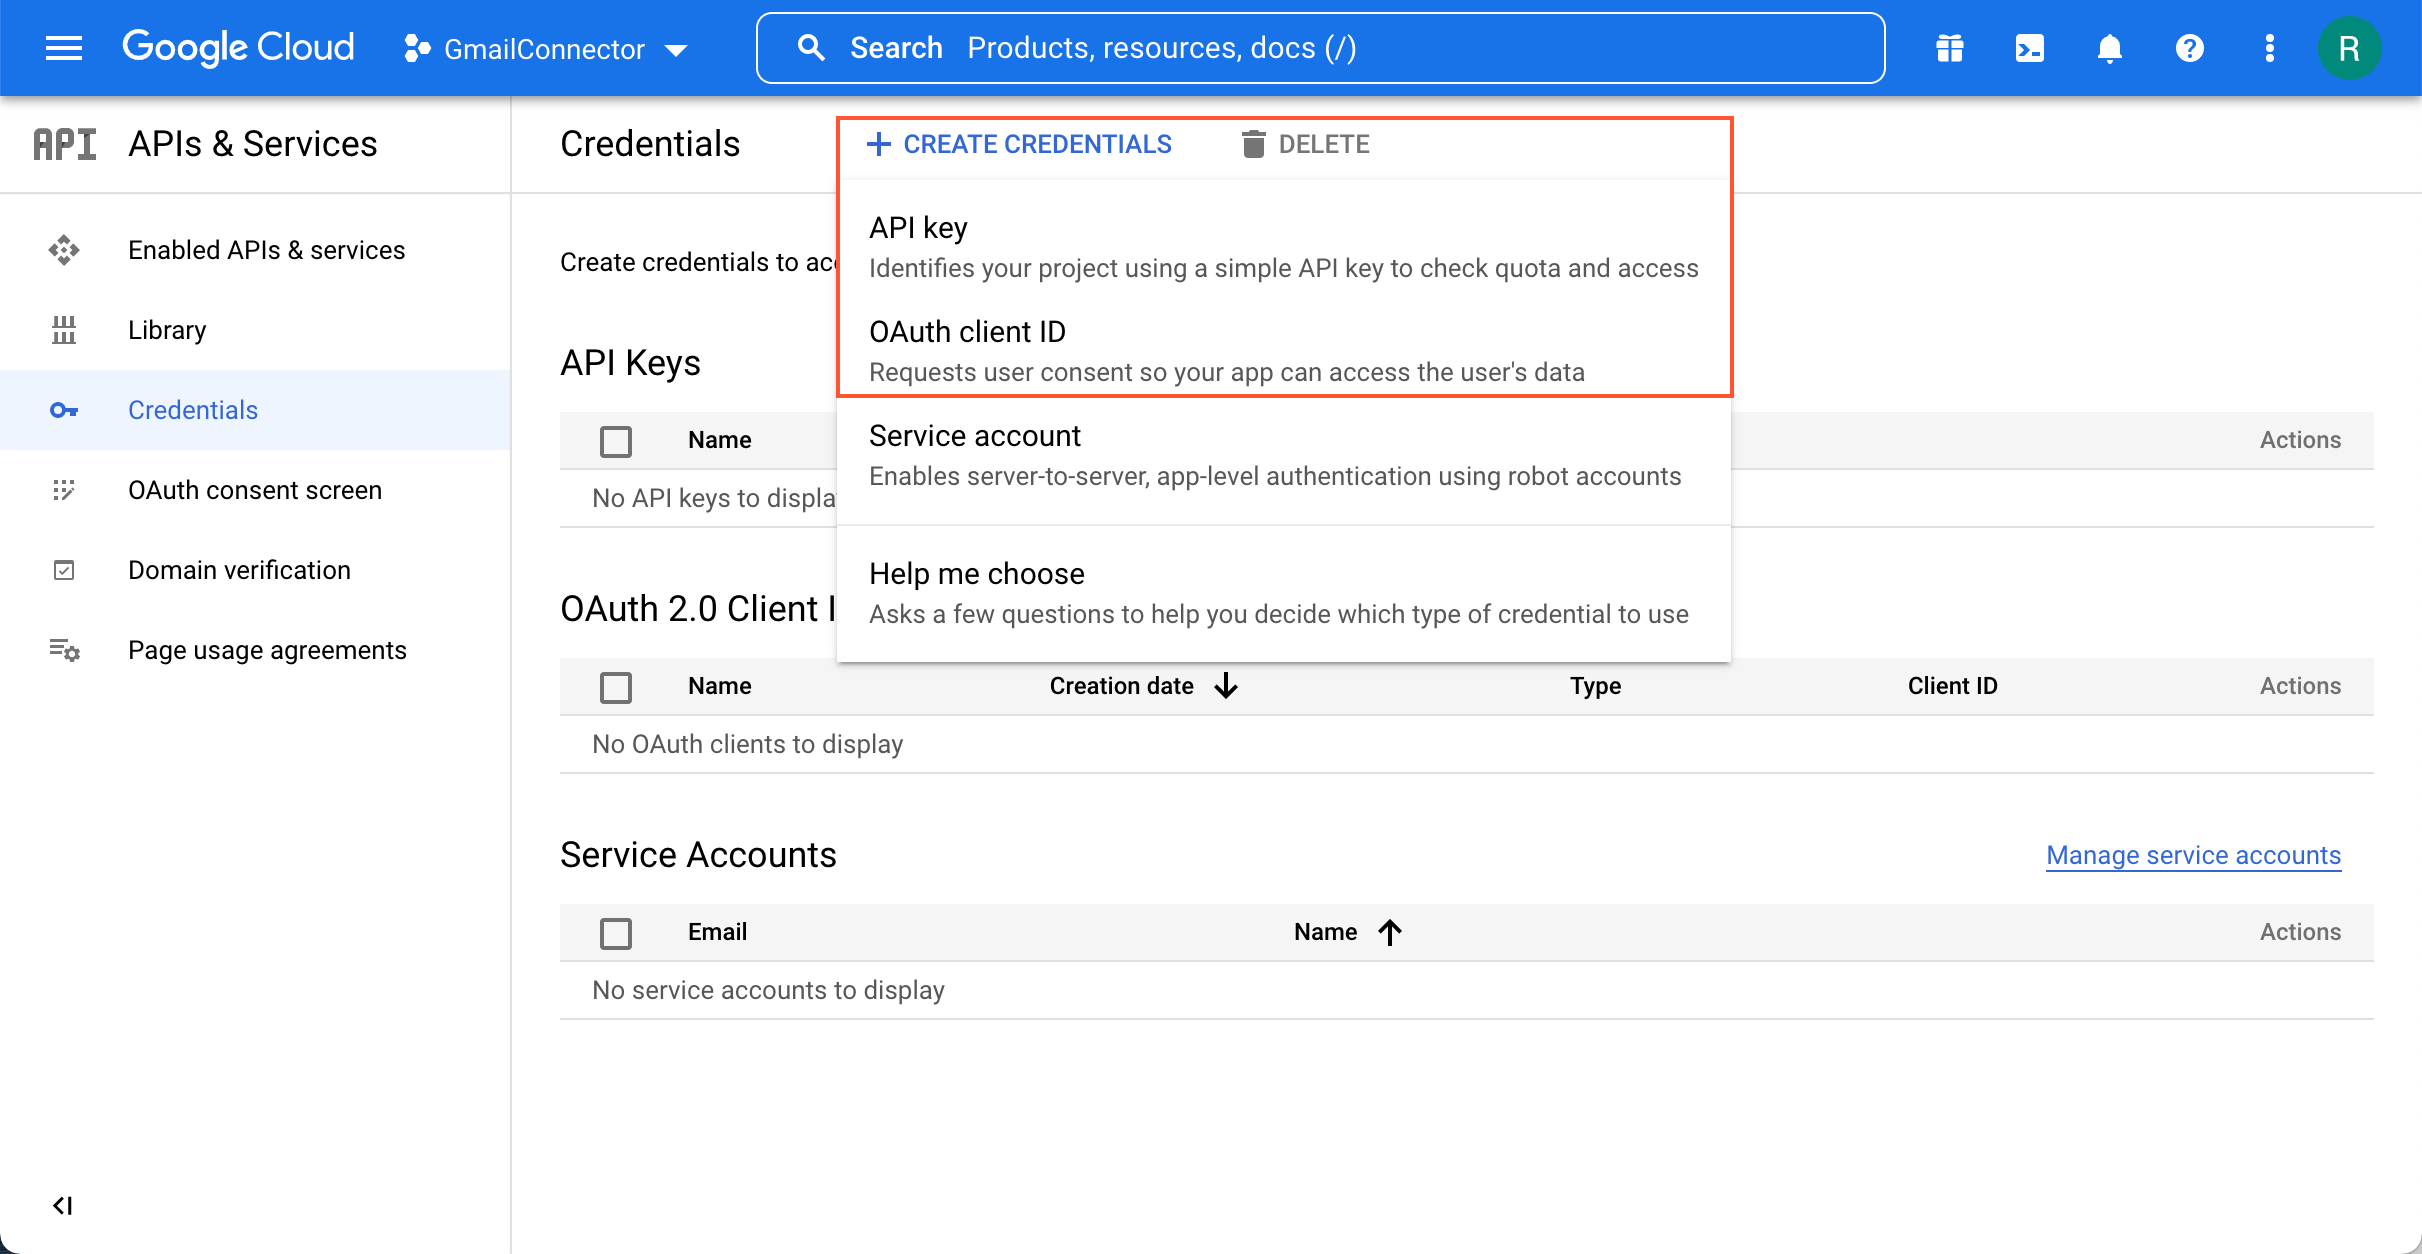
- On the Create OAuth client ID page which opens, do the following:
- In the Application type box, select Web application.
- In the Name box, type in a meaningful application name.
Figure 11. Application details for OAuth client ID creation 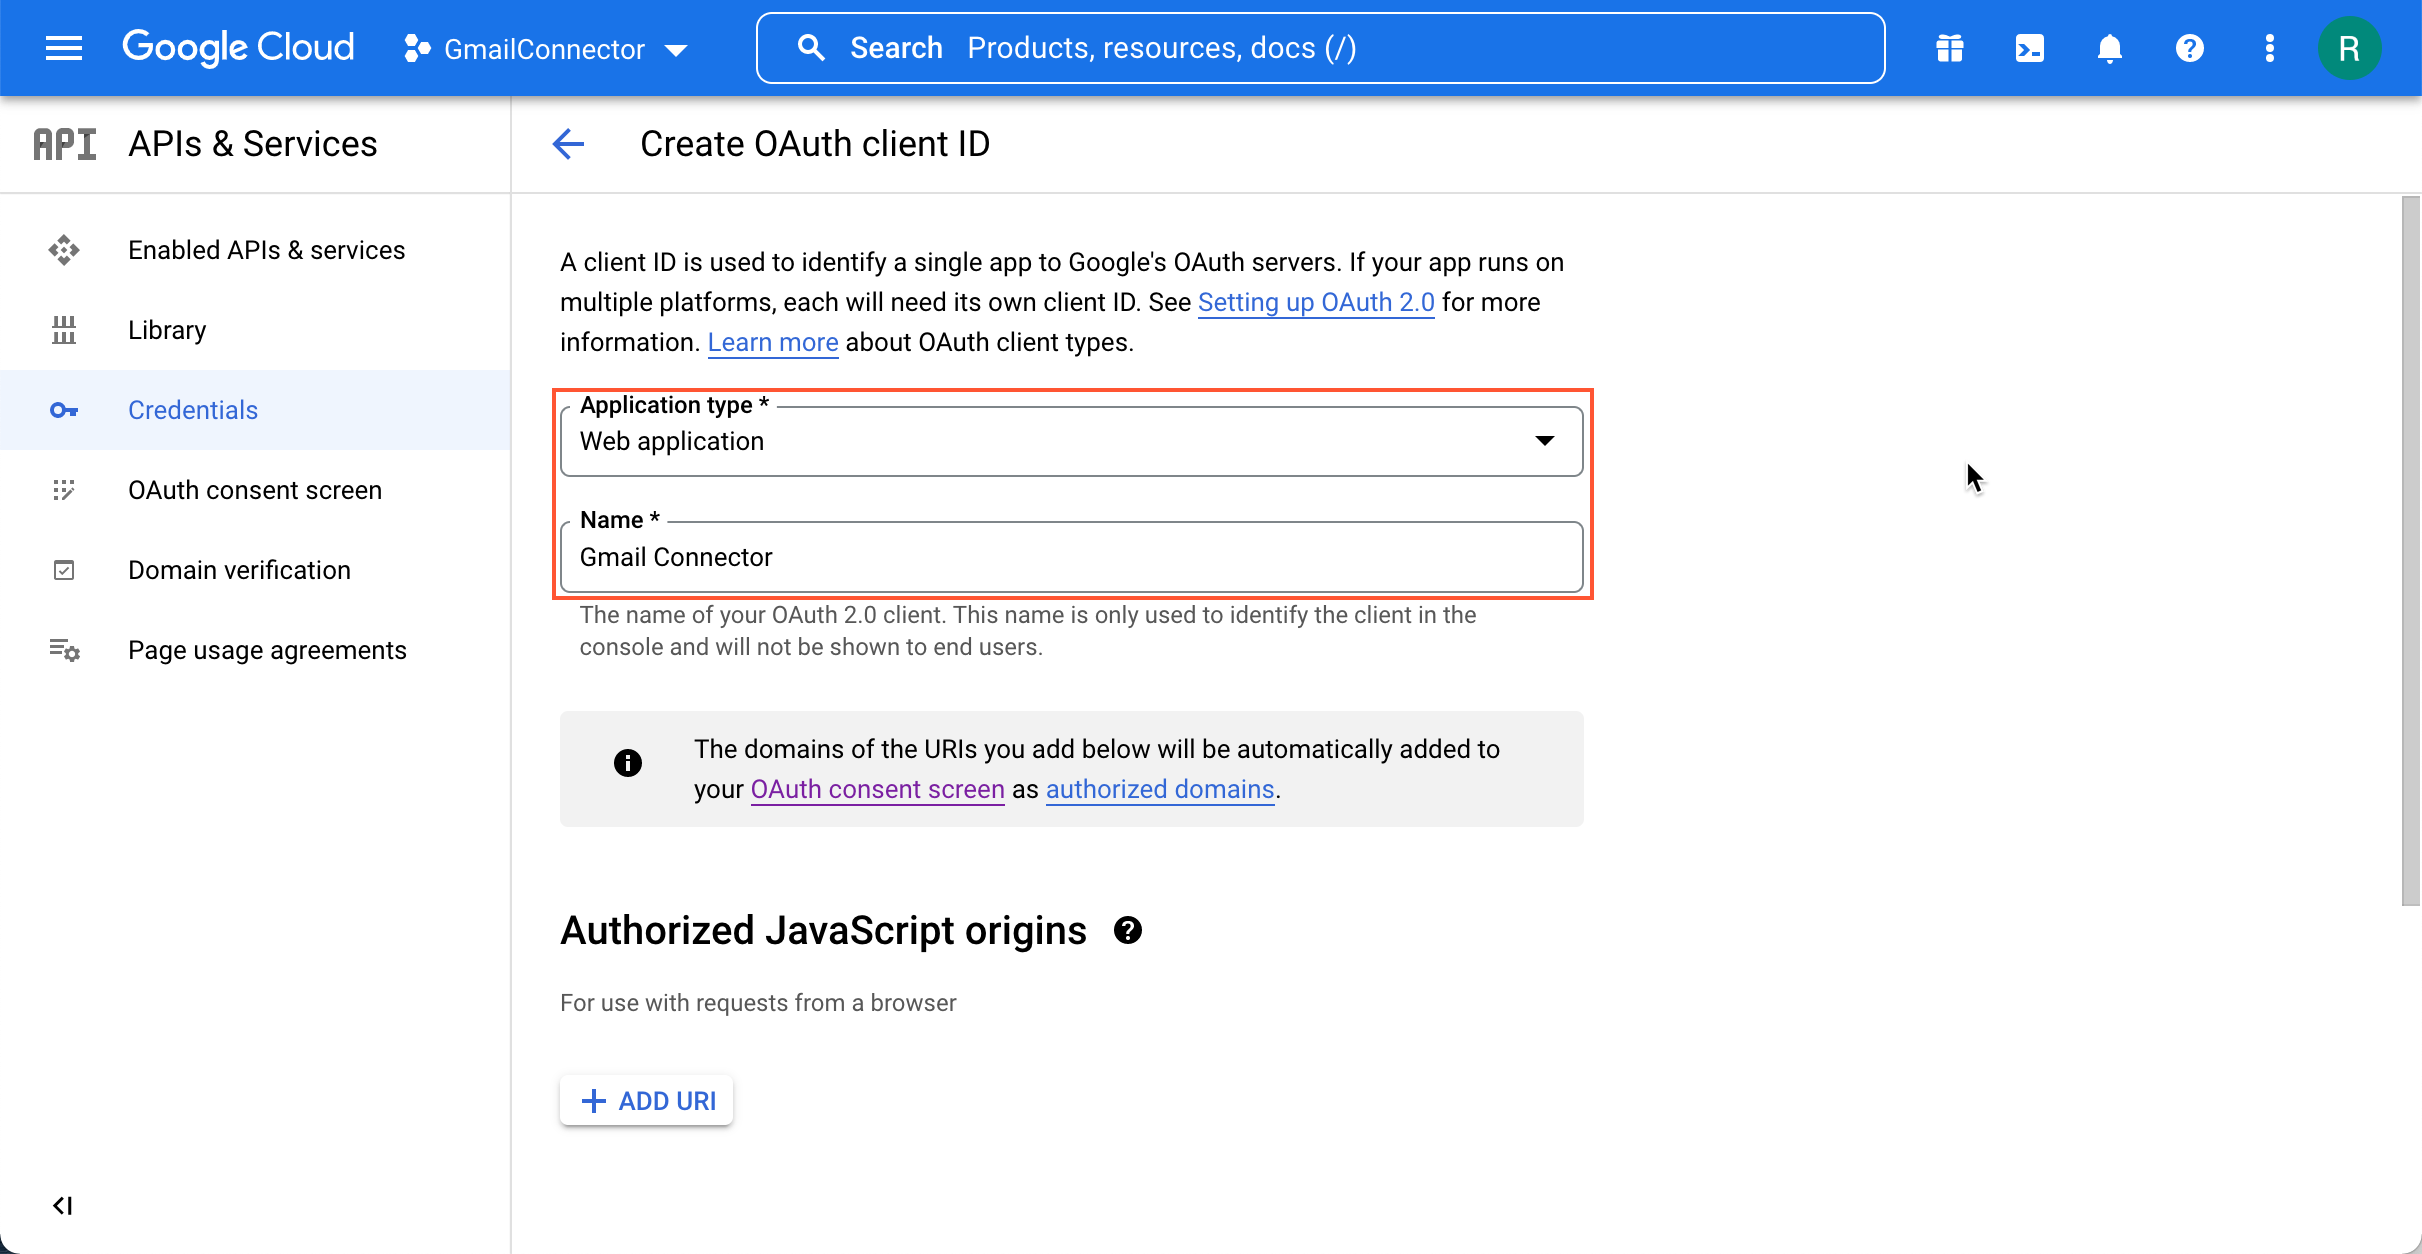
- In the Authorized redirect URIs section, click Add
URI and type in a redirect URI as shown in the following screenshot.
This value can be found on the External Applications
(SM301000) form in MYOB Acumatica.
Figure 12. Specification of the redirect URI 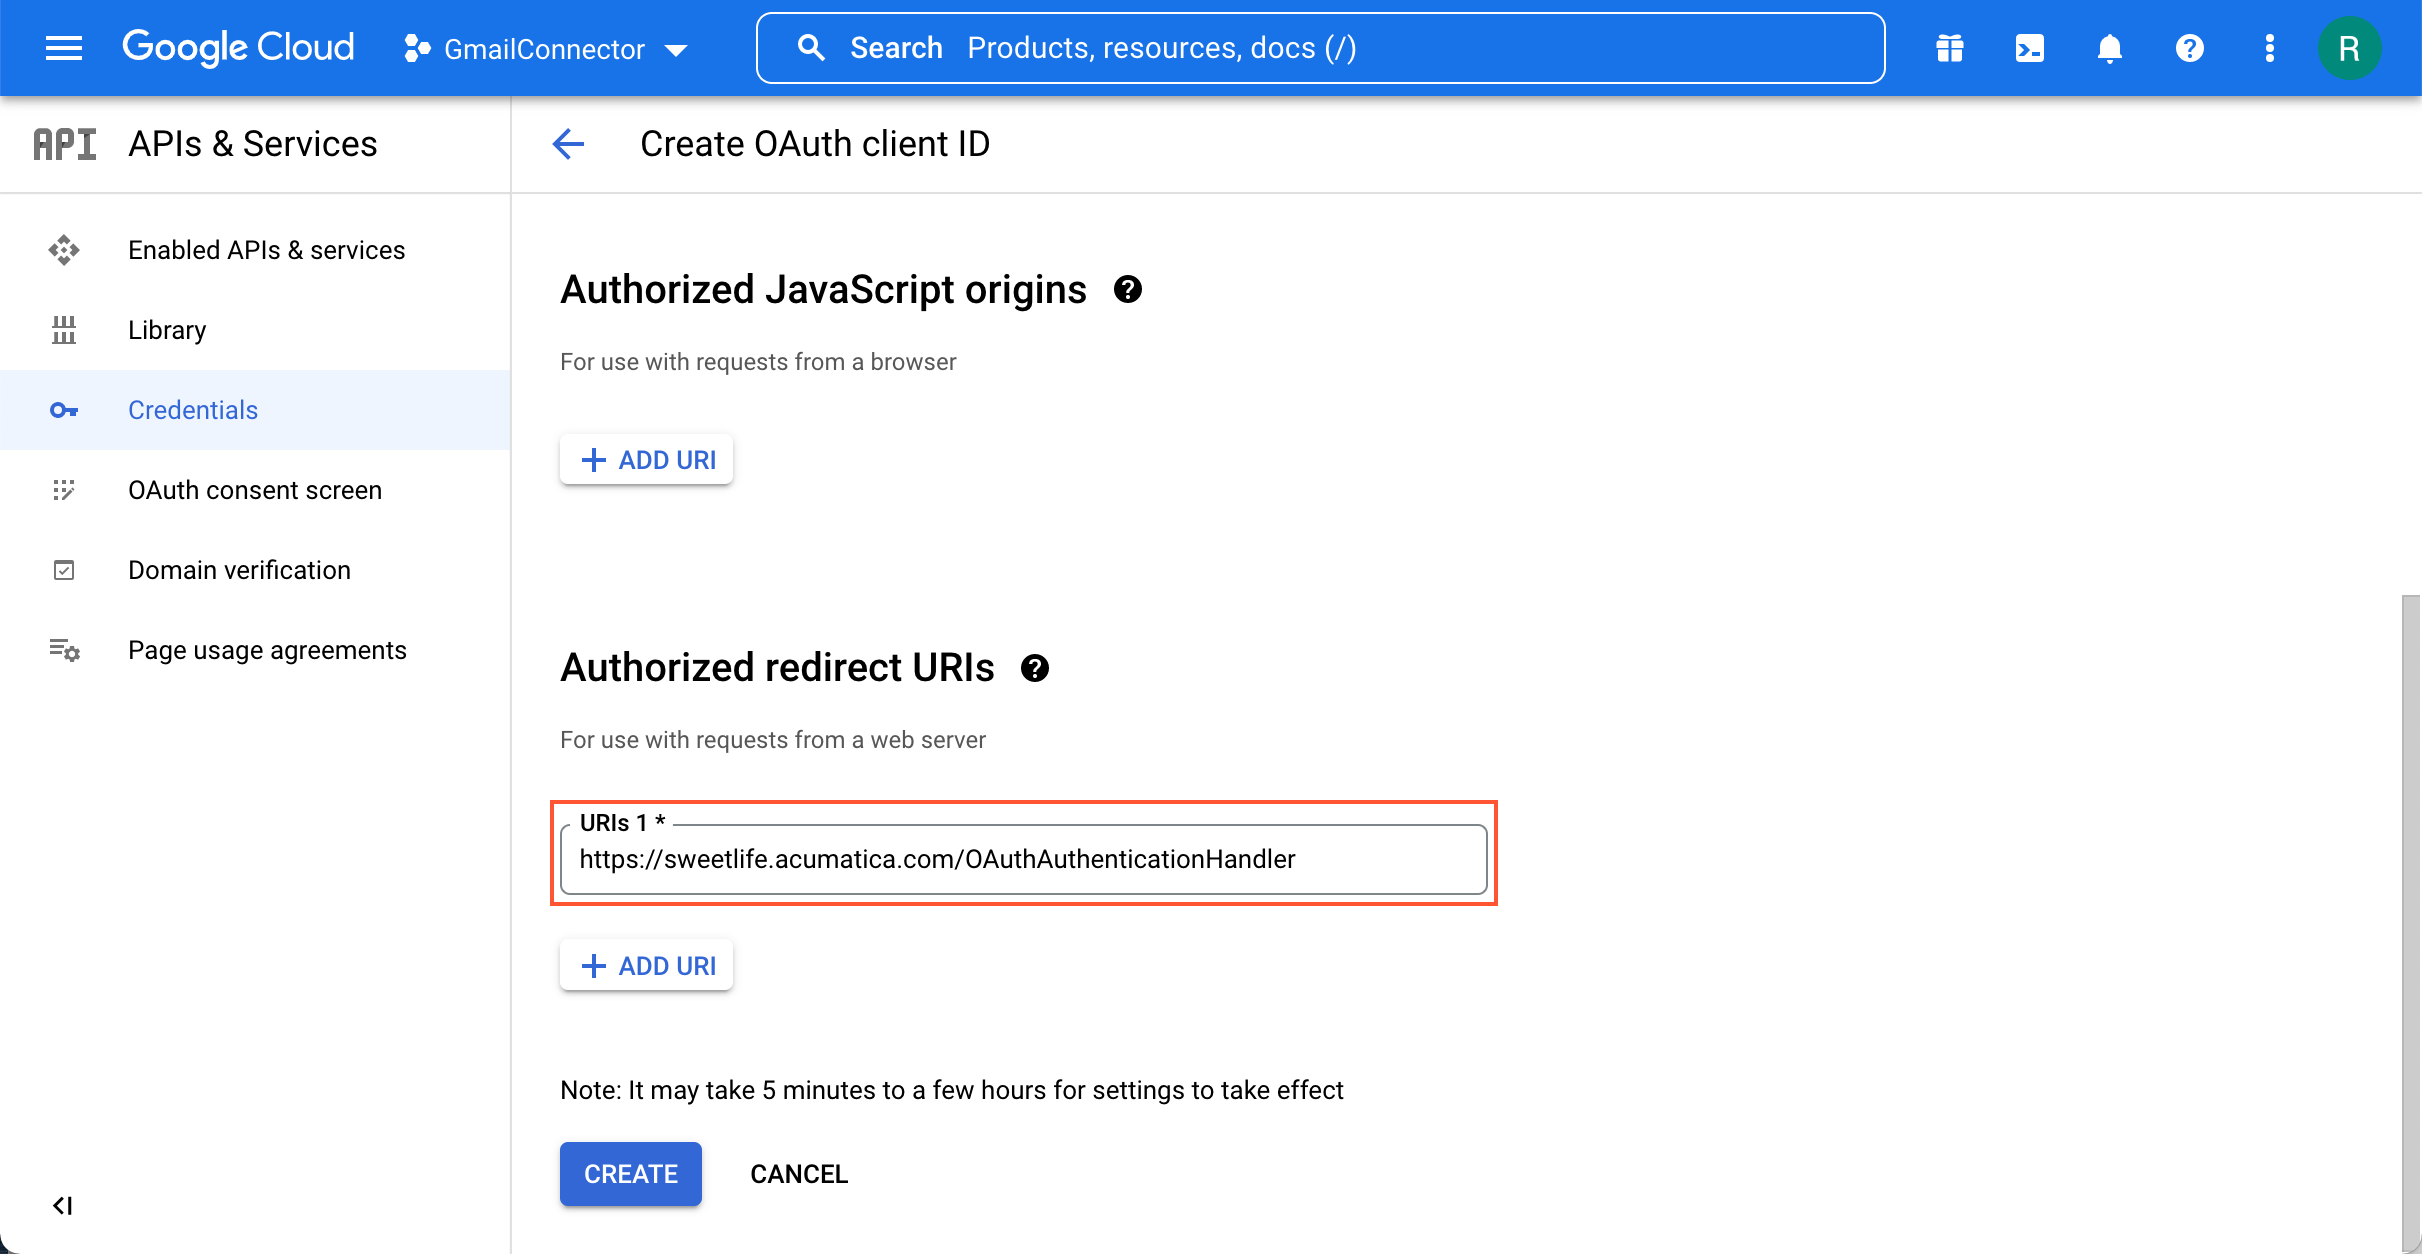
- Click Create.
- On the OAuth client created dialog box which opens, copy the following
values which will be used for registering an external application in MYOB Acumatica.
- Your Client ID
- Your Client Secret
Figure 13. Created credentials for OAuth client 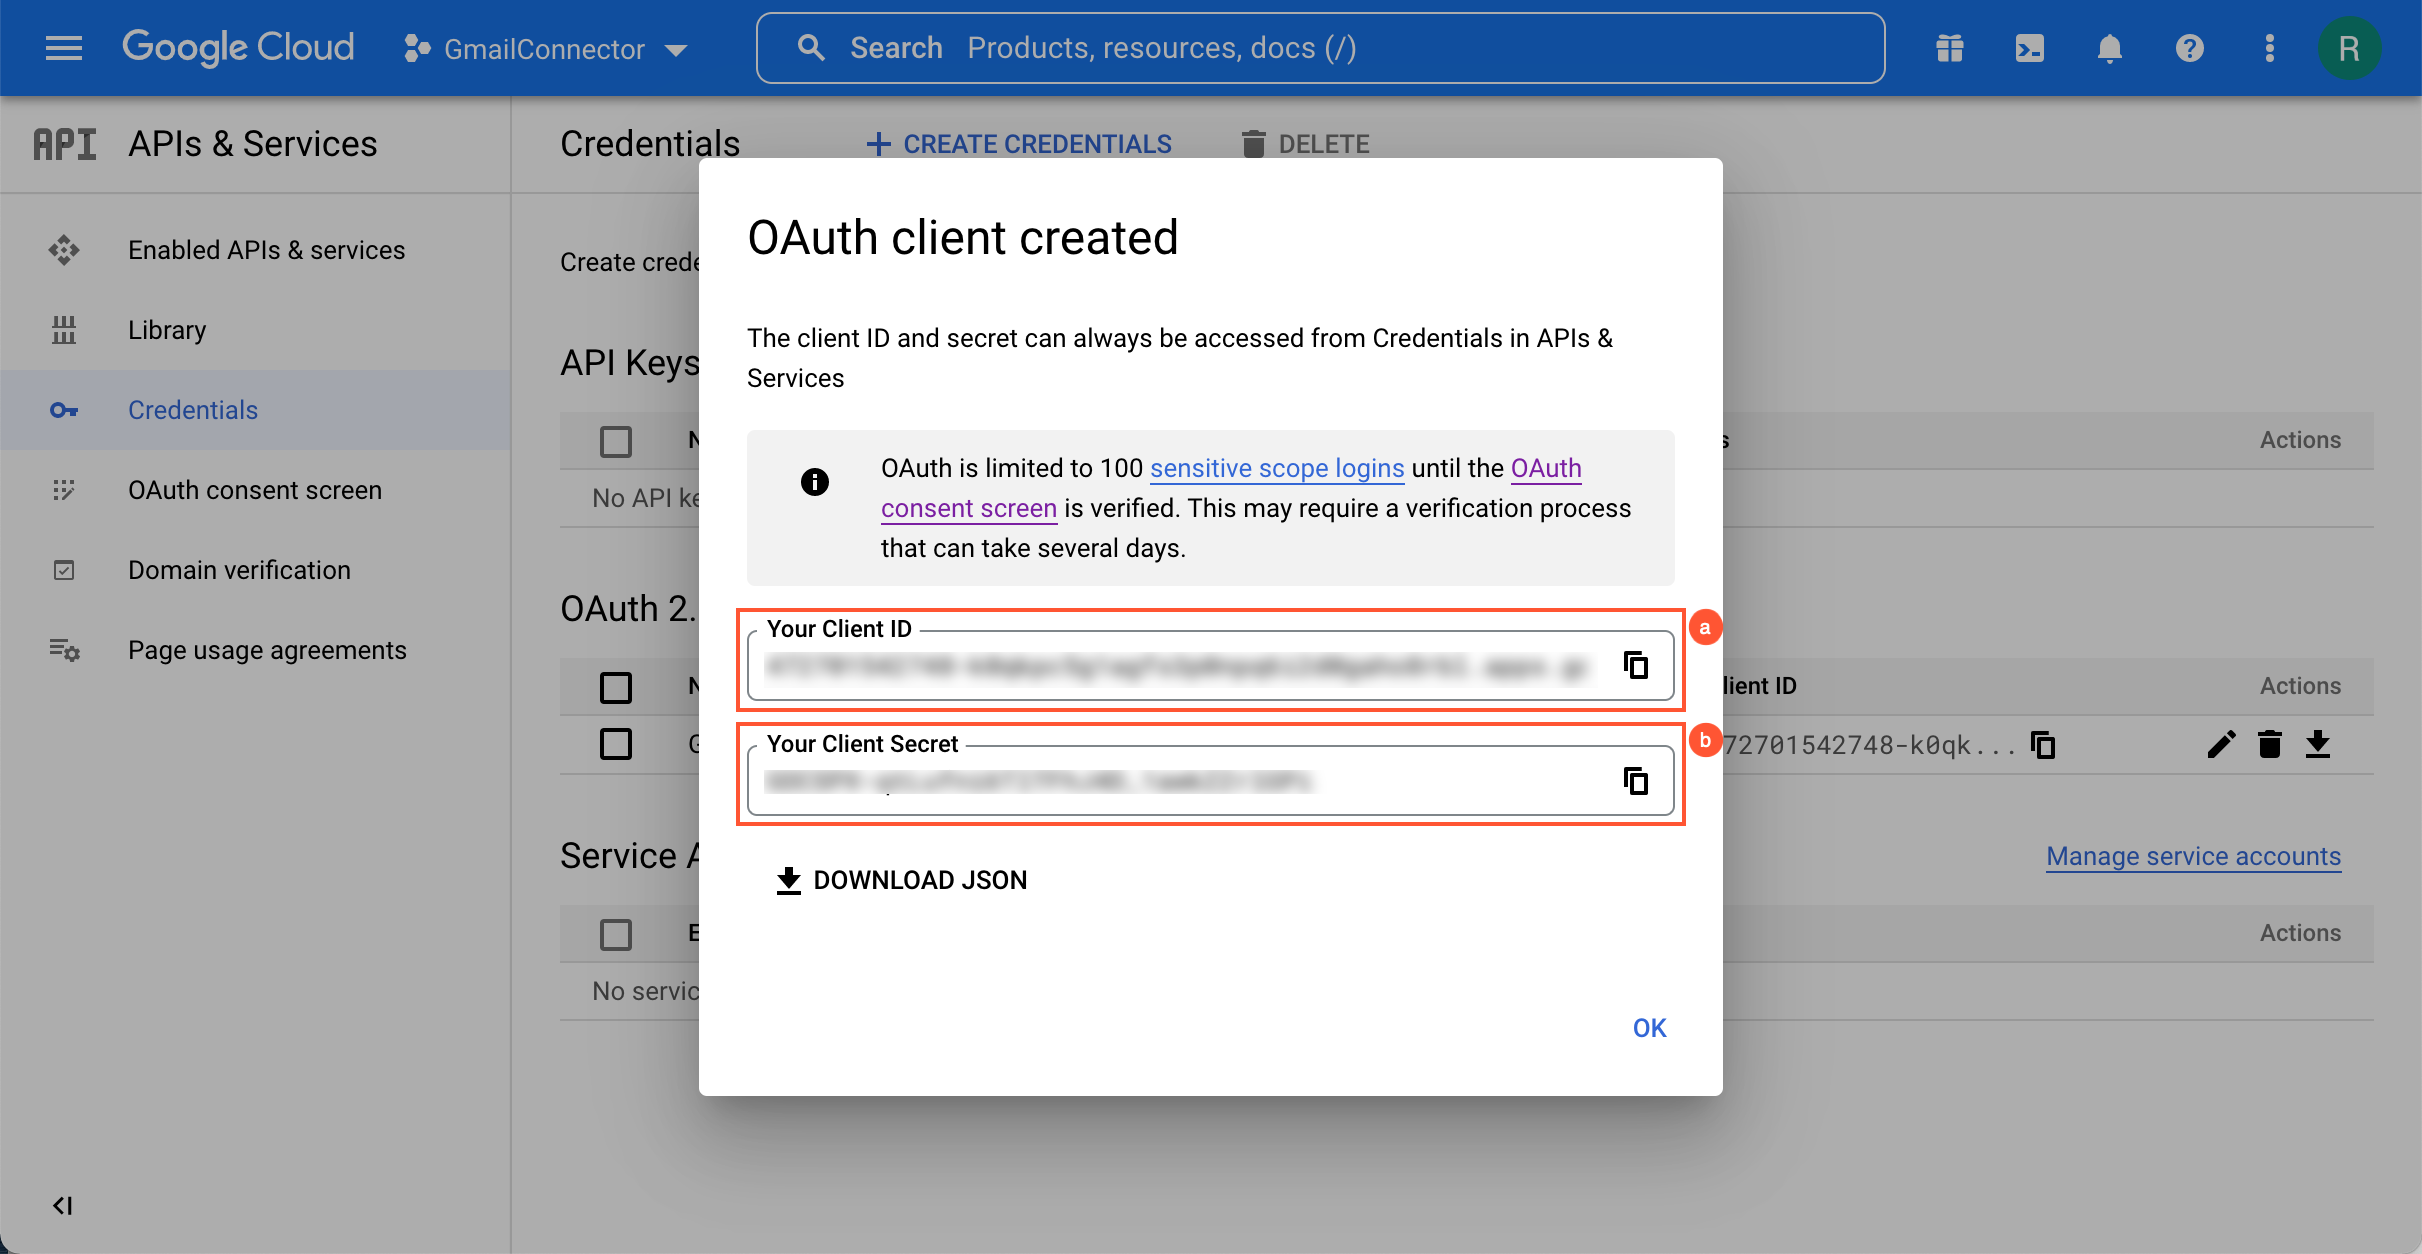
Tip:You can keep the browser page with the OAuth client created dialog box open and copy the values directly to MYOB Acumatica when you will register the application on the External Applications (SM301000) form.
Step 3: To Specify the General Settings of the Email Account
To specify the general settings of the account, do the following in MYOB Acumatica:
- Open the Email Accounts (SM204002) form.
- On the form toolbar, click Add New Record.
- In the Summary area of the form, do the following:
- In the Account Name box, type the name of the system email account.
- In the Email Address box, type the email address of the account that will be used as the system email account.
- Optional: In the Reply Address box, type the email address that will be used for automatic replies.
Step 4: To Specify the Servers
To specify the settings of the servers, do the following:
- While you are still on the Email Accounts (SM204002) form with the account you have created, be sure the Service tab of the form is opened.
- In the Incoming Mail Protocol box (Server
Information section), select the protocol to be used to connect
to the incoming server. Note:If you have selected IMAP, every email that has been successfully collected from the server will be marked as read on the server.
If you have selected the IMAP protocol, in the Root Folder (on Server) box, you need to type the path to the folder that will be used as the root folder for storing emails.
- In the Incoming Mail Server box, type imap.gmail.com.
- In the Outgoing Mail Server box, type smtp.gmail.com.
- On the form toolbar, click Save.
Step 5: To Configure Authentication Through OAuth 2.0
To configure authentication through OAuth 2.0, do the following:
- While you are still working with the account on the Email Accounts (SM204002) form, in the Authentication Method box, select the OAuth2 option.
- Click the pencil icon next to the External Application box. The system opens the External Applications (SM301000) form in a new window.
- In the External Applications form, click Add New Record.
- In the Type box, select the Google SMTP/IMAP/POP3 option.
- In the Application Name box, type the name of the application, for example, Gmail Connector.
- In the Client ID and Client Secret boxes, insert credentials for the OAuth client you have configured using Google console.
- On the External Applications form, click Save and Close on the form toolbar. The system closes the window with the form and specifies the configured application in the External Application box on the Email Accounts form.
Step 6: To Configure Port Numbers
Finally, you need to specify the advanced settings email account. Do the following:
- While you are still working with the account on the Email Accounts (SM204002) form, configure port numbers in the Server Port Numbers section of the Service tab.
- In the Incoming server port (POP3/IMAP) box of the Server Port Numbers section, type the number of the port to be used for incoming mail.
- Select the Incoming server requires encrypted connection (SSL) check box.
- In the Outgoing server port (SMTP) box, type the number of the port to be used for outgoing mail.
- In the Outgoing server encrypted connection box, select the TLS option.
- On the form toolbar, click Save, and then click Sign In to test the settings of the email account.