
Specific Widgets: To Register Your MYOB Acumatica Instance for Power BI
Tip:
Integrating Microsoft Power BI reports into MYOB Acumatica to be used as MYOB Acumatica forms is a different type of interaction between MYOB Acumatica and Microsoft Power BI than the integration described in the Managing Power BI Integration and To Integrate an External Application topics.
Attention:
This topic walks you through the
configuration of third-party software. Please note the following:
- The procedure below is designed for the most common usage scenarios. If you are implementing a more complicated scenario and you encounter difficulties, contact MYOB Acumatica technical support.
- The vendor of the third-party software may change the user interface and settings. Therefore, the screen elements and setting names that you see may differ from the ones described in the procedure.
- The procedure will be updated to describe new common scenarios and changes in the user interface and settings.
Before You Begin
- Be sure that your company has a Microsoft Entra ID instance configured. For more information, see Integration with Microsoft Entra ID.
- Make sure that you have at least one configured Power BI dashboard with tiles that you want to embed in MYOB Acumatica. For details, see Power BI.
To Register Your MYOB Acumatica Instance
You register a new instance on the Azure portal. If you already have any registered instances and configured Power BI tiles, you can view them on the https://app.powerbi.com/home?experience=power-bi website.
Note:
The registration of Power BI embedded is also described in Set up Power BI Embedded.
Do the following to register the instance:
- Sign in to the Microsoft Azure portal.
- On the left menu, click the Microsoft Entra ID icon. If you have one Microsoft Entra ID instance, it will be opened automatically. If you have multiple instances, click the Microsoft Entra ID instance where you want to register the application.
- In the left pane, expand the Manage node and click
App registrations. You will see a list of
applications or an empty list, as shown below, depending on whether any
applications have been registered previously.
Figure 1. Microsoft Azure: No registered applications in Microsoft Entra ID 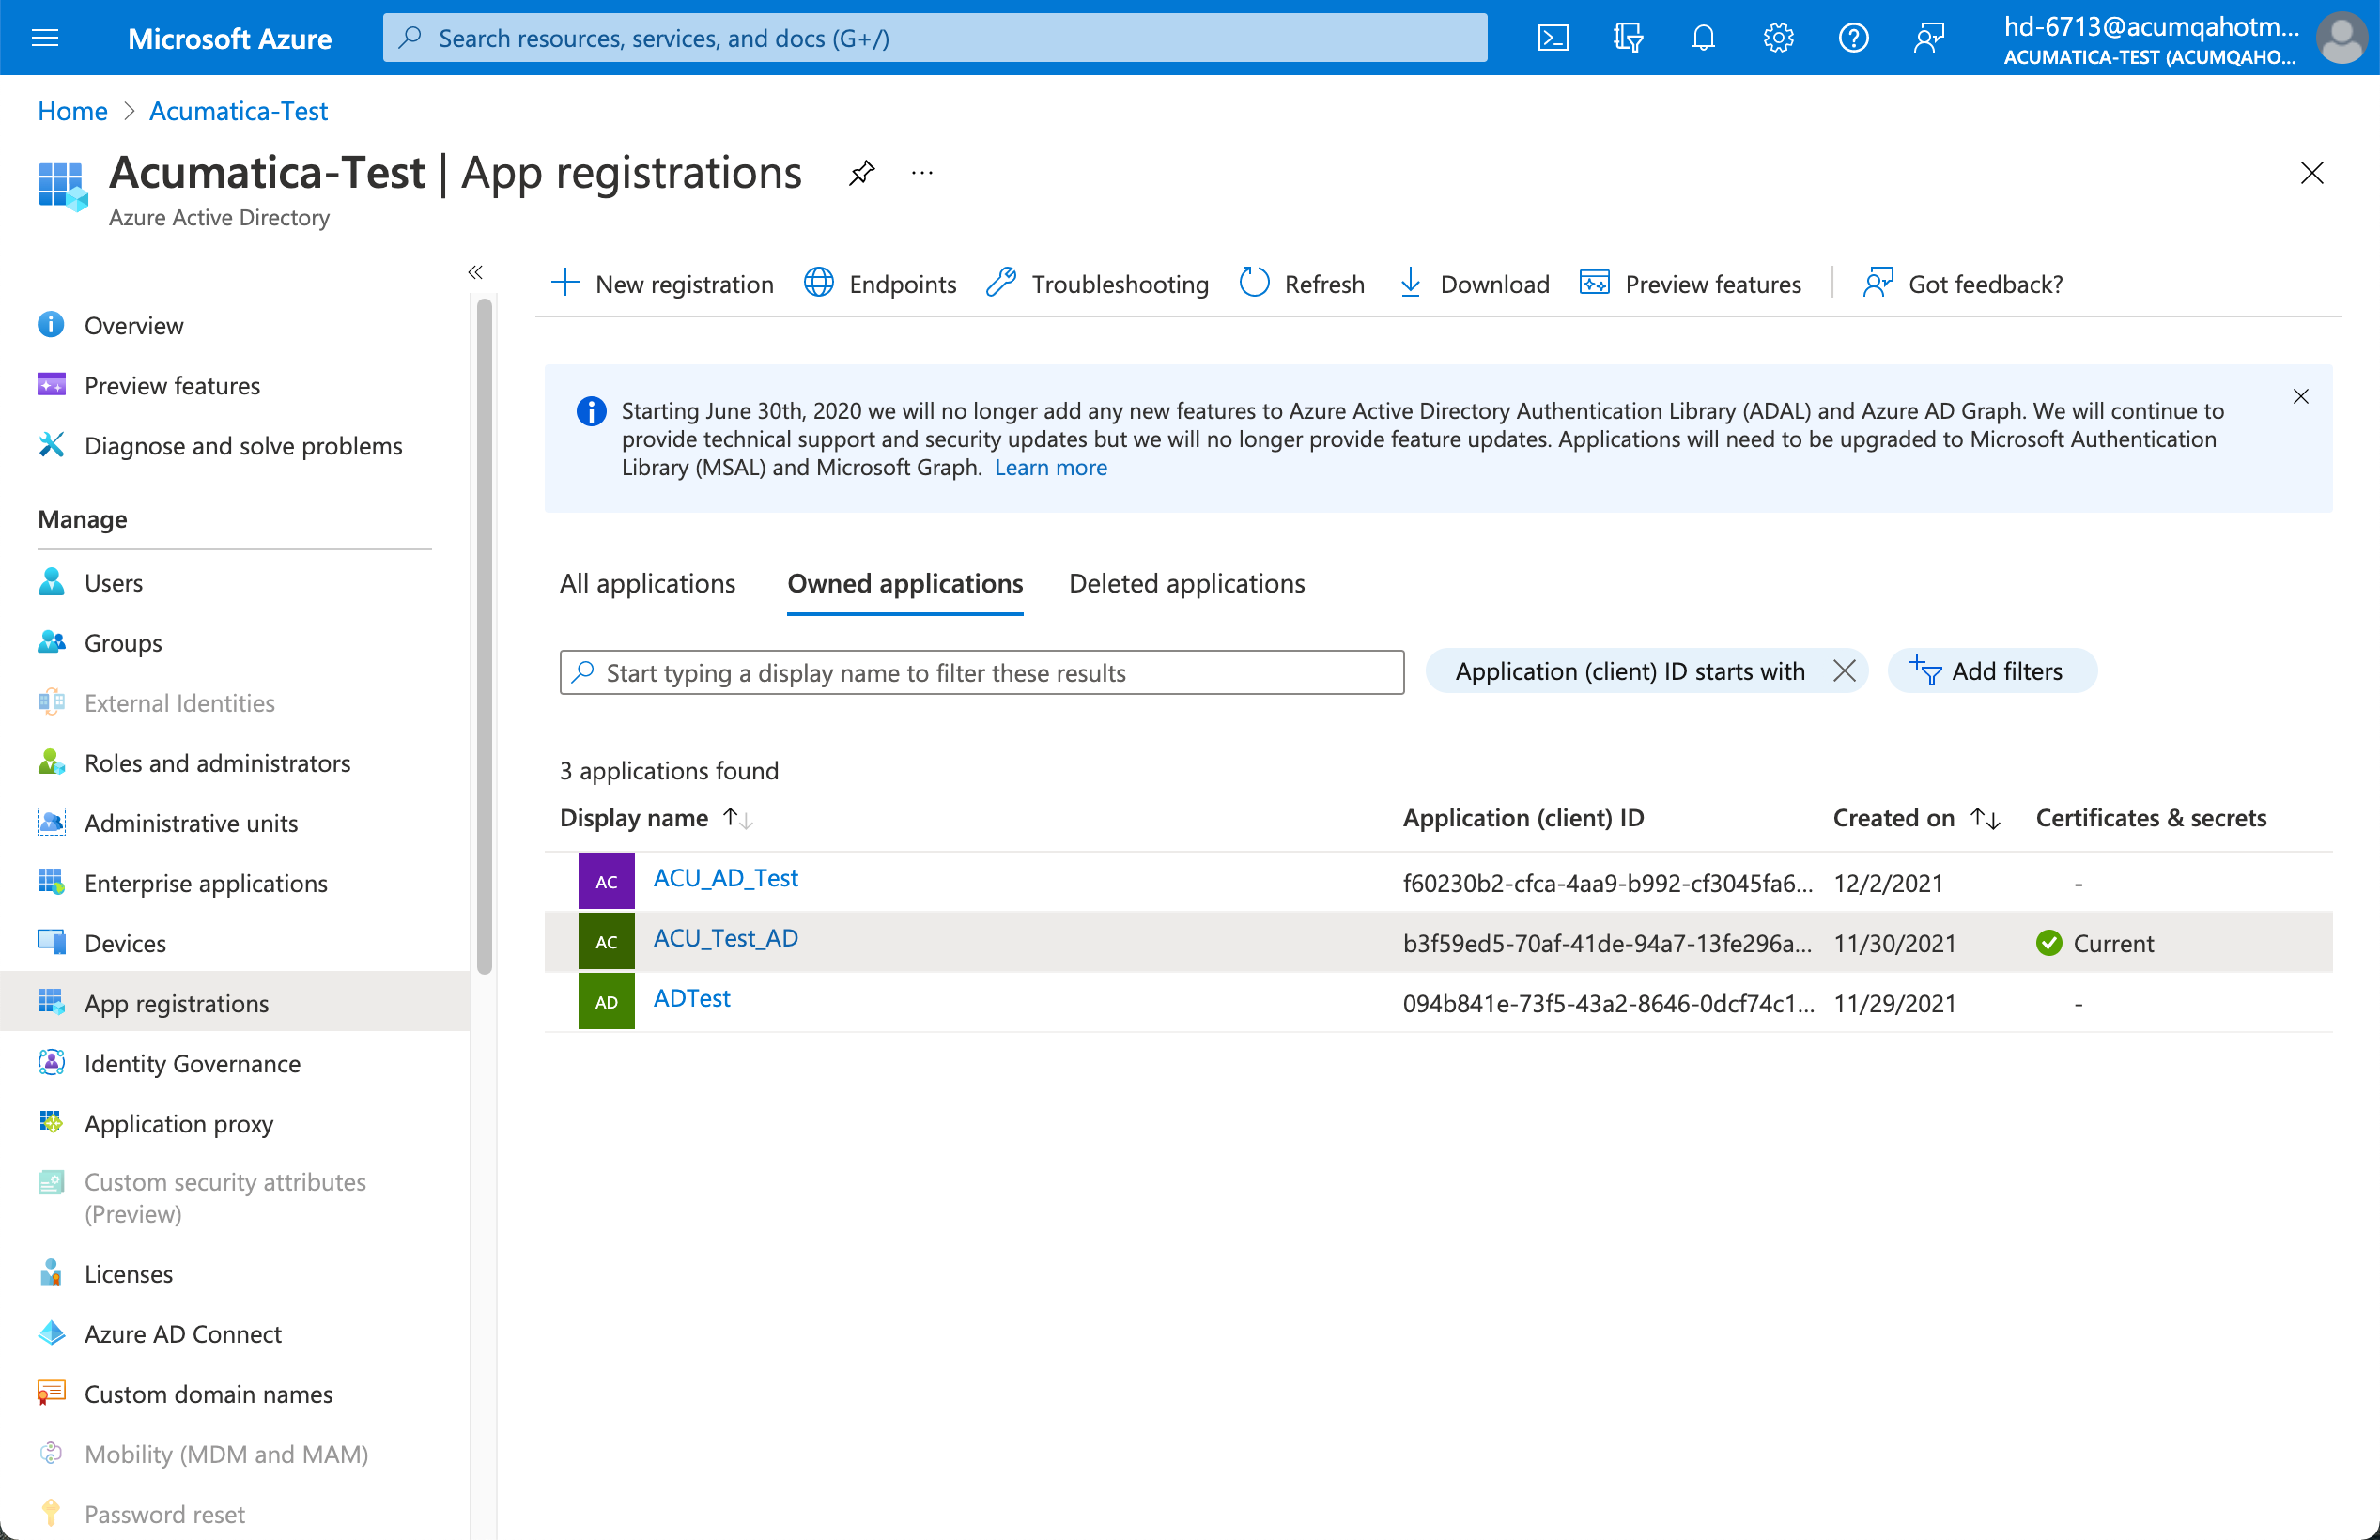
- On the pane toolbar, click New registration.
- In the Register an application pane (which is shown in
the following screenshot), do the following:
- In the Name box, type a name for your MYOB Acumatica instance. This name will be displayed in the application list.
- In the Supported account types section, select the Accounts in this organizational directory only (<Your_Entra_ID_Instance_Name> only - Single tenant) option button.
- In the Redirect URI section, select Web in
the first box. In the second box enter the URL of your MYOB Acumatica site in the following format: https://<full URL of your MYOB Acumatica site>/powerBI/auth (for example,
https://app.site.net/powerBI/auth)Tip:This URL is case sensitive.
- Click Register.
Figure 2. Microsoft Azure: Registration of an application 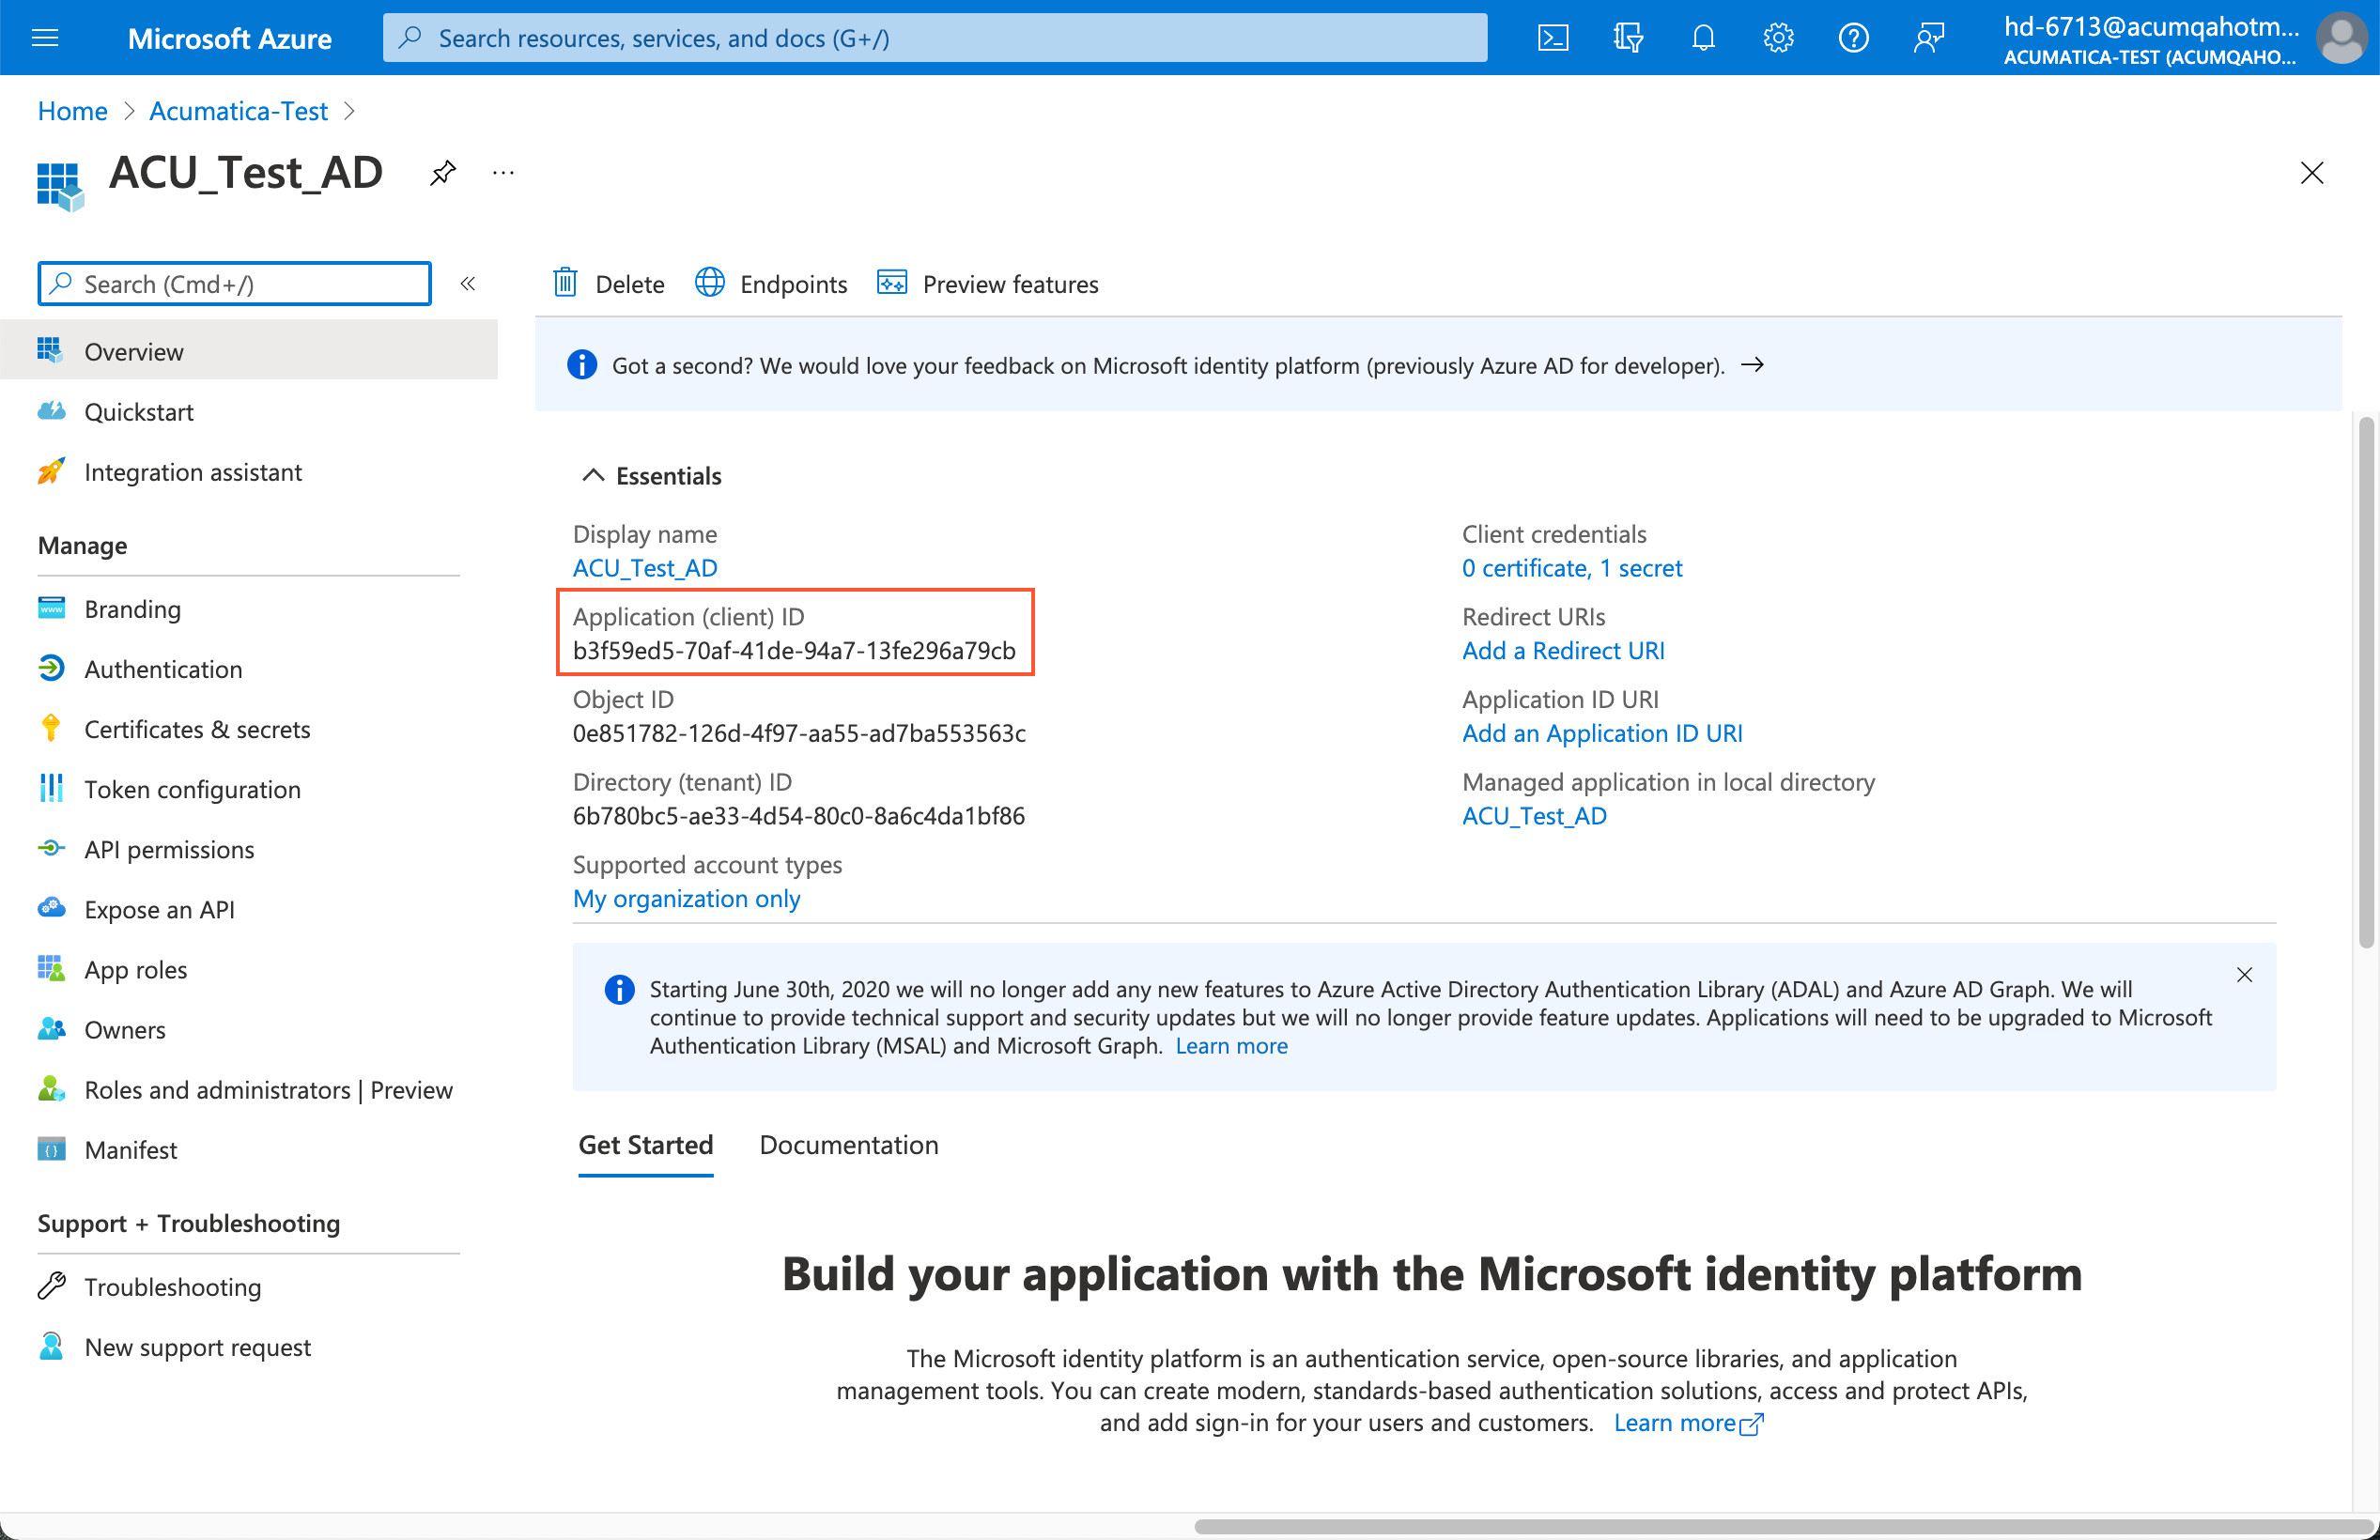
Now your MYOB Acumatica instance is registered with Microsoft Entra ID, and an Application (Client) ID value is generated (see the following screenshot).
Figure 3. Microsoft Azure: Application registered with Microsoft Entra ID 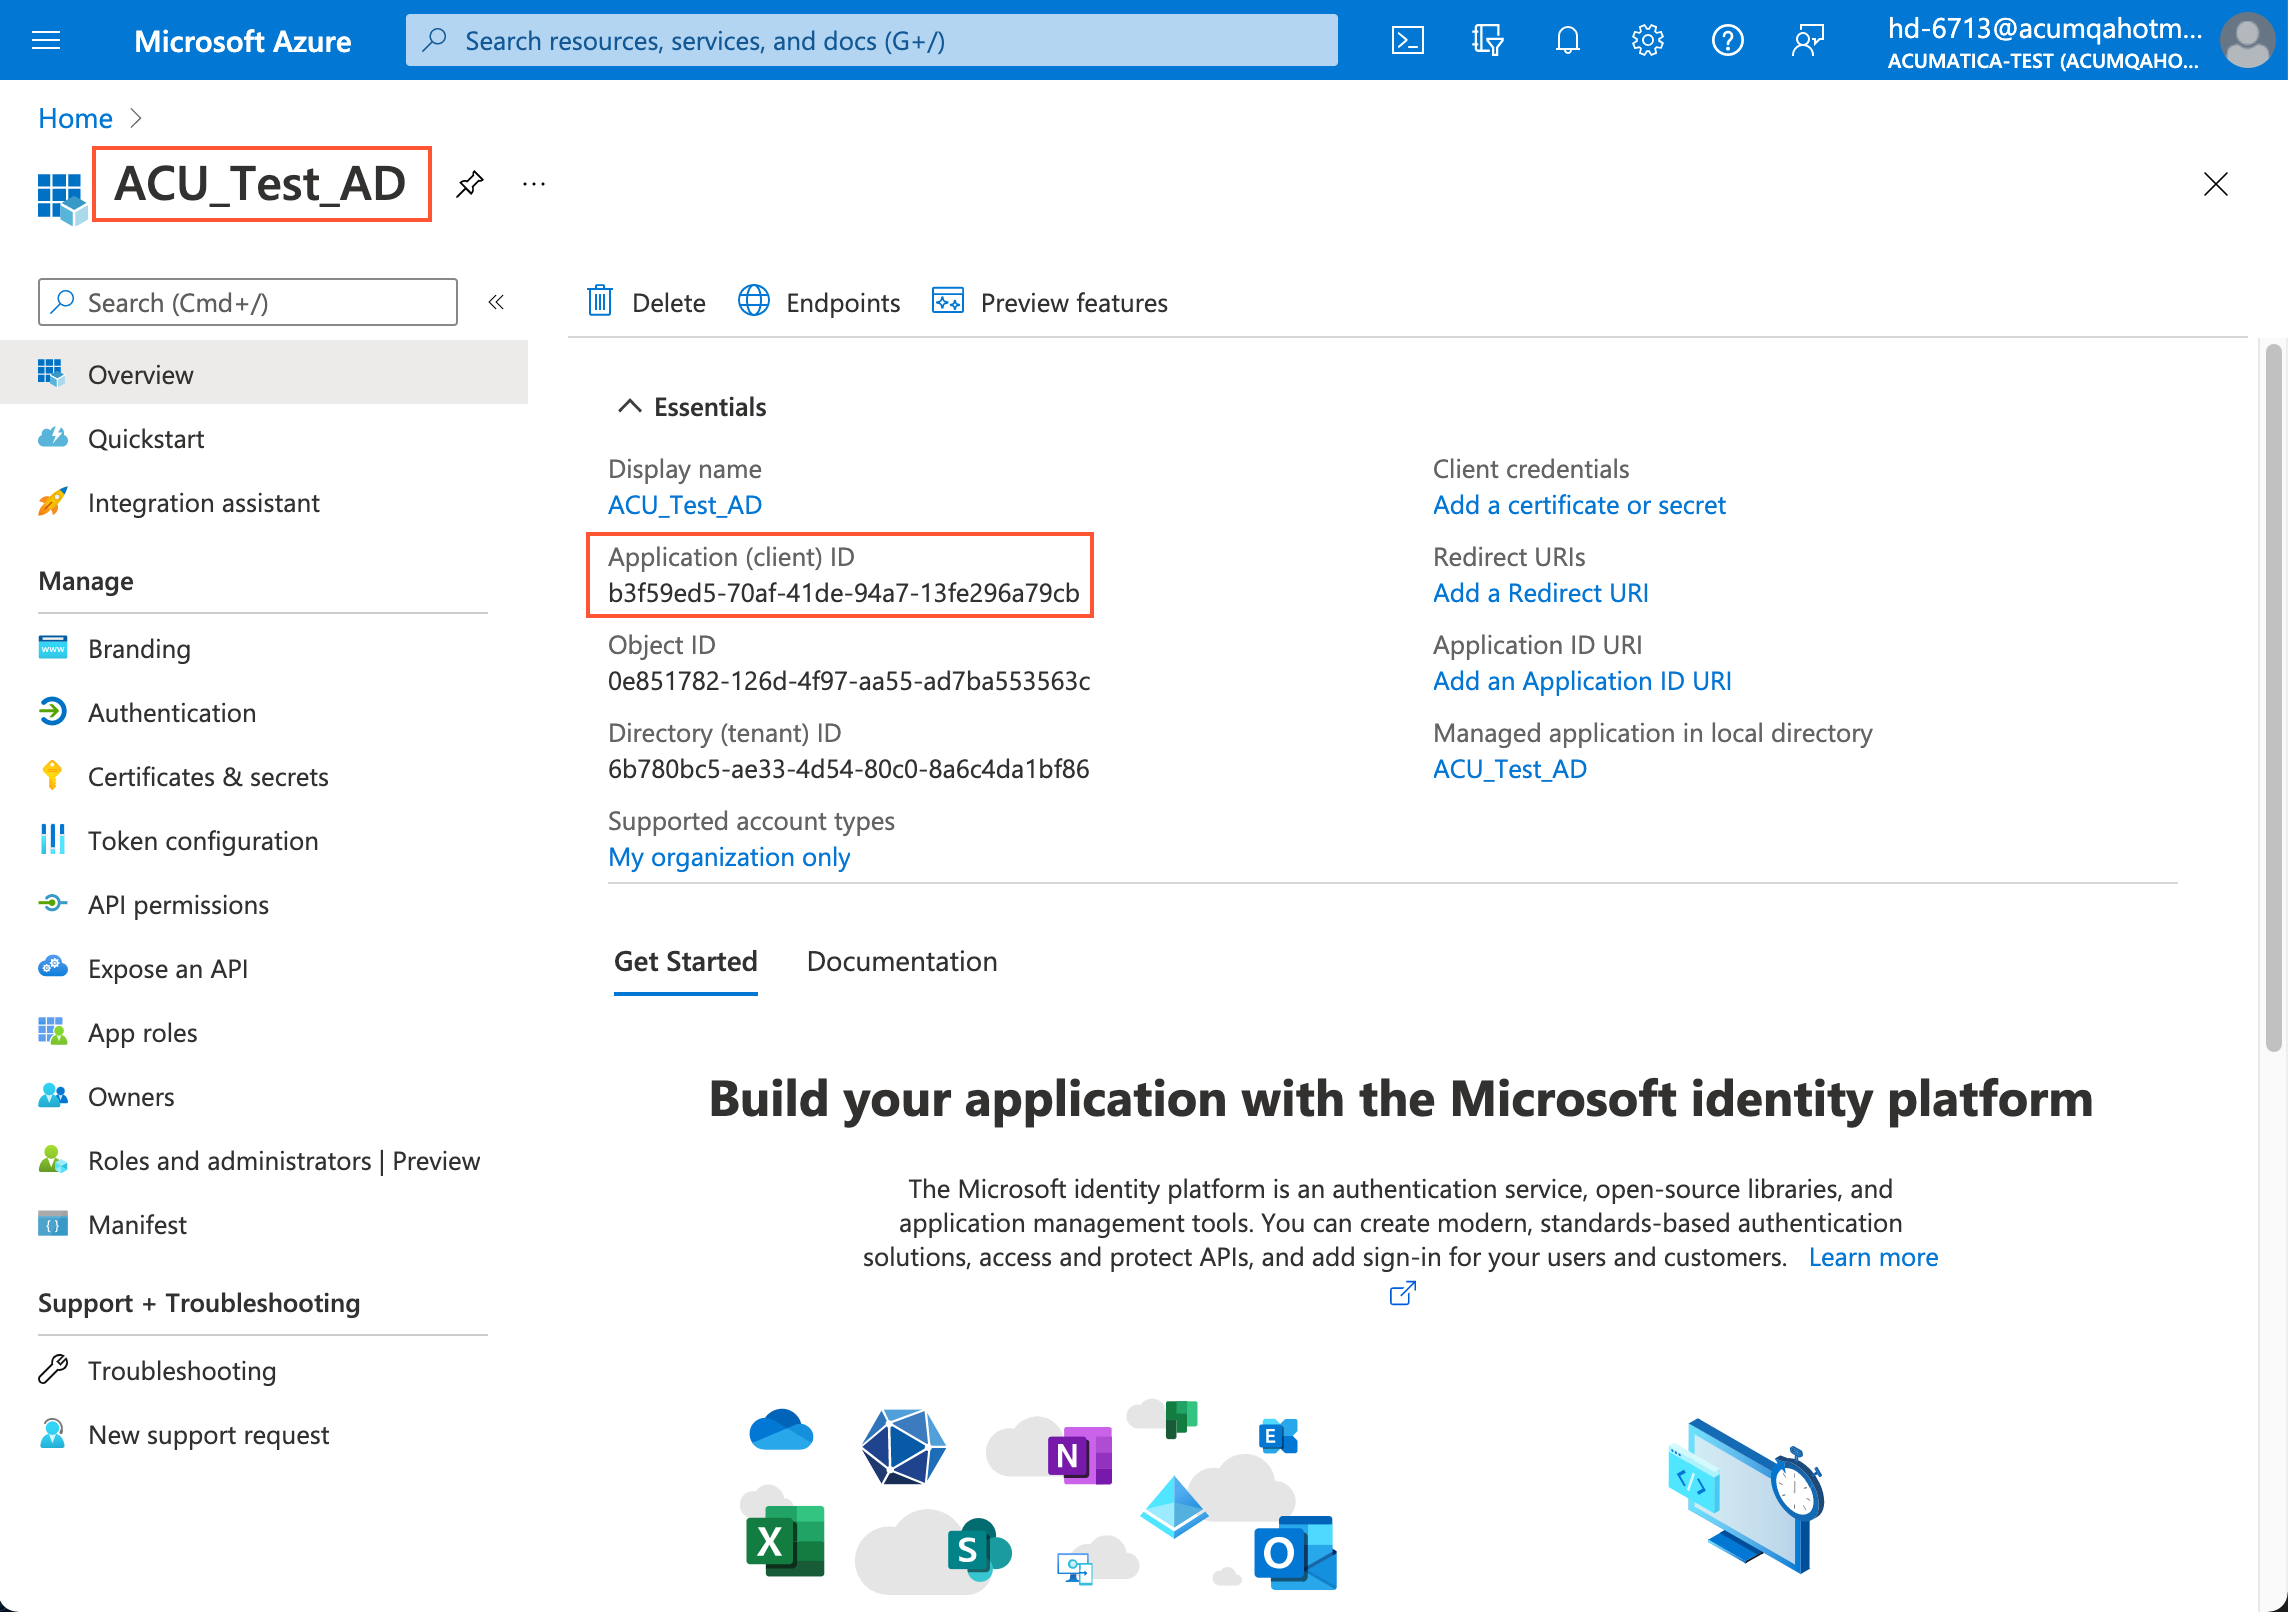
- On the left menu, click Certificates & secrets.
- On the Client secrets tab, click New client secret.
- In the Add a client secret dialog box, type the name of your client secret, select its expiration period, and click Add.
- Copy the client ID and client secret values for later retrieval.Important:You must copy the client secret value right after clicking Add and before you leave the page. If you leave the page and return to it, the value will be hidden and will not be shown anymore.
- In the left pane, expand the Manage node and click App registrations.
- Select your application on the Owned applications tab.
- Click View API permissions.
- In the API permissions pane, click Add a
permission (see the following screenshot).
Figure 4. Microsoft Azure: New API permissions 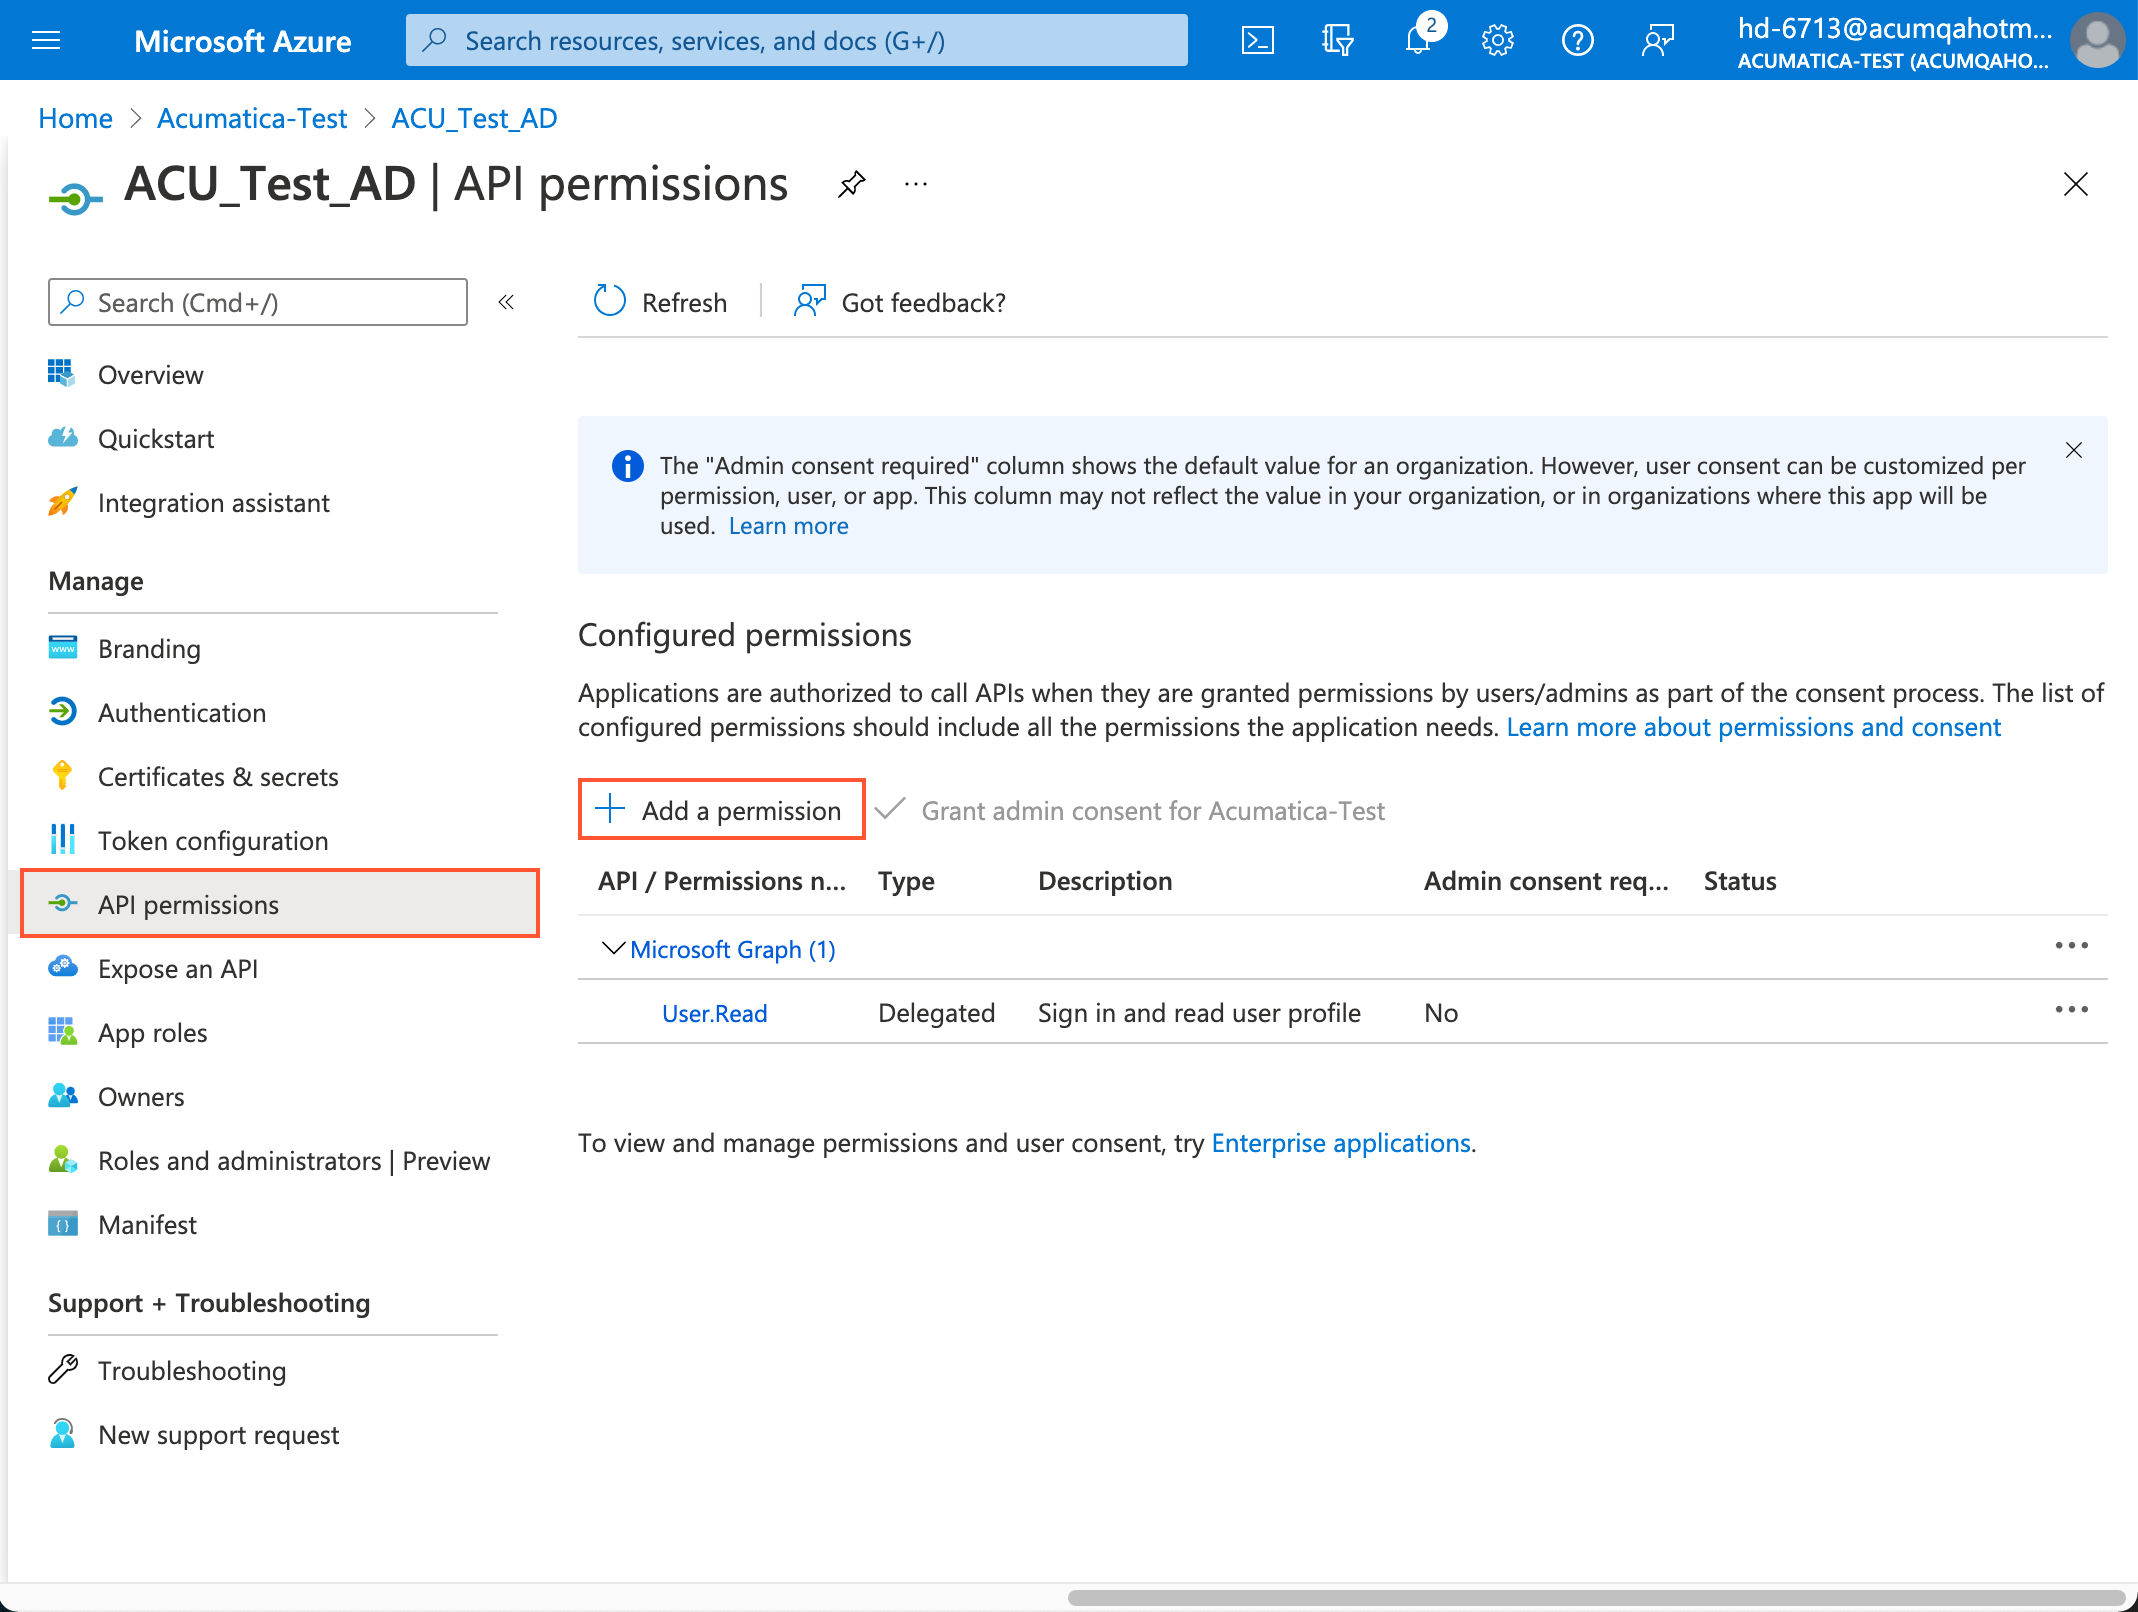
- On the Microsoft APIs tab, select Power BI service.
- Select Delegated Permissions and add the following
permissions:
- Read all datasets
- Read all dashboards
- Read all reports
Other permissions are optional and may be granted for your customers' additional needs and at your company's risk.
- Click Add permissions to save your changes.