
Record Validation for Duplicates: Association of Leads with Business Accounts and Contacts
During the association of a lead to a business account, you can update specific contact settings in any contact associated with the business account, create a new contact and associate it with the lead, or associate the lead with the business account without contact creation.
Association of Leads with Business Accounts and Contacts on the Duplicates Tab
When you have performed duplicate validation for an individual lead or a group of leads, and at least one duplicate business account for a lead has been found, you can associate the lead with a business account that is listed on the Duplicates tab of the Leads (CR301000) form. The duplicate values of UI elements in the table are highlighted.
You start associating the lead with the business account by selecting a duplicate business account in the Records for Association table on the Duplicates tab and clicking Associate on the table toolbar. In the Associate Entities wizard, which opens, you can do any of the following:
- Associate the lead with the business account without selecting or creating a contact.
- Associate the lead with an existing contact of the business account. If any settings are in conflict, you can choose which settings are in use or leave the existing settings.
- Create a new contact for the business account and associate the new contact with the lead.
In the wizard, if you select Associate the Lead with an Account (Item 1 in the following screenshot) and click Next (Item 2), you can do either of the following on the Associate the Account with the Lead page:
- Associate the account with the lead and leave the lead's contact settings unchanged
(Item 3).
When you click Associate (Item 4), the wizard is closed. After you save the changes on the currently opened form, the lead is associated with the business account. In this case, the contact and address settings of the lead remain unchanged.
Figure 1. Lead-account association without changing the contact settings of the lead 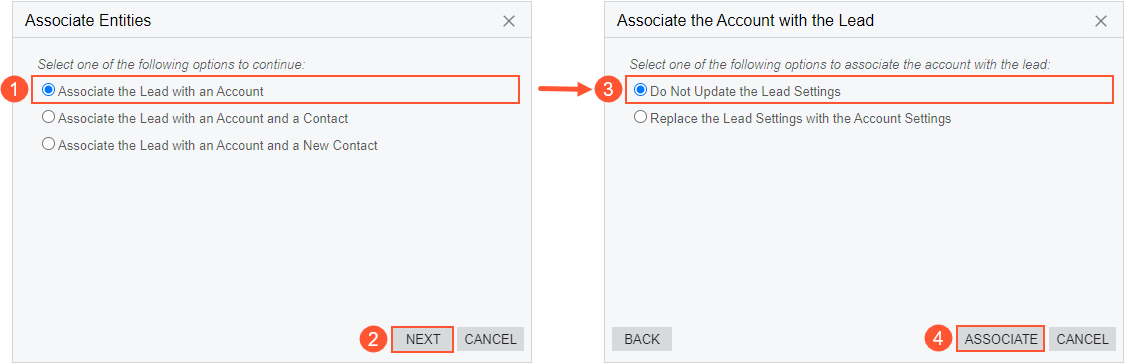
- Associate the account with the lead and replace the lead's contact settings with the
settings of the business account (Item 3 in the following screenshot).
When you click Associate (Item 4), the wizard is closed. After you save the changes on the currently opened form, the lead is associated with the business account. In this case, the contact and address settings of the lead will be updated with the settings of the associated business account.
Figure 2. Replacement of the contact settings in the lead with the settings of the account 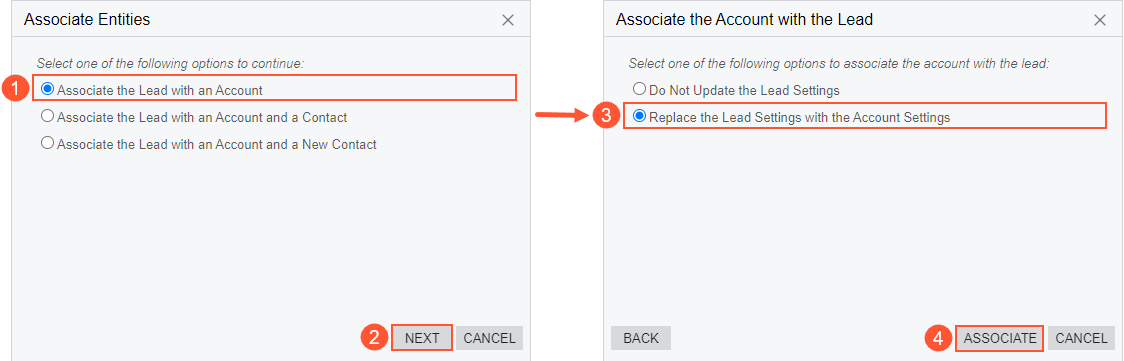
In the wizard, if you select Associate the Lead with an Account and a Contact (Item 1 in the following screenshot) and click Next (Item 2), the Select the Contact for the Lead page opens.
On the Select the Contact for the Lead page, you can do the following:
- Select the contact to be associated with the lead (Item 3) and click
Next (Item 4).
Figure 3. Contact selection for the account to be associated with the lead 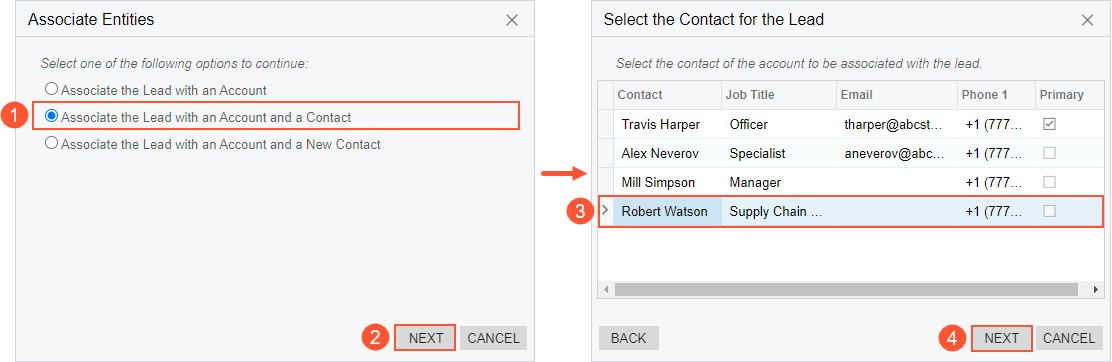
- On the Associate the Contact with the Lead page, which opens, associate the lead with
the selected contact of the business account as follows:
- Synchronize the contact settings in the lead and the associated contact by leaving the Sync with Lead check box selected (Item 1 in the following screenshot), selecting the needed settings in the table (Item 2), and clicking Associate (Item 3). The wizard is closed. After you save the changes on the currently opened form, the lead is associated with the contact and the business account. In this case, the contact and address settings in the lead and the associated contact will be synchronized.
- Clear the Sync with Lead check box and click Associate. The wizard is closed. After you save the changes on the currently opened form, the lead is associated with the contact and the business account. In this case, the contact settings of the lead and the associated contact remain unchanged.
Figure 4. Contact-lead association and selection of the field values for the contact 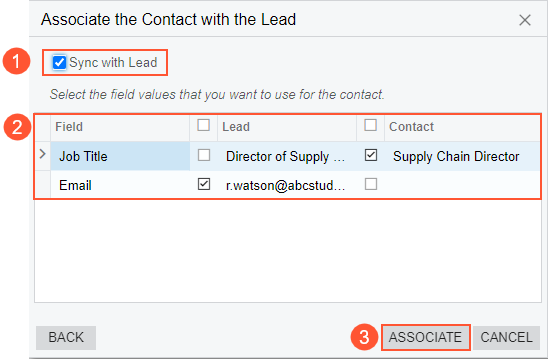
In the wizard, if you select Associate the Lead with an Account and a New Contact (Item 1 in the following screenshot) and click Next (Item 2), you can specify the settings of the contact (Item 3) and create the contact by clicking Create or Create and Review (Item 4) on the Create Contact page, which opens.

The system creates the contact and associates this contact with the lead and the business account.