
To Add a DAC Item for an Existing Data Access Class to a Project
Before modifying an existing data access class, you have to add a DAC item for the class to the customization project. This item is used to store the data of the class extension in XML format. After the item is created, you can modify the class members by using the Data Class. After the customization project is published, the .cs file for the item is created in the file system, and you can develop the C# code of the class extension in Microsoft Visual Studio. You can use the Data Class Editor as well as Visual Studio to add custom fields to existing data access classes.
You can add a DAC item for an existing data access class to a customization project by using the Element Inspector, or you can create and add the item on the Customized Data Classes page of the Customization Project Editor.
The following sections provide detailed information:
To Add a DAC Item by Using the Element Inspector
- Open the form in the browser.
- On the form title bar, click to open the Element Inspector.
- On the form, select a UI element for a field of the class to be customized to open the
Element Properties Dialog Box for the element.
The dialog box displays the name of the data access class that contains the selected element in the Data Class box, as shown in the screenshot below.
- In the dialog box, click .
Figure 1. Using the Element Properties dialog box to start customization of the class 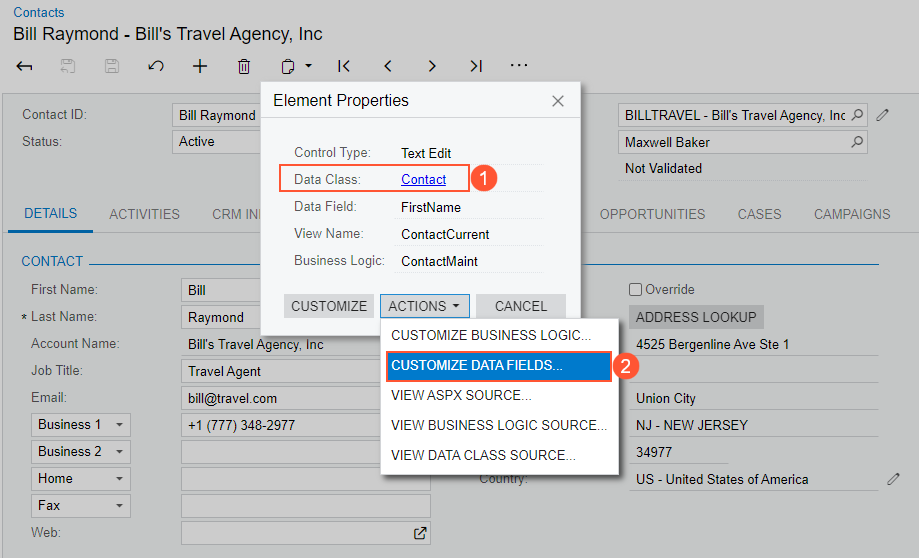
If there is no currently selected customization project, the inspector opens the Select Customization Project Dialog Box to force you to select an existing customization project or to create a new one.
MYOB Acumatica Customization Platform creates the DAC item for the class, adds the item to the currently selected customization project, and opens the class in the Data Class.
The platform assigns the new item the name of the data access class.
To Add a DAC Item on the Customized Data Classes page
- Open the customization project in the editor. (See To Open a Project for details.)
- Click Data Access in the navigation pane to open the Customized Data Classes page.
- On the page toolbar, click Add New Record.
- In the Select Existing Data Access Class dialog box, which opens,
select the class in the Class Name box.You can type the class name in the Class Name box or search for the class by a part of its name, as shown in the screenshot below. As soon as you add the class, the Data Class opens for it so that you can modify the fields of this class and add custom fields to it.
Figure 2. Adding an existing data access class to the project 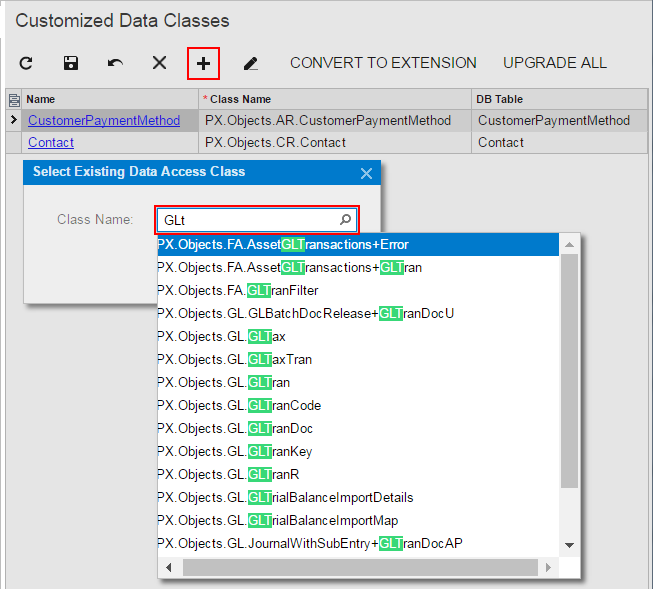
- On the page toolbar, click Save to save the item in the customization project.
As soon as you have modified the attributes of an existing field of the class or added a new field to the class and saved the changes in the Data Class Editor, the class is added to the customization project and appears in the table of the Customized Data Classes page.
To go back to the Customized Data Classes page of the Customization Project Editor, select Data Access on the navigation pane. You can see that the added item is saved to the list of project items.