- Contents
- Index
- Search

Show results that include all search words
Performing a CSV Bank Reconciliation
In CSV mode, the left-hand-side of the screen shows all unreconciled GL transactions, and the right-hand-side represents unmatched bank transactions from the import file. There are three ways to identify which item(s) on the left-hand-side matches to item(s) on the right-hand-side.
Note: Before manually trying to find the matches, MYOB recommends using the auto match feature.
-
Double-click on a single item from the left-hand-side. The system will search for matching item(s) from the right-hand-side. These will be selected and shown in red.
Note: It is possible that more than one match is found on the right-hand-side. If more than one match is found, you will have to determine which is the correct match, and deselect the incorrectly selected items on the right-hand-side.
-
Select an item from the left-hand-side, then click Find Match on the toolbar. The system will search for matching item(s) from the right-hand-side, and show these in red – as described above. (This serves the same purpose as double clicking on an item).
-
Manually select matching items by left-click on the appropriate rows. If more than one item is to be selected, then hold down the ctrl key.
To reconciled the selected items:
-
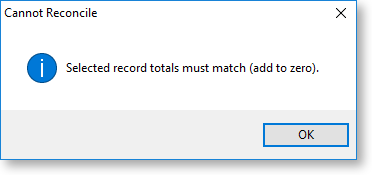
Having selected GL transactions and bank items, click Reconcile. This will remove all selected items from both sides. If the values do not match, an error message will appear:
-
If only one item is selected from each side of the bank reconciliation, the spacebar can be used to reconcile the items instead of clicking the Reconcile button.
Auto-Matching
The auto match function automatically finds matching records and allows the operator to reconcile these.
To automatically match records:
-
Click Auto Match on the toolbar. The following screen is displayed:
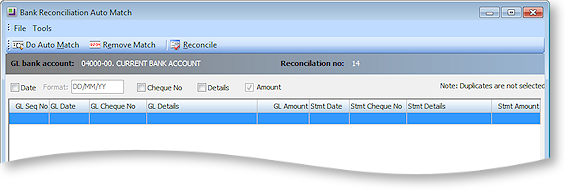
Item
Description
Date
Check this box if the match is to be based on transaction date. The date format of the items from the import file should be defined. The data on the file is in text format, so Exo Business needs to know how to interpret the date, i.e. which characters represent the day, month and year.
Cheque No
Check this box if the match is to be based on Cheque Number
Details
Check this box if the match is to be based on the details field of the GL transaction and bank items
Amount
The match will always be based on Amount. This cannot be unchecked; it is displayed here for information purposes to highlight the fact that the amounts have to match.
-
Having defined the basis for the match, click Do Auto Match. The program will now attempt to find GL transactions that match with imported bank items using all of the criteria defined by the user. The results will appear in the grid.
The details from the GL transactions are displayed in white columns. Details of items from the imported bank statement file are displayed in grey columns.
Note: That if a duplicate match is found (e.g. $100 found on left-hand side potentially matching 2 rows of -100 on the right-hand side) the match will not be returned.
-
Review the list to ensure the matches are correct. If a match is incorrect, select the row and click Remove Match. The row is removed from the grid and the items stay unreconciled.
-
To refresh the grid with new selection criteria, make the changes to the criteria, and click Do Auto Match again.
-
Once the list of matches has been reviewed and considered to be correct, click Reconcile. The system will display a confirmation message as follows: "Reconcile the listed auto matches? [Yes] [No]". Click Yes to continue the process. This will remove all listed items from both sides of the reconciliation.
-
Click the window's close button to close the window without reconciling the matched items.
To undo a previously reconciled item:
-
In CSV mode, reconciled transactions will disappear from the screen. To display reconciled transactions, select Setup > Show Reconciled Items. The system will then display reconciled items in blue.
-
To undo previously reconciled items, select the items and click Reconcile to restore the transactions to an unreconciled state.