Appointment Creation: General Information
In MYOB Acumatica, an appointment is a document that represents one in-person meeting to perform one service or multiple services. You can create an appointment either from a service order or independently. If an appointment is created separately, the system automatically generates a related service order when the appointment is saved.
Typically, you create a service order and include information on the services to be provided to a customer. Based on the details of the service order, you then create each needed appointment, and you schedule the date and time when the service is to be performed.
In some cases, the need for time-critical services (for example, urgent repair service) arises unexpectedly and may originate from a customer call. In such cases, you may need to create and schedule an appointment quickly without the initial creation of a service order.
In this chapter, you will create and schedule an appointment without first creating a service order. You will learn to do this in several ways.
Learning Objectives
In this chapter, you will learn how to do the following:
- Create an appointment directly on the Appointments (FS300200) form, add a service to the appointment, assign a staff member to the appointment, and send appointment notification emails to the customer and to the assigned employee.
- Create an appointment on the Calendar Board (FS300300) form. You will filter staff members by the performed services and select a staff member whose schedule suits your needs.
- Create an appointment from the Customers (AR303000) form, and send notification emails to the customer and to staff members.
Applicable Scenarios
You create an appointment in a wide variety of scenarios. In the most common scenario, you receive a call from your customer informing your company of a problem for which your company's services are requested. The service manager of your company creates the appointment and assigns an appropriate staff member to perform the service or services.
The Steps of the Workflow
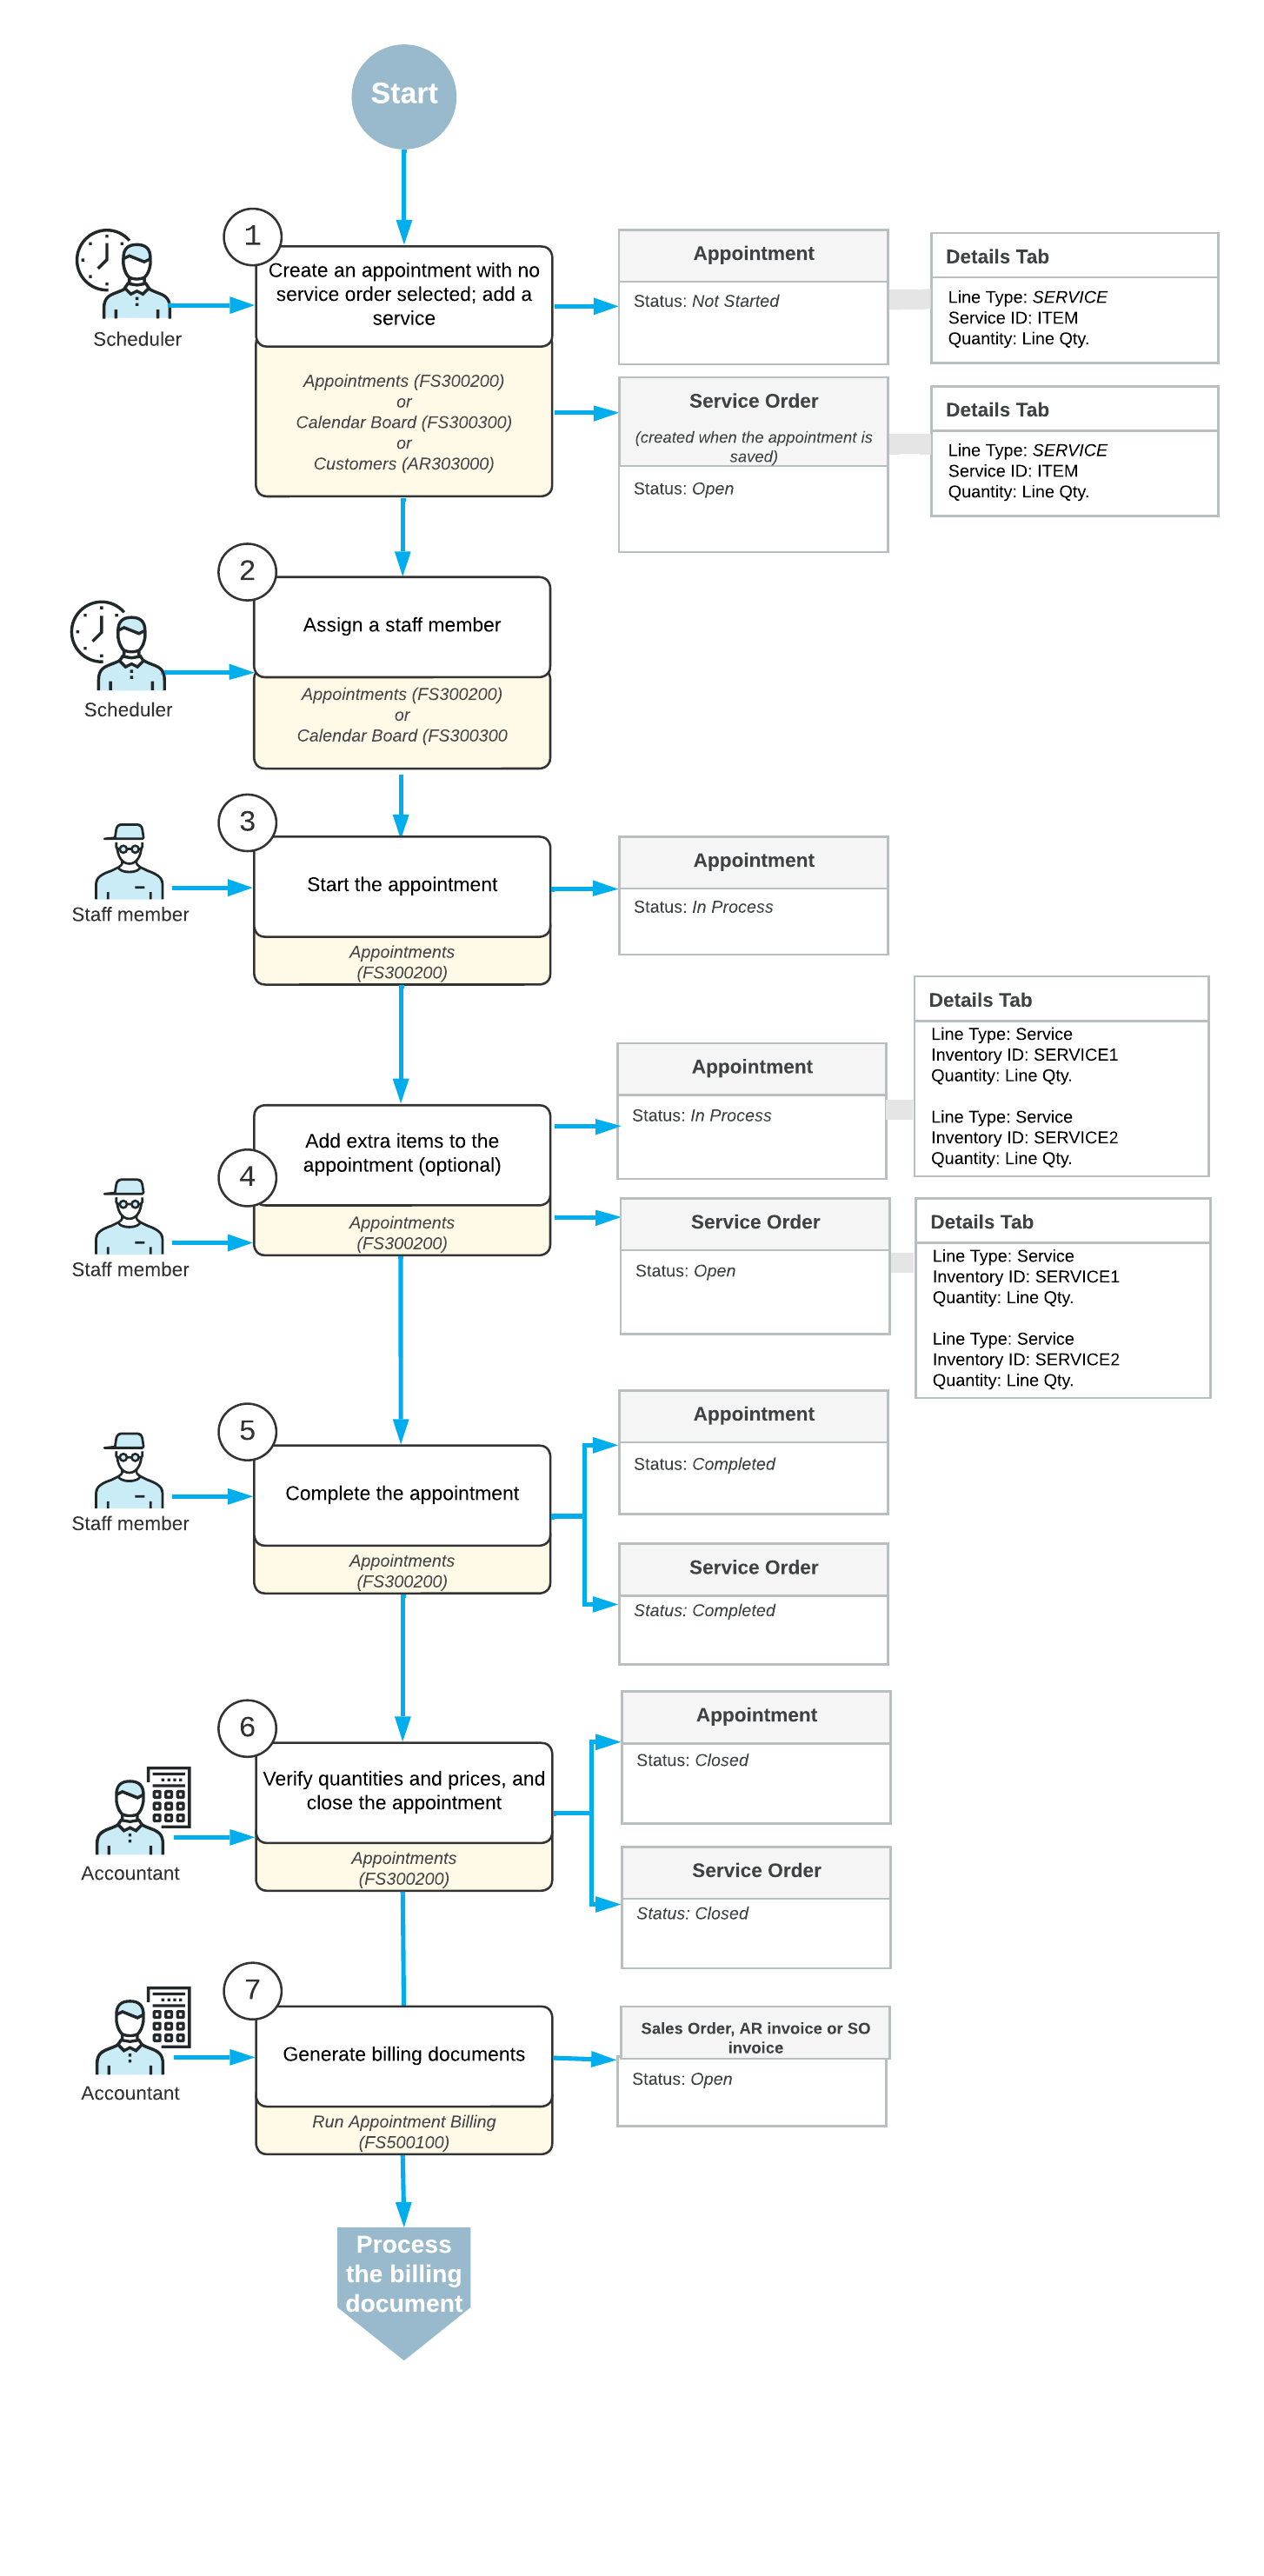
- Creating the appointment: The service manager creates an appointment in the system. The system automatically creates a related service order, and copies information from the appointment to the service order.
- Adding additional information: The service manager assigns the appropriate staff member to the appointment. The appointment is ready to be attended.
- Starting the appointment: On the day of the appointment at the agreed-on appointment location, the staff member starts the appointment in the system.
- Adding additional items (optional): The staff member adds extra items that have been sold during the appointment.
- Completing the appointment: After all the work on the appointment is done and all information is entered into the system and checked, the staff member specifies that all the work is finished and completes the appointment in the system.
- Closing the appointment: An accountant verifies the information entered for the completed appointment, such as quantities and prices, and closes the verified appointment.
- Generating a billing document for the customer (if the customer's billing cycle settings indicate that billing documents should be generated by appointment): An accountant generates billing documents and processes them in the system.
After each step has been performed, you can notify the customer and the staff member about appointment details by sending them notification emails. Before an appointment has been assigned, you can also send notification emails to staff members of the service area where the appointment takes place.
Workflow of Appointment Creation and Processing
The typical process of creating and processing an appointment that does not have an existing service order involves the actions and generated documents shown in the following diagram.

