
Appointments in the Mobile App: Basic Operations
The MYOB mobile app is an out-of-the-box solution that empowers the staff members of your company to access MYOB Acumatica from mobile devices to manage their work documents, including appointments.
Opening the List of Appointments
In the MYOB mobile app, you access the list of appointments by tapping Services on the main menu and then tapping Appointment List (see the following screenshots).
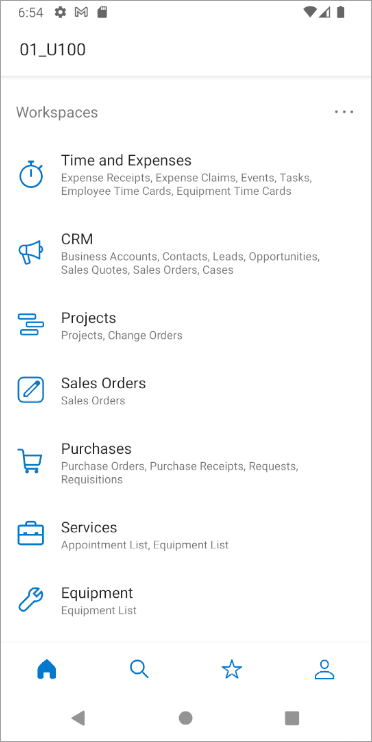
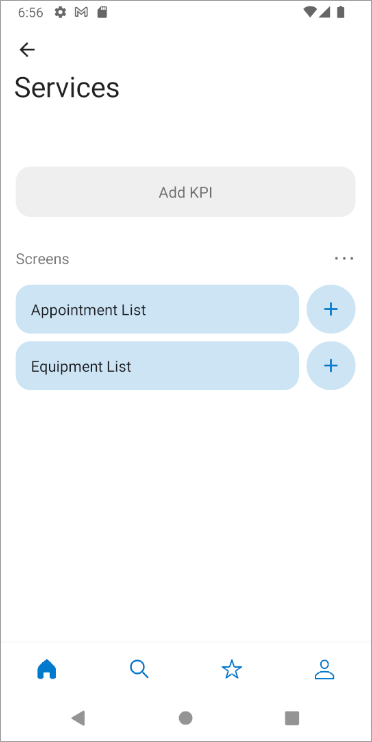
When you tap Appointment List, the Appointment List screen opens.
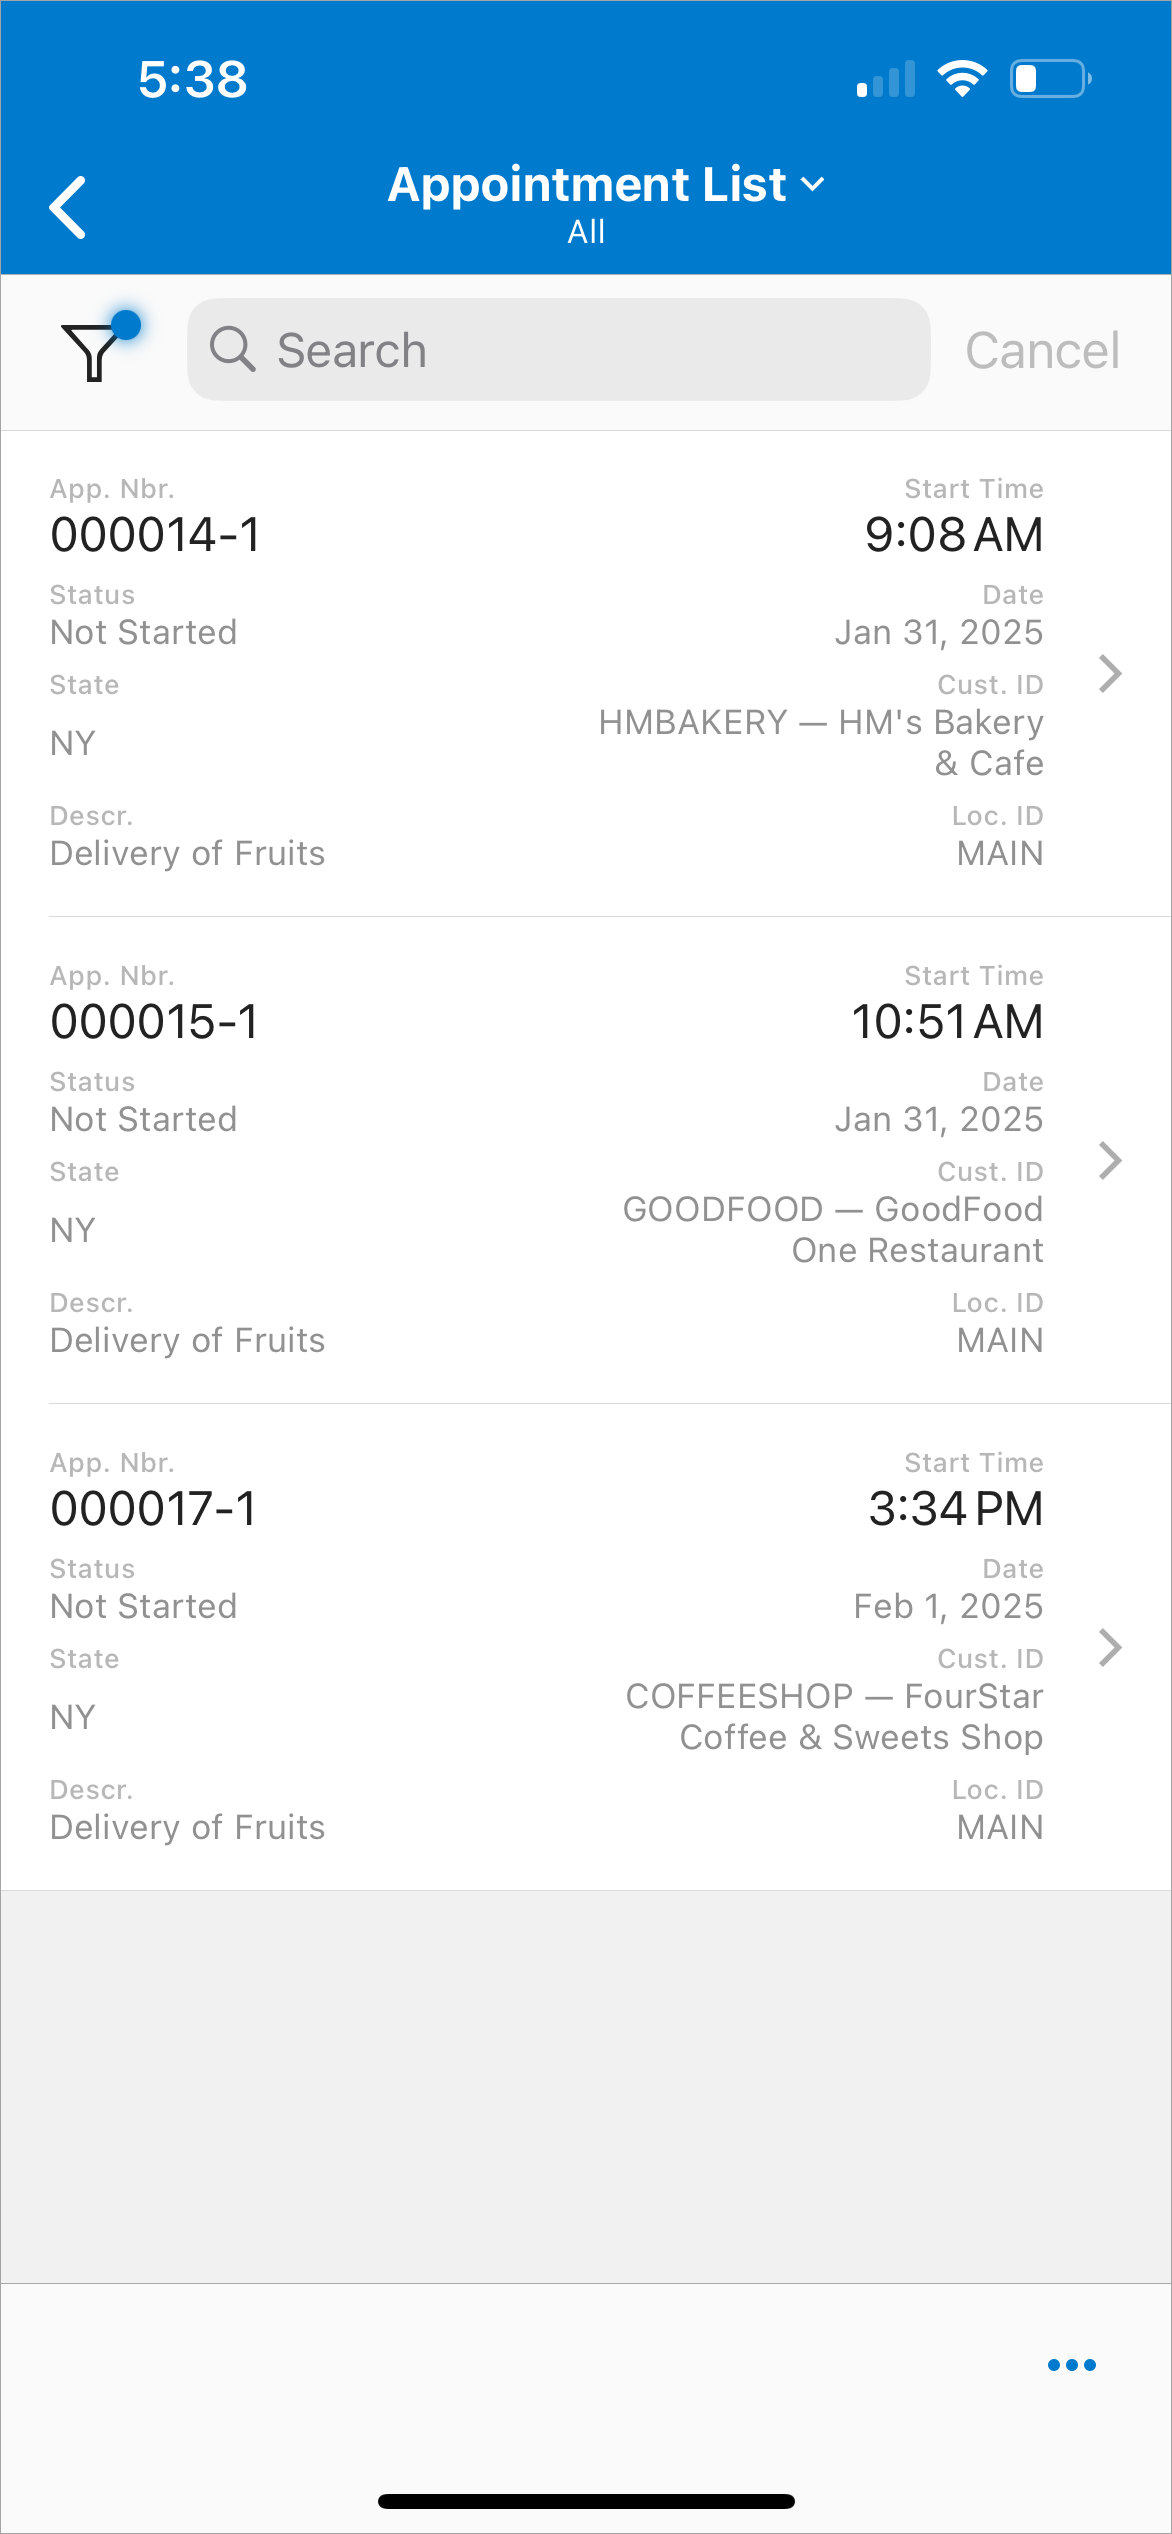
To find and view the needed appointment, you can change the filter criteria by tapping the Filter button in the top right corner of the screen, and specifying the needed dates and the assigned staff member (see the following screenshot).
Creating a New Appointment
In the mobile app, you can create a new appointment. On the Appointment List screen, you tap the + icon or Create New (depending on the mobile operating system) at the bottom of the appointment list, and specify the settings and details of the new appointment in form view. Once you are finished, you save the new appointment.
Searching for an Appointment
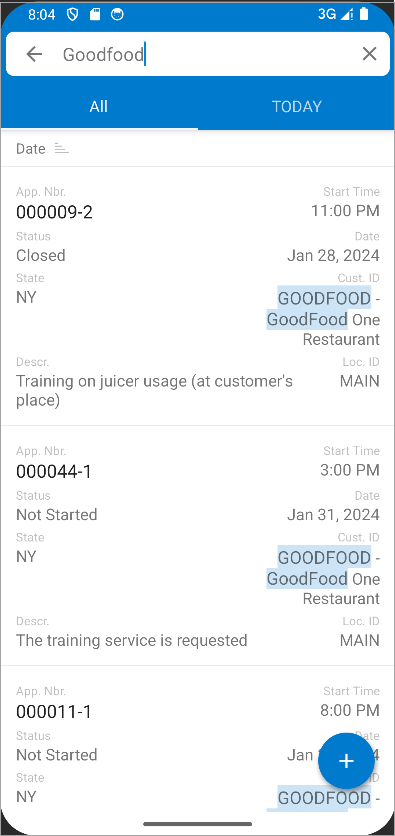
In the MYOB mobile app, you can find any needed appointment by entering a search string in the search box. The search results are listed with the highlighted words matching your string, as you can see in the following screenshot below.
Working with a Particular Appointment
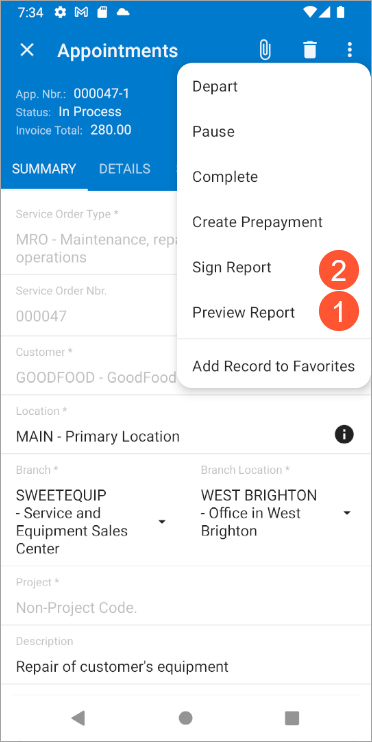
By tapping a particular appointment in the appointment list, you open the form view with the settings of the selected appointment. You can process an appointment by using one of the commands available on the More menu (see the following screenshot). You can use these commands to start, depart, pause, and complete the appointment, as well as signing and previewing a report related to the appointment.

Reviewing and Signing the Report
Before completing an appointment, you open the report by tapping Preview Report on the More menu (see Item 1 in the following screenshot); you review the report and show it to the customer. You then tap Sign Report (Item 2), and the signature screen opens so that the customer can sign it.
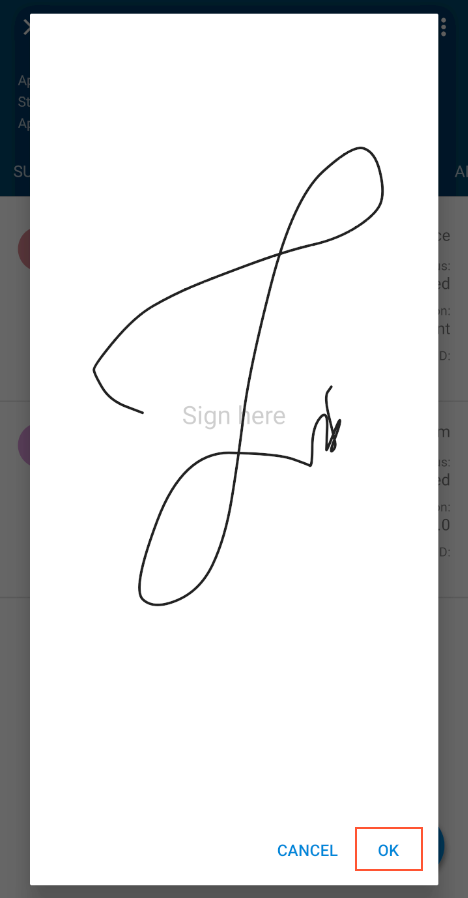
On the signature screen, the customer signs. You close the view by tapping OK at the bottom of the screen.
You can open the signed report by tapping Preview Report again. The following screenshot shows the signed report.
