
Appointments in the Mobile App: To Process an Appointment Assigned to a Staff Member
This activity will walk you through the process of starting and completing an appointment that requires additional service to be added during the appointment, and a customer signature in the MYOB mobile app.
Story
Suppose that Alberto Jimenez uses the MYOB mobile app to process the appointments that he attends. On January 31, 2025, he will arrive to the appointment location and process the appointment by using the mobile app. That is, he will start the appointment in the mobile app, add one more service to the appointment, and show the appointment report to the customer. The customer will sign the appointment in the app. Alberto Jimenez will then complete the appointment, send the signed appointment to the customer. Acting as Alberto Jimenez, you will perform these actions in the mobile app.
Configuration Overview
In the U100 dataset, the following tasks have been performed to support this activity:
- The minimum system configuration, which is described in Company with Branches that Do Not Require Balancing: General Information, has been performed.
- The SWEETLIFE company has been created on the Companies (CS101500) form. This company has multiple branches created on the Branches (CS102000) form, including SWEETEQUIP (Service and Equipment Sales Center).
- On the Service Management Preferences (FS100100) form, the minimum settings have been specified, including specifying the numbering sequences and work calendar, for the service management functionality to be used.
- On the Users (SM201010) form, the jimenez account has been created. For the jimenez user account, in the Linked Entity box of the Summary area of the form, the Alberto Jimenez employee account has been specified.
- On the Branch Locations (FS202500) form, the WEST BRIGHTON branch location of the SWEETEQUIP (Service and Equipment Sales Center) branch has been created.
- On the Service Order Types (FS202300) form, the TRN service order type has been configured to generate AR invoices to bill customers for provided services. That is, AR Invoices has been selected under Generated Billing Documents in the Billing Settings section (General tab).
- On the Appointments (FS300200) form, the 000044-1 appointment has been created.
Process Overview
In the MYOB mobile app, you will open the Appointment List screen and specify the filter criteria to find the needed appointment assigned to Alberto Jimenez. Then you will start the appointment, add an additional service on the Details tab, review the appointment report, obtain the customer's signature for the appointment by tapping Sign Report, complete the appointment, and send the report with the signed appointment to the customer.
Preparation
- On the mobile device, tap the app icon to launch the app.
- Enter the URL of your MYOB Acumatica instance (for example, http://my.site.acumatica.com), and tap
Next.Important:The U100 dataset must be installed on your instance before you can perform the instructions in this activity.
- Sign in as staff member Alberto Jimenez by using the jimenez username and the 123 password.
Step 1: Viewing Appointments Assigned to a Staff Member
You will start by viewing the appointments to which Alberto Jimenez, the staff member whose actions you are performing in the mobile app, is assigned. In the mobile app, do the following:
- On the main screen, tap Services, and then tap Appointment List.
- At the top of the screen, tap the Filter icon, and specify the filter criteria so that the scheduled date range includes the 1/31/2025 date. Tap Update.
- In the list of appointments assigned to Alberto Jimenez that opens, tap the 000044-1 appointment to open it.
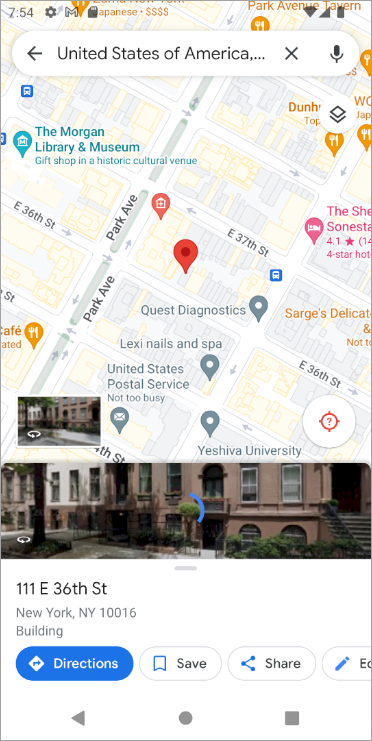
- On the Summary tab, tap View on Map. The map showing the
location of the appointment opens, as the following screenshot shows.
- Close the map and return to the appointment.
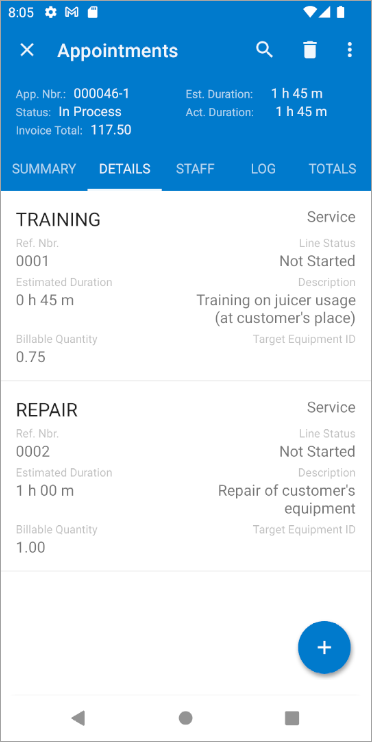
Step 2: Starting the Appointment and Adding an Additional Service
To start the appointment and add the additional service, do the following:
- While you are still viewing the appointment in the mobile app, on the More, tap Start.
- Tap the Details tab.
- Tap the plus sign.
The Details screen opens.
- Specify the following settings:
- Line Type: Service
- Inventory ID: REPAIR
- Description: Repair of customer's equipment
- Actual Quantity: 1 (inserted by default)
- Tap Update and save your changes on the Details screen.
The additional REPAIR service has been added to the appointment, as the
following screenshot shows.
Step 3: Obtaining the Customer's Signature and Completing the Appointment
Sign the appointment (on behalf of the customer) and complete it (again acting as Alberto Jimenez) as follows:
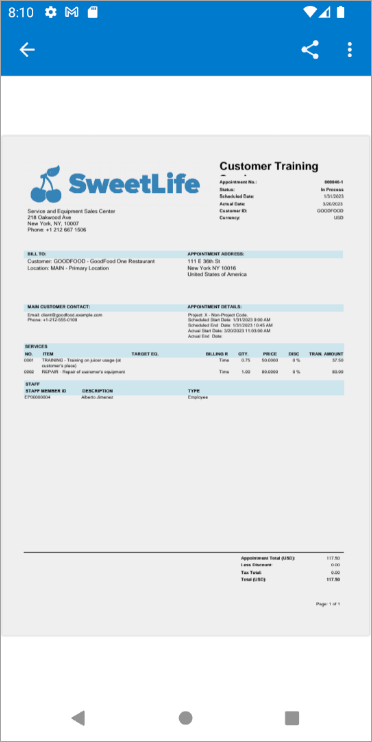
- While you are still viewing the appointment in the mobile app, on the More menu,
tap Preview Report.
The report appears on the screen (as the following screenshot shows). Alberto Jimenez would now show this report to the customer to verify that all information has been entered correctly.
- Close the report, and tap the Additional tab (see Item 1 in the following screenshot).
- In the Signature section, in the Full
Name box (Item 2), specify Douglas Kim,
and tap Save.

- On the More menu, tap Sign Report.
- In the form view of the appointment, leave a signature, and tap
Done. (Here you are signing the appointment on behalf
of the customer. In production use of the app for an appointment, the customer
would sign the appointment.)
The image with the signature is now attached to the appointment.
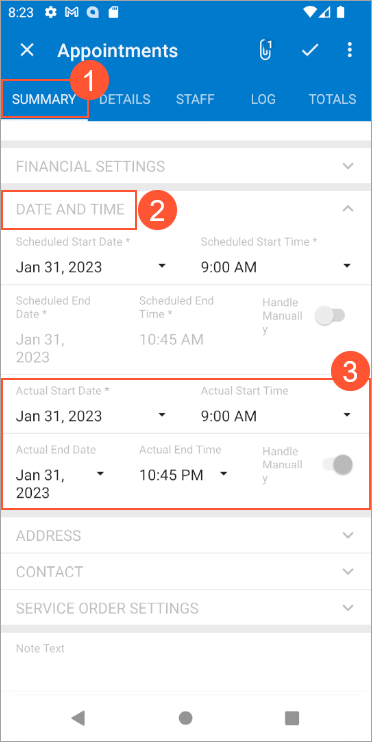
- On the Summary tab (see Item 1 in the following
screenshot), in the Date and Time section (Item 2),
specify the actual start date and time and actual end date and time (Item
3).
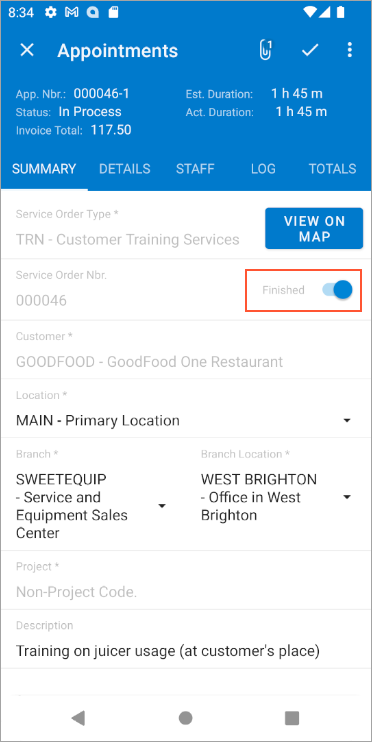
- In the Summary area, at the top of the screen, select
Finished, as the following screenshot shows.
- On the More menu, tap Complete.
The signed report is attached to the appointment in the Files section. You can tap the attached report to view it.
- On the More menu, tap Email Appointment.
An email with the signed report attached is sent to the customer assigned to the appointment.