Pivot Tables: Creation of a Pivot Table on a Filter Tab
Once a generic inquiry form has been created, you can create multiple pivot tables saved as filter tabs for the inquiry form. Once you have created a pivot table, you can modify its configuration. You can also delete a pivot table as a filter tab if you do not need the tab anymore.
Creation of the Pivot Table
If you save a pivot table as a filter tab of a generic inquiry form, this pivot table is not in the list on the Pivot Tables (SM208010) form. That is, you cannot view, modify, or delete this pivot table by navigating to this form and selecting it. You can work with this pivot table only by navigating to the inquiry form and opening the filter tab.
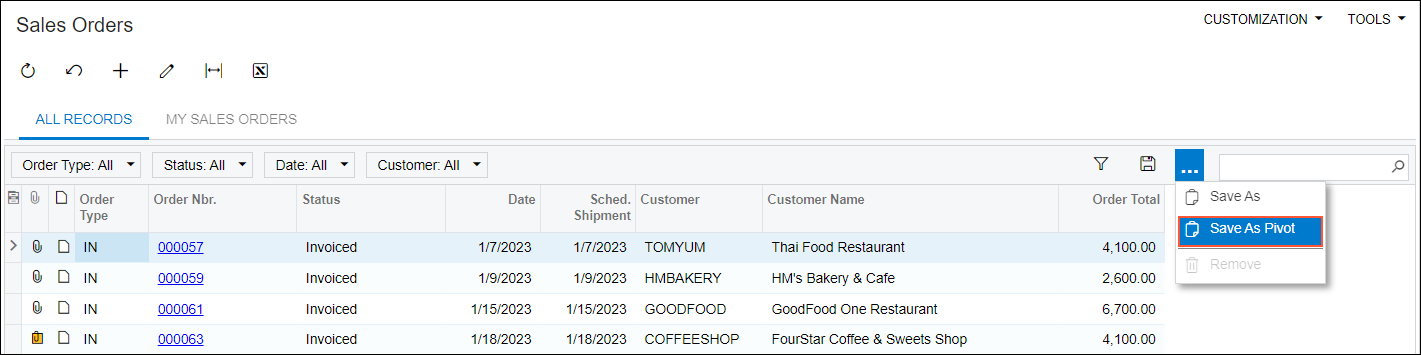
When you click in the filtering area of an inquiry form (shown in the following screenshot), the system opens the Filter Settings dialog box, where you specify the name to be used for the filter tab, select or clear the Shared Configuration check box, and click OK. Then the system opens the newly created tab in edit mode for the pivot table; this mode is similar in appearance and functionality to the Pivot Tables form, with various panes that you can use to construct the table based on the generic inquiry.
Access Rights to Pivot Tables on Filter Tabs
By default, the ability to save pivot tables on filter tabs is available to all users. For all user roles, the Delete access level is specified for the Pivot Tables (SM208020) form. The form has a similar layout to the Pivot Tables (SM208010) form, but it is used specifically for configuring pivot tables as filter tabs.
You can use the Access Rights by Screen (SM201020) form to verify the levels of access the user roles in the system have to the form. On this form, you look for the Pivot Tables link, which is located in the Hidden node of the tree in the left pane. Then in the right pane, you make sure that for all roles in the system, the Delete access level is set.
Personal and Shared Filter Tabs with Pivot Tables
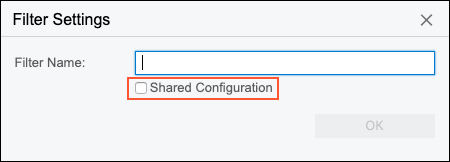
By default, when you save a filter as a pivot table, the Shared Configuration check box in the Filter Settings dialog box is cleared (see the following screenshot), and the system treats the filter tab as an advanced filter that is not available to other system users. If you select the Shared Configuration check box while saving a pivot table as a tab, this tab will instead be available to all users who have access to the inquiry form.
If you would like to share your pivot tables with other users, you need to have sufficient access rights to the Filters (CS209010) form; without the access, the Shared Configuration check box will be cleared and unavailable for you. By default, users with the built-in Administrator role (such as system administrators or technical specialists that perform simple customizations) have access to the form and can share pivot tables as filter tabs.
Edit Mode of the Pivot Table Tab
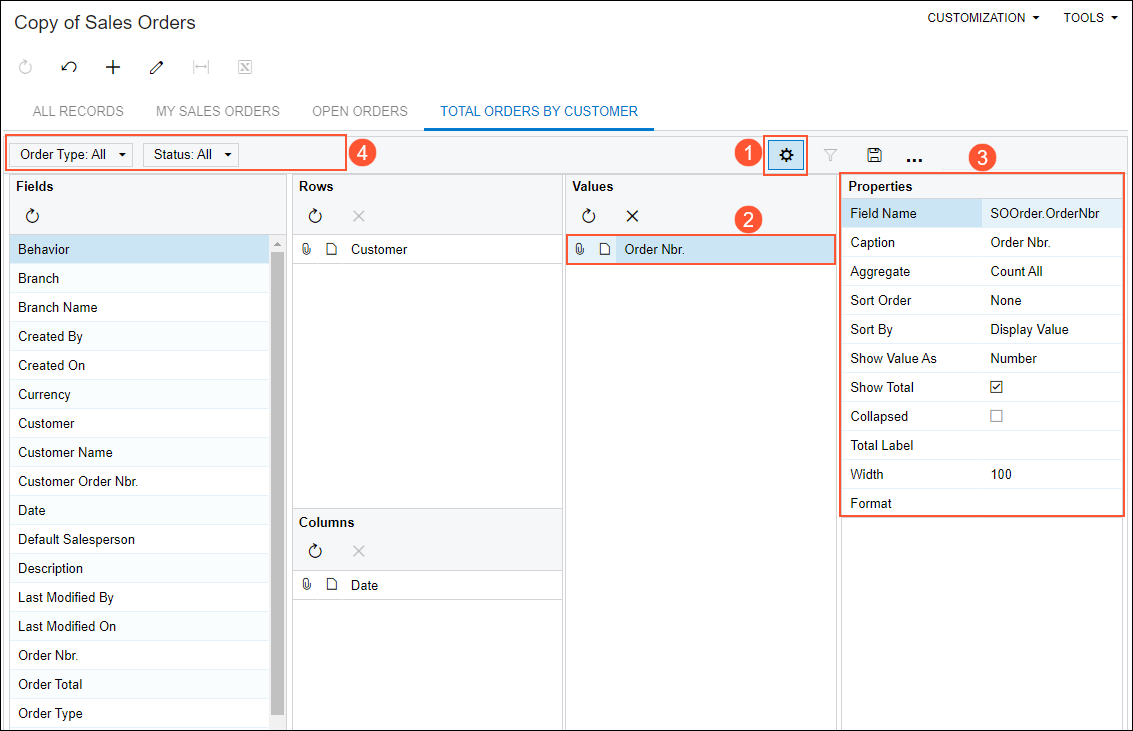
When you initially add a pivot table as a filter tab, the tab is opened in edit mode, so that you can configure the pivot table. Once you have configured the pivot table, you can switch between edit mode and view mode by clicking the Edit Pivot Table button (see Item 1 in the screenshot below).
The editing layout is similar to the one you may be accustomed to seeing when you are configuring a pivot table in Microsoft Excel. You use multiple panes to configure a pivot table.
The Fields pane lists all the fields that have been added to the generic inquiry on the Results Grid tab of the Generic Inquiry (SM208000) form, regardless of their visibility settings. You move fields between the panes by dragging them. When you set focus on a field in the Rows, Columns, or Values pane (Item 2), the system displays its properties in the Properties pane (Item 3). By using the settings in the Properties pane, you define how the data of the field is to be presented in the table.
If you need to add quick filters to the table, you drag the needed fields to the filtering area (Item 4). If some quick filters were added to an inquiry tab that you saved as a pivot table, the system copies all these filters to the filtering area by default. You can remove them if they are not needed. You remove quick filters by selecting Remove Quick Filter from the drop-down list that opens when you click this quick filter.