
Modern Customer Portal: Portal Deployment
In this topic, you deploy a new portal instance and create a portal in the MYOB Acumatica ERP Configuration Wizard so that it’s ready for further configuration.
At a glance: Portal deployment
- Deploy a portal instance by using the MYOB Acumatica ERP Configuration Wizard.
- Create the portal on the Portals (SP701000) form of MYOB Acumatica.
Who performs these steps: An MYOB Acumatica administrator of the portal owner—the company whose customers will use the Modern Customer Portal.
The sections that follow describe these steps in detail.
Requesting a Customer Portal
To request a portal instance, contact your partner or create a support request (if you're an MYOB direct customer).
Creating the Customer Portal in Acumatica ERP
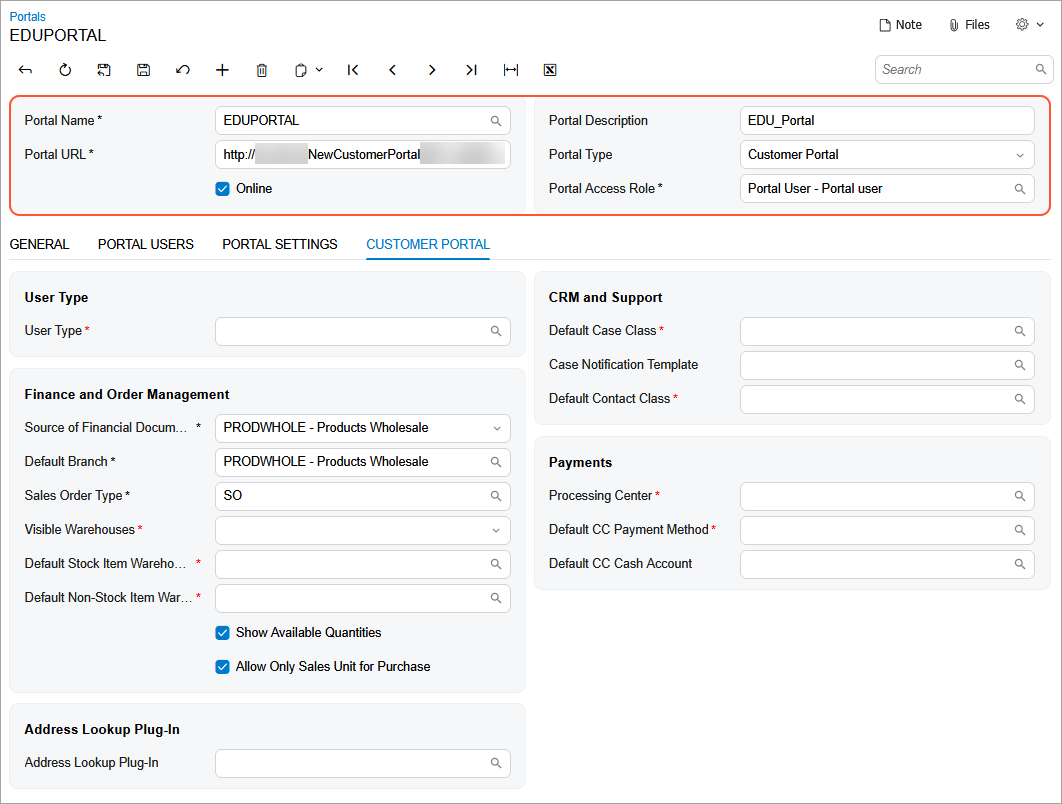
Once your portal instance request has been actioned, open the Portals (SP701000) form in MYOB Acumatica and start creating the portal.
Do the following in the Summary area of the form (see below):
- Enter the portal name and description provided by MYOB.
- Enter the full portal URL provided by MYOB (for example, https://yourserver/CompanyPortal).
- Select Customer Portal in the Portal Type box.
What's Next?
Before saving the portal, you must specify its settings on the tabs of the Portals (SP701000) form. See the next topic to learn how to complete the portal creation process.