
Modern Customer Portal: Catalog Configuration
You can tailor the Catalog (SP504001) form in the Modern Customer Portal to control which item details are visible—without customization or coding.
This topic explains how to perform this system-wide form configuration so that portal users see only the item information you want them to see.
At a Glance: Configuration of the Catalog Form
- Activate UI Configuration mode on the Catalog form.
- For a catalog item on the form:
- Turn on UI Configuration mode.
- Activate UI Configuration mode for the Item Details dialog box.
- Add or remove elements in the dialog box.
- Apply the changes to all items.Tip:If you modify at least one item on the Catalog form and save the changes, they are applied to all items on the form.
Below you'll find the details about this process.
System-Wide Form Configuration
In the Modern UI of MYOB Acumatica, an administrator can configure the layout of any form and share that layout with all system users.
In the Modern Customer Portal, this system-wide form configuration is available only on the Catalog (SP504001) form.
On this form, you control which item details are visible to portal users by default—so they see only the information you’ve chosen to display.
Starting Configuration for the Catalog Form
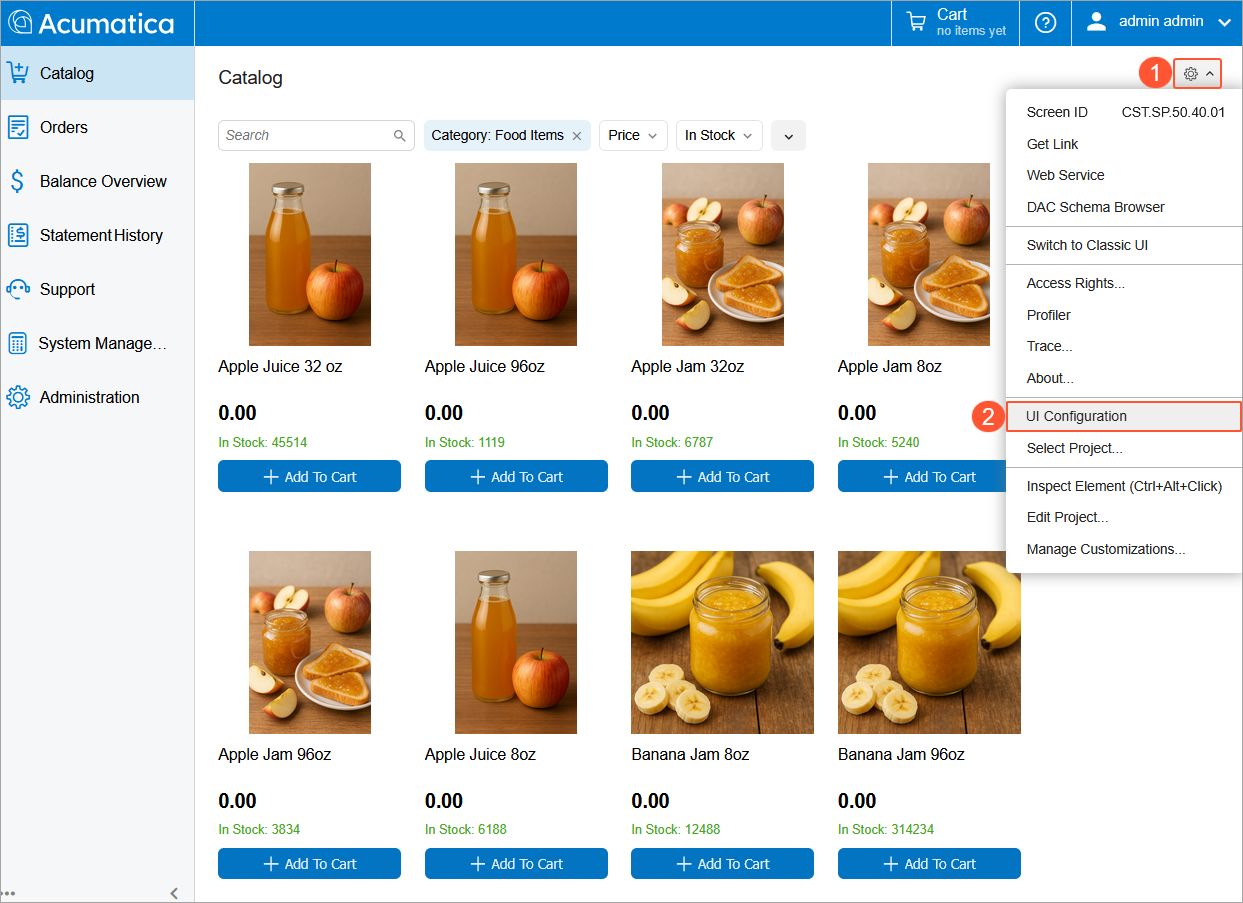
To begin, on the Catalog (SP504001) form, click the Settings button (Item 1 below) on the form title bar and then click UI Configuration (Item 2). This activates UI Configuration mode for the form.
Starting Configuration for the Item Details Dialog Box
Now that you’ve turned on UI Configuration mode for the Catalog (SP504001) form (Item 1 below), switch on this mode for the Item Details dialog box. Do the following:
- Click the Settings button in the upper right corner of any item (Item 2).
Figure 2. Using UI Configuration mode 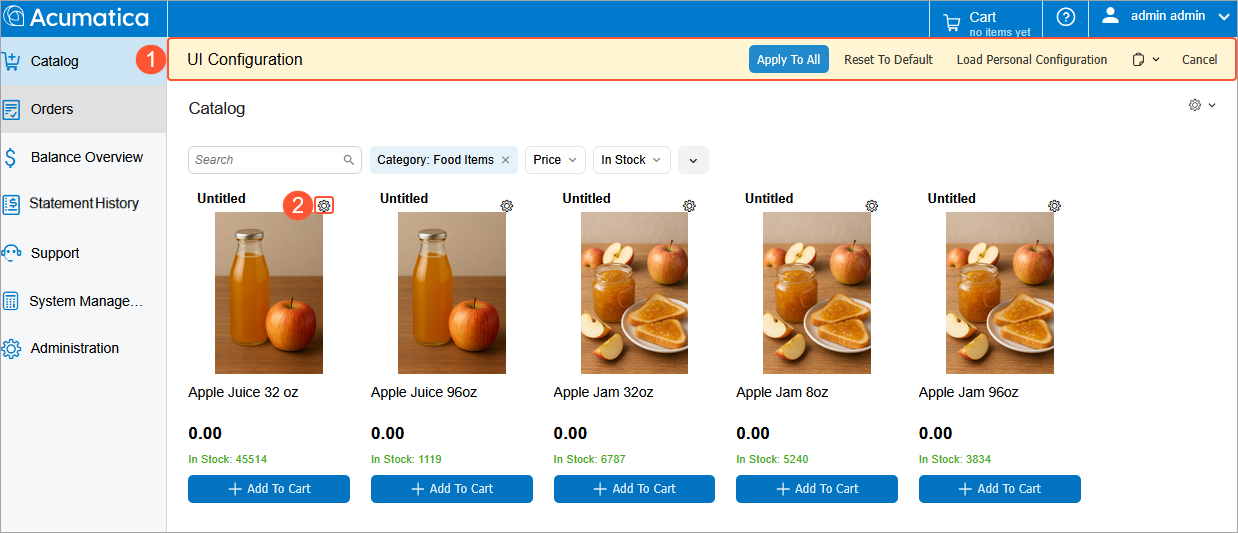
- Click the Settings button in the Item Details dialog box, which opens (Item 1 below).
- Click UI Configuration (Item 2).
Figure 3. Activating UI Configuration mode for the Item Details dialog box 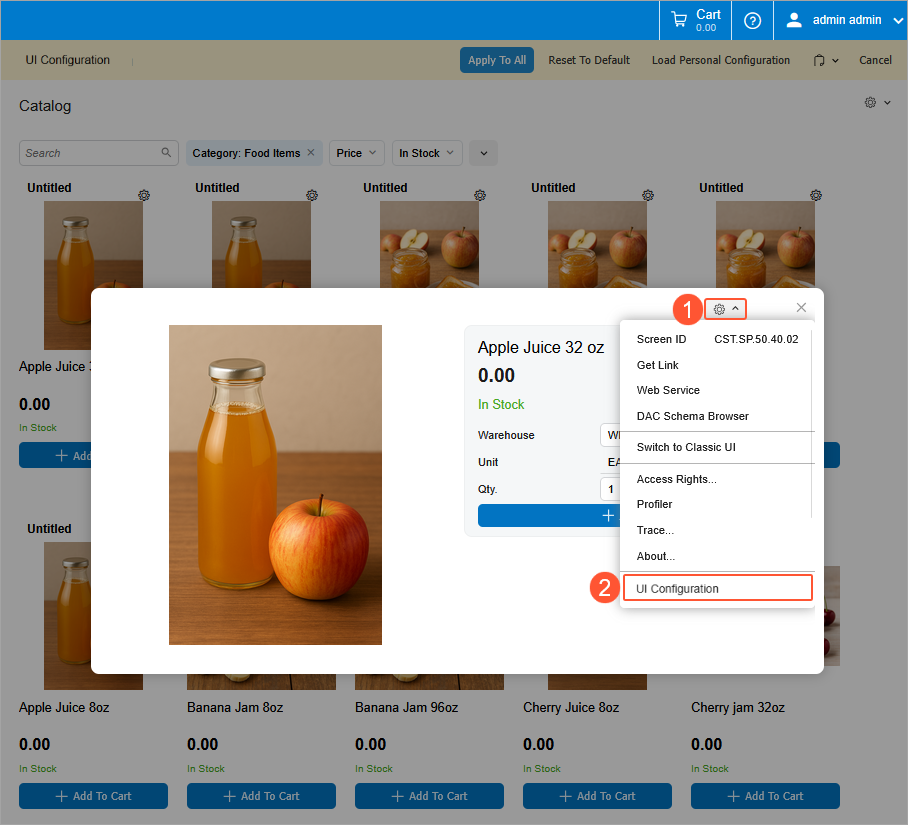
UI Configuration mode is now active for the Item Details dialog box.
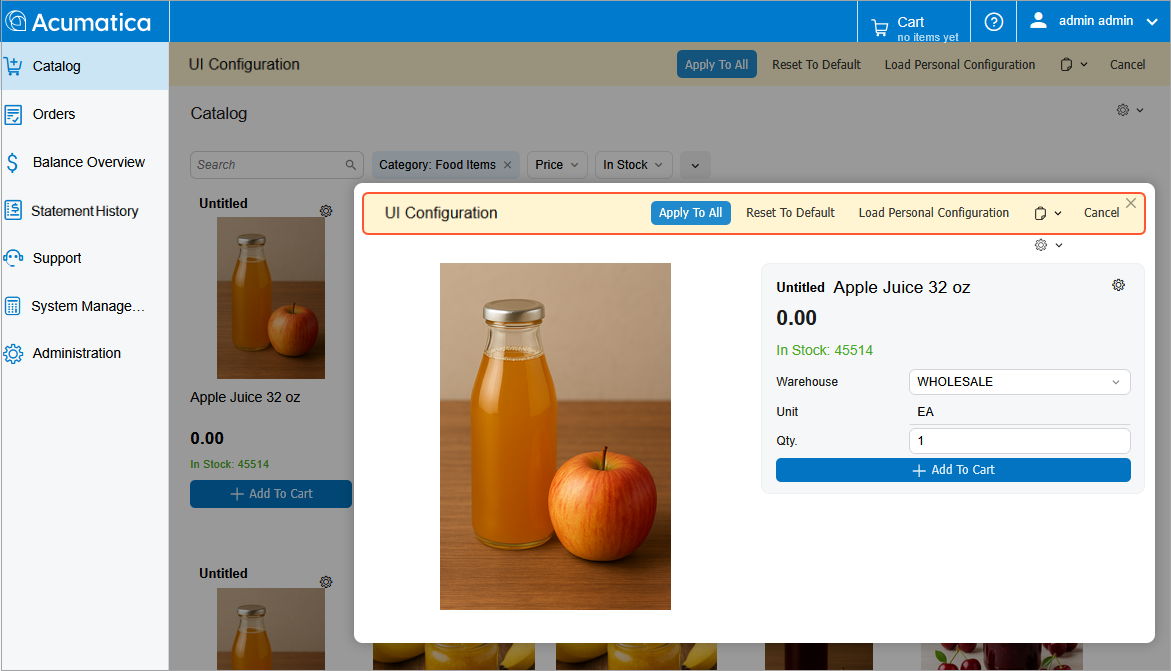
Configuring Visible Item Details
Now that UI Configuration mode is turned on for the Item Details dialog box, configure the visible item details. To begin, click the Settings button.
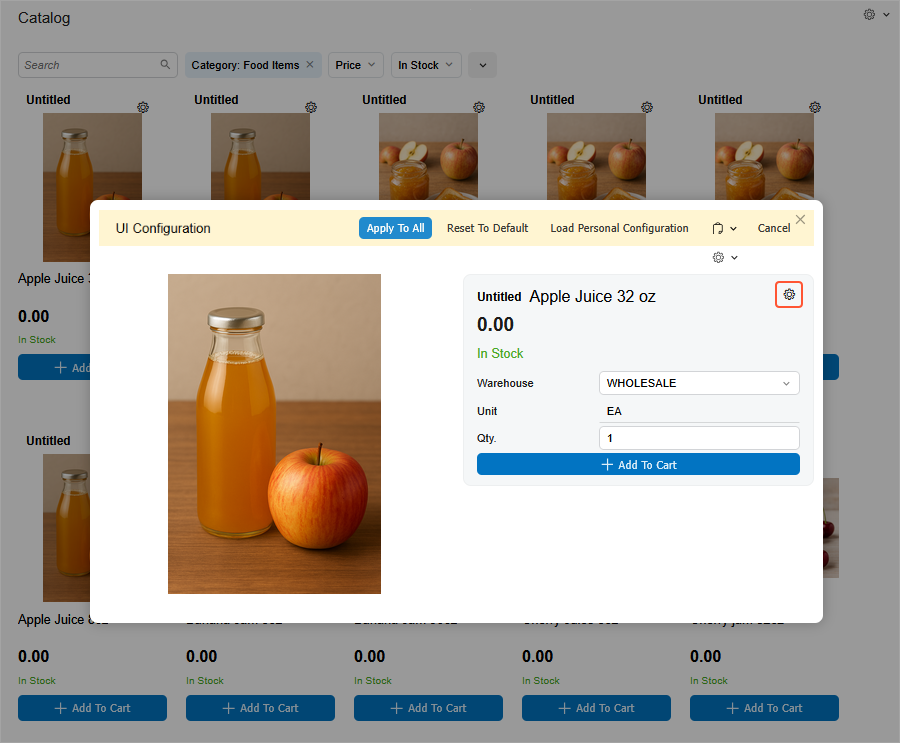
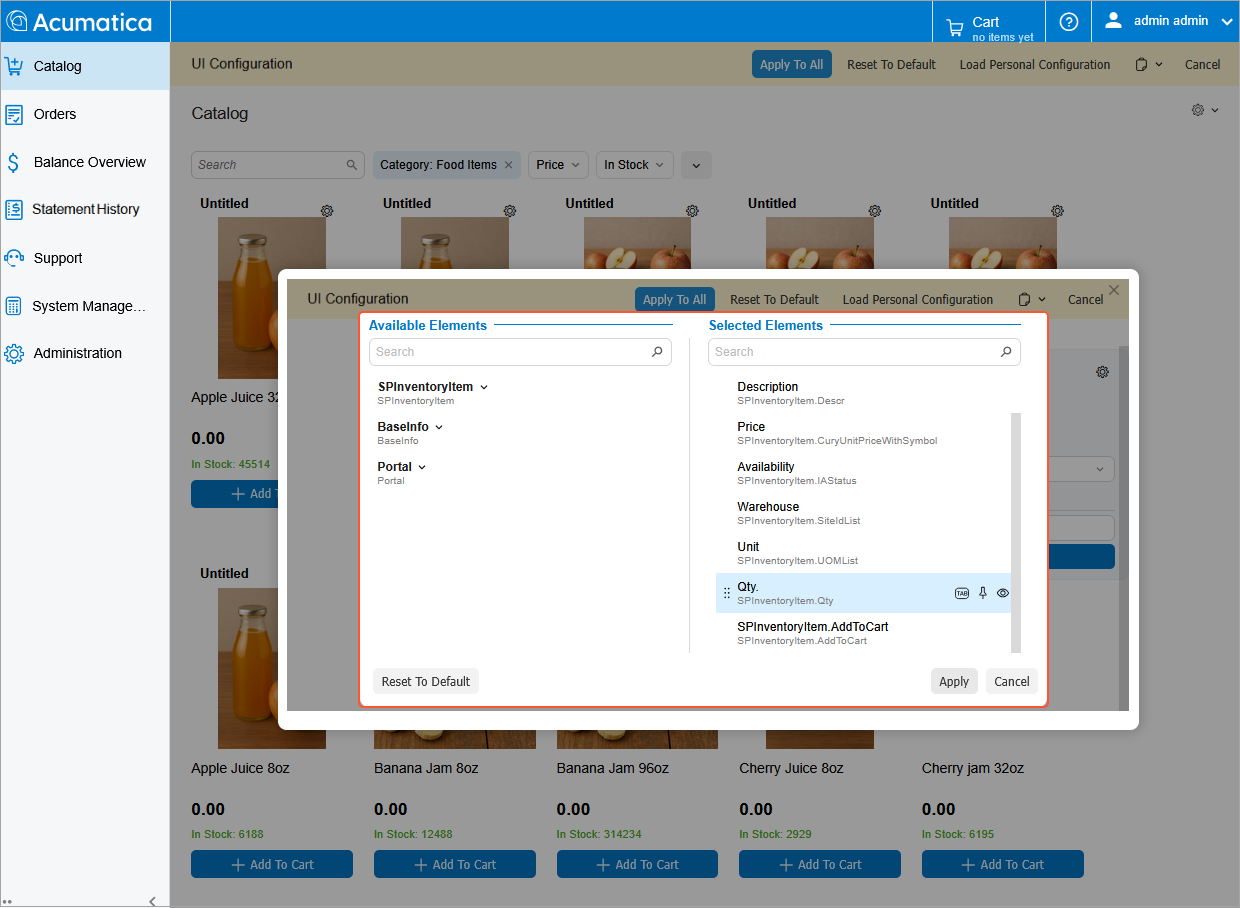
The system opens the Section Configuration dialog box. Here you can add or remove selected elements from the Item Details dialog box. When you complete the configuration, all portal users will see the selected elements for each item.
Click Apply.
Completing the Configuration
To finish the configuration, do the following:
- In the UI Configuration dialog box, click Overwrite Personal Configuration (Item 1 below).
- Click Apply to
All (Item
2).
Figure 7. Completing the configuration 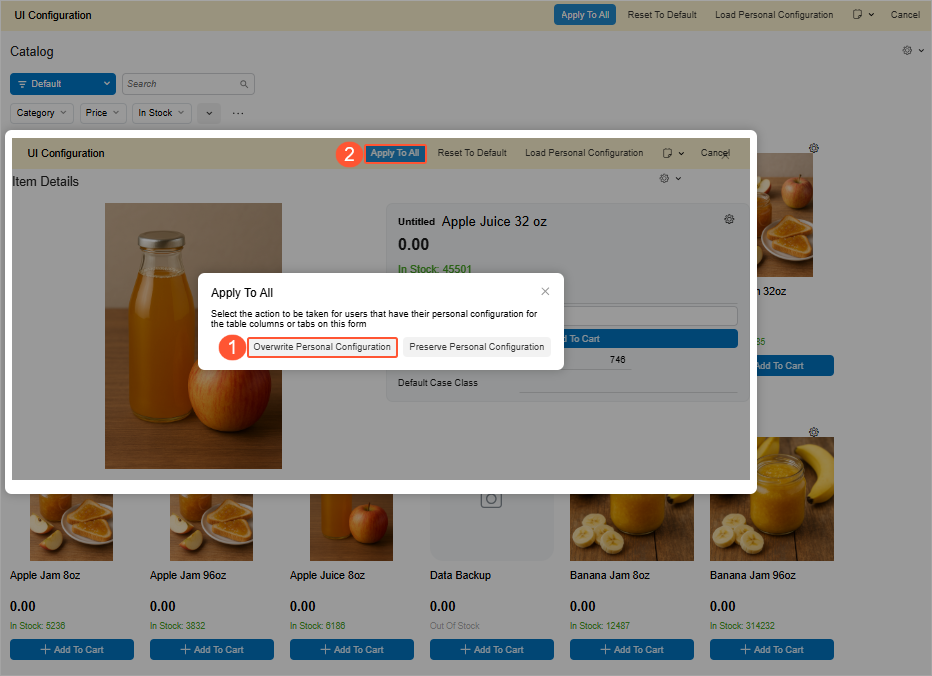
Clicking Apply to All ensures that the selected layout is used for every item on the Catalog (SP504001) form.
What's Next?
After you have configured the portal, you can create contact records for portal users and assign appropriate roles to them. See the next topic to learn how the predefined portal roles control user access.