
Personalization of the MYOB Acumatica UI: To Manage User-Defined Fields
This activity will walk you through the process of associating user-defined fields with a form and adding them to the form.
Story
Suppose that you are Kimberly Gibbs, a system administrator and customizer at the SweetLife Fruits & Jams company. You were asked to add the INTEREST and MODEL user-defined fields to the Opportunities (CR304000) form so that users can specify their values while working on opportunities. The INTEREST user-defined field must be hidden for the SERVICE class, while the MODEL user-defined field must be shown and required for this class.
Acting as Kimberly, you need to associate user-defined fields with the Opportunities form and specify their settings. Then you need to add them to the Summary area.
Configuration Overview
In the U100 dataset, the following tasks have been performed to support this activity:
- On the Enable/Disable Features (CS100000) form, the Customer Management feature has been enabled.
- On the Opportunity Classes (CR209000) form, the SERVICE opportunity class has been created. This class defines opportunities related to requests requiring service consulting.
- On the Attributes (CS205000) form, the INTEREST and MODEL user-defined fields have been created.
Process Overview
In this activity, you’ll associate the INTEREST and MODEL user-defined fields with the Opportunities (CR304000) form and specify their settings. Then you’ll add these fields to the Summary area of the form.
System Preparation
Before you begin performing the steps of this activity, do the following:
- Launch the MYOB Acumatica website with the U100 dataset preloaded and the Modern UI turned on.
- Sign in to the system as Kimberly Gibbs by using the following credentials:
- Username: gibbs
- Password: 123
Step 1: Associating User-Defined Fields with a Form
To associate the INTEREST and MODEL user-defined fields with the Opportunities (CR304000) form and specify their settings, do the following:
- On the Opportunities form, add a new record.
- Click the Settings button (
 ) in the upper-right corner of
the form title bar and then click the Screen
Configuration menu item.
) in the upper-right corner of
the form title bar and then click the Screen
Configuration menu item.Form Configuration mode is activated, and the Form Configuration pane appears at the top of the form.
- On the Form Configuration pane, click the
Manage User-Defined Fields button.
The Manage User-Defined Fields dialog box opens, as shown below.
Figure 1. The Manage User-Defined Fields dialog box 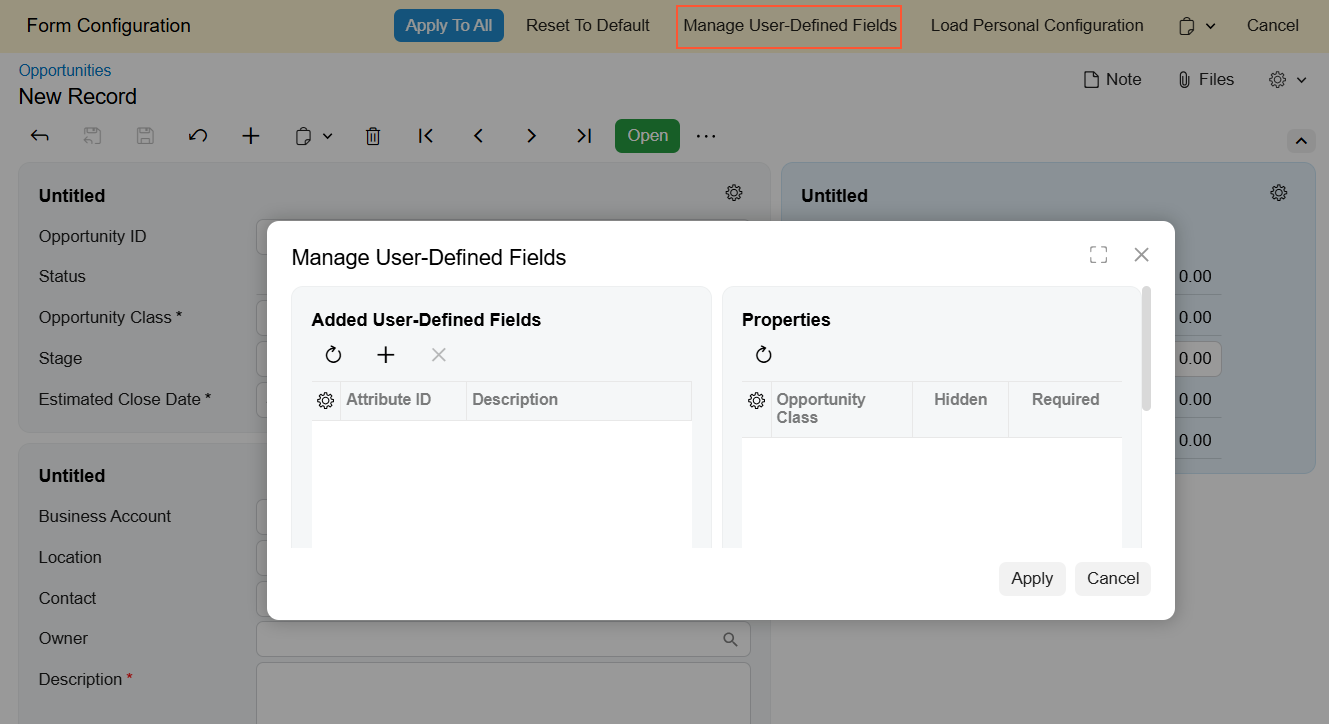
- In the Added User-Defined Fields pane of the dialog box,
click
the
Plus button.Important:You can add a user-defined field only if it has first been created on the Attributes (CS205000) form.
- In the Attribute ID column, select the INTEREST user-defined field.
- In the Properties pane of the dialog box, in the row with
the SERVICE opportunity class,
select the check box in the
Hidden column, as shown
below.
Figure 2. The settings of the Interest user-defined field 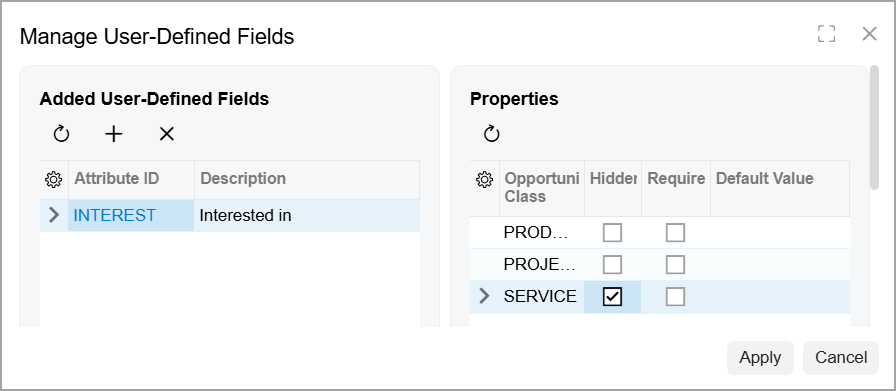
- In the Added User-Defined Fields pane, click the Plus button again.
- In the Attribute ID column, select MODEL.
- In the Properties pane, in the row with the
SERVICE opportunity class,
select the check box in the
Required column, as shown
below.
Figure 3. The settings of the Model user-defined field 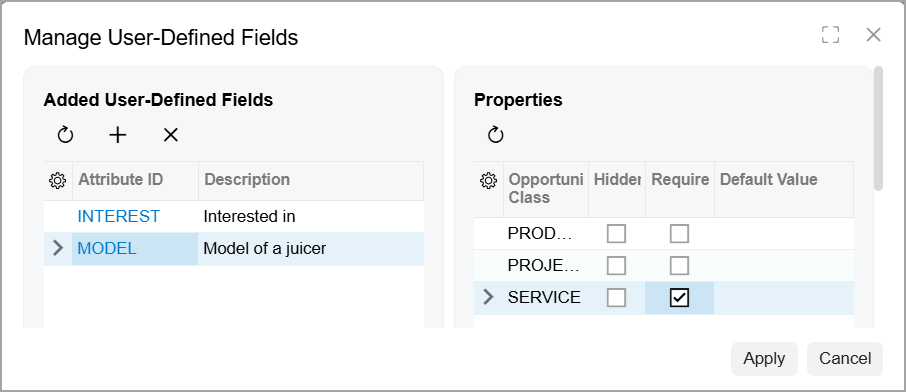
- Click Apply.
The system applies the changes.
Step 2: Adding the User-Defined Fields to the Form
To add the associated user-defined fields to the Opportunities (CR304000) form, do the following:
- While you are still on the Opportunities form with Form
Configuration mode activated, click the Settings button.
The Section Configuration dialog box opens.
- In the Available Elements pane of the dialog box, locate the User-Defined Fields group and click the arrow icon next to its name to expand it.
- Click Interested in in the expanded
User-Defined Fields group and then click the arrow
that appears to the right of its name (see below).
Figure 4. The arrow to the right of Interested in 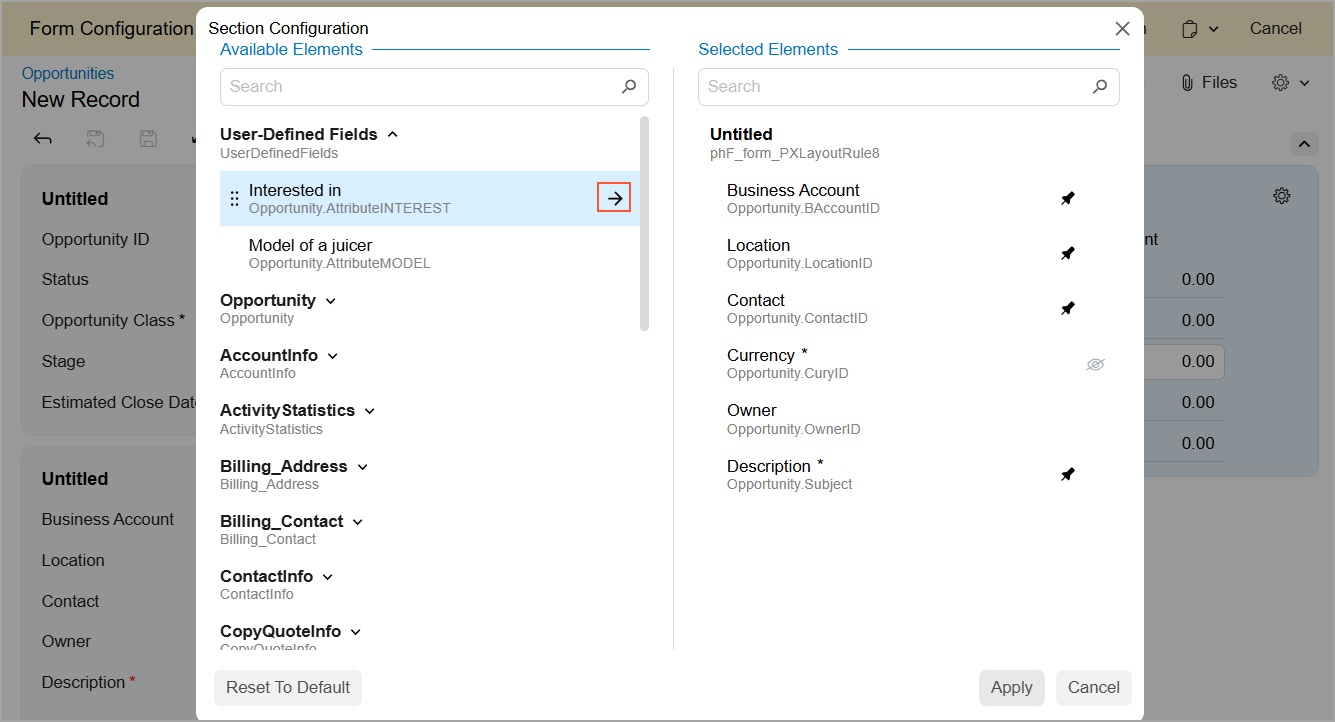
The system moves Interested in to the Selected Elements pane.
- In the Available Elements pane, select Model
of a juicer in the expanded User-Defined
Fields group and then click the arrow.
The system moves Model of a juicer to the Selected Elements pane after the Interested in user-defined field (see below).
Figure 5. The added user-defined fields 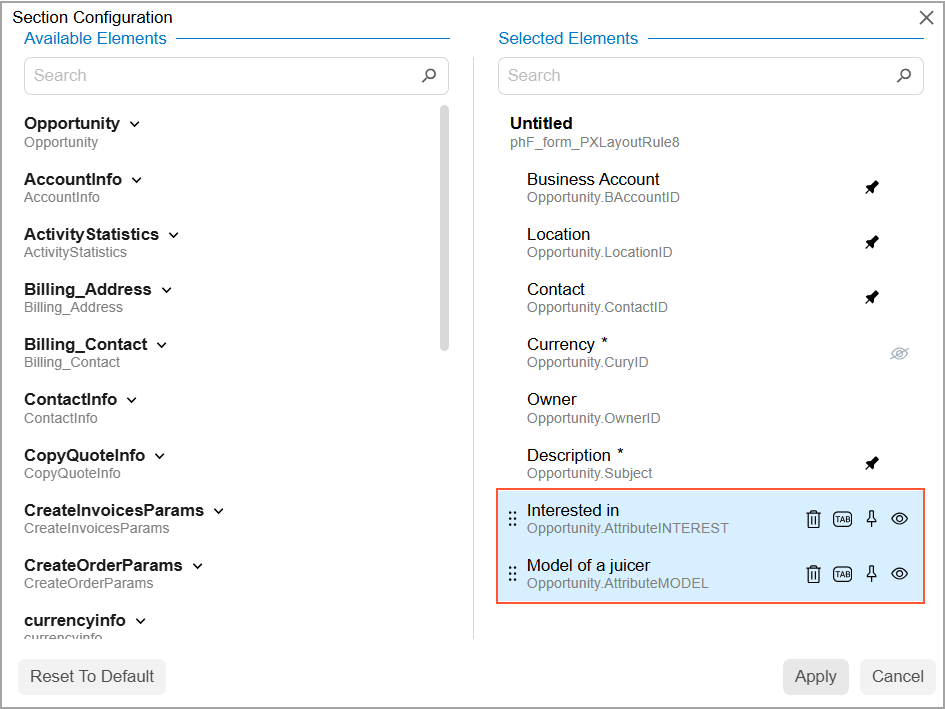
- Click Apply.
The system closes the dialog box and adds both user-defined fields to the second fieldset of the Summary area.
- In the Form Configuration pane, click Apply to All.
- In the Apply to All dialog box, which opens, click the
Preserve Personal Configuration button.
The system closes the Form Configuration pane and applies the changes (see below).
Figure 6. The added user-defined fields in the Summary area of the form 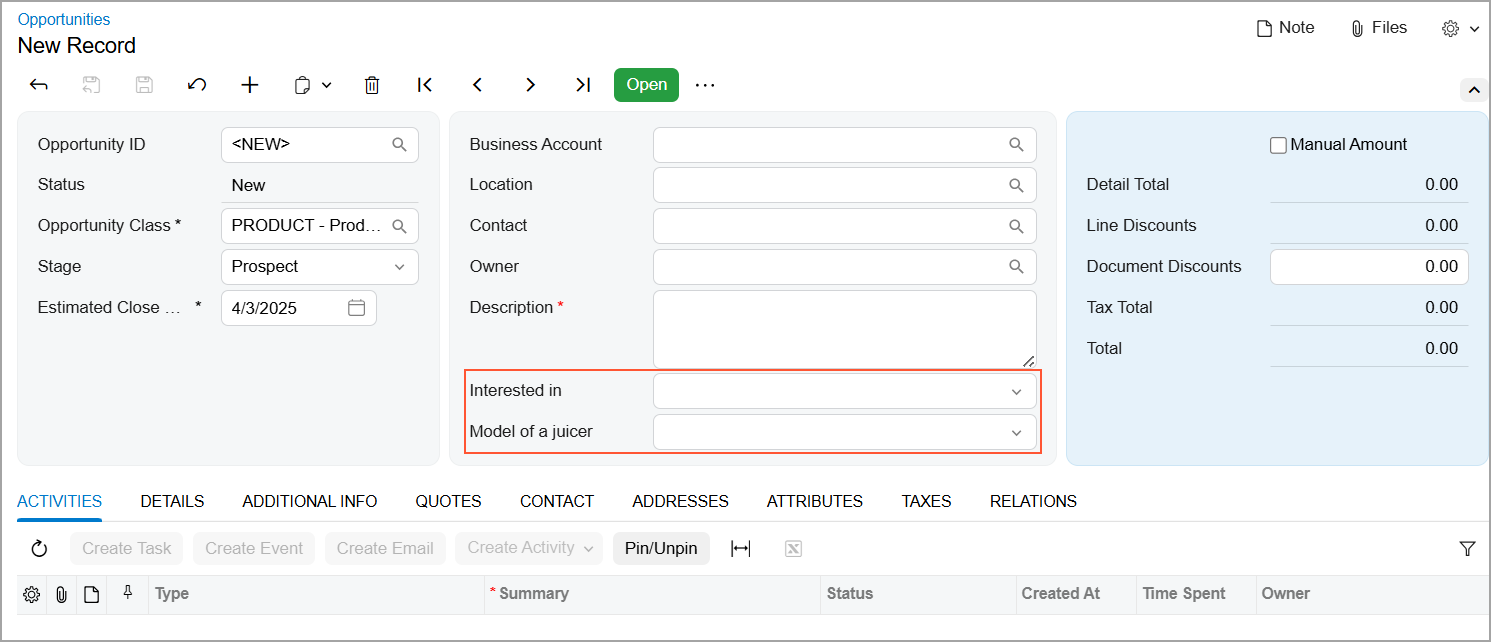
Note that both fields are visible. The PRODUCT opportunity class is selected, and you configured the INTEREST user-defined field to be hidden for only the SERVICE opportunity class.
- In the Opportunity Class box, select
SERVICE.
The Interested in user-defined field disappears from the form.