Redirection to Webpages: To Add Redirection to a Report at the End of Processing
The following activity will walk you through the process of implementing redirection to a report at the end of processing.
Story
For better usability of the custom Assign Work Orders (RS501000) processing form, the managers of the Smart Fix company have requested that the form be modified so that at the end of the processing, the system displays a report that lists all processed work orders and shows the employees to which they have been assigned during the processing. The report has already been developed.
Process Overview
You will add the RS601000.rpx report file to the PhoneRepairShop customization project. You will then modify the processing operation of the Assign Work Orders (RS501000) form so that it displays the report at the end of the operation. You will also test the updated functionality of the form.
System Preparation
Before you begin performing the steps of this activity, do the following:
- Prepare an MYOB Acumatica instance by performing the Test Instance for Customization: To Deploy an Instance with a Custom Form that Implements a Workflow prerequisite activity.
- Create a processing form without filtering parameters by performing the Processing Forms: To Create a Simple Processing Form prerequisite activity.
- Add filtering parameters to the form by performing the Filtering Parameters: To Add a Filter for a Processing Form prerequisite activity.
Step 1: Including RS601000.rpx in the Customization Project
In this step, you will add the RS601000.rpx report file to the customization project. You must include the report file in the customization project so that the report is available in each MYOB Acumatica instance to which you publish the PhoneRepairShop customization project.
- Copy the RS601000.rpx file to the ReportsCustomized folder of your MYOB Acumatica instance for the training course. The system uses this folder to search for custom and customized MYOB Acumatica reports.
- In the Customization Project Editor, open the PhoneRepairShop customization project.
- On the Files page, add the
ReportsCustomized\RS601000.rpx file, and save your
changes.Tip:For details on adding files to the customization project, see To Add a Custom File to a Project in the documentation.
- Publish the customization project.
- On the Site Map (SM200520) form of MYOB Acumatica, add a new row with the following settings, and save your changes:
- Screen ID: RS.60.10.00
- Title: Assigned Work Orders
- UI: Classic
- URL: ~/frames/reportlauncher.aspx?id=RS601000.rpx
- Graph Type: Empty
- Workspaces: Empty
The report is not supposed to be used directly from the UI of MYOB Acumatica; therefore, you do not include it in any workspace.
- Category: Empty
- Is Substitute: Empty
- In the Customization Project Editor (with it opened for the PhoneRepairShop customization project), on the Site Map page, add the site map item for the Assigned Work Orders report.
- Publish the customization project.
- On the Access Rights by Screen (SM201020) form, provide Granted access rights for the Assigned Work Orders (RS601000) report form for the Administrator and Customizer user roles.
- In the Customization Project Editor, include access rights for the new report in the customization project.
Step 2: Testing the Report
In MYOB Acumatica, make sure that the report is displayed correctly by doing the following:
- Open the Assigned Work Orders (RS601000) report form.Tip:Because the report has no workspace specified, you cannot find it in the UI by typing its name in the Search box or browsing the main menu. The only way to open the report is to type the ID of the report as the value of the ScreenId parameter of the URL in the address line of the browser, as shown in the following screenshot.
Figure 1. Report ID in the URL 
- On the report form toolbar, click Run Report. The report
is displayed, as shown in the following screenshot. Because no filtering is
specified in the report settings, the report displays all the repair work orders
that exist in the application database. When the system redirects the user to
this report from the Assign Work Orders (RS501000) form, it will filter the list
to show only the orders that have been assigned during the processing.
Figure 2. Assigned Work Orders report 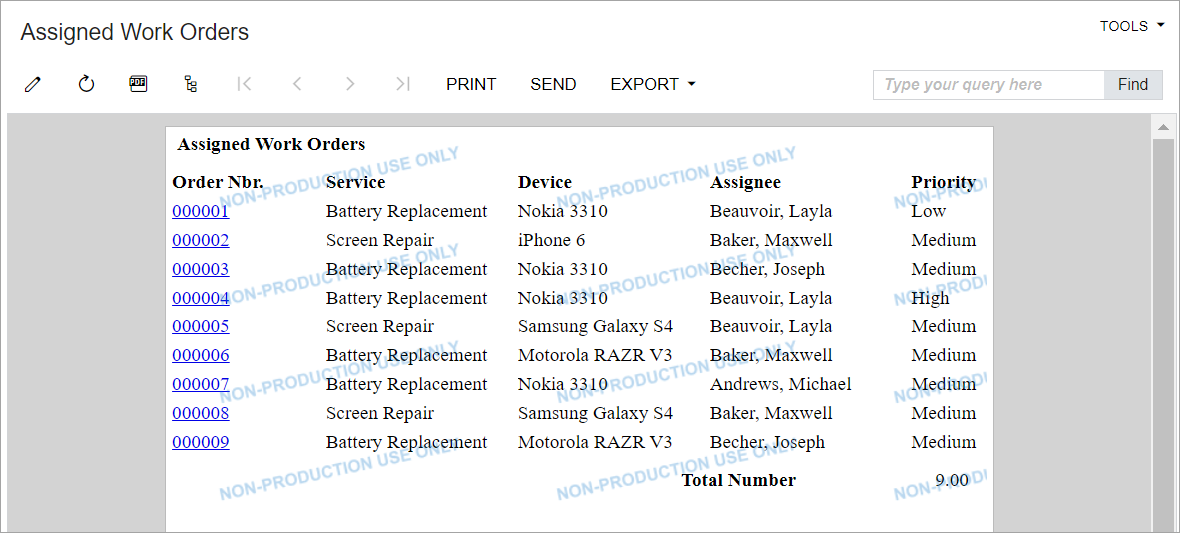
Step 3: Implementing Redirection to a Report
AssignOrders() method. The report will
display the repair work orders that have been assigned during the processing
operation the user invoked on the form. To implement the redirection, do the
following:- In the Messages.cs file, add the following constant,
which specifies the name of the webpage that will display the
report.
public const string ReportRS601000Title = "Assigned Work Orders"; - In the RSSVWorkOrderEntry.cs file, modify the
AssignOrders()method, as follows:- In the beginning of the method, add the following
lines.
// The result set to run the report on. PXReportResultset assignedOrders = new PXReportResultset(typeof(RSSVWorkOrder)); - In the end of the
tryblock, add the following code.// Add to the result set the order // that has been successfully assigned. if (workOrder.Status == WorkOrderStatusConstants.Assigned) { assignedOrders.Add(workOrder); } - In the end of the method, add the following
code.
            if (assignedOrders.GetRowCount() > 0 && isMassProcess)
            {
                throw new PXReportRequiredException(assignedOrders, "RS601000",
                                                    Messages.ReportRS601000Title);
            }
To redirect the user to the report, you have thrown the PXReportRequiredException exception. Once an exception is thrown, it interrupts the current context and propagates up the call stack until it is handled by MYOB Acumatica Framework, which performs the redirection. You do not need to implement the handling of the exceptions that are used for redirection.
The Assigned Work Orders report has no filtering parameters. You have passed the data to be displayed in the report (that is, the repair work orders that have been assigned) in the parameters of the PXReportRequiredException constructor.
- In the beginning of the method, add the following
lines.
- Build the project.
- Publish the customization project to include the latest version of the extension library in the customization project.
Step 4: Testing the Redirection to the Report
- On the Repair Work Orders (RS301000) form, create three repair work orders
with the settings specified in the following table. Once you have entered
the settings of each order, save the order and then click Remove
Hold.
First Work Order Second Work Order Third Work Order Customer ID C000000001 C000000002 C000000001 Service Battery Replacement Screen Repair Battery Replacement Device Nokia 3310 Samsung Galaxy S4 Motorola RAZR V3 Assignee Andrews, Michael Empty Beauvoir, Layla Description Test order Test order Test order Notice that each of the created work orders has the Ready for Assignment status.
- On the Assign Work Orders (RS501000) form, make sure that three repair work orders are listed.
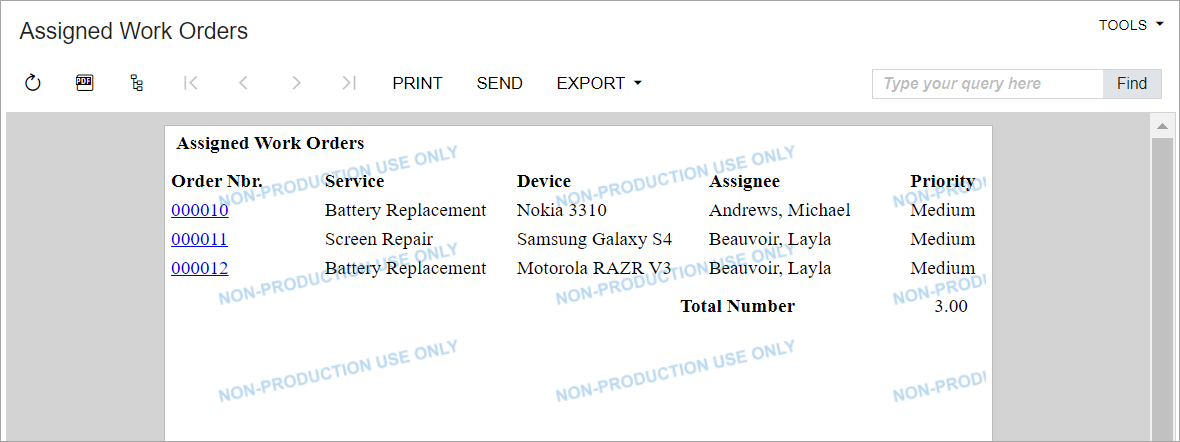
- On the form toolbar, click Assign All. At the end of
the processing, the Assigned Work Orders (RS601000) report is displayed.
Make sure that it shows the three work orders that you entered and that all
three have been assigned, as shown in the following screenshot.
Figure 3. Assigned Work Orders report