Budget Tree: Implementation Activity
Story
Suppose that the managers of SweetLife Fruits & Jams have decided to use hierarchical budgets in the system. They want the budget to include the Sales node and the Production node; the latter node should have the Purchases, Labor Cost, and Overhead subnodes.
Acting as a system administrator, you need to create a budget tree with the Sales and Production nodes, which will contain the related budget articles.
Configuration Overview
In the U100 dataset, the following tasks have been performed for the purposes of this activity:
- On the Companies (CS101500) form, the SWEETLIFE company has been defined.
- On the Branches (CS102000) form, the HEADOFFICE branch of the SWEETLIFE company has been created.
- On the Chart of Accounts (GL202500) form, the
following accounts have been created:
- 40000 - Sales Revenue
- 40010 - Sales Freight
- 51300 - COGS - Freight
- 60000 - Purchase Expense
- 61000 - Advertising Expense
- 62400 - Office Expense
- 62900 - Rent or Lease Expense
- 62950 - Repairs
- 63300 - Supplies
- 69500 - Salaries and Wages
- 69550 - Bonus Expenses
- On the Segmented Keys (CS202000) form, the SUBACCOUNT segmented key has been defined.
Process Overview
In this activity, on the Subaccounts (GL203000) form, you will upload the list of subaccounts from an Excel file. On the Budget Configuration (GL205000) form, you will create budget nodes and add leaves for each node.
System Preparation
- Launch the MYOB Acumatica website with the U100 dataset preloaded, and sign in as a system administrator Kimberly Gibbs by using the gibbs username and the 123 password.
- Make sure that you have completed the following prerequisite activity to perform the needed configuration of subaccounts: Subaccounts: Implementation Activity.
- Make sure that the 2026 financial year has been created on the Master Financial Calendar (GL201000) form.
Step 1: Uploading a List of Subaccounts
To upload the list of subaccounts from a file, do the following:
- Open the Subaccounts (GL203000) form.
- On the form toolbar, click Load Records from File.
- In the File Upload dialog box, which opens, click Choose File, and select the Subaccounts.xlsx file.
- Click Upload.
- In the Common Settings dialog box, which opens, leave the default settings, and click OK.
- In the Columns dialog box, which opens, leave the default settings, and click OK.
- On the form toolbar, click Save to save your changes.
Step 2: Defining Nodes
To define nodes in the budget structure, do the following:
- Open the Budget Configuration (GL205000) form.
In the Budget Tree pane, notice that Company is highlighted in bold type.
- In the Subarticles pane, click Add
Row on the table toolbar, and do the following in the added
row:
- Select the check box in the Node column.
- In the Description column, type Sales.
- Leave the other columns empty.
You have not specified the account and subaccount masks for this node, because you will preload accounts and add one account manually to this node later.
- Click Add Row, and specify the following settings in the
row to create a node:
- Node: Selected
- Description: Production
- Other columns: Empty
You have not specified the account and subaccount masks for this node, because you will add subnodes to this node later.
- Click Save on the form toolbar to save your changes.
You have created nodes for your budget structure, which you can now see in the Budget Tree pane.
Step 3: Adding Leaves to the Sales Node
To add leaves to the Sales node, do the following:
- While you are still viewing the budget tree on the Budget Configuration (GL205000) form, in the Budget Tree pane, click the Sales node.
- On the table toolbar of the Subarticles pane, click
Preload Accounts.
The Preload Accounts dialog box opens.
- In this dialog box, in the Account From and Account To boxes, select 40000 - Sales Revenue.
- In the Subaccount Mask box, enter ???-000.
- Click OK to preload the budget leaves. The system automatically populates the budget tree with all the possible combinations that match the specified mask.
- On the toolbar of the Subarticles pane, click
Add Row, and specify the following settings in the
added row:
- Node: Cleared
- Account: 40010 - Sales Freight
- Subaccount: 000-000
- Account Mask: 40010 - Sales Freight
- Subaccount Mask: ???-000
- On the form toolbar, click Save to save your changes. The
following screenshot shows the Sales node with the added
accounts.
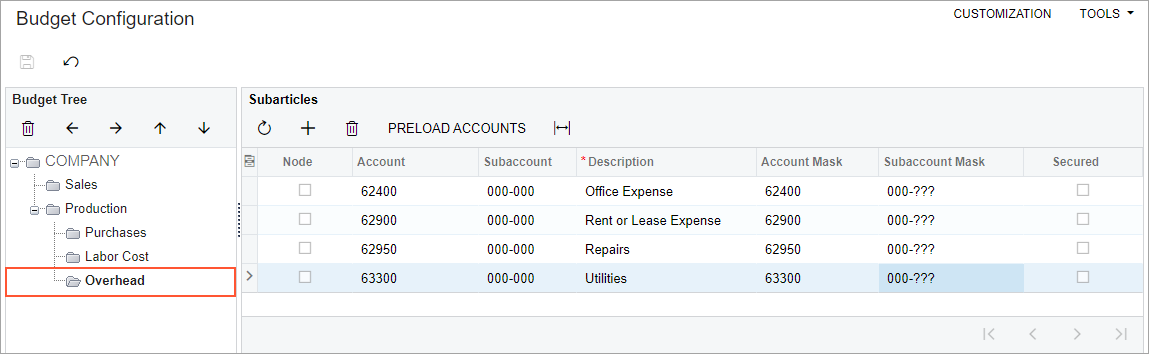
Figure 1. The Sales node with the added accounts 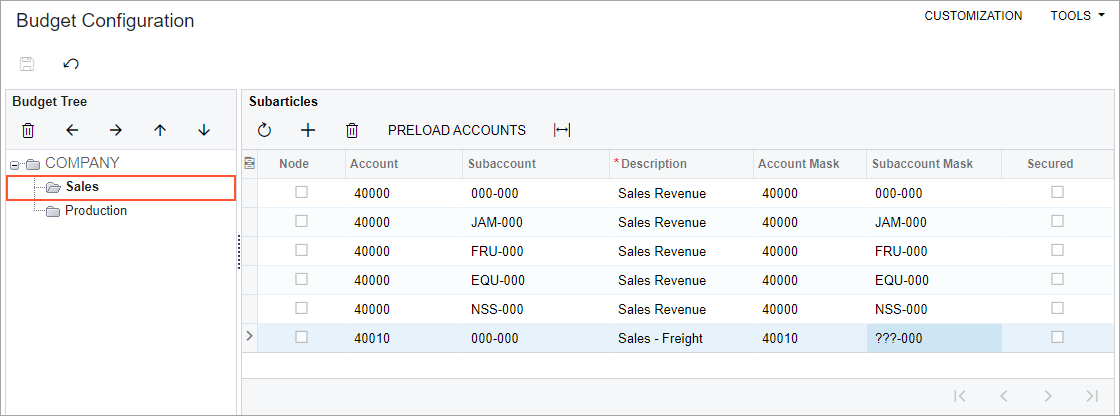
Step 4: Adding Subnodes to the Production Node
To add subnodes to the Production node, do the following:
- While you are still viewing the budget tree on the Budget Configuration (GL205000) form, in the Budget Tree pane, click the Production node.
- On the table toolbar of the Subarticles pane, click
Add Row, and specify the following settings for the
added row:
- Node: Selected
- Description: Purchases
- Click Add Row, and specify the following settings for the
added row:
- Node: Selected
- Description: Labor Cost
- Click Add Row, and specify the following settings for the
added row:
- Node: Selected
- Description: Overhead
- On the form toolbar, click Save to save your changes.
Step 5: Adding Leaves to the Subnodes of the Production Node
To add leaves to the subnodes of the Production node, do the following:
- While you are still viewing the budget tree on the Budget Configuration (GL205000) form, in the Budget Tree pane, click the Purchases subnode of the Production node.
- On the table toolbar of the Subarticles pane, add each of
the following leaves by clicking Add Row and entering the
settings of the leaf.
Node Account Subaccount Description Cleared 60000 000-000 Purchase Expense Cleared 61000 000-000 Advertising Expense Cleared 51300 000-000 COGS - Freight - On the form toolbar, click Save to save the budget
configuration, which is shown in the following screenshot.
Figure 2. The Purchases subnode of the Production node 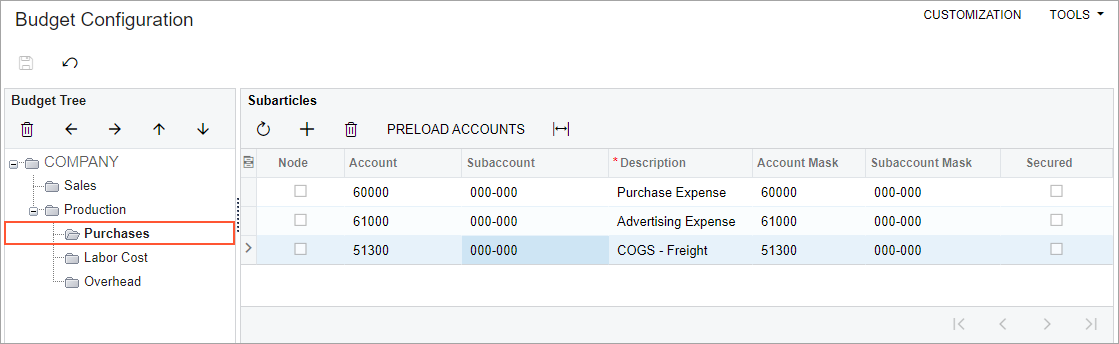
- In the Budget Tree pane, click the Labor Cost subnode of the Production node.
- On the table toolbar of the Subarticles pane, click Preload Accounts.
- In the Preload Accounts dialog box, which opens, specify
the following settings:
- Account From: 69500 - Salaries and Wages
- Account To: 69500 - Salaries and Wages
- Subaccount Mask: 000-???
- Click OK in the dialog box.
The system loads all the accounts that match the specified account and subaccount masks.
- In the Subarticles pane, remove the row with the 69500 account and 000-000 subaccount, and a row with the 69500 account and the 000-ENG subaccount.
- On the table toolbar of the Subarticles pane, click
Add Row and specify the following settings for the
row:
- Node: Cleared
- Account: 69550 - Bonus Expenses
- Subaccount: 000-000
- On the form toolbar, click Save to save the budget
configuration, which is shown in the following screenshot.
Figure 3. The Labor Cost subnode of the Production node 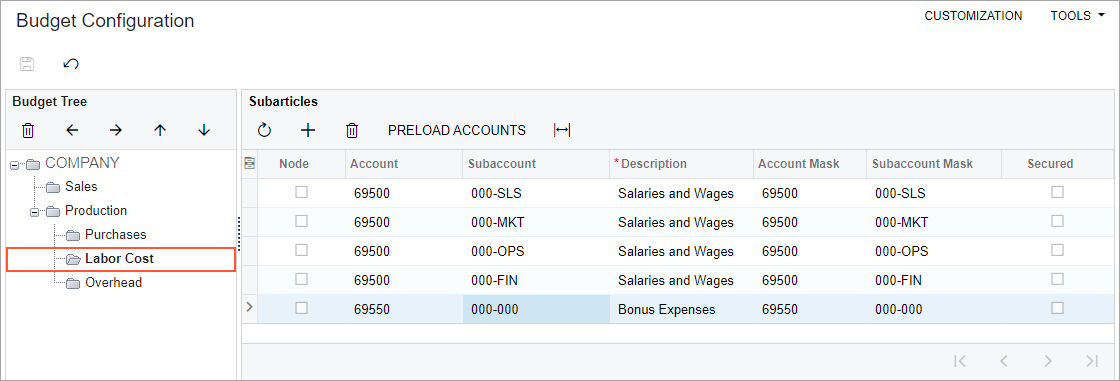
- In the Budget Tree pane, click the Overhead subnode of the Production node.
- On the table toolbar of the Subarticles pane, add each of
the following leaves by clicking Add Row and entering the
settings of the leaf.
Node Account Subaccount Description Account Mask Subaccount Mask Cleared 62400 000-000 Office Expense 62400 000-??? Cleared 62900 000-000 Rent or Lease Expense 62900 000-??? Cleared 62950 000-000 Repairs 62950 000-??? Cleared 63300 000-000 Utilities 63300 000-??? - On the form toolbar, click Save to save the budget
configuration, which is shown in the following screenshot.
Figure 4. The Overhead subnode of the Production node