
Staff Schedules: Modifying Working Hours on the Schedule Board
The staff working schedule board is a dashboard that displays the available and unavailable time of the selected staff member. On this two-dimensional board, the horizontal dimension displays dates, and the vertical dimension displays times within the dates. The system places the elements appropriately with regard to the two dimensions of the board. Unspecified time (such as nighttime hours) has a plain white background, available working time is shaded in blue, and occupied time (when appointments are planned to take place) is shaded in red.
You use the staff working schedule board to modify the generated working schedules of the staff members by deleting working time slots or adjusting the starting and ending times of work.
Story
Suppose that the SweetLife Service and Equipment Sales Center needs to more effectively manage the availability of staff members. The service manager wants to know every staff member's working and unavailable hours, as well as to be able to schedule appointments and adjust a staff member's working schedule on the staff schedule board.
Acting as a service manager, you will modify the working hours for a particular day. (In this activity, you will also remove working hours for a specific day, for educational purposes.)
Configuration Overview
In the U100 dataset, the following tasks have been performed to support this activity:
- The minimum system configuration, which is described in Company with Branches that Do Not Require Balancing: General Information, has been performed.
- The SWEETLIFE company has been created on the Companies (CS101500) form. This company has multiple branches created on the Branches (CS102000) form, including SWEETEQUIP (Service and Equipment Sales Center).
- On the Service Management Preferences (FS100100) form, the minimum settings have been specified, including specifying the numbering sequences and work calendar, for the service management functionality to be used.
- On the Branch Locations (FS202500) form, the WEST BRIGHTON branch location of the SWEETEQUIP (Service and Equipment Sales Center) branch has been created.
- On the Users (SM201010) form, the frank user account has been created, and the EP00000042 (Chase Frank) employee has been associated with the user account. That is, the employee name has been selected in the Linked Entity box.
- On the Employees (EP203000) form, EP00000042 (Chase Frank) has been defined. On the General tab (Employee Settings section), the Staff Member in Service Management check box has been selected, so you can assign this employee to perform services.
- On the Staff Schedule Rules (FS202001) form, the work schedule rule has been defined for EP00000042 - Chase Frank, and on the Generate Staff Schedules (FS500400) form, the work schedule has been generated.
Process Overview
On the Staff Working Schedule Board (FS300500) form, you will review a staff member's schedule for the next month, modify the working hours for a specific day, and then remove the working hours for a particular day.
System Preparation
Before you begin modifying working hours, do the following:
- Launch the MYOB Acumatica website, and sign in to a company with the U100 dataset preloaded. You should sign in as a service manager by using the davis username and the 123 password.
- In the company to which you are signed in, ensure the Service Management feature has been enabled on the Enable/Disable Features (CS100000) form.
- On the Company and Branch Selection menu on the top pane of the MYOB Acumatica screen, select the Service and Equipment Sales Center branch.
- In the info area, in the upper-right corner of the top pane of the MYOB Acumatica screen, click the Business Date menu button, and select 1/1/2025 on the calendar. In this activity, you will create a work schedule rule on this business date.
- Make sure that you have completed the following prerequisite activity: Staff Schedules: To Create a Schedule Rule and Generate the Work Schedule.
Step: Modifying a Staff Schedule on the Schedule Board
To view and adjust the working schedule for a staff member, do the following:
- Open the Staff Working Schedule Board (FS300500) form.
- In the Date box on the upper right corner of the dashboard, select 1/1/2025 (see Item 1 in the following screenshot).
- In the Staff box on the upper pane of the dashboard,
select Chase Frank (Item 2). By default, the signed-in staff member is
selected in the Staff box.
The dashboard displays Chase Frank's working hours (shaded in blue), as shown in the following screenshot.
Figure 1. The Staff Working Schedule Board form 
Notice that the available and unavailable hours in the calendar start from the date that you selected when you created the schedule rule for this staff member.
- On the toolbar, click the Month button (see Item 1 in the
following screenshot) to view Chase Frank's working calendar from the current
date until the end of the current month.
Identify Chase Frank's next working day. (If necessary, move between dates by using the arrows in the top right corner of the toolbar.)
- Change Frank's working hours for the next working day to be from 8:00 AM to
11:00 AM (Item 2), by dragging the time slot borders. When you move the cursor
onto the schedule, the double-sided arrow appears on the edges of the time slot.
Click this arrow on the bottom edge of the time slot and move it vertically in
the same day until the button edge aligns with 11:00 AM. You can adjust the time
slot of any schedule by changing its starting and ending time.
Figure 2. Changed working hours 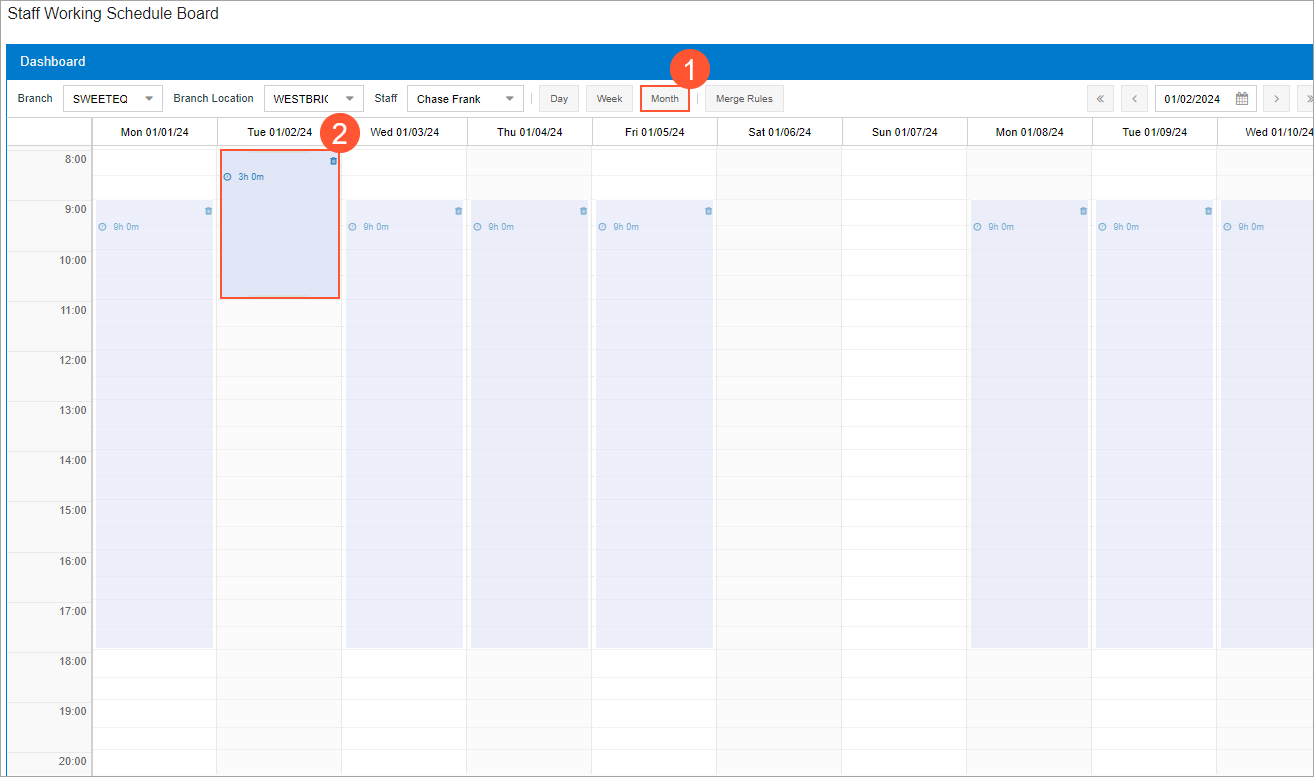
- Remove that working day from Chase Frank's working calendar by clicking the trash can icon in the top right corner of the corresponding time slot.