
UI Definition in HTML and TypeScript: To Convert an MYOB Acumatica Form to the Modern UI with the Converter
The following activity will walk you through the conversion of an MYOB Acumatica form from the Classic UI to the Modern UI. You will convert the form by using the built-in converter.
Story
Suppose that you have developed the Serviced Devices (RS202000) form for the Smart Fix company. The form has been developed for a previous version of MYOB Acumatica and is displayed in the Classic UI. You need to convert the form to the Modern UI and want to use the built-in converter.
Process Overview
You will modify the converter settings to fit your needs and convert the form to the Modern UI. You will then review the contents of the TypeScript and HTML files and adjust them. You will build the Modern UI sources for the form and review the resulting form.
System Preparation
Before you begin converting the Serviced Devices (RS202000) form, do the following:
- Complete the following prerequisite activity: Modern UI Development: To Deploy an Instance with Custom Forms and the Modern UI. The prepared instance contains the Serviced Devices (RS202000) form.
- Perform the prerequisite actions and build the source code for the first time, as described in Modern UI Development: To Build the Source Code of All MYOB Acumatica Forms for Modern UI Development.
Step 1: Adjusting the Converter Settings
The built-in converter comes with default settings. You need to adjust them to have the following results after conversion:
- The views are declared in the RS202000.ts file instead of a separate views.ts file.
- The files of the Serviced Devices (RS202000) form are saved in the FrontendSources\screen\src\development\screens\RS\RS202000 folder of the instance instead of a ZIP file.
To configure the converter, add the shouldFilesBeDownloaded and declareViewsInViewModelFile attributes in the px.core\ui\screenConverter tag of the web.config file of the instance, as shown in the following code.
<ui>
  <screenConverter usingOfPXJoinSyntaxEnabled="true"
    shouldFilesBeDownloaded="false"
    declareViewsInViewModelFile="true"/>
</ui>web.config file by default.Step 2: Generating the Source Files with the Converter
Now you can generate the source files of the form by using the converter. To generate the files, do the following on the Serviced Devices (RS202000) form:
- On the Customization menu, click Convert to Modern
UI.
The system generates the files, saves them in the FrontendSources\screen\src\development\screens\RS\RS202000 folder of the instance, and displays a notification that the conversion has completed.
- Close the notification by clicking OK.
- Optional: Move the generated files from the development folder to the
following
location.
FrontendSources\screen\src\screens\RS\RS202000Note:Since MYOB Acumatica 2025 R2 RC, all files in the development folder can be built and added to the customization project so you don't need to move them to the \screen\src\screens\ folder.
Step 3: Adjusting the Generated TypeScript File
The generated TypeScript file may contain unnecessary import directives. To clean up the code, do the following:
Review the RS202000.ts file.
The TypeScript code contains the
RS202000screen class, which extends the PXScreen class and includes a property for the data view of the form. The code also contains theRSSVDeviceview class, which extends the PXView class.- Adjust the file as follows:
- Remove unnecessary import directives.
- Fix any formatting issues.
- Adjust the name in the viewInfo decorator, which specifies the container name. (This name is used as an object name during the configuration of particular functionality, such as workflows and import and export scenarios.)
The resulting file looks as follows.
import {
	createSingle, PXScreen, graphInfo, viewInfo, PXView, PXFieldState
} from "client-controls";

@graphInfo({
	graphType: "PhoneRepairShop.RSSVDeviceMaint",
	primaryView: "ServDevices",
})
export class RS202000 extends PXScreen {
	@viewInfo({containerName: "Service Devices"})
	ServDevices = createSingle(RSSVDevice);
}

// View
export class RSSVDevice extends PXView  {
	DeviceCD : PXFieldState;
	Description : PXFieldState;
	Active : PXFieldState;
	AvgComplexityOfRepair : PXFieldState;
}
Step 4: Adjusting the Generated HTML File
The generated HTML file may contain unnecessary code elements and inaccurate IDs. To adjust the file, do the following:
- Review the RS202000.html file.
The HTML code includes one qp-template element with the 1-1 name, which organizes the elements on the form into two columns of equal width. Each column is defined with the qp-fieldset element, which is marked with the slot attribute to identify the column of the template to which the fieldset belongs. Each fieldset includes the field elements for UI elements that appear on the form.
- Adjust the file as follows:
- Move fields from the fieldset with
slot="B"to the end of the fieldset withslot="A"and remove the fieldset withslot="B". Since the form has only four fields, it is better to organize them in one column. - Change the IDs so that they match the guidelines for IDs. You can use the following IDs:
- For the qp-template tag:
form-ServDevices - For the qp-fieldset tag:
fsColumnA
Tip:You can find the guidelines for IDs of particular UI components in UI Component Guide. - For the qp-template tag:
- Remove the wg-container attribute because you do not have tests for the Classic UI of the Serviced Devices (RS202000) form, which can be reused for the Modern UI. (For details about the tests, see Testing the Modern UI.)
- Fix any formatting issues.
The resulting HTML code looks as follows.
<template> <qp-template id="form-ServDevices" name="1-1"> <qp-fieldset id="fsColumnA" slot="A" view.bind="ServDevices"> <field name="DeviceCD"></field> <field name="Description"></field> <field name="Active"></field> <field name="AvgComplexityOfRepair"></field> </qp-fieldset> </qp-template> </template> - Move fields from the fieldset with
Step 5: Building the Source Code and Viewing the Form
Now you can build the source files and view how the converted form looks in the Modern UI. Do the following:
- Build the source code of the Serviced Devices (RS202000) form. For details on
how to do it, see Modern UI Development: To Build the Source Code of a Particular Form for the Modern UI Development.Note:When you build the generated files, make sure they are located in the src/screens folder. The files that were generated in the development folder are ignored.
- While you are on the Classic UI of the Serviced Devices (RS202000) form, click on the form title bar. The Modern UI for the form is displayed.
- In the Device Code box, click the selector icon.
The lookup table opens, as shown in the following screenshot.
Figure 1. The lookup table 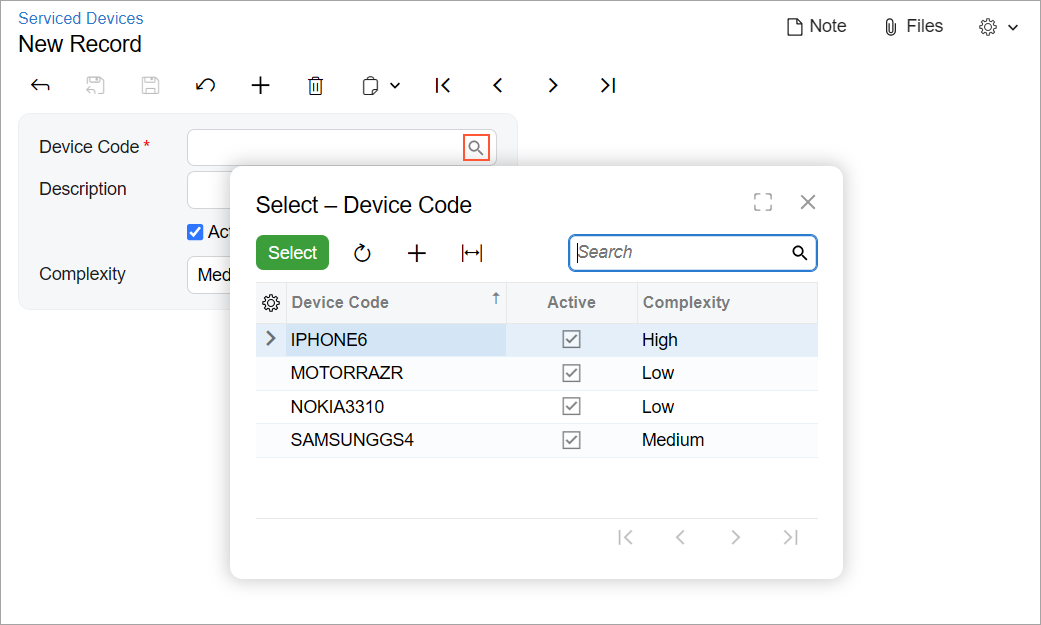
- In the lookup table, select the MotorRAZR device.
The rest of the elements on the form are filled in with the MotorRAZR device properties, as shown in the following screenshot.
Figure 2. The device properties 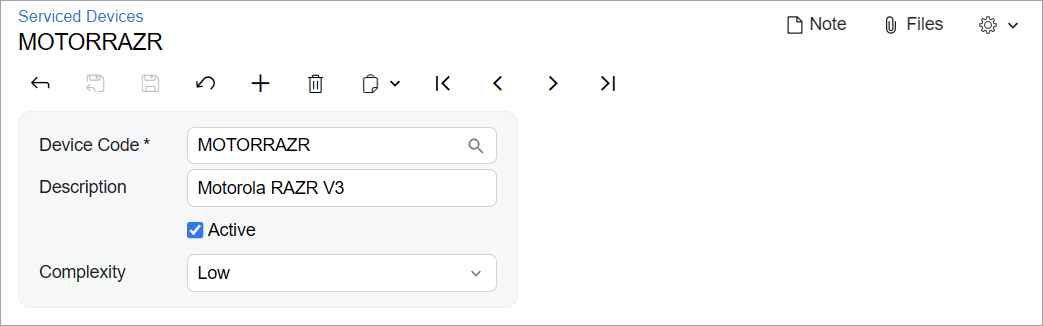
- Clear the Active check box.
- On the form toolbar, click Save.