- Contents
- Index
- Search

Show results that include all search words
Entering Costs
Select the Costs tab.

|
Field |
Description |
|
Group select |
The first column contains a checkbox that enables you to select the line as part of a group of lines to perform actions on using the right-click menu. |
|
Narrative |
The second column displays the You can only add or edit a narrative after the line has been saved, using Save or Save & Exit. |
|
Code |
A product code. Enter ? and press Tab and select the number from the list if you don't know it. |
|
Description |
A product description taken from the stock records. You can change the description. |
|
Quantity |
The quantity to be supplied. The default is 1. |
|
Cost |
The cost of the product taken from the stock records. You can change it. |
|
Sell |
The selling price of the product. You can change it. |
|
Status |
The status of this line:
|
|
Total |
This value is automatically calculated. |
|
Date |
The date on which cost was incurred. |
|
GST No |
Select the GST number from the list. This sets the GST rate. |
|
Disc (%) |
The discount applied to the selling price of this line. |
|
Mark up % |
This value is automatically calculated, but you can change it. When you start typing an entry, a screen pops up. Enter the number for the new markup, ignoring the % sign — for example, 112.5. Click OK to confirm. |
|
Invoice date |
The date of last invoice. |
|
Kit No |
When you add a kit to the job, the lines of the kit are given a kit incidence number that holds the components of the kit together. Lines that are not part of a kit have the value -1. |
|
Line # |
The line number. You can use this to re-sequence the lines from their original sequence. |
|
Source Ref |
An optional reference number. |
|
Serviceable Unit |
If the line relates to a serviceable unit, enter the unit's code here. |
|
WIP Out Date |
The date and time when the cost was moved out of work in progress — for example, when it was sold or written off. |
|
Labour Allowance |
Specify a unit labour allowance associated with a product. |
|
Total Labour Allowance |
This is the extended labour allowance. You cannot edit this value. |
|
Cost Type |
Enter a Cost Type, if types are used. Type ? and press Tab to select from a list of cost types. |
|
Cost Group |
Enter a Cost Group, if groups are used. Type ? and press Tab to select from a list of cost groups. This field is automatically populated if the cost type is entered first. You can change it. |
|
To WIP |
You can't change this field. |
Right click on the column header and click Select Visible Columns to display these additional columns:
|
Field |
Description |
|
Sell Inc GST |
Sell price including GST. |
|
From loc |
Enter a number indicating the From location or type ? and press Tab to search for location and double-click to select. |
|
To Location |
WIP is locked. No entry can be made in this screen. |
|
Total Cost |
This value is automatically calculated. |
|
GST |
The GST value per unit. |
|
GST Total |
The total line value of GST. |
|
Total Inc GST |
The line total including GST |
|
Staff Name |
The name of an employee. If you don't know the name, press ? and press Tab to search for the employee. Double-click on the name. |
|
Length, Width and Depth |
Applies additional factors to the quantity. These default to 1 |
|
Total Quantity |
The value that's the result of the Length, Width, and Breadth fields multiplied by quantity. |
|
Analysis codes 1 and 2 |
Use these field to code for posting to the General Ledger. |
|
Showline |
Select Y to include the line on an invoice This applies to kit component lines if the component lines is hidden. |
|
Spread |
Select Y to take the line into account when using the spread function to change the quote total. |
|
Schedule # |
The billing schedule number when using progress invoicing. |
Toolbar Options
Send All to Invoice - Sends all lines to the Invoice tab.
Re-sorting Lines - You can move quote lines up and down in the order by selecting the line then clicking the Up or Down arrows on the toolbar.
Copy - Click this button to append lines defined in another job to the current job.
Note: If you are copying serialised lines from another job, you will be given the option of pre-assigning serial numbers to them.
Right-click Menu Options
Right-clicking on a quote or budget line show options for the line, such as copying specific lines to the Timesheet, Cost, or Invoice tabs.
Send Line to Invoice/Send All to Invoice - These options enable you to send the selected line, or all lines, to the Invoice tab.
Split Line - Splits a line that has a quantity greater than 1 into two lines. You're prompted for the quantity to be split-off into the new line:
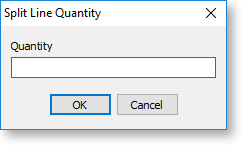
The remainder of the quantity is left on the original line.
Add Narrative (CTRL+N) - Use this option to add or edit a line-level narrative.
Cancel Line - If the stock item is material, it is taken from work-in-progress and returned to the stock count. It does not add a cost or a sell price to the job. Serial numbers are unassigned.
Write-off Line - Writes the line item off. This is a cost to the job. It does not add to the job's selling price. Serial numbers remain assigned.
UnWrite-off - For lines that have been written off, this option generates new stock transactions to reverse the write off transactions. It returns the stock item to WIP.
Move Line to Another Job - Select this option to move the line item from one job to another. This option has these constraints:
- The stock item for the line must not be serialised item.
- The jobs must have the same currency.
- The source or destination job must not be read-only.
- The line must not be a kit component.
Select the destination job from the a search window that opens.
Attach Line to Kit - Select this option to add the line item to a selected kit. At least one kit must exist on the job before you can use this function.