
Processing of Transfers: Process Activity
In the following activity, you will learn how to transfer stock items between locations of the same warehouse in a single step by using the Scan and Transfer (IN304020) form.
Story
Suppose that you, as a warehouse worker of the SweetLife Fruits & Jams company, have a task to transfer all jam jars from one location of the wholesale warehouse to another, which will clear the origin location for a new batch of jam.
You will prepare the single-step transfer to reflect the movement of jam jars between the warehouse locations.
Configuration Overview
In the U100 dataset, the following tasks have been performed to support this activity:
- On the Enable/Disable Features (CS100000) form, the
following features have been enabled in the Inventory and Order
Management group of features:
- Multiple Warehouse Locations
- Warehouse Management
- Inventory Operations
- On the Warehouses (IN204000) form, the WHOLESALE warehouse has been created. On the Locations tab, the following warehouse locations have been defined: L3R3S1, L2R3S1, and WRITEOFF.
- On the Stock Items (IN202500) form, the
following stock items have been created, and the corresponding alternate IDs
with the Barcode type have been defined on the
Cross-Reference tab:Tip:For simplicity, in this activity, the alternate IDs will be further referred to as barcodes.
- APJAM96, which has the AJ96 barcode
- ORJAM96, which has the OJ96 barcode
- LEMJAM96, which has the LJ96 barcode
Process Overview
In this activity, acting as a warehouse worker, you will do the following:
- Open the Storage Summary (IN409010) form and review the quantities of the items to be transferred from the L3R3S1 location. Then you will open the Scan and Transfer (IN304020) form and enter the settings of a transfer document.
- On the Scan and Transfer form, remove a partial quantity of an item from the document.
- On the same form, add a line with other origin and destination locations to the same document, and enter an item and its quantity to be moved between these locations.
- Review and release the transfer document. Then you will open the Storage Summary form again and review the quantities of items in the L3R3S1 location.
System Preparation
Before you start processing transfers between warehouse locations, you need to sign in to a company with the U100 dataset preloaded. You should sign in as a warehouse worker with the perkins username and the 123 password.
Step 1: Creating a Transfer
Suppose that the L3R3S1 location contains one 96-ounce jar of apple jam, one 96-ounce jar of lemon jam, and two 96-ounce jars of orange jam. To create a single-step transfer that will register the movement of these items from the L3R3S1 location to the L2R3S1 location of the WHOLESALE warehouse, do the following:
- On the Storage Summary (IN409010) form, specify WHOLESALE as the Warehouse and L3R3S1 as the Location. In the table, notice that the location contains one jar of APJAM96, one jar of LEMJAM96, and two jars of ORJAM96.
- Open the Scan and Transfer (IN304020) form.
- In the Scan box, type L3R3S1 as the origin location and press Enter.
- Enter L2R3S1 as the destination location.
- Enter AJ96 as the first item to be transferred. The system adds a line with one unit of the item to the table on the Transfer tab.
- Enter LJ96 as the next item to be transferred. The system adds a line with one unit of the item to the table on the Transfer tab.
- Enter OJ96 as the last item to be transferred. The system adds a line with one unit of the item to the table on the Transfer tab.
- Set the quantity of the last entered item to 2 as
follows:
- On the form toolbar, click Set Qty. The system prompts you to enter the item quantity.
- In the Scan box, enter 2.
- On the form toolbar, click Save. The system creates the transfer with the data you have entered. Notice that it has inserted the transfer number in the Reference Nbr. box of the Summary area.
You have created the inventory transfer for moving APJAM96, LEMJAM96, and ORJAM96 between the L3R3S1 and L2R3S1 locations.
Step 2: Removing Items from the Transfer
Suppose that while you were moving jars of ORJAM96 between the locations, you noticed that the lid of one of the jars had been dented. The warehouse manager asked you to move this jar to the warehouse location for items to be written off. The location is indicated as WRITEOFF in the system. To remove one jar of orange jam from the inventory transfer, do the following:
- While you are still viewing the transfer on the Scan and Transfer (IN304020) form, on the form toolbar, click Remove to switch to Remove mode.
- In the Scan box, enter L3R3S1 as the origin location.
- Enter L2R3S1 as the destination location.
- Enter OJ96 as the item to be removed from the transfer. On the Transfer tab, the system decreases the value of the Quantity column in the line with the ORJAM96 item by 1.
You have removed one unit of the ORJAM96 item from the transfer. Now you need to add another line to the transfer to reflect the movement of the jar to the WRITEOFF location.
Step 3: Adding Items to Be Transferred Between Other Locations
To add to the same transfer the line that reflects the movement of one jar of ORJAM96 from the L3R3S1 location to the WRITEOFF location, do the following:
- While you are still viewing the transfer on the Scan and Transfer (IN304020) form, in the Scan box, enter L3R3S1 as the origin location.
- Enter WRITEOFF as the destination location.
- Enter OJ96 to indicate the item to be transferred. The system adds the line with one unit of the item to the table on the Transfer tab.
You have added another line to the transfer.
Step 4: Reviewing and Releasing the Transfer
Now that you have added all required items to the transfer, you can release the it. Do the following:
- While you are still viewing the transfer on the Scan and Transfer
(IN304020) form, review the lines that have been added to the table on the
Transfer tab. They should have the settings indicated
in the following table.
Inventory ID Location To Location Quantity APJAM96 L3R3S1 L2R3S1 1 LEMJAM96 L3R3S1 L2R3S1 1 ORJAM96 L3R3S1 L2R3S1 1 ORJAM96 L3R3S1 WRITEOFF 1 - On the form toolbar, click Release. The system releases the transfer.
- Click the Edit button next to the Reference Nbr. box.
- On the Transfers (IN304000) form, which opens, review the
inventory transfer transaction. Make sure it includes the needed lines and is
assigned the Released status, as shown in the following screenshot.
Figure 1. Inventory transfer transaction 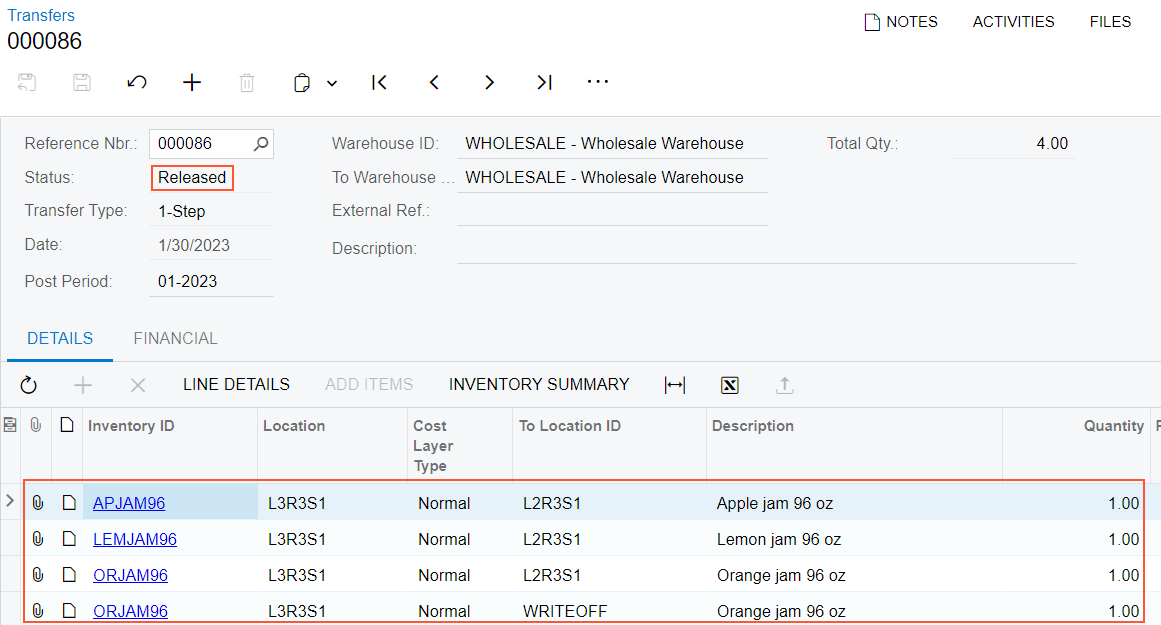
- On the Storage Summary (IN409010) form, do the following:
- Warehouse: WHOLESALE
- Location: L3R3S1
- Review the table. It must contain no lines, which indicates that you have successfully moved all items from the location.
You have successfully processed the transfer for moving jam jars between warehouse locations.