
Dashboard Design: To Modify a Dashboard
The following activity will show you how to modify your copy of an MYOB Acumatica dashboard.
Story
Suppose that you are Gladys Peters, a new manager of the SweetLife Fruits & Jams company workshop. You have been using the predefined AR Clerk dashboard to stay informed about accounts receivable. However this dashboard displays too many parameters and you need to adjust it to your liking.
Process Overview
In this activity, you will do the following:
- Switch on design mode for the predefined dashboard
- Remove widgets from the dashboard
- Rearrange widgets on the dashboard
- Resize widgets
- Specify the dashboard as your MYOB Acumatica home page
System Preparation
Before you start modifying the dashboard, launch the MYOB Acumatica website, and sign in to a tenant with the U100 dataset preloaded as workshop manager Gladys Peters with the peters username and the 123 password.
Step 1: Switching On Design Mode for the Predefined Dashboard
Suppose that you need to save a copy of the dashboard and switch to design mode so that you can modify it for your personal use.
To switch on design mode for the dashboard, do the following:
- Open the Dashboards workspace.Tip: If the Dashboards menu item is not on the main menu, click the More Items menu item and then click the Dashboards tile.
- In the Dashboard: Finance category, click AR Clerk. The AR Clerk dashboard opens.
- On the dashboard title bar, click the Create User Copy
button. The system creates your personal copy of the dashboard. Notice that the
Design button has appeared on the dashboard title
bar.Attention: You can see the Create User Copy button on the dashboard title bar before you switch on design mode for a dashboard for the first time. Once you have created your copy of the dashboard, the Design button is displayed on the dashboard title bar.
- Click the Design button. You have switched the dashboard to design mode.
- Click the Design button again to switch to view mode for the dashboard.
Step 2: Removing Widgets from the Dashboard
Suppose that in your copy of the AR Clerk dashboard, you do not need the following widgets, which are related to documents and cash inflow: Documents on Hold, Unreleased Documents in Prior Months, Documents to Release and two Cash Inflow for 7 Days widgets. Also you do not need to view the Overdue by Salesperson and Top 10 Overdue Balances charts.
To remove these widgets from the dashboard, do the following:
- While you are still viewing the AR Clerk dashboard in view mode, click the Design button on the dashboard title bar to switch on design mode for the dashboard.
- On the widget title bar of the Documents on Hold widget, click the
Remove button (
 )
which is located at the right of the widget.
)
which is located at the right of the widget. - In the warning dialog box that opens click OK. The widget is removed from the dashboard, and the remaining widgets are automatically rearranged.
- By performing similar actions to those in the previous two instructions, delete
the following widgets from your dashboard:
- Unreleased Documents in Prior Months
- Documents to Release
- Both Cash Inflow for 7 Days widgets
- Overdue by Salesperson
- Top 10 Overdue Balances
You can see the modified dashboard in the following screenshot.
Figure 1. The dashboard without the document-related and cash inflow widgets 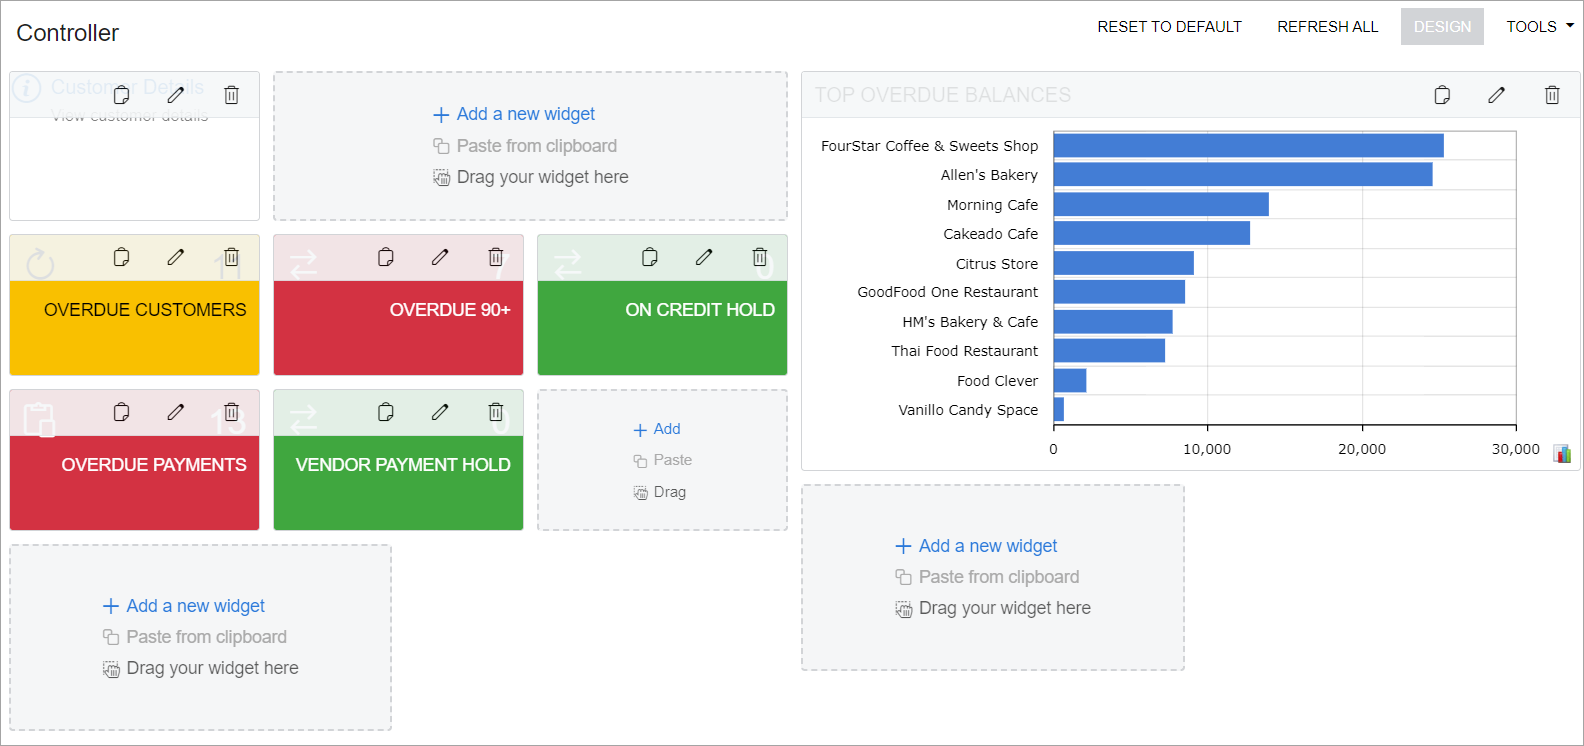
- On the dashboard title bar, click the Design button to switch to view mode for the dashboard.
Step 3: Rearranging Widgets on the Dashboard
Suppose that you want to move the Total AR widget to the upper-left part of the dashboard, and move the AR Aging widget to the upper-right part of the dashboard. Also, you want to move the AR Overdue and Average Days to Pay widgets to the right working area, and place the Statements to Email widget next to the Statements to Print one.
To rearrange the widgets on the dashboard, do the following:
- While you are still viewing the AR Clerk dashboard in view mode, click the Design button on the dashboard title bar to switch on design mode.
- Drag the Total AR widget to the upper-left part of the dashboard.
- Drag the AR Aging widget to the upper-right part of the dashboard.
- Drag the AR Overdue and Average Days to Pay widgets, one by one, to the right working area.
- Drag the Statements to Email widget to the widget placeholder next to the Statements to Print widget.
You can see the modified dashboard in the following screenshot.

Step 4: Resizing Widgets
Suppose that you want to resize the Total AR widget, so that it had the same height as the AR Aging widget. Also, you want to make the Days Sales Outstanding widget wider, so that the left working area had no empty gaps.
To resize these widgets, do the following:
- While you are still viewing the AR Clerk dashboard in design mode, in the left working area, drag the bottom right corner of the Total AR widget upwards to make its height the same as the height of the AR Aging widget.
- Drag the right border of the Days Sales Outstanding to the right until it
occupies the gap in left working area.
You can see the modified dashboard in the following screenshot.
Tip: The width of the widgets and number of available widget placeholders depend on the size of your browser window. You may need to resize other widgets as well to get the same arrangement.Figure 3. The dashboard with the resized widgets 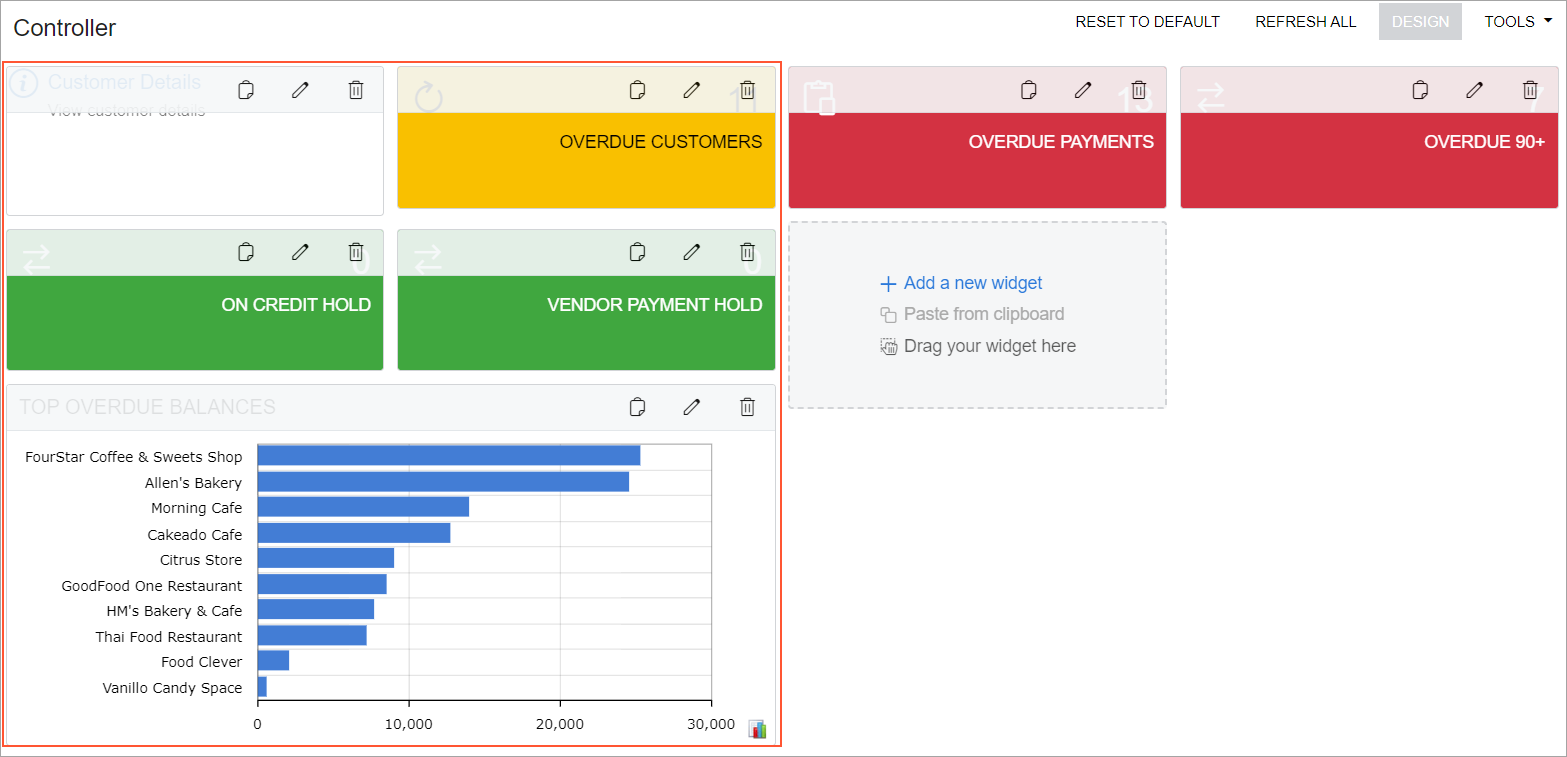
- On the dashboard title bar, click the Design button to switch to view mode for the dashboard.
Step 5: Defining the Dashboard as Your MYOB Acumatica Home Page
To make your modified AR Clerk dashboard your home page in MYOB Acumatica, do the following:
- In the top pane, click the User menu button (where your username appears), and on the User menu, click My Profile. The User Profile (SM203010) form opens.
- On the General Info tab (Personal Settings section), in the Home Page box, click the magnifier button to open the lookup table.
- In the Search box of the lookup table, type ar clerk to search for the AR Clerk dashboard.
- In the Title column, double-click the AR Clerk entry, which has DBAR0001 in the Screen ID column. This selects the value, closes the lookup table, and fills in the Home Page box.
- On the form toolbar, click Save to save your changes.
- In the upper left corner of the MYOB Acumatica screen, click the Home button to make sure that the AR Clerk dashboard, which you have defined as your home page, opens.