
Project Templates and Common Tasks: Process Activity
This activity will walk you through the process of configuring project templates. You will create a common task and add this task to a project. You will also learn how to create a new project based on a project template.
Story
Suppose that the Lake Cafe customer has ordered a juicer, along with the following services from the SweetLife Fruits & Jams company: site review, installation, and training of employees on operating the juicer. SweetLife's project accountant has analyzed the past projects and realized that customers are usually doing typical fixed-price projects that involve the sale of a juicer, along with the services of installation and site review. Sometimes customers' projects also involve training on operating the juicer.
The project accountant decides to create a new project template for such a project, and to create a common task for training on operating juicers (so the task can be quickly added to projects as needed). Then the project accountant creates a project for the customer based on the created project template and common task.
You will perform the needed actions in the system, acting as the project accountant.
Configuration Overview
In the U100 dataset, the following tasks have been performed to support this activity:
- On the Enable/Disable Features (CS100000) form, the Projects feature has been enabled to provide support for the project accounting functionality.
- On the Billing Rules (PM207000) form, the COMBINED billing rule has been configured.
Process Overview
You create a project template on the Project Templates (PM208000) form. You create a common task on the Common Tasks (PM208030) form. Then you use the Projects (PM301000) form to create a project based on the created project template and add the common task to the project.
System Preparation
To sign in to the system and prepare to perform the instructions of the activity, do the following:
- Launch the MYOB Acumatica website, and sign in to a company with the U100 dataset preloaded; you should sign in as project accountant by using the brawner username and the 123 password.
- In the info area, in the upper-right corner of the top pane of the MYOB Acumatica screen, make sure that the business date in your system is set to 1/30/2025. If a different date is displayed, click the Business Date menu button and select 1/30/2025 on the calendar. For simplicity, in this activity, you will create and process all documents in the system on this business date.
Step 1: Creating a Project Template
To create a new project template, do the following:
- On the Project Templates (PM208000) form, add a new record.
- In the Summary area, specify the following settings:
- Template ID: INSTALL
- Description: Installation project
- On the Summary tab, specify the following settings:
- Project Properties section:
- Revenue Budget Level: Task and Item
- Cost Budget Level: Task
- Project Manager: EP00000001
- Billing and Allocation Settings section:
- Billing Period: On Demand
- Billing Rule: COMBINED
- Project Properties section:
- On the Tasks tab, add a new row, and specify the
following settings in the row:
- Task ID: PHASE1
- Type: Cost and Revenue Task
- Description: Site review
- Add one more row, and specify the following settings:
- Task ID: PHASE2
- Type: Cost and Revenue Task
- Description: Installation
By default, the system inserts By Billing Period as the Billing Option of each project task and the COMBINED billing rule as the Billing Rule.
- On the Revenue Budget tab, add each line of the project
revenue that is listed in the following table by clicking Add
Row and specifying the listed settings in the row.
Project Task Inventory ID Original Budgeted Quantity Unit Rate PHASE1 SITEREVIEW 2 50 PHASE2 JUICER10 1 1500 PHASE2 INSTALL 4 100 For each line, the system inserts REVENUE as the Account Group because the sales account specified in the settings of the stock and non-stock items is mapped to this account group, which has the Income type.
- Save your changes to the project template.
When you save the project template, the system automatically creates project template tasks corresponding to the tasks you have added to the project template.
- On the form toolbar, click Activate to assign the project template the Active status, which makes it possible to use the project template for creating projects.
- On the Tasks tab, in the Task ID
column, click the PHASE1 link to open the task on the Project Template Tasks (PM208010) form.
On the Summary tab of this form, notice that the Automatically Include in Project check box is selected by default. With this setting, the project template task will be automatically included in any project created based on the associated project template.
You have created a project template and project template tasks. In the next step, you will create a common task.
Step 2: Creating a Common Task
A common task is a task that can be added to any new or existing project (unlike a project template task, which is associated with just one project template). To create a common task, perform the following instructions:
- On the Common Tasks (PM208030) form, add a new record.
- In the Summary area, specify the following settings:
- Task ID: TRAINING
- Description: Training on juicer usage
- On the Budget tab, add a budget line with the following
settings:
- Account Group
LABOR
The system automatically inserts Expense in the Type column when you select the account group.
- Inventory ID: TRAINING
- Cost Code: 00-000
- Description: Training on juicer usage
- UOM: HOUR
- Unit Rate: 50
- Account Group
LABOR
- Save your changes to the common task.
You have created a common task. In the next step, you will create a project based on the project template you have created.
Step 3: Creating a Project Based on the Project Template
To create a project based on template, do the following:
- On the Projects (PM301000) form, create a new project,
and specify the following settings:
- Project ID: INSTLAKE
- Customer: LAKECAFE
- Template: INSTALL
When you select the project template, the system fills in the relevant elements of the project with the settings specified for the template, including tasks and revenue budget lines.
- In the Summary area, enter Installation project for Lake Cafe as the Description of the project.
- On the Summary tab, clear the Change Order Workflow check box.
- Save your changes to the project.
- On the Tasks tab, make sure that the PHASE1 and PHASE2 tasks have been copied to the project from the selected project template.
- On the table toolbar of the tab, click Activate Tasks to change the status of the added tasks to Active.
- On the Revenue Budget tab, make sure that three revenue budget lines have been copied to the project from the selected project template.
- In the line with the PHASE1 task and the SITEREVIEW item, specify
4 as the Original Budgeted
Quantity.
When you enter the Original Budgeted Quantity in each line, the system automatically calculates the Original Budgeted Amount as the Original Budgeted Quantity multiplied by the Unit Rate (see the screenshot below).
- In the line with the PHASE2 task and the INSTALL item, specify 8 as the Original Budgeted Quantity.
- In the line with the PHASE2 task and the JUICER10 item, specify
2 as the Original Budgeted
Quantity.
Figure 1. Revenue budget lines in the project 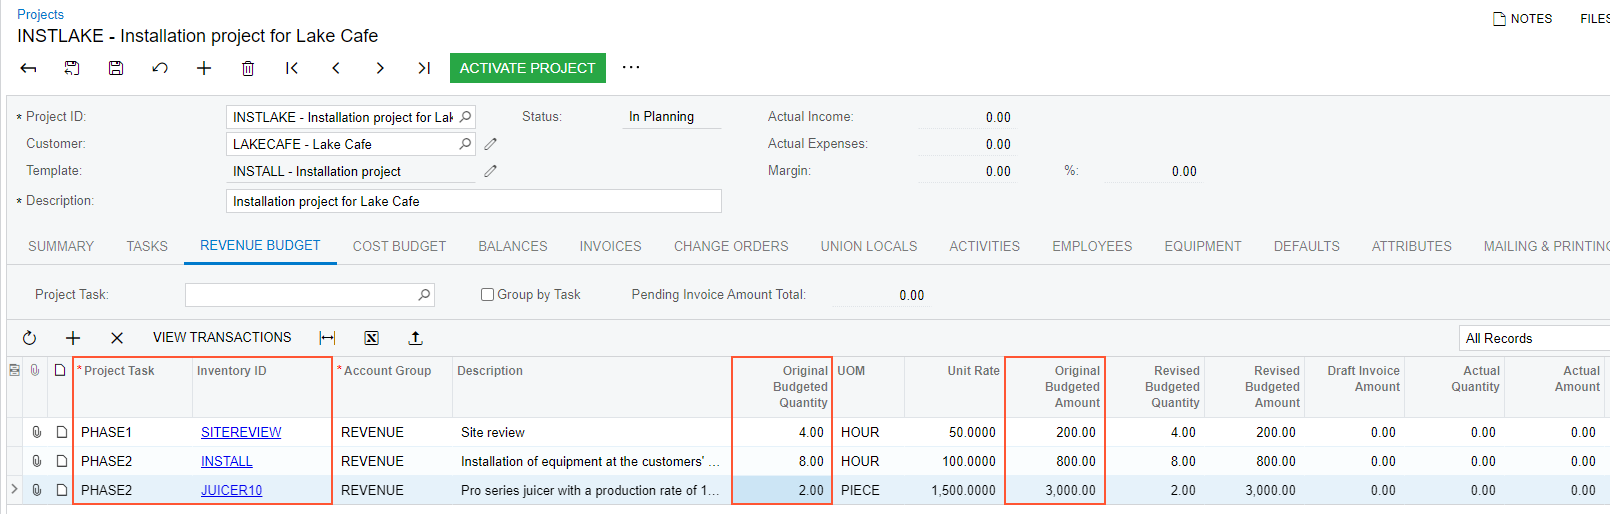
- Save the project.
- On the form toolbar, click Activate. The system assigns the project the Active status.
You have created the project based on the project template. In the next step, you will add the common task to the project.
Step 4: Adding the Common Task to the Project
To add the common task to the INSTLAKE project, perform the following instructions:
- While you are still reviewing the INSTLAKE project on the Projects (PM301000) form, on the table toolbar of the Tasks tab, click Add Common Tasks.
- In the Add Tasks dialog box, which opens, select the
check box in the unlabeled column for the line with the TRAINING common
task, and click Add Tasks & Close.
The system adds the common task to the project and closes the dialog box.
- On the Tasks tab, select Active as the Status in the line with the TRAINING task, which you just added.
- On the Cost Budget tab, make sure that the line with the TRAINING common task has been added to the cost budget of the project. Specify 1 as the Original Budgeted Quantity in this line.
- Save your changes to the project.
You have finished configuring the project based on a project template and have added the common task to the project.