
Tenant Maintenance: To Deploy an Instance with Multiple Tenants
The following activity will walk you through the process of creating an MYOB Acumatica application instance with three tenants. You will also make some changes to the tenants of the instance.
Story
Suppose that you are the system administrator for a group of companies, and you need to deploy the MYOB Acumatica application instance with three tenants, one for each of the companies included in the group. You also need to make some changes to the tenants and then delete one of the existing tenants.
Process Overview
In this activity, you will do the following:
- Deploy the MYOB Acumatica application instance with three tenants.
- Set up the visibility of a tenant.
- Delete an existing tenant.
System Preparation
Before you begin deploying an MYOB Acumatica application instance, make sure that you have performed the following prerequisite activity: MYOB Acumatica Installation On-Premises: To Install the MYOB Acumatica Configuration Wizard.
Step 1: Creating an Instance with Multiple Tenants and Changing Tenants’ Visibility Settings
To create a multitenant MYOB Acumatica instance, do the following:
- On the Start menu, click Acumatica ERP Configuration to open the MYOB Acumatica ERP Configuration Wizard.
- On the Welcome page, click Deploy a New Acumatica ERP Instance.
- On the Database Server Connection page, specify the following settings, and then
click Next to go to the next page:
- Server Type: Microsoft SQL Server
- Server Name: (local)
- Windows Authentication: Selected
- On the Database Configuration page, specify the following settings, and then
click Next to go to the next page:
- Create a New Database: Selected
- New Database's Name: AcumaticaMultitenant
- On the Tenant Setup page, do the following to configure the tenants of the
instance:
- Click the Create button twice to add two more new
tenants in addition to the default new tenant, so that there are three
new tenants in the list.
The system automatically assigns the following names to the tenants in the Tenant Name column:
- For a tenant with an ID of 2: Company
- For a tenant with an ID of 3: Company2
- For a tenant with an ID of 4: Company3
- In the first tenant in the list (the Company tenant),
double-click in the Parent Tenant ID
column.
Notice that you can select only the default parent tenant (the System tenant, which has an ID of 1).
- Select the Advanced Settings check box below the
table.
Now the wizard also displays the System tenant in the table. Notice that the Visible check box for this tenant is cleared, meaning that users do not see it.
- In the row with the Company tenant, clear the Visible check box.
- In the row with the Company3 tenant, double-click in the
Parent Tenant ID column and select 2,
as shown in the screenshot below.
This makes Company3 the child of Company. In this configuration, users will be able to sign in to only Company2 and Company3, because these tenants do not have children.
Figure 1. The tenants to be created for the instance 
- Click Next to go to the next page.
- Click the Create button twice to add two more new
tenants in addition to the default new tenant, so that there are three
new tenants in the list.
- On the Database Connection page, select Windows Authentication; click Next.
- On the Instance Configuration page, specify the following settings, and then
click Next to go to the next page:
- Instance Name: AcumaticaMultitenant
- Create Acumatica ERP Site: Selected
- Local Path to the Instance: The path on the local computer to the application instance
- On the Website Configuration page, specify the following settings, and then
click Next to go to the next page:
- Website Settings: Default Web Site
- Create Virtual Directory: Selected
- Virtual Directory Name: AcumaticaMultitenant
- Use Existing Application Pool: Selected
- List of existing application pools: DefaultAppPool
Leave the other settings without changes.
- On the Confirmation of Configuration page, click Finish, and wait while the new application instance is created.
- After the installation is completed, click OK in the dialog box to return to the MYOB Acumatica ERP Configuration Wizard.
- Click Perform Application Maintenance.
- Click the row with the AcumaticaMultitenant instance, and then click
Launch.
The instance opens in a new tab of your default browser. Notice that the instance’s Sign-In page has the tenant selection box above the Sign In button with the Company2 and Company3 tenants you have created in this step, as shown in the following screenshot.
Figure 2. The Sign-In page with the tenant selection box 
Step 2: Setting Up Tenant Visibility
To make changes to tenants of the created instance, do the following:
- Go back to the MYOB Acumatica ERP Configuration Wizard.
- On the Application Maintenance page, click the row with the AcumaticaMultitenant instance, and click Maintain Tenants.
- In the SQL Server Authentication dialog box, leave Windows
Authentication selected, and click
OK.
The Tenant Setup page is displayed for the selected instance.
- Click Create to add one more tenant to the
instance.
The system adds a new row with the Company4 tenant to the list.
- Select the Secure Tenant on the Sign-In Page check
box.
This hides the tenant selection box on the Sign-In page until a user enters a username and password. After the user is authorized, the system displays the tenant selection box with the list of tenants to which the user can sign in.
- In the row with Company3 tenant, clear the check box in the
Visible column.
This makes the tenant invisible to all users. Only the Company2 and Company4 tenants have the Visible check box selected, as shown in the following screenshot.
Figure 3. The restriction of tenant visibility on the Sign-In page 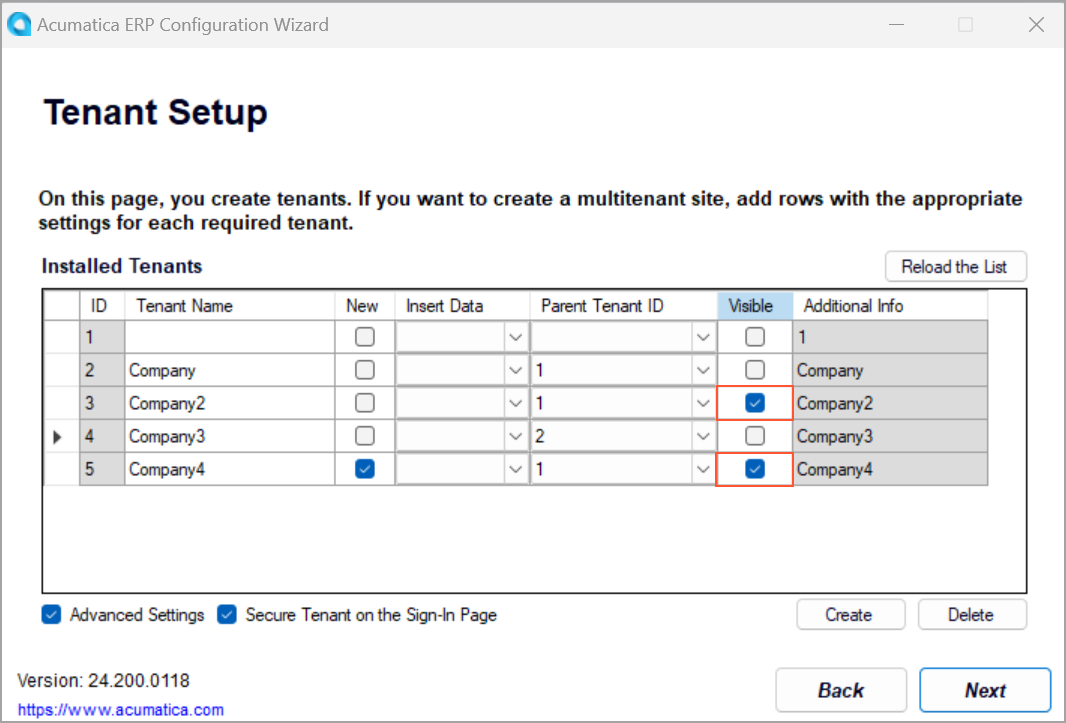
- Click Next.
- On the Confirmation of Configuration page, click Finish.
- After the application instance is updated, click OK in the dialog box to return to the MYOB Acumatica ERP Configuration Wizard.
- Click Perform Application Maintenance.
- On the Application Maintenance page, click the row with the
AcumaticaMultitenant instance, and click
Launch.
The instance opens in a new tab of your default browser. Notice that the instance Sign-In page does not have the tenant selection box.
- Enter the default username and password for the application instance
(admin and setup, respectively).
Because the admin user has access to all the tenants you have created, the tenant selection box is displayed for the user. Notice that only Company2 and Company4 are available for signing in, as shown in the following screenshot.
Figure 4. The tenant selection box on the Sign-In page 
- Select the Company2 tenant in the tenant selection box and click
Sign In.The Sign-In page refreshes and shows the read-only tenant selection box with the selected Company2 tenant. The system prompts you to enter a new password and confirm it, as shown in the following screenshot.
Figure 5. Creation of a new password for a tenant in a multitenant instance 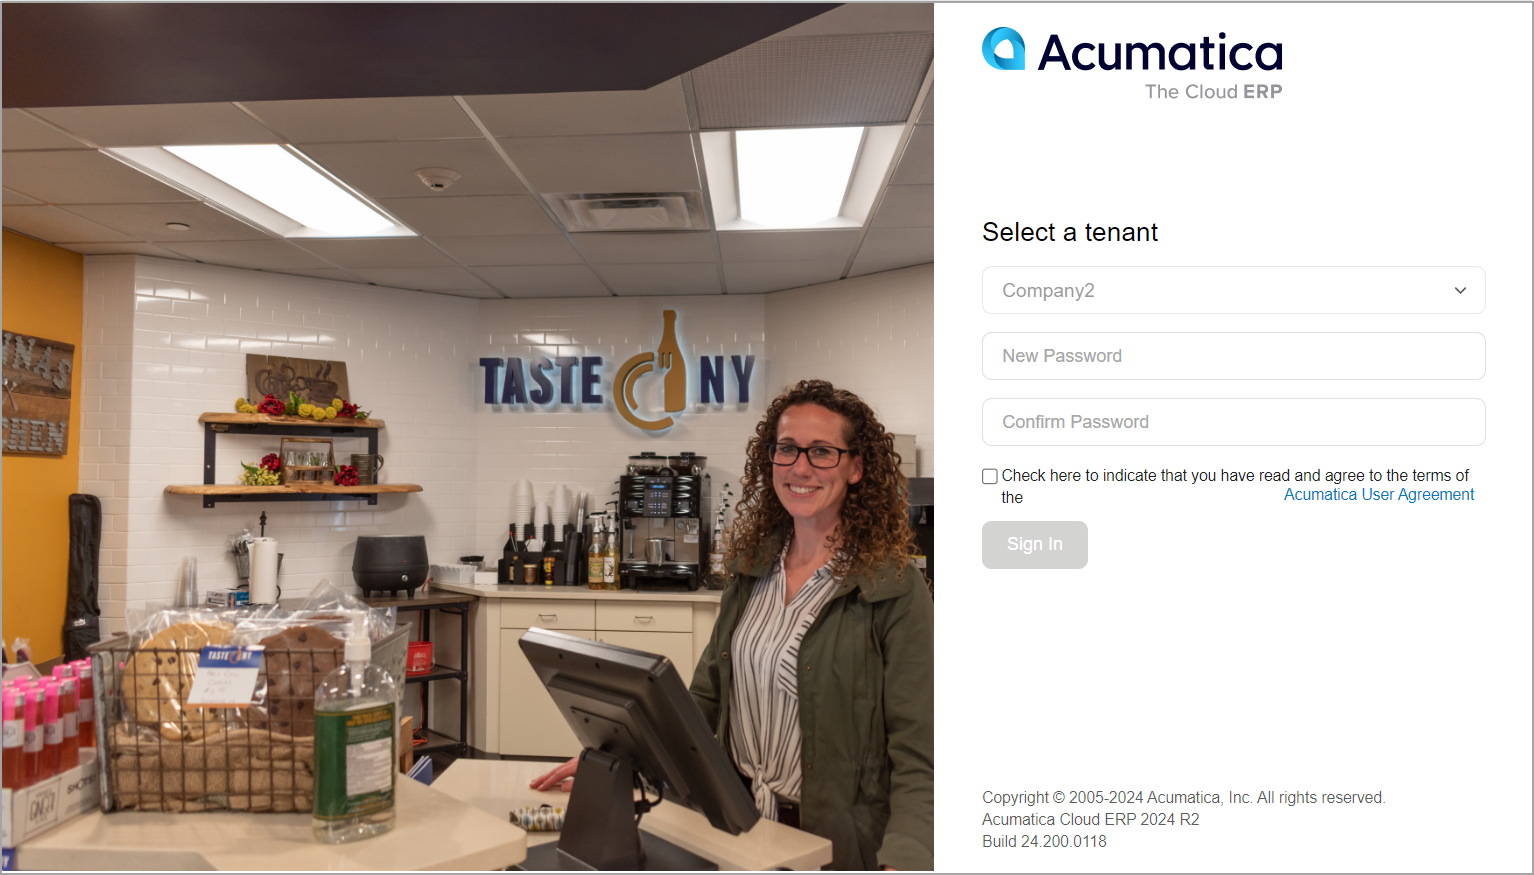
- Enter a new password and confirm it.
- Click the link of the Acumatica User Agreement above the Sign In button, read the agreement, and then select the check box to indicate that you have read the terms of the agreement and agree to them.
- Click Sign In.
You have signed in to the AcumaticaMultitenant instance. Now you can work within the Company2 tenant.
- Sign out.
- On the Sign-In page, enter the default username and password for the application
instance (admin and setup, respectively) to access the
Company4 tenant. Since the admin user has access to all the
tenants you have created, the system prompts you to change the default password
for the Company4 tenant, as shown in the following screenshot. Notice
that because you have entered the default password, the tenant selection box for
the remaining Company4 tenant does not appear.
Figure 6. Creation of a new password for another tenant in a multitenant instance 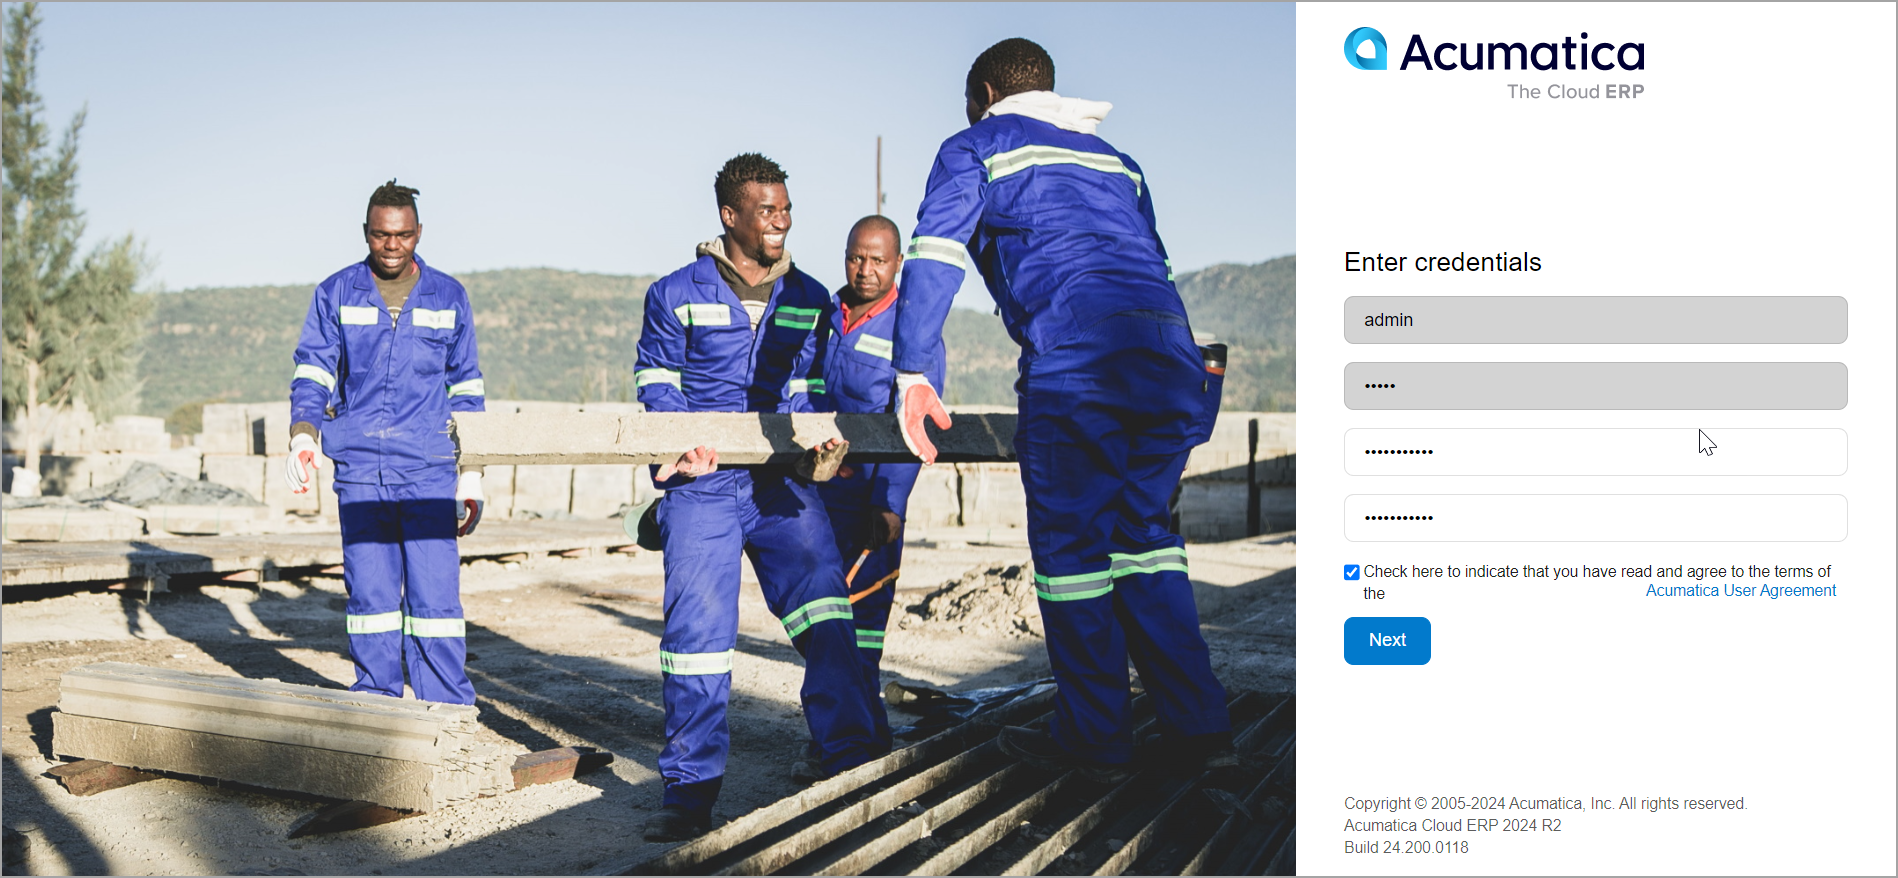
- Change the password and click Next.
You have signed in to the AcumaticaMultitenant instance. Now you can work within the Company4 tenant. You can also switch to the Company2 tenant in the user menu, as shown in the following screenshot.
Figure 7. Access to multiple tenants 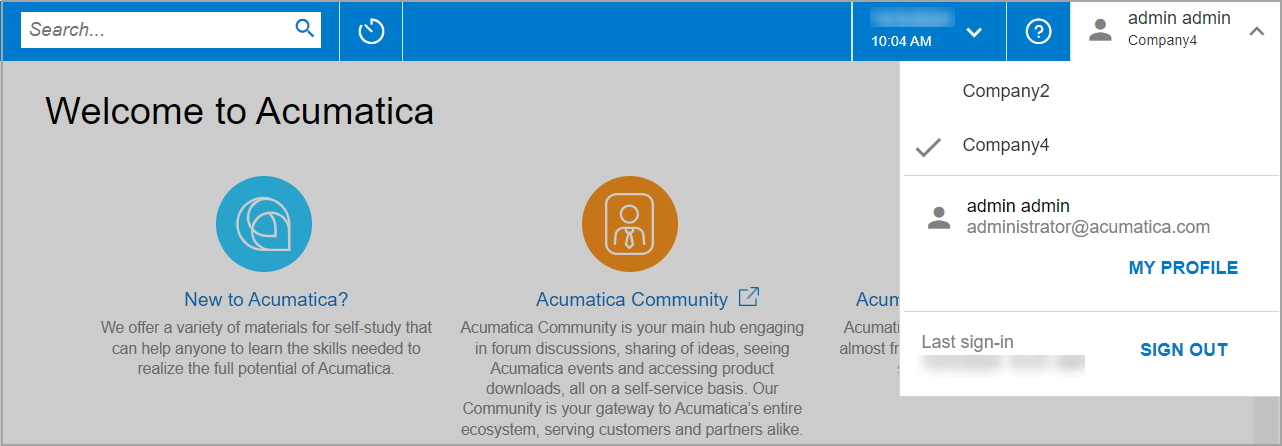
Step 3: Deleting an Existing Tenant
In this step, you will delete the unnecessary tenant by doing the following:
- Return to the MYOB Acumatica ERP Configuration Wizard.
- While you are viewing the Application Maintenance page, do the following:
- In the Installed Sites list, click the row with the AcumaticaMultitenant instance.
- Click Maintain Tenants.
- In the SQL Server Authentication dialog box, leave Windows Authentication selected, and click OK.
- On the Tenant Setup page, select the row with the Company4 tenant in the Installed Tenants list.
- Click Delete.
- Click OK in the confirmation dialog box to delete the tenant.
- Click Next.
- On the Confirmation of Configuration page, do the following:
- Check the configuration settings you have specified.
- Click Finish to delete the tenant.