
MYOB Acumatica Installation On-Premises: To Install the MYOB Acumatica Configuration Wizard
In this implementation activity, you will learn how to download an MYOB Acumatica version and install the MYOB Acumatica ERP Configuration Wizard.
Story
Suppose that you, as the system administrator of the SweetLife Fruits & Jams company, need to download the MYOB Acumatica 2025 R2 GA version and install the MYOB Acumatica ERP Configuration Wizard for this version.
Process Overview
In this activity, you will do the following:
- Download the installation package for the needed version of MYOB Acumatica
- Install the MYOB Acumatica ERP Configuration Wizard
Step 1: Obtaining an Installation Package for a Specific MYOB Acumatica Version
In this step, you will find the build for the MYOB Acumatica 2025 R2 GA version and download it.
To find and download the needed MYOB Acumatica build, do the following:
- Open the Acumatica Community website.
You will need your partner username and password to access the site.
- On the Product menu on top of the page, click 2025 R2.
The MYOB Acumatica 2025 R2 Downloads and Release Notes page opens. On this page, you can find the latest release and prior releases of the selected version; you can also read the release notes.
- Click the Show Content link in the Prior Releases section.
- Click the Acumatica 2025 R2 GA Build ХХ.ХХХ.ХХХХ link.
The page with the release opens.
- In the Download Links section, click the MYOB Acumatica
2025 R2 GA link to download the AcumaticaERPInstall.msi
Windows installer package.
Wait until the package is downloaded to your computer.
Step 2: Installing MYOB Acumatica
In this step, you will install the MYOB Acumatica ERP Configuration Wizard on your computer.
To install the MYOB Acumatica ERP Configuration Wizard, do the following:
- Run the AcumaticaERPInstall.msi file that you have downloaded in the previous step.
- On the Welcome page of the Setup wizard, click Next, as
shown in the following screenshot.
Figure 1. The Welcome page of Acumatica ERP installer 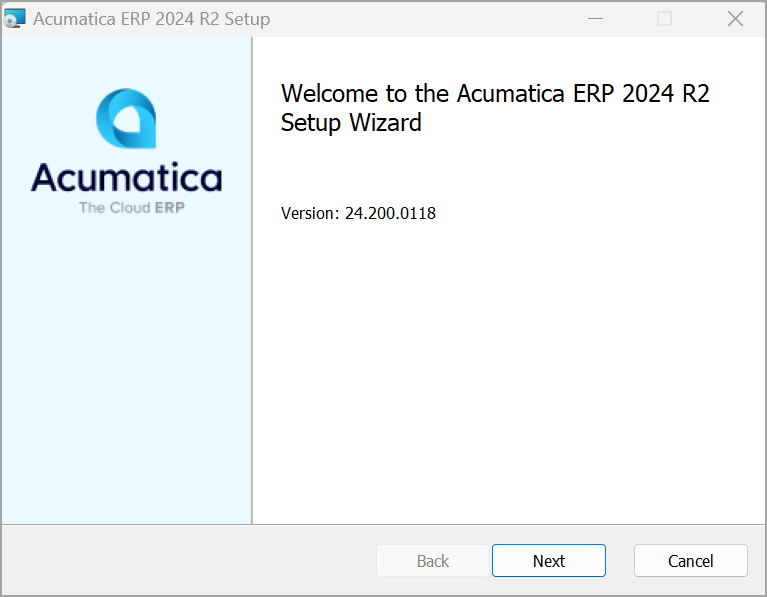
- On the End-User License Agreement page, read the license agreement, and select the I accept the terms in the License Agreement check box.
- Click Next.
-
On the Main Software Configuration page, which opens, notice that the Install Acumatica ERP and Launch the Acumatica ERP Configuration Wizard (Recommended) check boxes are selected by default, as shown in the following screenshot.
Figure 2. Acumatica ERP components to be installed 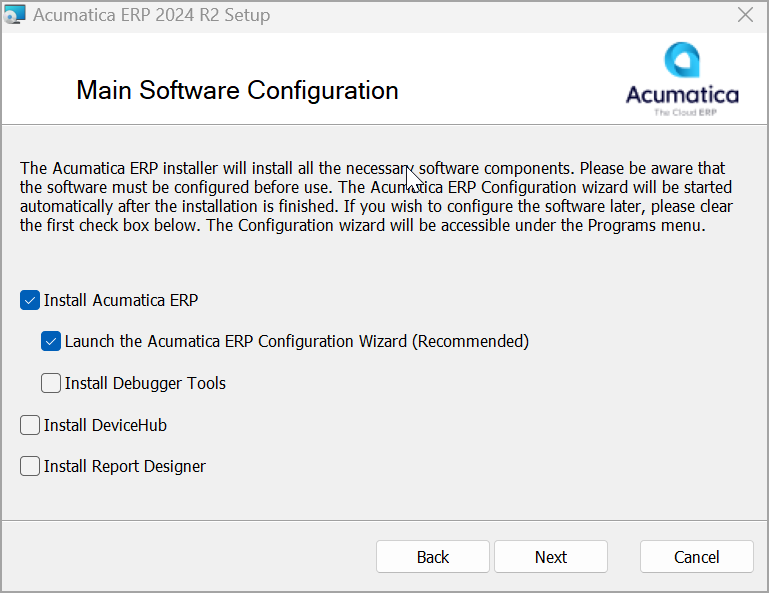
Tip:You can also select any of the following check boxes to install the MYOB Acumatica Tools:- Install Debugger Tools
- Install DeviceHub
- Install Report Designer
- Click Next.
- On the Destination Folder page, check the path to the default folder to which
MYOB Acumatica will be installed, and change it if needed.
By default, the address of the folder is C:\Program Files\Acumatica ERP\.
- Click Next.
- On the confirmation page, click Install to install the
MYOB Acumatica ERP Configuration
Wizard.
Wait while the MYOB Acumatica software is being installed.
- When the installation process has completed, click
Finish.
The MYOB Acumatica ERP Configuration Wizard is started automatically. You can also run the MYOB Acumatica ERP Configuration Wizard anytime by clicking it on the Start menu.
Now you can proceed with deploying the MYOB Acumatica application instances.