
Instance Deployment: To Deploy an Out-of-the-Box Instance
In this activity, you will learn how to deploy an MYOB Acumatica out-of-the-box application instance (that is, the instance without demo data) and sign in to it for the first time.
Story
Suppose that you are the system administrator of your company, and you need to deploy the MYOB Acumatica out-of-the-box instance.
Process Overview
In this activity, you will do the following:
- Deploy the MYOB Acumatica out-of-the-box instance
- Sign in to the MYOB Acumatica out-of-the-box instance for the first time
System Preparation
Before you begin deploying an MYOB Acumatica out-of-the-box application instance, make sure you have installed the MYOB Acumatica ERP Configuration Wizard by performing the following prerequisite activity: MYOB Acumatica Installation On-Premises: To Install the MYOB Acumatica Configuration Wizard.
Step 1: Deploying an Out-of-the-Box Instance
To deploy an MYOB Acumatica out-of-the-box instance, do the following:
- On the Start menu, click Acumatica ERP Configuration to open the MYOB Acumatica ERP Configuration Wizard.
- On the Welcome page, click Deploy a New Acumatica ERP
Instance, as shown in the following screenshot.
Figure 1. The Welcome page of the MYOB Acumatica ERP Configuration Wizard 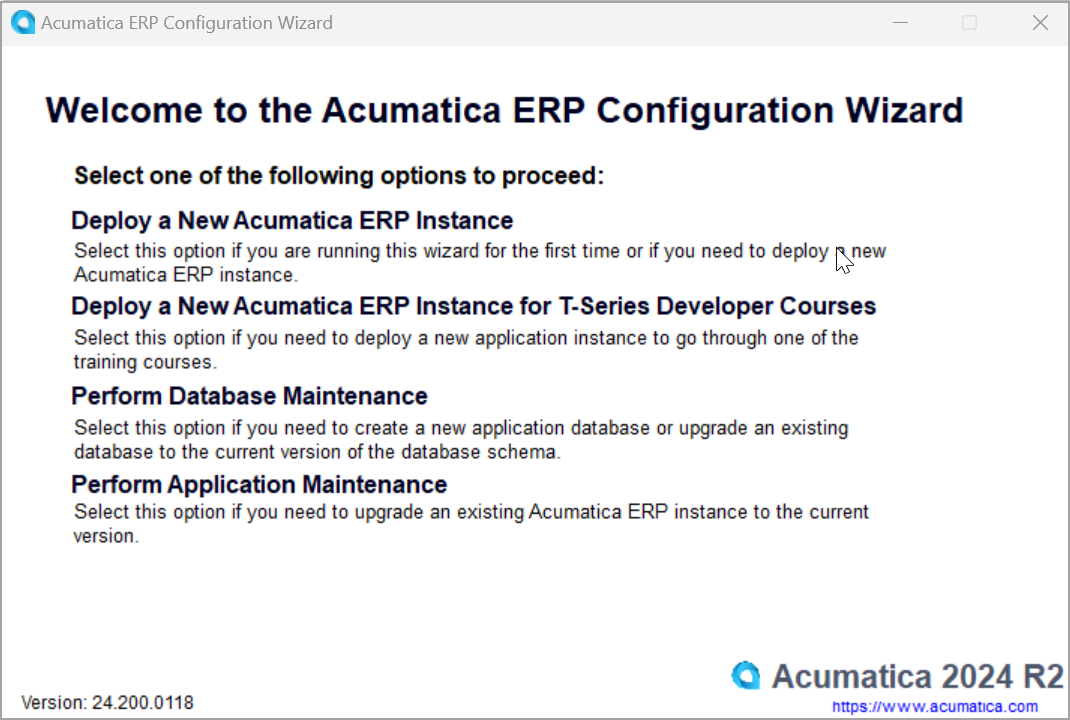
- On the Database Server Connection page, which opens, specify the following
settings, and then click Next:
- Server Type: Microsoft SQL Server
- Server Name:
(local)Note: If you are using the Microsoft SQL Server Express edition, enter LOCALHOST\SQLEXPRESS.
- Windows Authentication: Selected
- Optionally. Encrypt Database Server Connection:
Selected
Figure 2. The Database Server Connection page 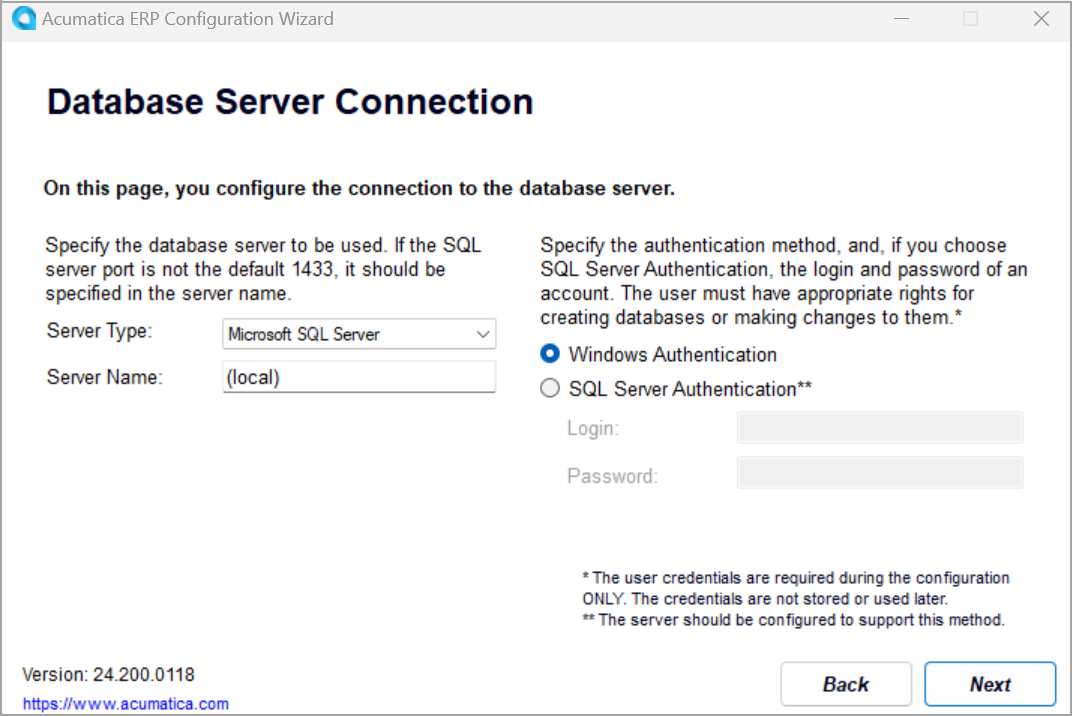
- On the Database Configuration page, which opens, enter the following settings to
create a new database, and then click Next:
- Create a New Database: Selected
- New Database's Name:
AcumaticaS100 .
Figure 3. The Database Configuration page 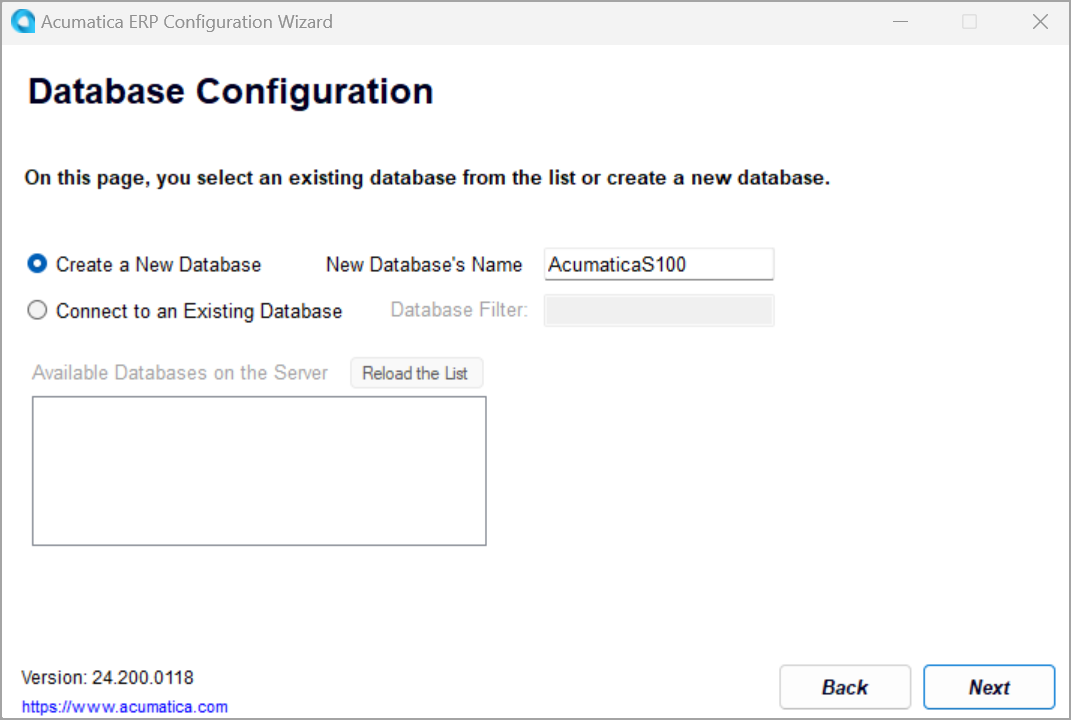
The Tenant Setup page opens. By default, the wizard creates a new tenant with no data preloaded and with the default name Company in the Tenant Name column. The name specified in this column is displayed on the Sign-in page of the application instance and in the instance’s user interface.
- On the Tenant Setup page, change the tenant name to
MyCompany, and then click Next
to go to the next page.
Leave the default values in other boxes, as shown in the following screenshot.
Figure 4. The Tenant Setup page 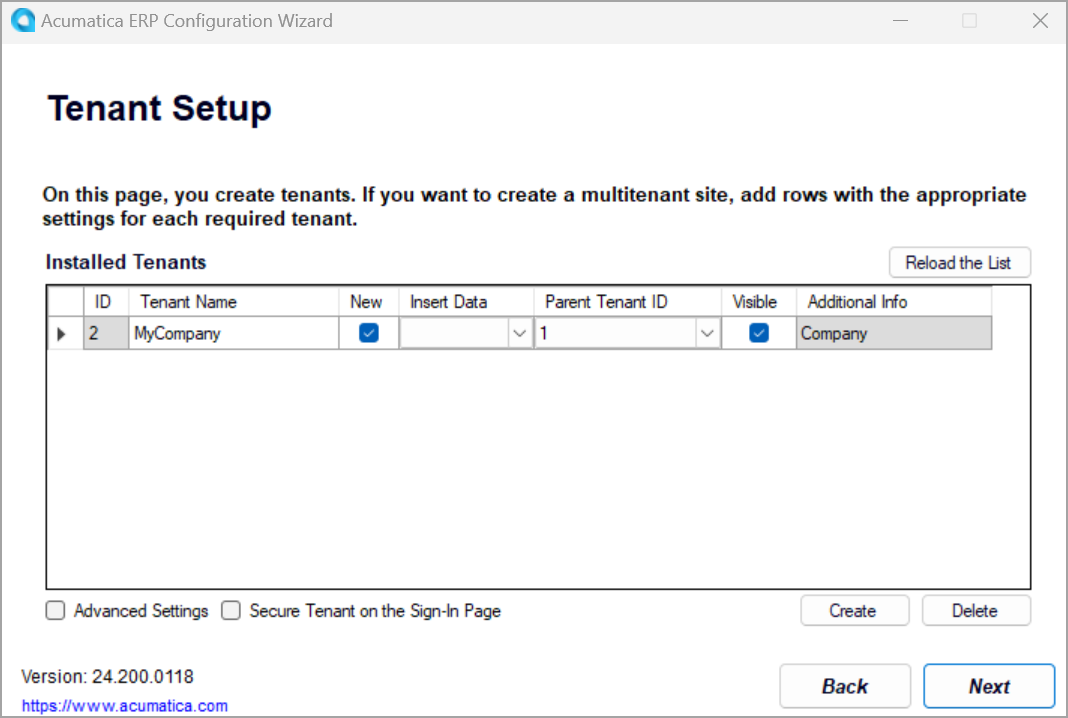
- On the Database Connection page, which opens, leave the default
Windows Authentication option selected, and click
Next.
Figure 5. The Database Connection page 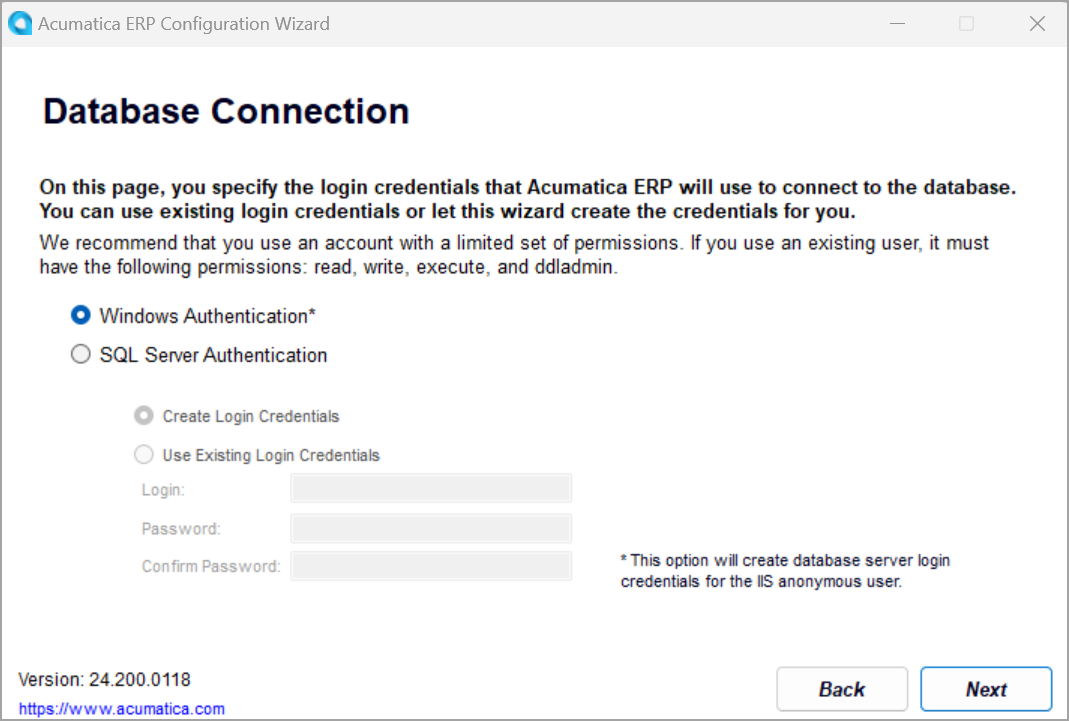
The default anonymous user account used by Internet Information Services, which is ApplicationPoolIdentity, will be used to connect to the database.
- On the Instance Configuration page, which opens, enter the following settings,
and then click Next:
- Instance Name: AcumaticaS100.
By default, this is the name that you have specified for the database. You can change it.
- Create Acumatica ERP Site: Selected.
- Local Path to the Instance: The path on the local
computer to the application instance being created.
By default, this is the folder with the instance name, which is located in the folder where the MYOB Acumatica ERP Configuration Wizard has been installed. The path should have the following format: %Program Files%\Acumatica ERP\AcumaticaS100, as shown in the following screenshot.
Figure 6. The Instance Configuration page 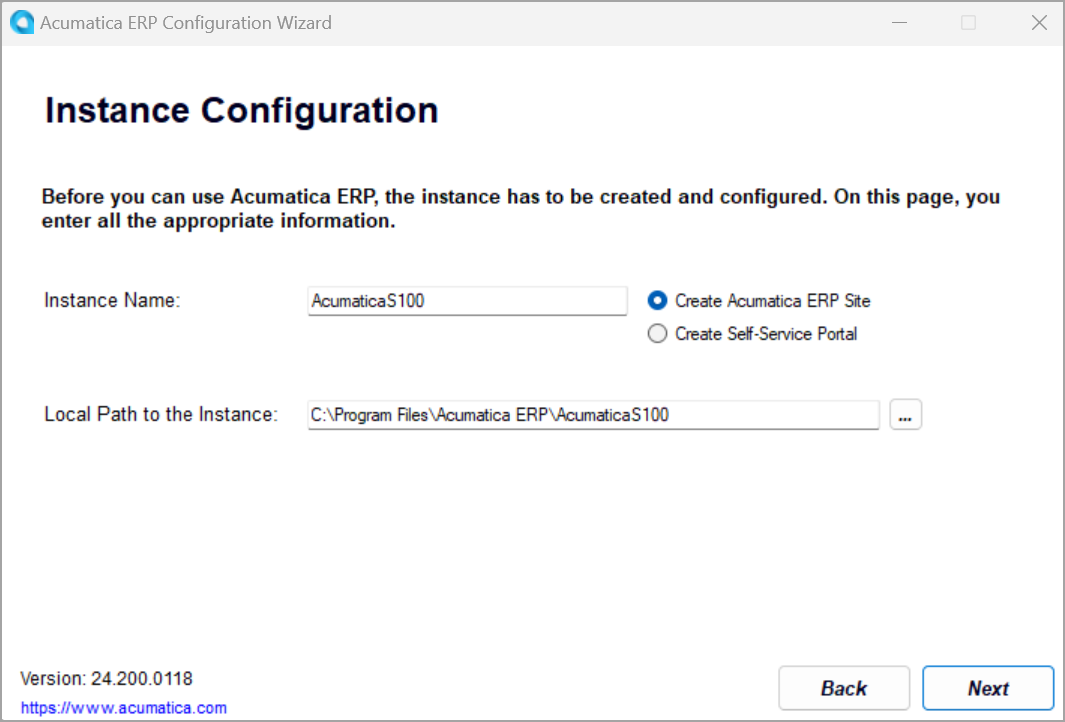
- Instance Name: AcumaticaS100.
- On the Website Configuration page, which opens, specify the following settings,
and then click Next:
- Available Websites: Default Web Site
- Create Virtual Directory: Selected
- Virtual Directory Name: Name of the virtual directory, which matches the instance name
- Compile the Site: Selected
- Install Node.js: Selected
- Use Modern UI as Default: Selected
- Use Existing Application Pool: Selected
- Available Application Pools:
DefaultAppPool
Figure 7. The Website Configuration page 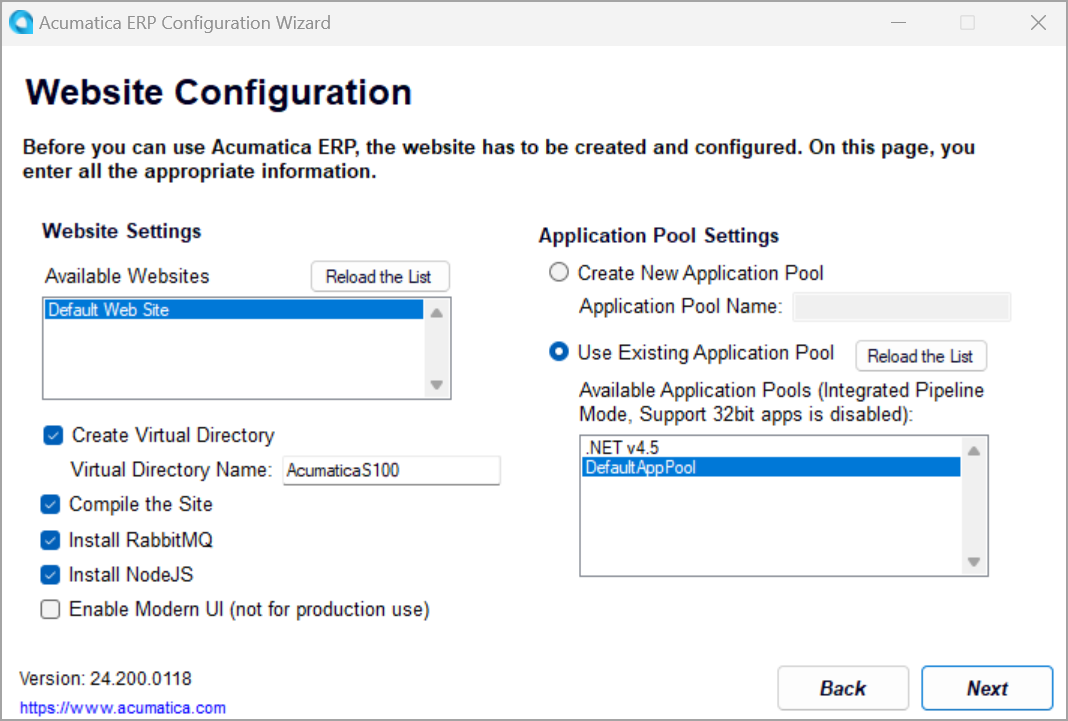
-
On the RabbitMQ Configuration page, which opens, make sure the Set up RabbitMQ on this server automatically option is selected and then click Next.
Figure 8. The RabbitMQ Configuration page 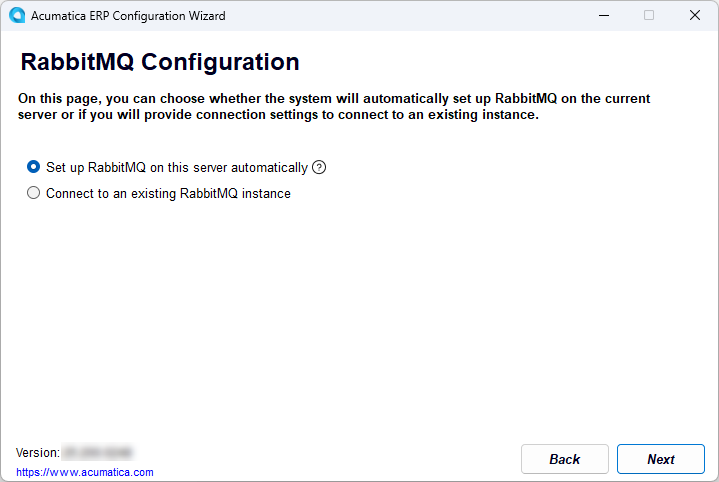
- On the Confirmation of Configuration page, click Finish,
and wait while the installation process completes.
Figure 9. The settings of the instance to be created 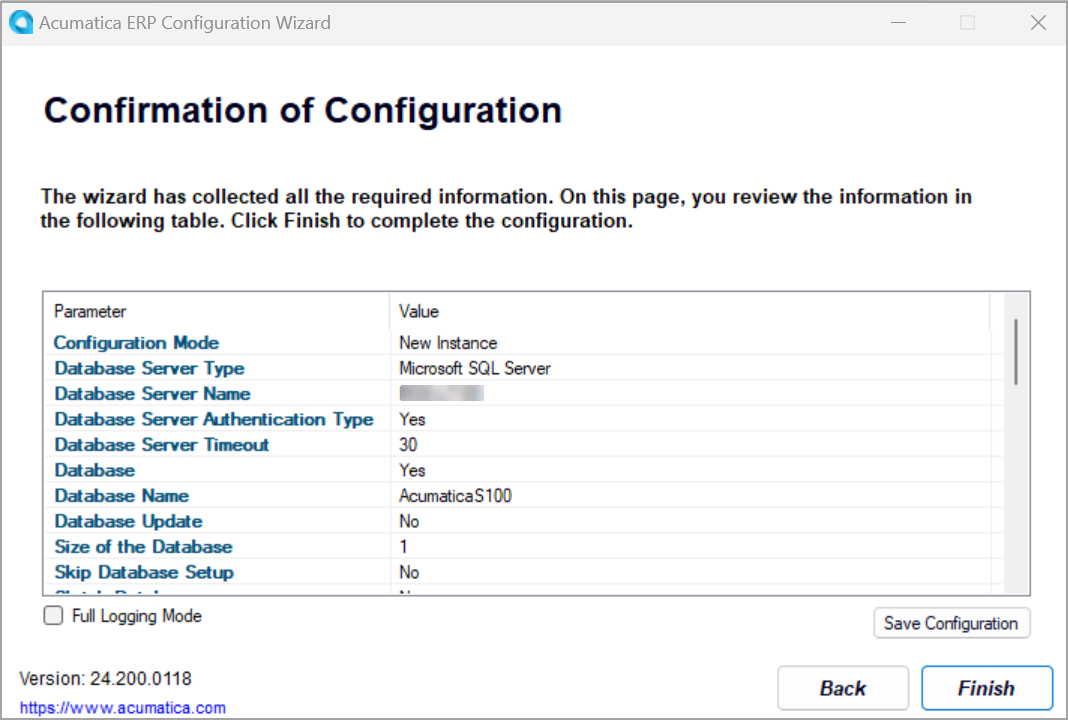
- Click OK in the dialog box after the installation is complete; the system returns you to the Welcome page of the MYOB Acumatica ERP Configuration Wizard.
The new MYOB Acumatica instance is created, and now you can access it for the first time.
Step 2: Accessing the Instance for the First Time
To access the AcumaticaS100 application instance for the first time, do the following:
- While you are viewing the Welcome page of the MYOB Acumatica ERP Configuration Wizard, click Perform Application Maintenance.
- On the Application Maintenance page, which opens, in the list of installed
sites, click the AcumaticaS100 instance, and then click the
Launch button, as shown in the following screenshot.
Figure 10. The list of the MYOB Acumatica installed sites 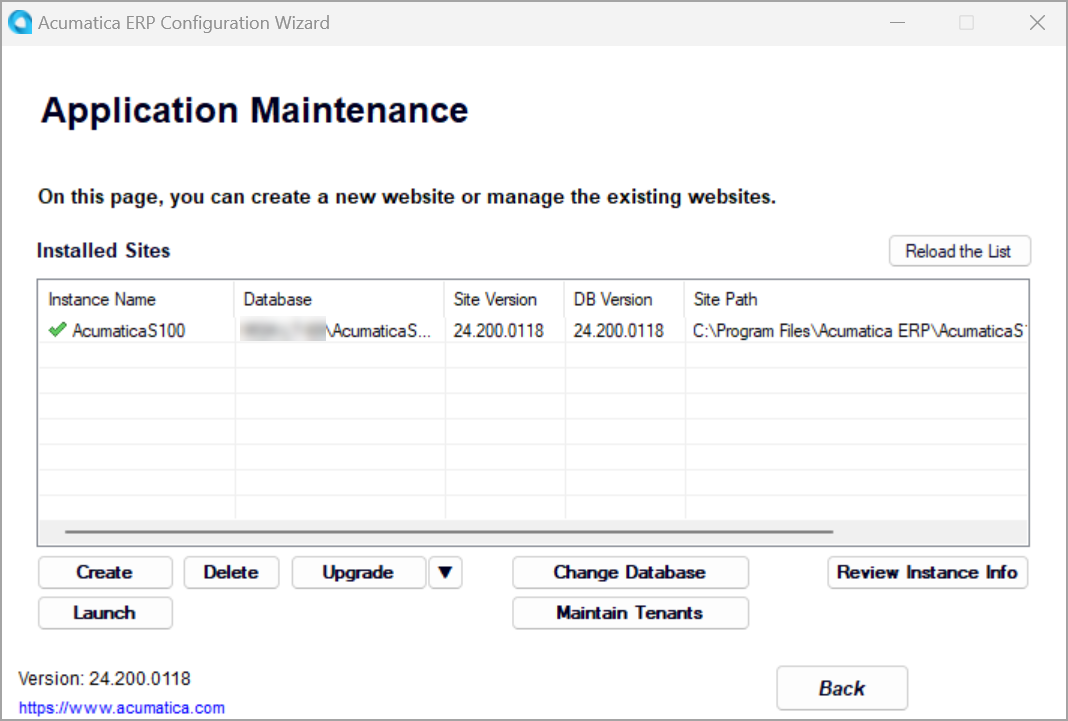
The instance opens in a new tab of your default browser.
- Use the following credentials for the first sign-in:
- Username: admin
- Password: setup
- Click Sign In.
The system prompts you to enter a new password and confirm it.
- Type the new password in the New Password and
Confirm Password boxes.
By default, passwords must be at least 8 characters and contain characters from three of the following four categories:
- English uppercase characters: A through Z
- English lowercase characters: a through z
- Numerals: 0 through 9
- Special characters: !, $, #, and %
- Click the link of the Acumatica User Agreement above the Sign
In button, read the agreement, and then select the check box to
indicate that you have read the terms of the agreement and agree to them, as
shown in the following screenshot.
Figure 11. Creation of a new password to an application instance 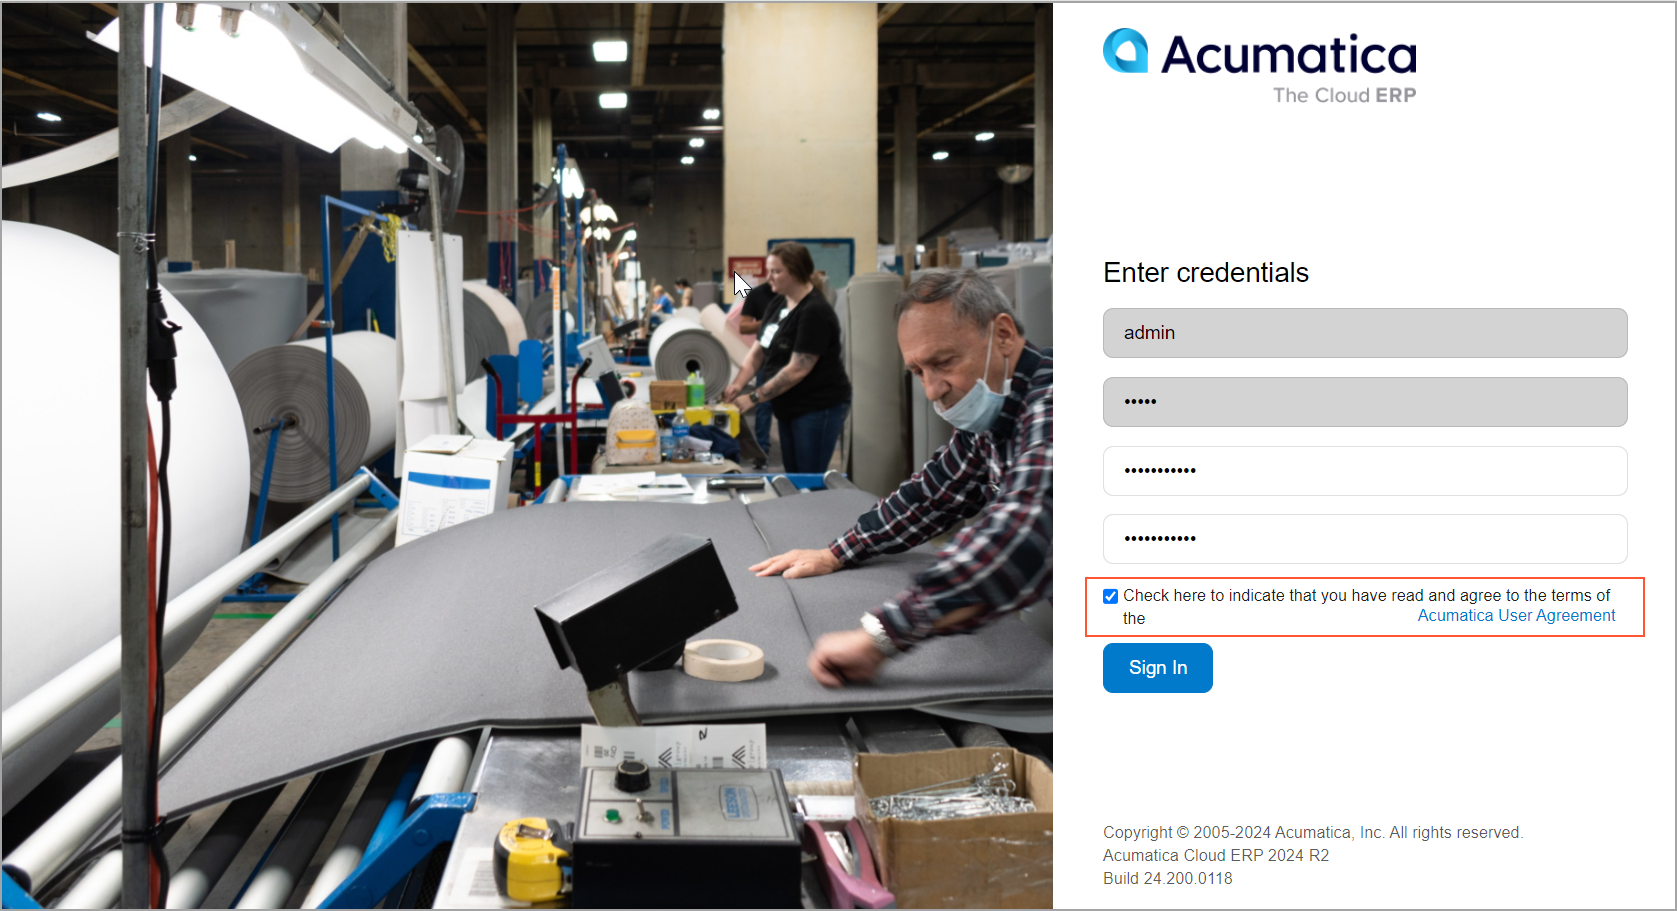
- Click Sign In.
The home page of the MYOB Acumatica instance opens.