Stock Items to Be Tracked Post-Sale: To Create Stock Items with Components
In this activity, you will create a piece of equipment with components that will be tracked after the equipment is sold. To accomplish this, you will first create an item class to group similar equipment with components. For the item class, you will define the components, including one optional component (that is, the equipment can be sold without this particular component). You will also specify the quantity required for each component in each piece of equipment.
You will then create a stock item for a piece of equipment with components, based on the newly created item class.
Story
Suppose the SweetLife Service and Equipment Sales Center plans to sell commercial cold press juicers with various components and to track these juicers after they are sold. As the administrative user, you will create the COLDPRESS - Commercial Cold Press Juicers item class for model equipment; this class is specifically designed to manage equipment with components. Next, you will create the CPRESS30J - Cold Press Juicer H30J stock item based on this item class and define the components included with this piece of equipment.
Process Overview
On the Item Classes (IN201000) form, you will create an item class with the Model Equipment setting and specify the necessary components for this class. Then on the Stock Items (IN202500) form, you will create a piece of equipment with components based on the newly created item class.
System Preparation
Before you begin performing the steps of this lesson, do the following:
- On the MYOB Acumatica website, sign in to a company with the U100 dataset preloaded. You should sign in as a system administrator by using the gibbs username and the 123 password.
- In the info area, in the upper-right corner of the top pane of the MYOB Acumatica screen, set the business date to 1/30/2025. For simplicity, in this activity, you will create and process all documents in the system on this business date.
- To perform this activity, make sure that you have performed the following prerequisite activity: Stock Items to Be Tracked Post-Sale: To Create Components.
Step 1: Creating an Item Class for Equipment with Components
To create an item class for equipment that has components, do the following:
- On the Item Classes (IN201000) form, add a new record and
specify the following settings in the Summary area:
- Class ID: COLDPRESS
- Description: Commercial Cold Press Juicers
- On the General tab (General
Settings section), specify the following settings:
- Stock Item: Selected
- Item Type: Finished Good
- Tax Category: EXEMPT
- Posting Class: AOL
- Default Warehouse: EQUIPHOUSE
- Availability Calculation Rule: ALLOTHER
- In the Unit of Measure section of the tab, specify the
following settings:
- Base Unit: ITEM
- Sales Unit: ITEM
- Purchase Unit: ITEM
- On the Service Management tab, select Model Equipment under Equipment Class.
- On the form toolbar, click Save.
- On the table toolbar of the table on the Service
Management tab, click Add Row, and
specify the following settings in the added row to add a component to the item
class:
- Component ID: JUICECUP
- Active: Selected
- Optional: Cleared
- Quantity: 1
- Description: Juice Cup
- Item Class ID: CPRESSCOMP
- On the table toolbar, click Add Row again, and specify
the following settings in the added row to add another component to the item
class:
- Component ID: HOPPER
- Active: Selected
- Optional: Cleared
- Quantity: 1
- Description: Hopper
- Item Class ID: CPRESSCOMP
- On the table toolbar, click Add Row again, and specify
the following settings in the added row to add the third component to the item
class:
- Component ID: HOPPER_O
- Active: Selected
- Optional: Selected
With this check box selected, you can sell equipment of the class without this component.
- Quantity: 1
- Description: Hopper (optional)
- Item Class ID: CPRESSCOMP
- On the table toolbar, click Add Row again, and specify
the following settings in the row to add the fourth component to the item
class:
- Component ID: PLUNGER
- Active: Selected
- Optional: Cleared
- Quantity: 1
- Description: Plunger
- Item Class ID: CPRESSCOMP
- Click Add Row, and specify the following settings in the
row to add the fifth component to the item class:
- Component ID: AUGER
- Active: Selected
- Optional: Cleared
- Quantity: 1
- Description: Auger
- Item Class ID: CPRESSCOMP
- Click Add Row, and specify the following settings to add
the sixth component to the item class:
- Component ID: DRUM
- Active: Selected
- Optional: Cleared
- Quantity: 1
- Description: Drum
- Class ID: CPRESSCOMP
- On the form toolbar, click Save.You have added the components to the COLDPRESS item class, as shown in the following screenshot.
Figure 1. The item class with components 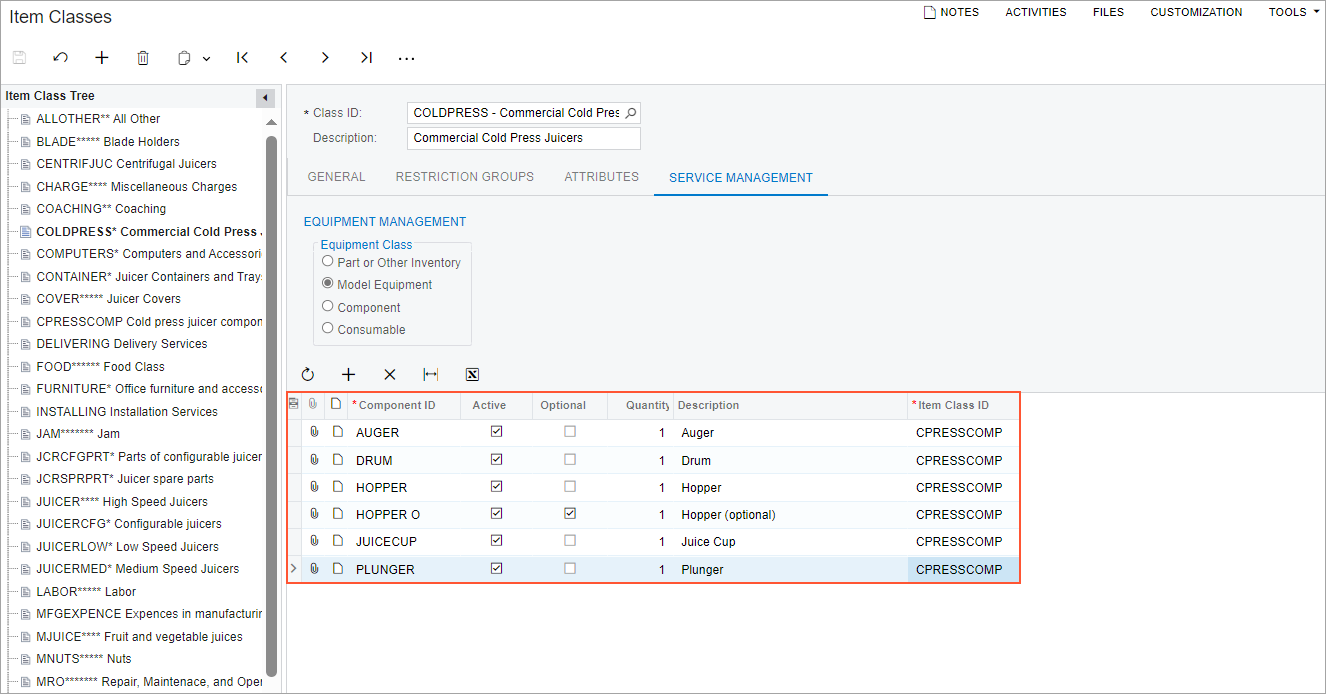
Step 2: Creating a Piece of Equipment with Components
To create a piece of model equipment with components, do the following:
- On the Stock Items (IN202500) form, add a new record and
specify the following settings in the Summary area:
- Inventory ID: CPRESS30J
- Item Status: Active
- Description: Cold Press Juicer H30J
- On the General tab, select COLDPRESS as the
Item Class.
The Type, Tax Category, Posting Class, and Default Warehouse boxes, as well as the boxes in the Unit of Measure section, have been populated with the values from the selected item class.
- On the Price/Cost tab, set the Default Price to 800.
- On the Service Management tab, do the following:
- In the Manufacturer box, select JUICEAPP.
- In the Company Warranty box, specify
12
Months, and in the Vendor Warranty box,
specify 6
Months.
Notice that the Model Equipment option button has been selected based on the settings of the item class, and you cannot change this setting.
- On the form toolbar, click Save.
- In the table of the Service Management tab, specify the
following identifiers in the Inventory ID column for the
rows with the mentioned Component ID values, so that you
are specifying the stock items corresponding to the required components:
- AUGERH30J in the row with the AUGER component
- DRUMH30J in the row with the DRUM component
- HOPPERH3 in the row with the HOPPER component
- 30HOPPERJK in the row with the HOPPER_O component
- CUPH300J in the row with the JUICECUP component
- PLUNGERH30J in the row with the PLUNGER component
Notice that as you select the inventory IDs, the system updates the warranty settings.
- Clear the Requires Serial check box in all rows except the row with the DRUM component.
- In the row with the AUGERH30J component, select SQUEEZO in the Vendor ID column.
- On the form toolbar, click Save.
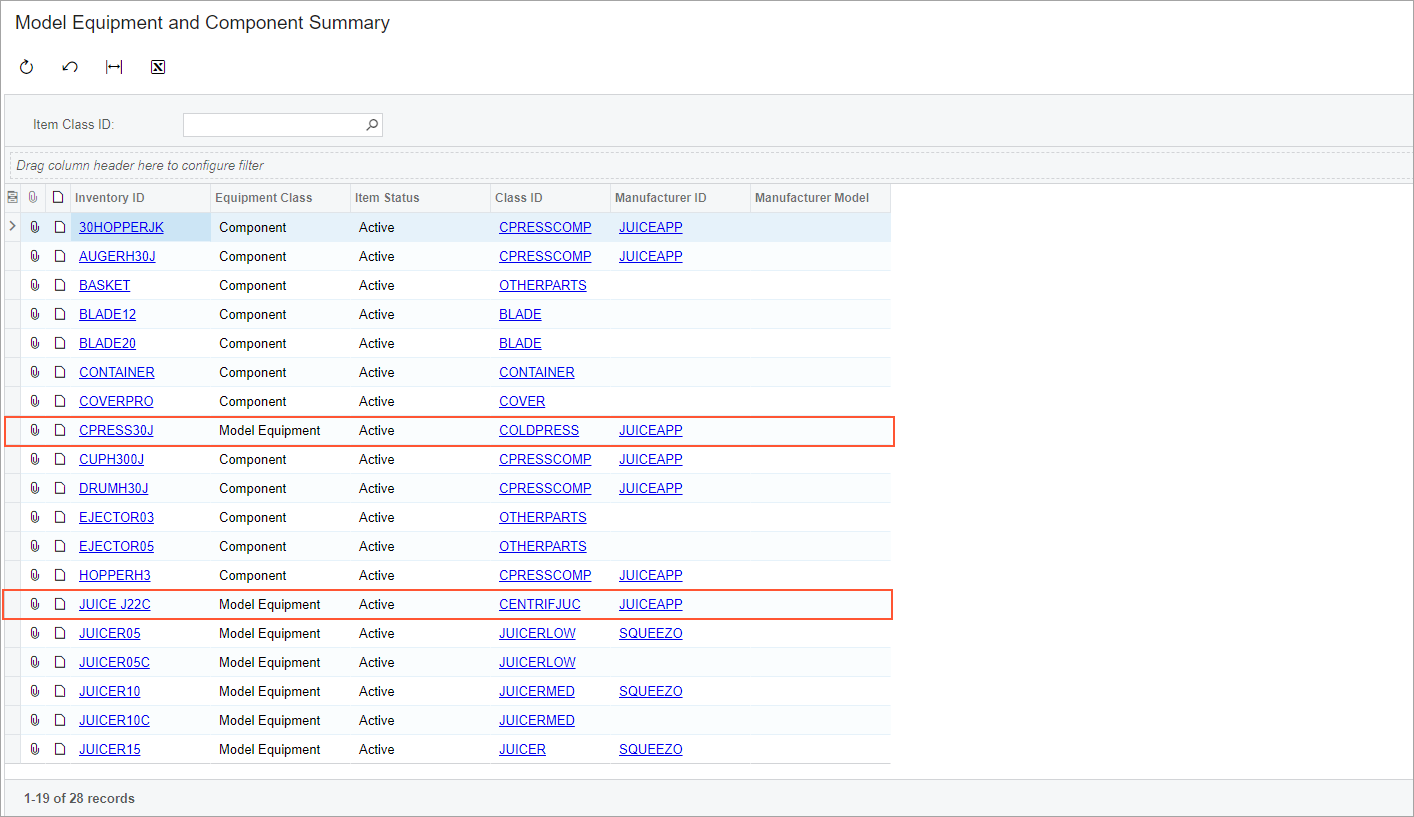
- Navigate to the Model Equipment and Component Summary (FS400400) form, and verify that
both pieces of model equipment that you have created are listed. Notice that all
the components you have created are also listed here.
Figure 2. The defined model equipment