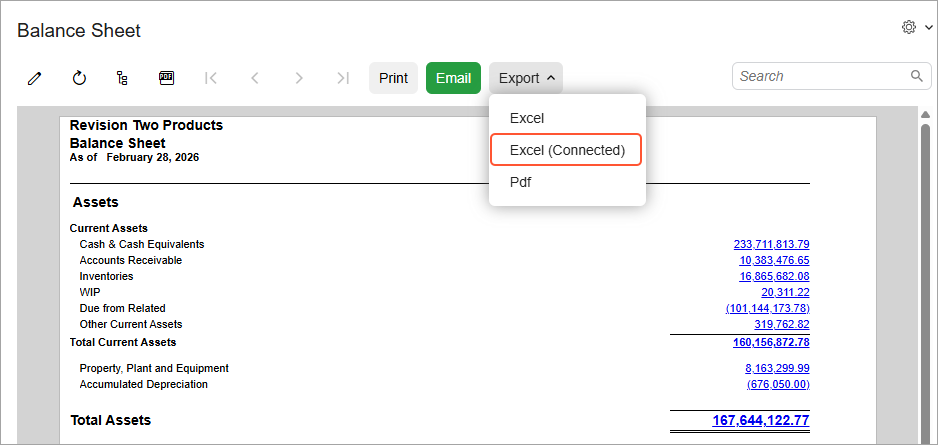
InsightXL: Using the Excel Add-In
Once the Excel add-in is installed, the Acumatica tab is added to Excel.
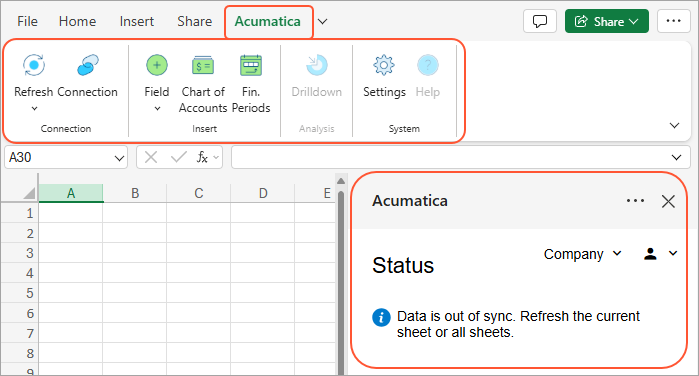
Here is what you can do by using the commands available on this tab:
- Connect to MYOB Acumatica
- Refresh values in Excel by pulling data from MYOB Acumatica
- Insert MYOB Acumatica helper functions
- Drill down into calculated values to see underlying data
Connecting to MYOB Acumatica
Click Connection on the Acumatica tab to open the add-in's right panel and sign in to MYOB Acumatica. When you are signed in, this panel displays the status of workbook synchronization and informs you if displayed data needs to be refreshed. If you work with multiple tenants, you can also use this panel to switch between the tenants you have access to.
Refreshing Data Exported to Excel
Use Refresh options on the Acumatica tab to recalculate and repopulate values from MYOB Acumatica in your workbook.
During refresh, the add-in batches MYOB Acumatica functions found in the sheet or workbook and sends them to the server to be calculated by the ARM engine. The calculated values are sent back to Excel. The add-in then identifies any other functions (for example, Excel functions) that reference those values, recalculates formulas containing those functions, and fills the results into the appropriate cells.
Before you start refresh, make sure that no cell is selected for editing. While refresh is in progress, you can monitor its status and progress in the right panel.
You can control what you refresh in your workbook:
- Pending and Errors: Refresh recently changed but not yet calculated cells, or cells with errors in the current sheet.
- Current Sheet: Refresh only the active sheet.
- All Sheets: Refresh the entire workbook.
- Cancel Refresh: Cancel a refresh if it takes too long.
Using Helper Functions
The add-in's Acumatica tab includes the Insert group of actions that place supported functions into the worksheet in the cell you're working in:
Click a cell that contains a calculated Beginning Balance, Debit, Credit, Turnover, or Ending Balance value, and then click Drilldown. This opens a new sheet named Drilldown with the underlying data.
Exporting ARM Reports to Excel
You can export an existing ARM report to Excel by clicking on the report form's toolbar. The report is exported along with the functions used to calculate amount values as well as formulas used in the report cells.