
Graph Extensions: Creating a Graph Extension Through the UI
You can create the class extension for an existing graph and add the Code item with the created code to a customization project in several ways, as described in the following sections:
- Adding a Code Item by Using the Element Inspector
- Adding a Code Item by Using the Screen Editor
- Adding a Code Item on the Code Page
If you need to extend the code of a graph with no associated webpage (such as ARReleaseProcess), follow the instructions described in Adding a Code Item on the Code Page.
As soon as you add the Code item for customizing the business logic to the project, the system generates an extension class for it and opens the code in the Code Editor. You can work with the extension classes in the Code Editor. After you publish the customization project, you can develop the code in Microsoft Visual Studio.
Adding a Code Item by Using the Element Inspector
Typically, you want to modify the business logic that’s executed for an MYOB Acumatica form.
You can use the Element Inspector to add to a customization project a Code item for customizing an existing form’s business logic. Perform the following actions:
- Open the form in the browser.
- On the form title bar, click to launch the Element Inspector.
- On the form, select any UI element to open the Element Properties Dialog Box for it.
The Business Logic box of the dialog box displays the name of the graph that provides business logic for the form (see below).
- Click .
Figure 1. Using the Element Properties dialog box to customize the form’s business logic 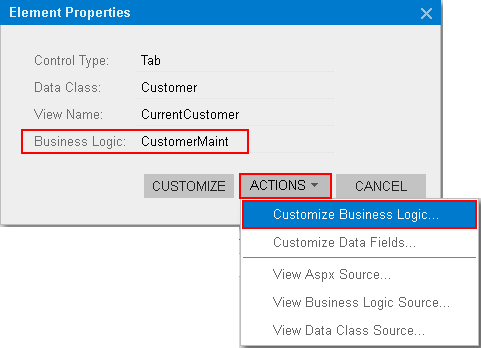
- If no customization project is selected and the inspector opens the Select Customization Project Dialog Box, select an existing customization project or create one.
The platform creates the template of the class that is derived from the PXGraphExtension<> class, saves the code as a Code item of the project in the database, and opens the item in the Code Editor.
Adding a Code Item by Using the Screen Editor
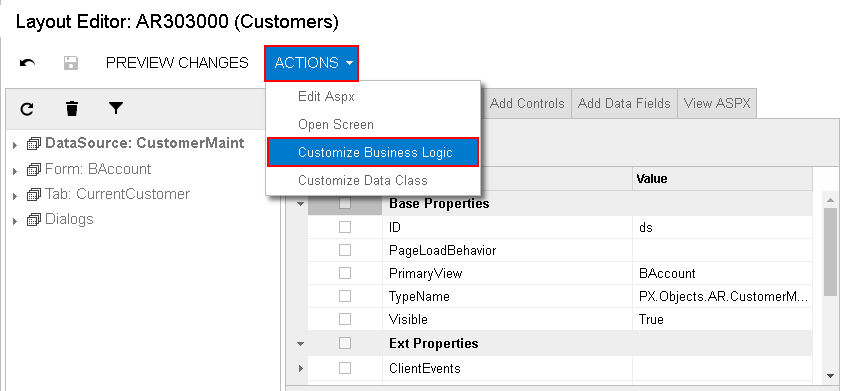
To customize the form’s business logic, you can add a Code item to a customization project from the Screen Editor in the Classic UI.
On the toolbar of the Screen Editor, click the More menu and click Customize Business Logic, as shown below.
The platform creates the template of the class that’s derived from the PXGraphExtension<> class, saves the code as a Code item of the project in the database, and opens the item in the Code Editor.
Adding a Code Item on the Code Page
If you know the name of the graph to be customized, you can create a Code item with the graph extension template on the Code page of the Customization Project Editor by using the Create Code File dialog box.
To do this, perform the following actions:
- Open the customization project in the editor.
- Click Code in the navigation pane to open the Code page.
- Click Add New Record on the page toolbar.
- In the Create Code File dialog box, which opens, select Graph Extension in the File Template box, as shown below.
- In the Base Graph box, select the name of the graph to be customized.
- Click OK.
Figure 3. Adding a Code item with the graph extension to the project 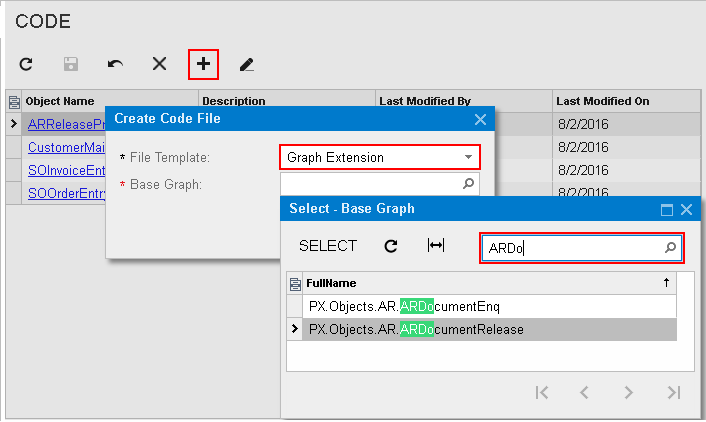
The platform creates the template of the class that’s derived from the PXGraphExtension<> class, saves the code as a Code item of the project, and opens the item in the Code Editor.