- Contents
- Index
- Search

Show results that include all search words
Billing Schedules
Progress Bills are charged by looking up a stock item whose code starts with the @ character. One of these was automatically created in your database.
Generating Billing Schedules
You can create a progress bill on the:
- Billing Schedule tab, - enter details into the grid.
- Quote/Budget tab - the Marked Lines submenu includes the Generate Billing Schedule option.
- Timesheets, Costs, and Invoice tabs - the Marked Lines submenu includes the Allocate to Progress Invoice option.
From the Quote/Budget tab
To create a schedule for billing when you create a quote:
-
On the Quote/Budget tab, mark lines that have not been sent to another tab.
-
Right click and select Marked Lines > Generate Billing Schedule.
-
The Billing Schedule window displays. Enter a description and the date when the invoice is due to be created. The values are summed from the contributing lines. You cannot change the values.

-
Click OK.
The schedule display on the Billing Schedule tab.
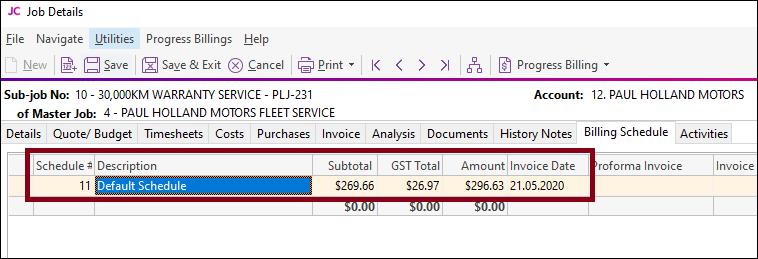
You can also create schedules on the Billing Schedule tab by pressing the down arrow on the grid and entering in a new schedule. You can specify the value or leave it at zero pending allocation of work in progress.
Adding Information
You can add information to the schedule in these columns on the Billing Schedule tab:
|
Field |
Description |
|
Due Date |
The anticipated date for creating a tax invoice. |
|
Allow Allocation |
Select Y to allocate work in progress lines to the billing schedule. If you select N, the schedule does not appear in the Progress Invoice window for allocating lines. |
|
GL Code |
The General Ledger code to which to bill the schedule. Note: You must select the Enable display and override of GL code from stock item profile setting for the GL code to flow through to the invoice. If you don't, the invoice uses the GL code for the stock item. |
|
Percentage Complete |
Enter a percentage to monitor the progress of work in progress relative to the schedule. |
Allocating Work in Progress Lines
You can add work in progress lines on the Timesheets, Costs, and Invoice tabs to a billing schedule. Mark the required lines and from the right click menu select Marked Lines > Allocate to Progress Invoice.
Job Costing prompts you for the progress invoice to which to add the lines. Click OK. This window displays:
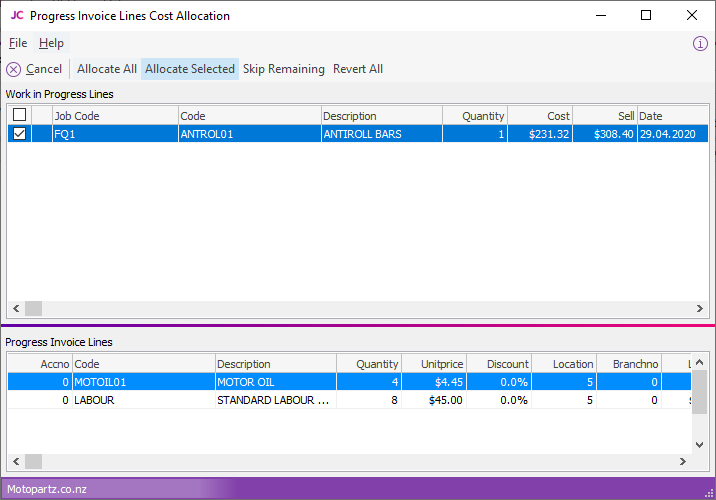
Use this window to confirm the lines to add to the invoice. The top section of this window displays the lines that you selected on the Timesheets, Costs, or Invoice tab. The bottom section displays the lines that are included on the selected invoice. Select the lines to add, then click the toolbar buttons to allocate them to the invoice.