- Contents
- Index
- Search

Show results that include all search words
Emailing Payslips
The Email Payslip Wizard allows you to generate PDF payslips to specifically marked employees, and then generate the remainder of the (printed) payslips for the rest of the employees in your pay run, all in one operation. Payslips should be printed before the pay is updated.
NOTE: If you experience any issues sending emails, check that version 4.5 of the .NET Framework is present on all PCs. Talk to your system administrator to identify what version is currently present and update it if necessary.
Launch the Email Payslip Wizard by selecting "Payslip - Emailing Wizard" from the Pay tab of the Select Report window.
NOTE: This report is not available if the Hide other payslip reports option is ticked on the Payslip Setup window.
Step 1: Select Ranges and Options
Set ranges to specify which payslips to print/email.

Sort Orders Payslips that are printed from the Wizard can be grouped and sorted in a variety of ways:
- Employee Code
- Employee Alpha
- Department
- Payment Method
- Default Cost Centre
For example, if each supervisor is responsible for handing out payslips to his or her own staff, you may elect to adjust Sort Order 1 to Department, and potentially set Sort Order 2 to Employee Alpha (an alphanumeric code derived from the surname), so that payslips are distributed more efficiently.
Pay Frequency Select an appropriate pay frequency from the list – this is vital for establishing exactly which current pay the payslip run is for.
Pay Type This represents the pay for which you want to generate payslips. Normally this would be an open pay, and would be either the Current pay, or a One Off Pay (via the Selected pay type).
Selection Ranges The selection ranges act as a filter – the Payslip Wizard will exclude any employees whose codes are less than the From range and greater than the To range.
Options Note that the options set here control the layout and visibility of various items that may appear on the payslips. Refer to page 152 for detailed description of payslip report options.
Once you have made your selections, click Next or press F8 to continue.
Step 2: Summary of Payslips
This is a summary of the payslips that will be created by the wizard.

Click the Preview button to open a window showing how each employee has contributed to the total Gross and Net earnings on the Summary screen:

To ascertain the makeup of a particular employee’s pay, click on the appropriate row in the grid and click the Select button. The employee’s payslip appears on screen.
Once you have finished with the Summary screen, click Next or press F8 to continue.
Step 3: Destination
From this step you can change the destination of the employee's payslips.

If the employee has previously been set up to receive payslips via email the Destination will default to the employee’s email address.
To change an employee's email address, right-click on the employee’s record in the list and select Edit employee email settings.
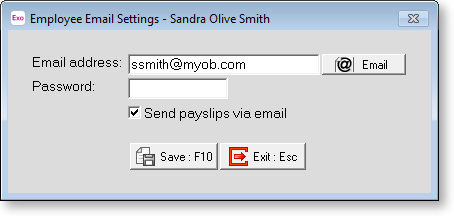
From this screen you can:
-
Alter the employee’ s email address.
-
Alter the employee’ s password, i.e. the password that will be requested when the PDF Payslip file is opened.
-
Click Email to compose a new email message to the employee. This opens your default email software with the employee’s email address in the recipient line.
-
Select whether or not email payslips to this employee in future.
To ascertain the makeup of a particular employee’s pay, right-click on the employee’s record in the list and select Preview Payslip – the employee’s payslip appears on screen.
Once you have finished with the Destination screen, click Next or press F8 to continue.
Step 4: Print Payslips
This is where you generate the payslips to printer or screen. Emailing payslips is handled in the next step.

Select a Destination and click Print to generate payslips.
Once you have finished generating payslips, click Next or press F8 to continue.
Step 5: Send Emails
This is where you email the payslips.

Email settings default to those specified on the Email Setup window in the Payroll Setup, but they can be edited if necessary.
Emails are sent one at a time, which means that for large organisations with many staff members, sending emails can take a long time. Ticking the Send Emails Asynchronously box speeds up the process by sending multiple emails concurrently.
Click the Email button to send emails.
NOTE: Once the emails are sent, they cannot be retrieved.
Once you have finished sending emails, click Next or press F8 button to continue.
Finished – Print Summary
The wizard is now complete.
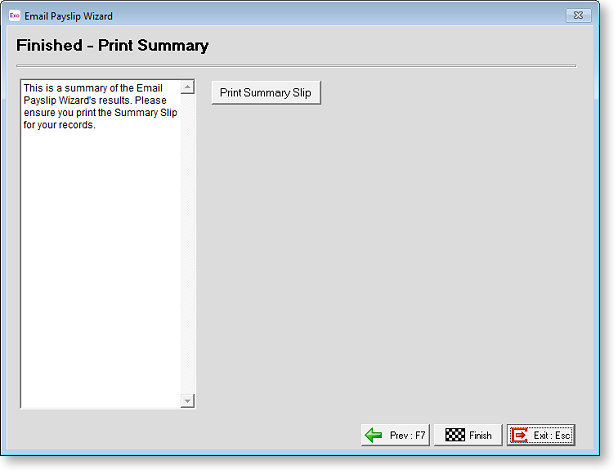
Click the Print Summary Slip button to generate a report that displays the status of each payslip, i.e. whether or not a payslip was emailed to the employee or sent to the printer successfully.
Click the Finish button to exit the Email Payslip Wizard.