Report Content: To Embed an Image in a Report
In the following activity, you will learn how to embed an image in a report.
Story
Suppose that you are a technical specialist in your company who is working on simple customizations. A sales manager has requested that you add an image of his signature to a report that displays the details of an invoice or memo. You have decided to use the predefined Invoice/Memo (AR641000) report as a base and modify it by adding the image of the signature, which the sales manager has sent to you as a PNG file.
Process Overview
In the Report Designer, you will open the AR6410C3.RPX report, which is a copy of the Invoice/Memo (AR641000) report, and add the PictureBox element to the report layout. You will specify the properties of this element to display the facsimile.png image.
System Preparation
Before you perform the steps of this activity, make sure that the following tasks have been performed:
- You have installed the MYOB Acumatica Report Designer, as described in Report Designer: To Install the MYOB Acumatica Report Designer.
- You have installed an MYOB Acumatica instance with the U100 dataset, or a system administrator has performed this task for you.
- You have signed in to MYOB Acumatica as the system administrator by using the gibbs username and the
123 password.Tip:The gibbs user is assigned the Administrator role and the Report Designer role. Thus, this user has sufficient access rights to manage system configuration and to preview, save, and publish reports.
Also, to prepare for use the file that you will need for this activity, do the following:
- Download the AR6410C3.rpx file.
- Open the downloaded file in the Report Designer.
- On the Report Designer menu bar, select , which opens the Save Report on Server dialog box.
- In the dialog box, specify the connection string and sign-in credentials of your
MYOB Acumatica instance, type AR6410C3 as the report name, and click
OK.
The report is saved on the server.
Finally, you should download the facsimile.png file and save it to any folder on your computer.
Step 1: Embedding the Image in the Report
To embed the image in the AR6410C3 report, do the following:
- In the Report Designer, make sure that the AR6410C3 report (which you have saved to the server) is open.
- On the Properties tab of the
Properties pane, select the
report1 Reportobject from the drop-down list to select the report form, and do the following:- In the property, click the More button to open the Embedded Images dialog box.
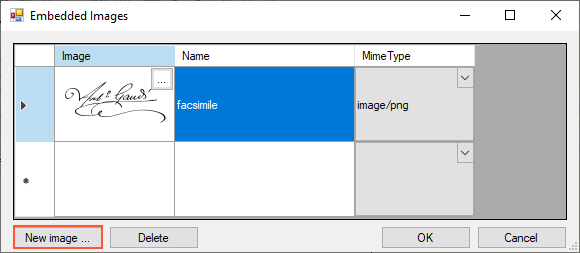
- In the dialog box, click the New image ...
button, which is shown in the following screenshot, and select the facsimile.png file,
which contains the needed image. (The Name and
Mime Type of the selected file are filled in
automatically.)
Figure 1. The embedded image in the Embedded Images dialog box 
- Click OK to add the image that you have selected to the embedded images collection of the report and to close the Embedded Images dialog box. Now you can use this image in the report.
- Select the
groupFooterSection2 (Footer of groupInvoice)section and specify the 2.5cm value for the property to increase the height of the section. - In the Tools pane, drag the PictureBox element to the left side of the
groupFooterSection2 (Footer of groupInvoice)section. - While the element is selected, specify the following
properties for the embedded image:
- : Embedded
- : facsimile
- : 2cm; 2cm
- : Scale
By specifying the Scale value for the property, you adjust the sizing of the image so that the image keeps its proportions.
- On the Report Designer window toolbar, click Save.
Step 2: Viewing the Report
To view the report, do the following:
- In MYOB Acumatica, open the S150 Invoice/Memo (AR6410C3) report form by searching for its
identifier.Tip:This report, which you have modified in this activity, has been published in the U100 dataset. That is, it has been added to the Site Map (SM200520) form, and you can access it in MYOB Acumatica.
- On the Report Parameters tab, in the Document Type box, make sure Invoice (the default value) is selected.
- In the Reference Number box, select any number, for example, 000058.
- On the report form toolbar, click Run Report.
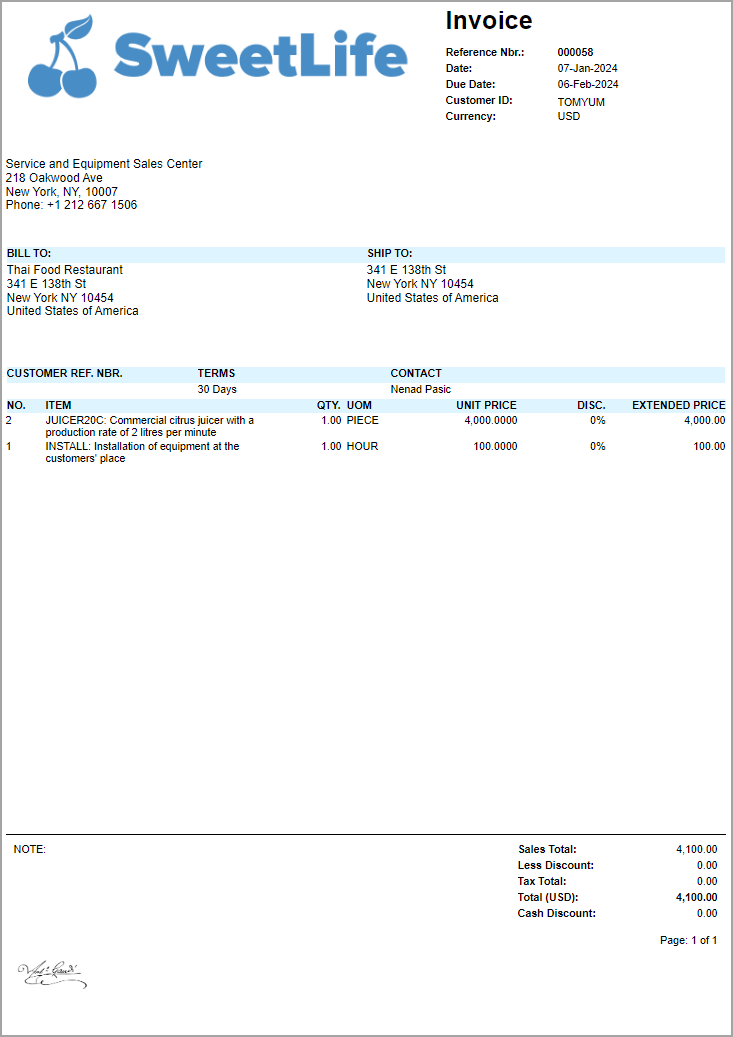
Make sure that the image you have added is displayed below the list of items in the invoice. The following screenshot displays the report.

