
Sales Price Uploading: Process Activity
In this activity, you will learn how to upload sales price lists with regular prices and promotional prices. You will also review how the history of updated prices is kept in the system.
Story
Suppose that the SweetLife Fruits & Jams company has decided to update regular sales prices for 2026 and set up promotional prices for some items during the holiday season.
Acting as SweetLife's accountant, you need to upload two Excel files with both sales price worksheets and see how the system uses them. You also want to review how the sales prices are retained in the system.
Configuration Overview
In the U100 dataset, the following tasks have been performed to support this activity:
- On the Non-Stock Items (IN202000) form, the ONLCOURSE non-stock item has been created.
- On the Customer Price Classes (AR208000) form, the LOCAL customer price class has been created.
- On the Customers (AR303000) form, the ABAKERY and COFFEESHOP customers have been created.
Process Overview
First, you will create sales price worksheets by uploading Excel files on the Sales Price Worksheets (AR202010) form. Then you will release each sales price worksheet and review the new prices on the Sales Prices (AR202000) form.
Finally, to analyze how the system selects prices, you will create an AR invoice on the Invoices and Memos (AR301000) form.
System Preparation
- Download the PricesAndDiscounts_SalesPrices_Base_2026_01_01.xlsx and PricesAndDiscounts_SalesPrices_Promotion_2025_12_01.xlsx files to your computer.
- Launch the MYOB Acumatica website with the U100 dataset preloaded, and sign in to the system as an accountant by using the johnson username and the 123 password.
- In the info area, in the upper-right corner of the top pane of the MYOB Acumatica screen, make sure that the business date in your system is set to 1/30/2026. If a different date is displayed, click the Business Date menu button and select 1/30/2026. For simplicity, in this lesson, you will create and process all documents in the system on this business date.
- On the Company and Branch Selection menu, also on the top pane of the MYOB Acumatica screen, make sure that the SweetLife Head Office and Wholesale Center branch is selected. If it is not selected, click the Company and Branch Selection menu to view the list of branches that you have access to, and then click SweetLife Head Office and Wholesale Center.
Step 1: Importing a Sales Price Worksheet with Base Prices
To import a sales price worksheet with base prices effective from 1/1/2026, do the following:
- Open the Sales Price Worksheets (AR202010) form.
- On the form toolbar, click Add New Record.
- In the Effective Date box, select 1/1/2026.
- In the Description box, enter Base prices for 2026.
- On the table toolbar, click Load Records from File.
- In Step 1 of the Import Data dialog box, which opens, click Upload File (*.csv, *.xlsx).
- In the dialog box that opens, find the PricesAndDiscounts_SalesPrices_Base_2026_01_01.xlsx file and select it for upload.
- In Step 2, leave the default values and click Next.
- In Step 3, for the Price column name, specify the Pending Price property name and click Finish.
- Make sure that the worksheet contains four lines (see the following screenshot),
and save it.
Figure 1. The newly created sales price worksheet 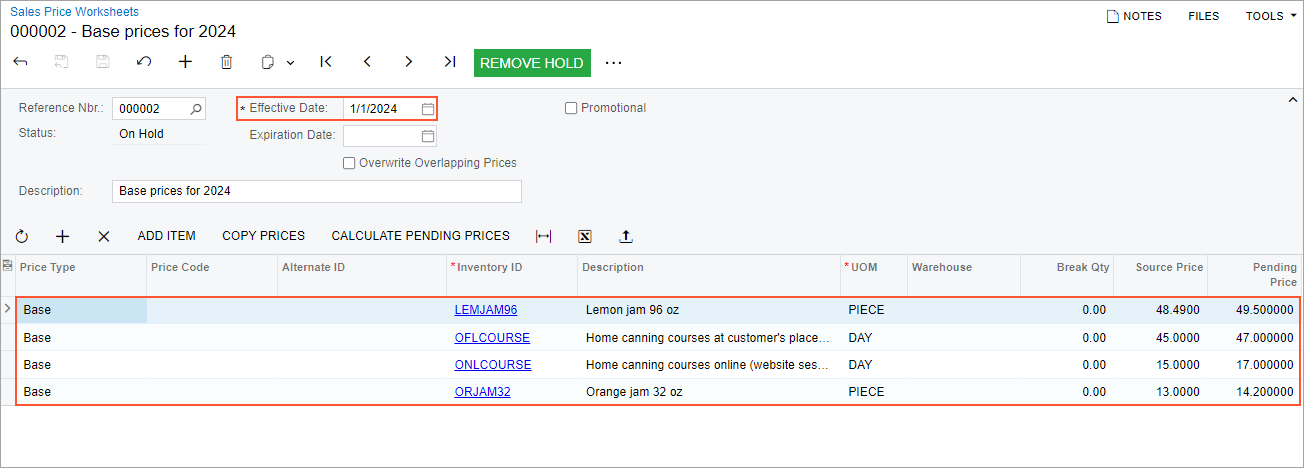
- On the form toolbar, click Remove Hold, and then click Release to release the worksheet.
Step 2: Importing a Sales Price Worksheet with Promotional Prices
To import a sales price worksheet with promotional prices that are effective from 12/1/2025 to 1/15/2026, do the following:
- While you are still on the Sales Price Worksheets (AR202010) form, on the form toolbar, click Add New Record.
- In the Effective Date box, select 12/1/2025.
- In the Expiration Date box, select 1/15/2026.
- Select the Promotional check box.
- In the Description box, enter Promotional prices 12/1/2025 - 1/15/2026.
- On the table toolbar, click Load Records from File.
- In Step 1 of the Import Data dialog box, which opens, click Upload File (*.csv, *.xlsx).
- In the dialog box that opens, find the PricesAndDiscounts_SalesPrices_Promotion_2025_12_01.xlsx file, and select it for upload.
- In Step 2, leave the default values and click Next.
- In Step 3, for the Price column name, specify the Pending Price property name and click Finish.
- Make sure that the worksheet contains five lines and save it.
Figure 2. The newly created sales price worksheet with promotional prices 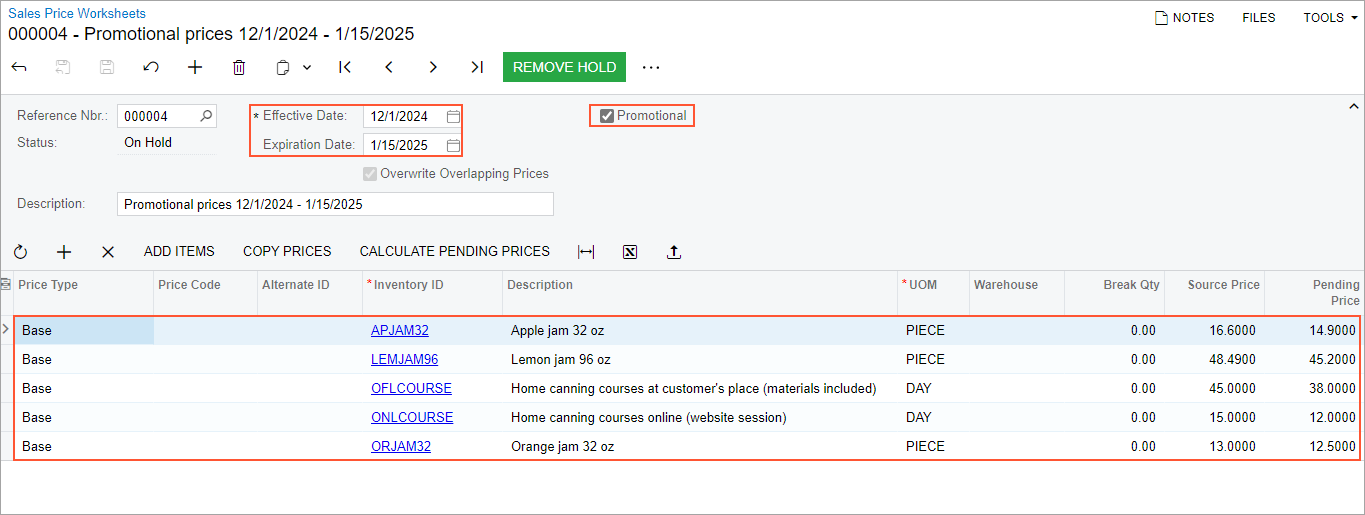
- On the form toolbar, click Remove Hold, and then click Release.
Step 3: Reviewing How the System Retains the Sales Prices
To review the sales prices for the ONLCOURSE non-stock item, do the following:
- Open the Sales Prices (AR202000) form.
- In the Price Type box of the Selection area, make sure that All Prices is selected.
- In the Inventory ID box, select ONLCOURSE.
- In the Selection area, clear the Effective As Of box. In
the table, review the prices that exist for the ONLCOURSE non-stock
item.
The base price of $15 is effective from 1/1/2025 to 12/31/2025.
For the period from 12/1/2025 to 1/15/2026, the promotional price of $12, which you uploaded in the previous step, is effective.
Also, starting from 1/1/2026, a new base price of $17, which you uploaded in Step 1, is effective.
Besides, the customer-specific price configured for COFFEESHOP ($13.00) and the price for the LOCAL customer price class ($14.50) are also effective in the system starting from 1/1/2025, as shown in the screenshot.
Figure 3. The sales prices specified for the ONLCOURSE non-stock item 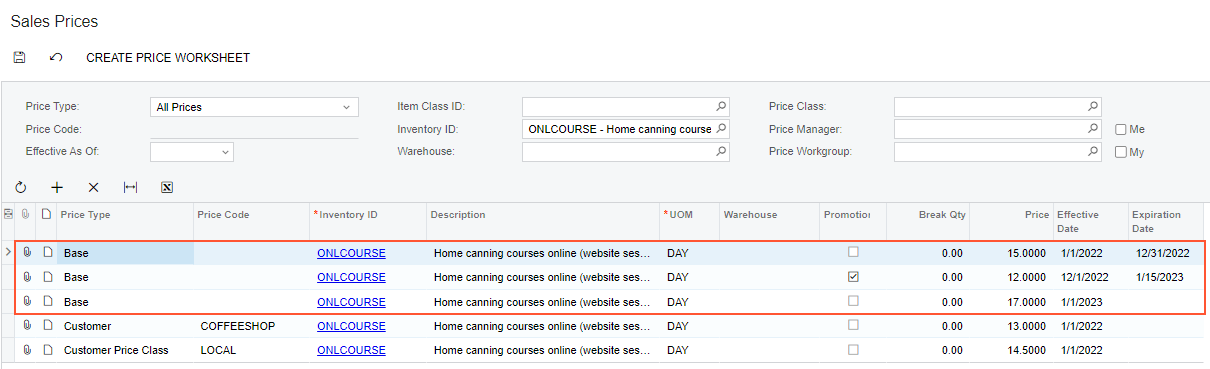
Step 4: Creating an Invoice with the New Price
To create an AR invoice with a new sales price, do the following:
- Open the Invoices and Memos (AR301000) form.
- On the form toolbar, click Add New Record and specify the
following settings in the Summary area:
- Type: Invoice
- Customer: ABAKERY
- Date: 1/30/2026
- Post Period: 01-2026
- Description: One-day online course
- On the Details tab, click Add Row
on the table toolbar, and specify the following settings in the added row:
- Branch: HEADOFFICE
- Inventory ID: ONLCOURSE
- Quantity: 1
Review the price in the Unit Price column. It shows the new base price ($17) effective from 1/1/2026, which you uploaded in Step 1.
- In the Date box of the Summary area, change the date to 1/3/2026.
- On the Details tab, review the price in the
Unit Price column. It now shows the new promotional
price ($12) effective from 12/1/2025 to 1/15/2026, as shown in the following screenshot, because the invoice date is
within this date range, and promotional prices have a priority over base
prices.
Figure 4. The invoice with the promotional price specified for the ONLCOURSE non-stock item 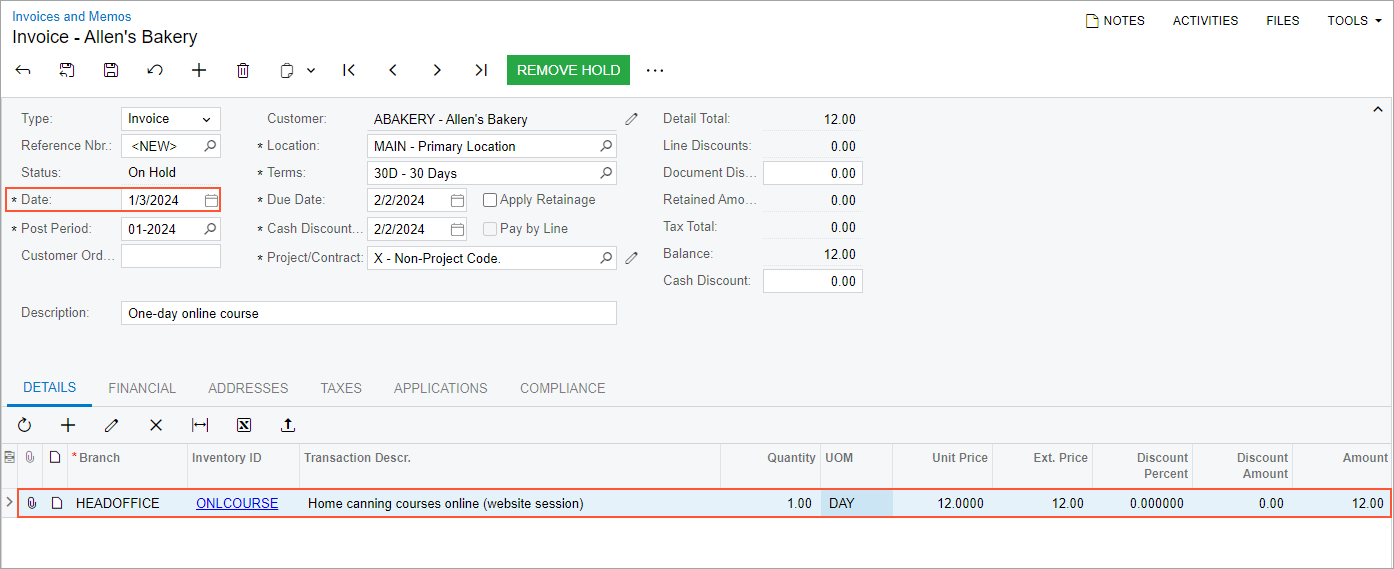
- Close the form without saving your changes to the invoice, which was created solely for testing purposes.