
Modern Customer Portal: Role Assignment in MYOB Acumatica
After a portal manager creates a contact, the contact must be assigned access rights before the corresponding portal user can sign in to the system. This can happen in one of these ways:
- You or another MYOB Acumatica administrator assign the role or roles to the contact based on a portal manager’s request. Below you’ll read about this scenario.
- A portal manager assigns the role or roles to the contact on their own, as described in Modern Customer Portal: Role Assignment in the Portal.
At a Glance: Assigning Access Rights in MYOB Acumatica
- Receive a case requesting the assignment of one or more roles to the contact.
- Assign the appropriate user type and the requested role or roles to the contact.
- Save the record. The system automatically creates a user account for the contact.
Who performs these steps: An MYOB Acumatica administrator.
Assigning Roles to a Contact in MYOB Acumatica
Suppose that the portal manager has created a case requesting that you assign a role to a contact. The submitted case is visible in both the portal and MYOB Acumatica.
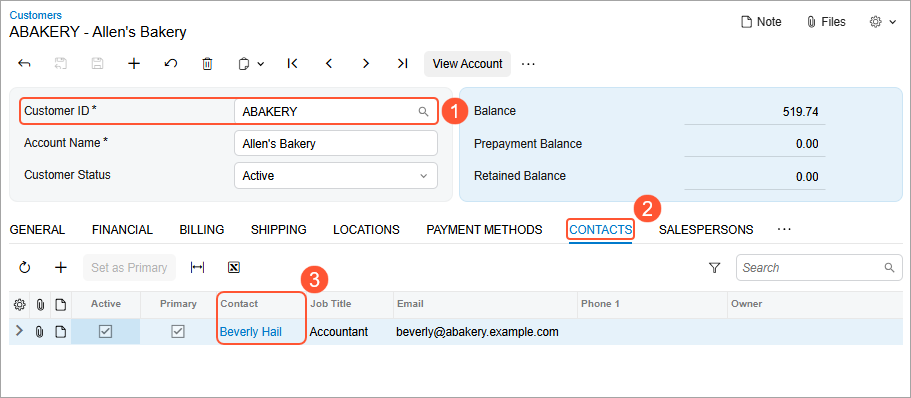
To find the contact quickly, first open the customer on the Customers (AR303000) form (Item 1 below). Then on the Contacts tab (Item 2), click the link in the Contact column (Item 3).
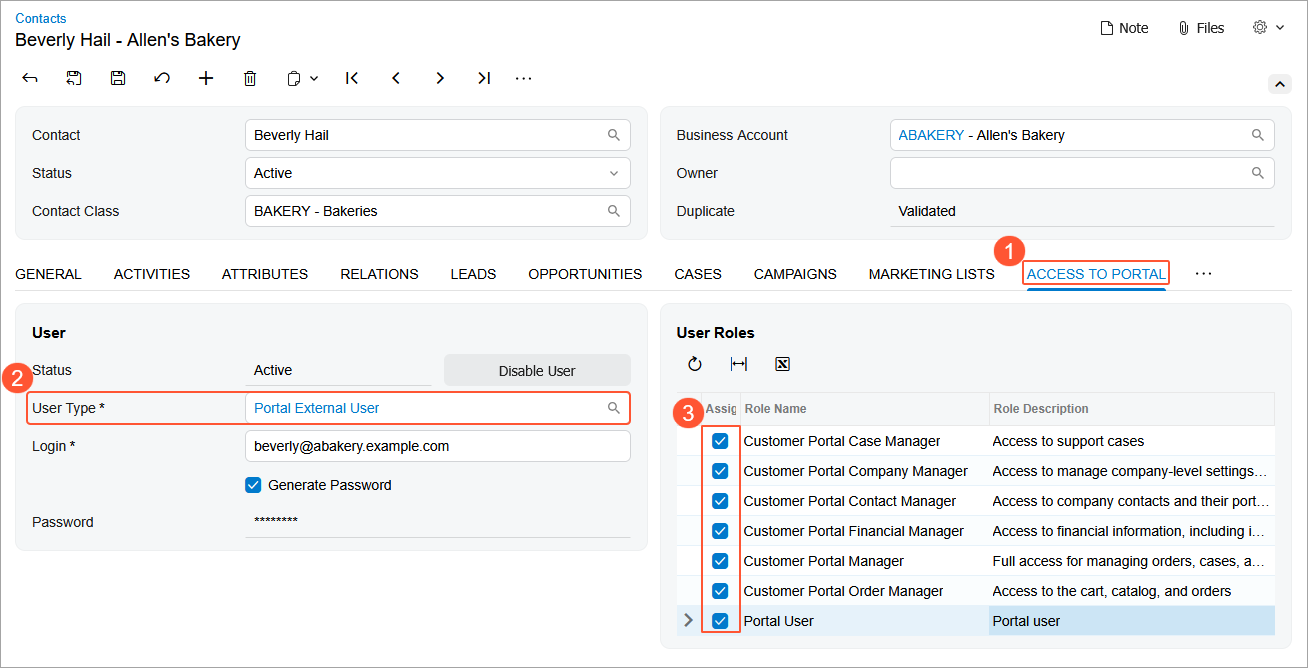
The Contacts (CR302000) form opens with the contact selected. On the Access to Portal tab (Item 1 below), select the Portal External User user type (Item 2).
In the User Roles section, select the check boxes that correspond to the roles the portal manager requested (Item 3):
- The Portal User role.Important:By default, every contact must be assigned this role so that the employee can sign in to the Modern Customer Portal.
- At least one role that matches the employee’s responsibilities (see below).
Save your changes. The system automatically creates a user account on the Users (SM201010) form.
Viewing Portal Users
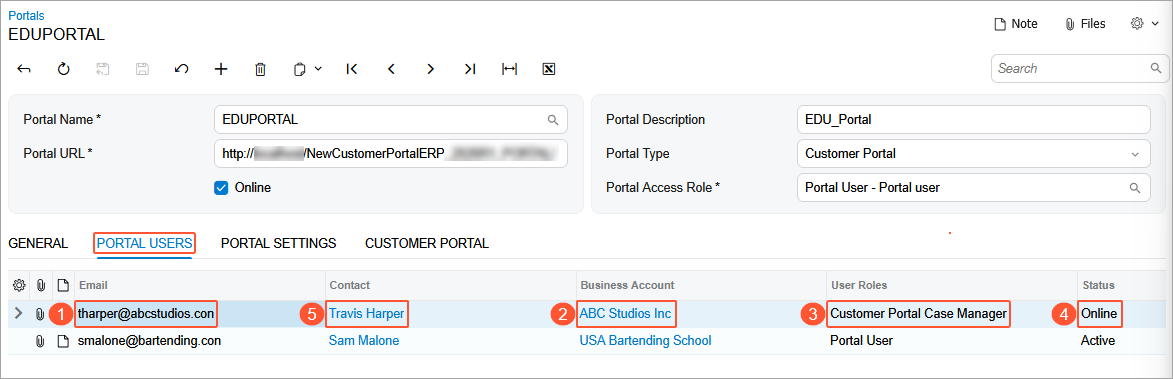
After you create portal users, they appear on the Portal Users tab of the Portals (SP701000) form. The list shows each user’s roles, email address, linked business account (customer), and status (Items 1–4 below).
You can click links (Item 2 and 5) to view or update information about the customer and the contact on the Business Accounts (CR303000) and Contacts (CR302000) forms.
What's Next?
Now that the portal user has been assigned the needed role or roles, they can sign in to the Modern Customer Portal and perform tasks based on their roles.