Instance Maintenance: To View the Settings of an Instance
The following activity will walk you through the process of viewing and modifying the settings of the MYOB Acumatica application instance.
Story
Suppose that you are the system administrator of your company, and you need to review the settings of the existing MYOB Acumatica application instance and change its name.
Process Overview
In this activity, you will review the settings of the MYOB Acumatica application instance and change the instance name.
System Preparation
Before you begin performing the step of this activity, make sure that you have performed the following prerequisite activity: Instance Deployment: To Deploy an Instance with Demo Data.
Step: Changing the Settings of an Application Instance
To review the settings of the instance and change its name, do the following:
- On the Start menu, click Acumatica ERP Configuration to open the MYOB Acumatica ERP Configuration Wizard.
- On the Welcome page, click Perform Application Maintenance.
- In the list of existing application instances, click the row
with the MYOB Acumatica application instance you want to review, and then click the Review
Instance Info button.
This opens the Instance Information page.
- To change the instance name, do the following:
- Right of the Instance Name box, click Rename.
- Change the name of the instance to
AcumaticaTraining, as shown in the following
screenshot.
Figure 1. The updated instance name 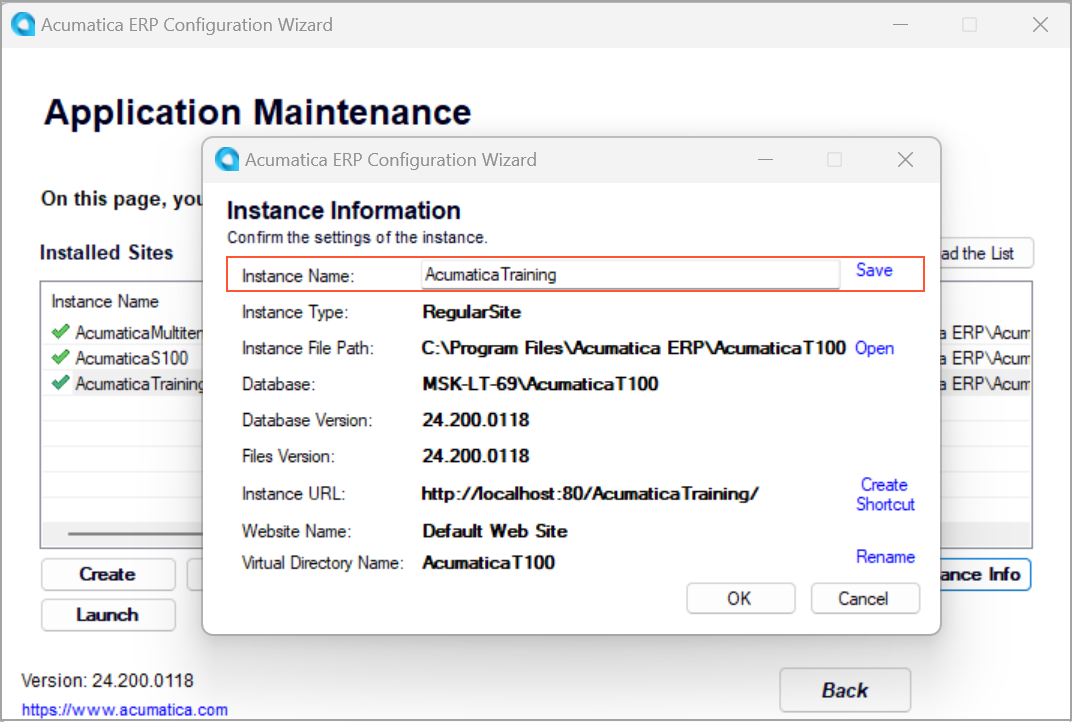
- Right of the Instance Name box, click Save.
- Right of the Instance Files Path box, click
Open.
This opens the folder where the selected application instance is installed. In particular, this folder contains the web.config file of the current instance.
- To change the virtual directory name, go back to the MYOB Acumatica ERP Configuration
Wizard, and do the following:
- Right of the Virtual Directory Name box, click Rename.
- Change the virtual directory name to AcumaticaTraining.
- Right of the Virtual Directory Name box, click Save.
- Click OK to save your changes.
- In the dialog box with the notification message, click
OK.
This closes the Instance Information page and returns you to the Application Maintenance page.
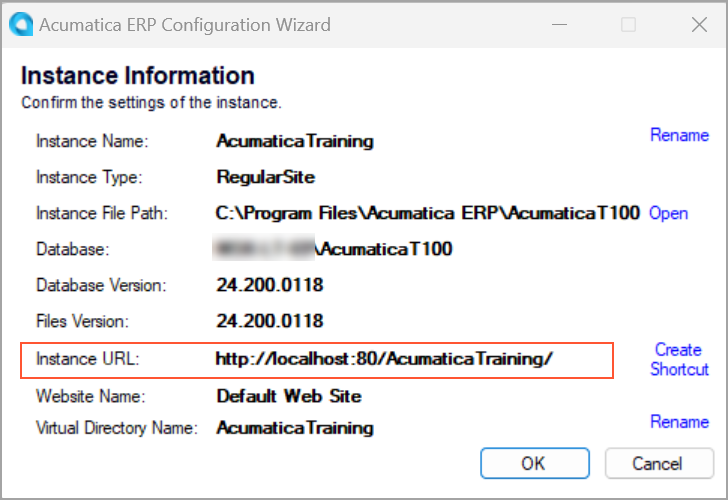
- Open the Instance Information page again and notice that the URL of the renamed
AcumaticaTraining instance has also been updated, as shown in the
following screenshot.
Figure 2. The updated URL of the instance