
Payments with Write-Offs: To Create a Payment with a Balance Write-Off
The following activity will walk you through the processing of a payment with a balance write-off.
Story
Suppose that on January 30, 2025, SweetLife Fruits & Jams received a payment from Morning Cafe in the amount of $195. The payment should be applied to a $199 invoice dated 1/6/2025.
Acting as a SweetLife accountant, you need to create the payment in the system and apply it to the outstanding invoices of this customer. As you are processing the payment, you need to create a balance write-off for the remaining invoice balance of $4 and apply it to the payment.
Configuration Overview
In the U100 dataset, the following tasks have been performed to support this activity:
- On the Reason Codes (CS211000) form, a reason code for balance write-offs has been created.
- On the Customers (AR303000) form, the MORNINGCAF customer has been created. For the customer, the Enable Write-Offs check box has been selected on the Financial tab of the Customers form.
- On the Invoices and Memos (AR301000) form, the $199 invoice that will be paid in the activity has been created for the customer.
Process Overview
In this activity, on the Payments and Applications (AR302000) form, you will create a payment, apply it to the customer's invoice, and create a balance write-off on the Documents to Apply tab of the form. You will then release the payment and its application and review the generated GL transaction on the Journal Transactions (GL301000) form.
System Preparation
To prepare the system for the processing of the customer payment, do the following:
- Launch the MYOB Acumatica website, and sign in to a company with the U100 dataset preloaded. To
sign in as an accountant, use the following credentials:
- Username: johnson
- Password: 123
- In the info area, in the upper-right corner of the top pane of the MYOB Acumatica screen, make sure that the business date in your system is set to 1/30/2025. If a different date is displayed, click the Business Date menu button and select 1/30/2025. For simplicity, in this exercise, you will create and process all documents in the system on this business date.
- On the Company and Branch Selection menu, also on the top pane of the MYOB Acumatica screen, make sure that the SweetLife Head Office and Wholesale Center branch is selected. If it is not selected, click the Company and Branch Selection menu to view the list of branches that you have access to, and then click SweetLife Head Office and Wholesale Center.
Step 1: Creating a Payment
To create a payment received from the customer, do the following:
- On the Payments and Applications (AR302000) form, add a new record.
- In the Summary area, specify the following settings:
- Type: Payment
- Customer: MORNINGCAF
- Application Date: 1/30/2025 (inserted by default)
- Application Period: 01-2025 (inserted by default)
- Payment Amount: 195
- Description: Payment received on January 30
Step 2: Applying the Payment to an Invoice and Creating a Balance Write-Off
To apply the payment to the customer's invoice and create a balance write-off, do the following:
- While you are still on the Payments and Applications (AR302000) form viewing the payment you have created, in the table on the Documents to Apply tab, review the customer's invoices, which the system has loaded automatically.
- Click the Included check box for the row in the table, which corresponds to a $199 invoice with the 000106 reference number. Notice that the Applied to Documents box in the Summary area now displays 199.00 and the Available Balance box displays -4.00.
- On the Documents to Apply tab, in the row of the $199
invoice, specify the following settings (also shown in the screenshot below):
- Amount Paid: 195
- Write-Off Amount: 4
- Write-Off Reason Code: BALWOFF
- On the form toolbar, click Save to save your changes. The
saved payment is illustrated in the following screenshot.
Figure 1. Payment with a balance write-off 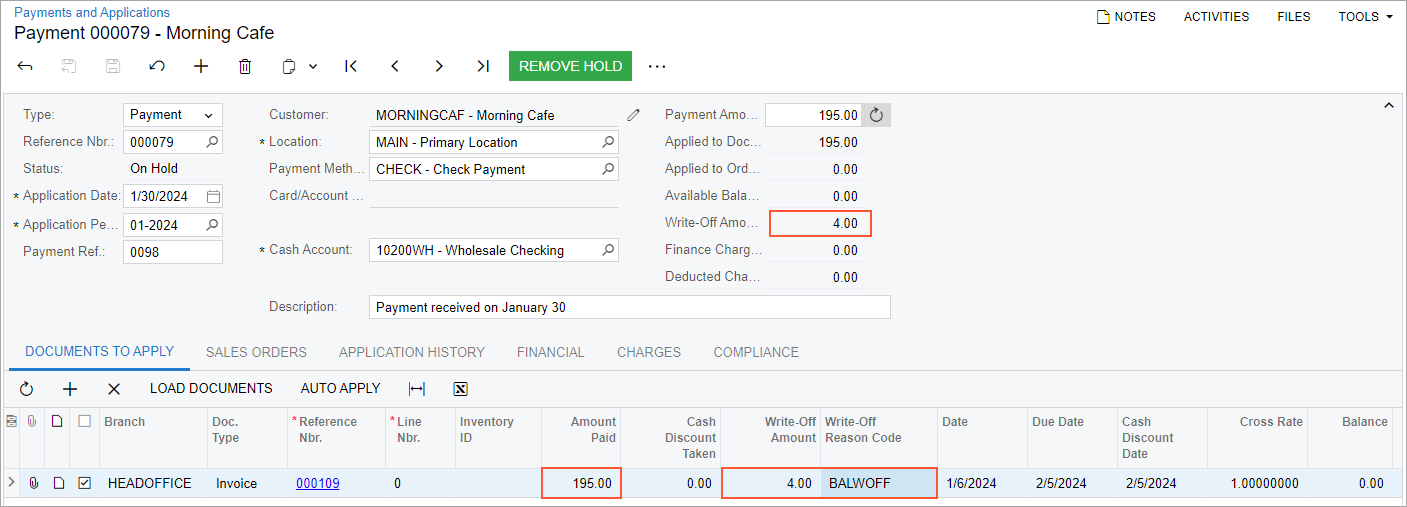
- Review the Summary area of the form. The Applied to Documents box now displays 195.00, the Write-Off Amount box displays 4.00, and the Available Balance box displays 0.00.
Step 3: Releasing the Payment and Its Application
To release the payment and its application to the invoice, do the following:
- While you are still on the Payments and Applications (AR302000) form viewing the payment you have created, click Remove Hold on the form toolbar to give the payment the Balanced status.
- On the form toolbar, click Release to release the payment
and its application.
Notice that the payment now has the Closed status.
- On the Application History tab, review the row that the
system has added, and click the link in the Batch Number
column for this row.
The system opens the Journal Transactions (GL301000) form with the GL transaction generated after the release of the payment and its application.