To Add a Form to the Mobile Site Map by Using an XML File
To add the metadata for an MYOB Acumatica
form to the mobile site map, you have to include it in a new .xml file in
the \App_Data\Mobile folder of the website. If the metadata must contain
multiple new .xml.inc files, place the files in the
\App_Data\Mobile\includes folder of the website.
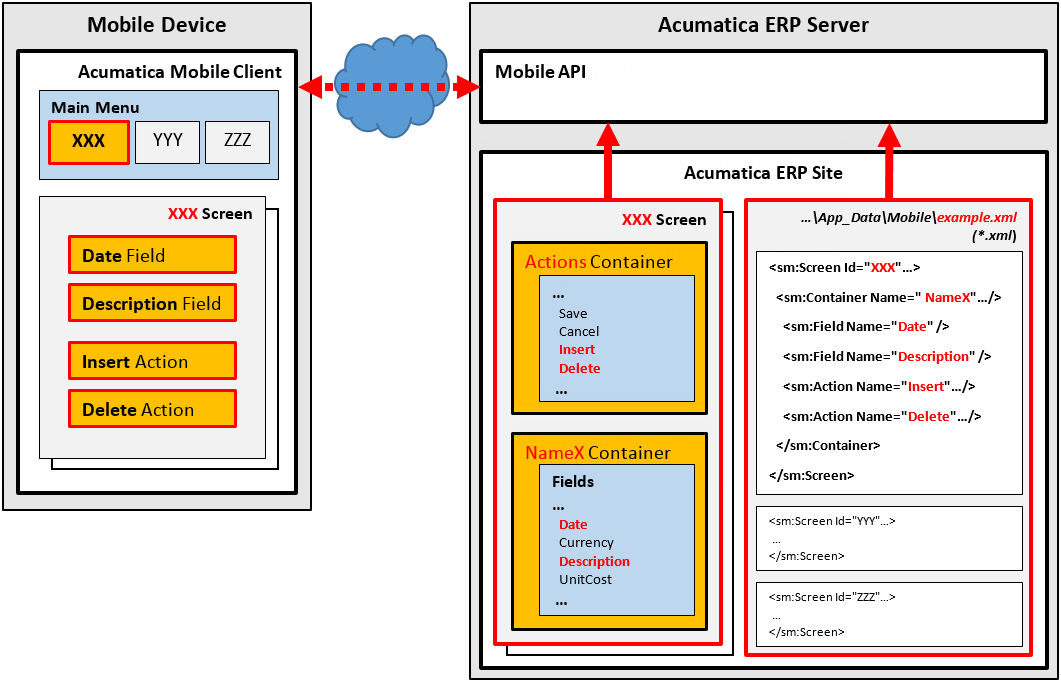
Suppose that you need to add to the mobile site map an MYOB Acumatica form with the XXX screen ID, and you are sure that the mobile site map does not
contain the XML metadata for this form. Further suppose that you have to add the
Date and Description fields and the
Insert and Delete actions of the original XXX
screen of MYOB Acumatica to the screen on the mobile device, as the following diagram shows.Figure 1. Use of an XML file to configure a screen in the mobile app
Get the WSDL schema for the original XXX screen of MYOB Acumatica,
as described in Getting the WSDL Schema.
Add the sm:Screen tag to the sm:SiteMap tag, as
described in Configuring Lists.
In the WSDL schema, find the Insert and Delete actions
and make sure that these actions belong to the Action container.
In the WSDL schema, find the Date and Description
fields and make sure that these fields belong to the NameX container.
Add the sm:Container tag to the sm:Screen tag,
assigning it the NameX name to map the NameX container of the original
XXX screen of MYOB Acumatica to the XXX screen in the mobile app (see the figure above).
For each required field, add an sm:Field tag with the original name to
the container tag to map the field to the XXX screen in the mobile app.
For each required action, add an sm:Action tag with the original name to
the container tag to map the action to the XXX screen in the mobile app.
Note:
Once you have changed the mobile site map, you can include the added
.xml and .xml.inc files in a customization project
as File items to deploy the customization on the target system. For details, see Custom Files in the Customization Guide.