Action Definition: To Define an Action for a Form
The following activity will walk you through the process of implementing an action for a form. The action will be represented by a button on the form toolbar of the form and the equivalent command on the More menu.
Story
Suppose that you are a developer working on the Repair Work Orders (RS301000) form in the PhoneRepairShop customization project. You need to create an action that gives users the ability to assign the selected repair work order to themselves and add the corresponding button to the form toolbar. You’ll define an action in the graph of the form and configure the associated button (on the form toolbar) and its equivalent command (on the More menu). The button and command will be visible only if the repair work order has the On Hold or Ready for Assignment status and available if the Assignee box doesn’t already contain the current user's name.
When the user clicks the button or command, the contact ID associated with the current user, which is specified in the Linked Entity box of the Users (SM201010) form, will be inserted into the Assignee box. (If the user has selected an assignee before clicking the button or command, it will be overridden.) The clicking of the button or command will not affect the status of the repair work order.
Process Overview
- Creating the
AssignToMeaction, the associated Assign to Me button on the form toolbar, and the command with the same name on the More menu - Configuring the availability and visibility of the Assign to Me button and the corresponding command on the More menu
- Testing the Assign to Me button and the associated action
System Preparation
Make sure that you’ve configured your instance by performing the Test Instance for Customization: To Deploy an Instance with Custom Maintenance and Data Entry Forms prerequisite activity.
Step 1: Implementing the AssignToMe Action
In this step, you’ll implement the AssignToMe action. The associated
button will be placed on the form toolbar and the equivalent command on the More
menu (under the default Other category).
To implement the AssignToMe action, do the following:
- In Visual Studio, open the RSSVWorkOrderEntry.cs file.
- After the
Graph constructorregion of theRSSVWorkOrderEntryclass, insert the following code.#region Actions public PXAction<RSSVWorkOrder> AssignToMe = null!; [PXButton] [PXUIField(DisplayName = "Assign to Me", Enabled = true)] protected virtual void assignToMe() { // Get the current order from the cache. RSSVWorkOrder row = WorkOrders.Current; // Assign the contact ID associated with the current user row.Assignee = PXAccess.GetContactID(); // Update the data record in the cache. WorkOrders.Update(row); // Trigger the Save action to save changes in the database. Actions.PressSave(); } #endregionTip: You don’t need to set the CommitChanges property of the PXButton attribute toTruebecause CommitChanges isTrueby default for PXButton. - Save your changes.
Step 2: Specifying the Availability and Visibility of the Assign to Me Button and Command (with RowSelected)
The Assign to Me button on the form toolbar (and the equivalent command on the More menu) should be:
- Visible for only orders with the On Hold or Ready for Assignment status
- Available if the Assignee box does not already contain the employee name of the user who is currently signed in
To satisfy these conditions, you should specify the Enabled and
Visible properties of the AssignToMe action.
Do the following:
- In Visual Studio, open the RSSVWorkOrderEntry.cs file.
- Add the handler for the RowSelected event for the
RSSVWorkOrderDAC, as shown in the following code.// Manage visibility and availability of the actions. protected virtual void _(Events.RowSelected<RSSVWorkOrder> e) { if (e.Row == null) return; RSSVWorkOrder row = e.Row; } - In the
_(Events.RowSelected<RSSVWorkOrder> e)event handler, add the following code to the end of the method.AssignToMe.SetEnabled((row.Status == WorkOrderStatusConstants.ReadyForAssignment || row.Status == WorkOrderStatusConstants.OnHold) && WorkOrders.Cache.GetStatus(row) != PXEntryStatus.Inserted);In the code above, you’ve checked theWorkOrdersobject status in the PXCache to disable the Assign to Me button and command until the repair work order is saved in the database. - In the
_(Events.RowSelected<RSSVWorkOrder> e)event handler, add the following code to the end of the method.AssignToMe.SetVisible(row.Assignee != PXAccess.GetContactID());
- Save your changes.
- Rebuild the project.
Step 3: Testing the Assign to Me Button and the Associated Action
To test the AssignToMe action and the Assign to
Me button, do the following:
- In MYOB Acumatica, open the Repair Work Orders (RS301000) form.
- Create a work order, and specify the following settings:
- Customer ID: C000000001
- Service: Battery Replacement
- Device: Nokia 3310
- Description: Battery replacement, Nokia 3310
- Save your changes.
The new repair work order (for example, 000003) has been created.
Notice that the Assign to Me button is displayed on the form toolbar, as shown below.
Figure 1. The Assign to Me button on the Repair Work Orders form 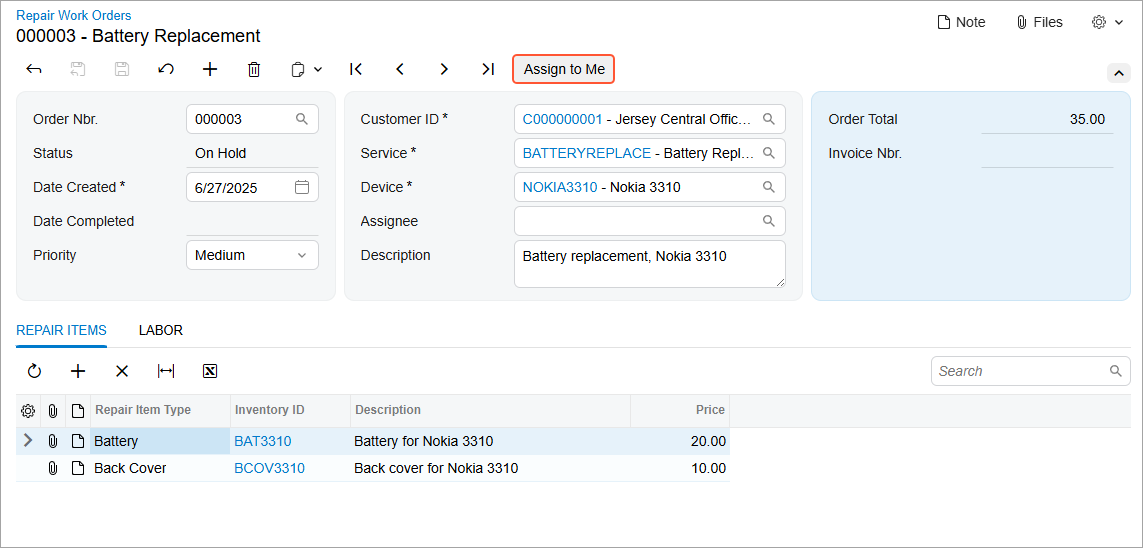
- On the form toolbar, click the Assign to Me button.
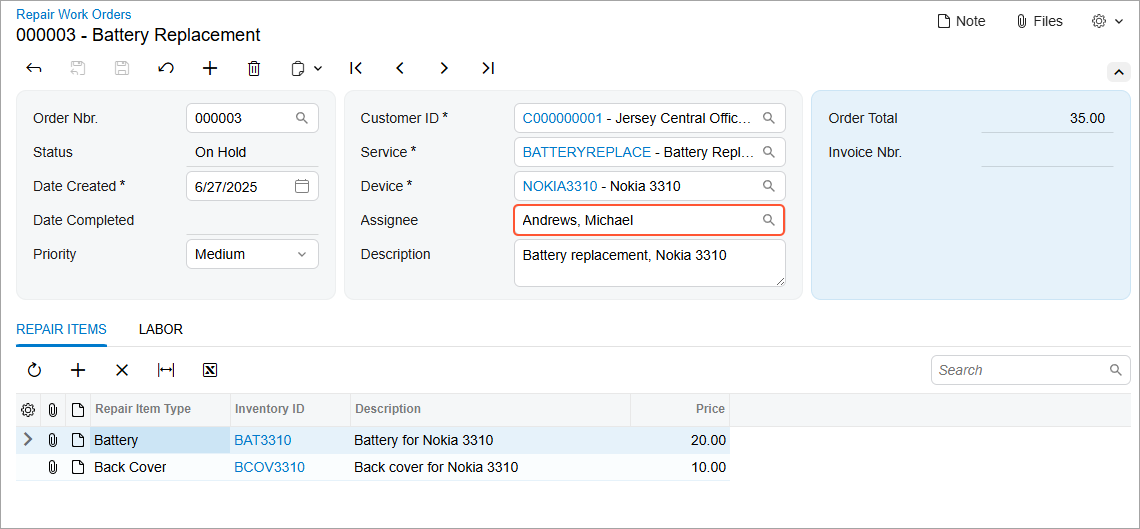
In the Assignee box, notice that the employee name associated with the current user is now specified; the employee name associated with the user was copied from the Linked Entity box of the Users (SM201010) form. Also, notice that the Assign to Me button is no longer displayed on the form toolbar.
Figure 2. The employee name in the Assignee box