
Modern UI: Site-Wide Personalization
With Modern UI functionality, if you have the appropriate privileges, you can modify and customize the overall appearance of MYOB Acumatica forms, including both standard and custom forms. Additionally, you can set a default form layout for the entire site. You can perform this site-wide personalization only if your user account is assigned both the Administrator and Customizer roles.
Any site-wide modifications you make will be shared among all system users. When you apply these changes, you can choose to either keep or override any personal configurations that system users have made.
Using Form Configuration Mode
To modify a form’s appearance, you click the Settings button on the form title bar and then click Screen Configuration. You are now working in Form Configuration mode (as shown in the following screenshot) for the current form; if you navigate to another form, the mode is deactivated, discarding any changes you have made.
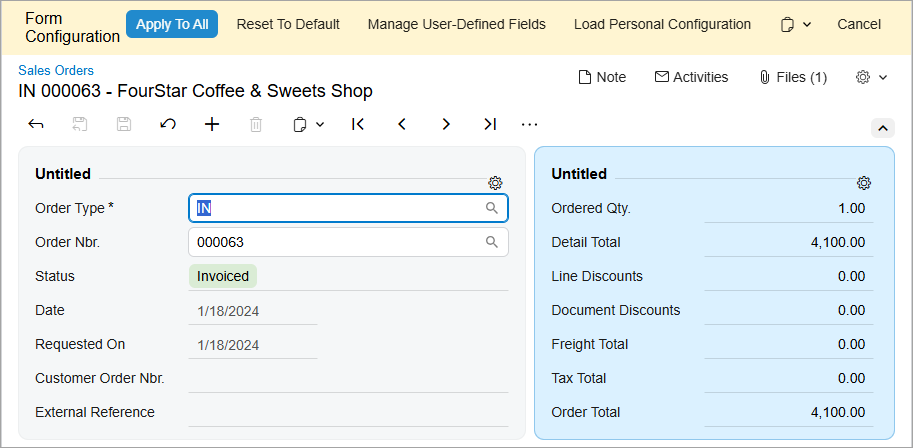
When Form Configuration mode is active, the system does the following:
- Applies either the default layout of the current form or the layout shared between all users (if one has been configured)
- Displays the Form configuration pane on the top of the form
- Displays the Settings buttons next to each fieldset and tab control
The buttons that appear in the Form Configuration pane are described in the following table.
| Button | Description |
|---|---|
| Apply to All | Applies the changes to the layout shared between all users and deactivates Form Configuration mode. The system prompts you about whether it should replace or retain the personalized layouts of individual users. |
| Reset to Default | Restores the form to the default layout supplied by MYOB Acumatica. |
| Manage User-Defined Fields | Opens a dialog box where you can manage user-defined fields associated with the current form. See Modern UI: Managing User-Defined Fields for details. |
| Load Personal Configuration | Opens a dialog box that displays other users' customized layouts for the current form and gives you the ability to apply the selected layout to the layout shared between all users. |
| Export Configuration | Exports the current form’s configuration to an external file. |
| Import Configuration | Imports the form’s configuration from an external file and applies it to the current form. |
| Cancel | Discards all changes and deactivates Form Configuration mode. |
Customizing Tab Controls
In Form Configuration mode, you can change the order of tabs and hide or display individual tabs. Changes to the tab controls will be applied to form layout shared among all users.
To reorder a tab, click and hold the tab name and then drag it to the desired position (as shown in the screenshot below).
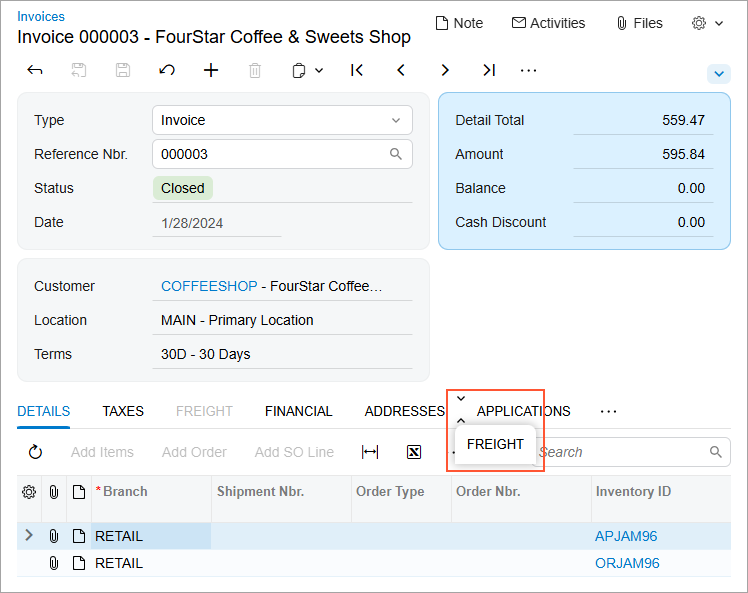
To hide a tab, click and hold the tab name, drag it first to the More button, and then drag it to the Hidden Tabs section (as shown in the screenshot below).
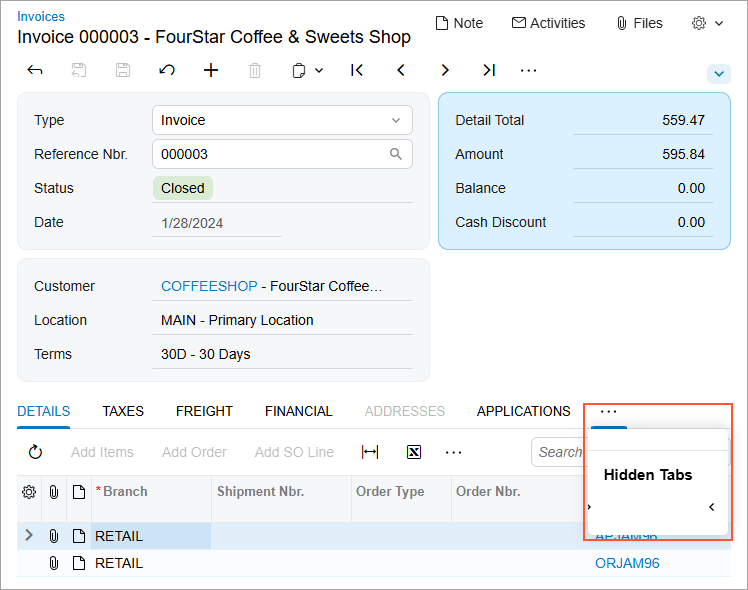
To display a hidden tab, click the More button and then drag the tab name from the Hidden Tabs section to the needed position.
Additionally, in Form Configuration mode, Settings buttons appear next to each tab control. If you click one of these buttons, the Tab Configuration dialog box opens for the tab, as shown in the screenshot below.
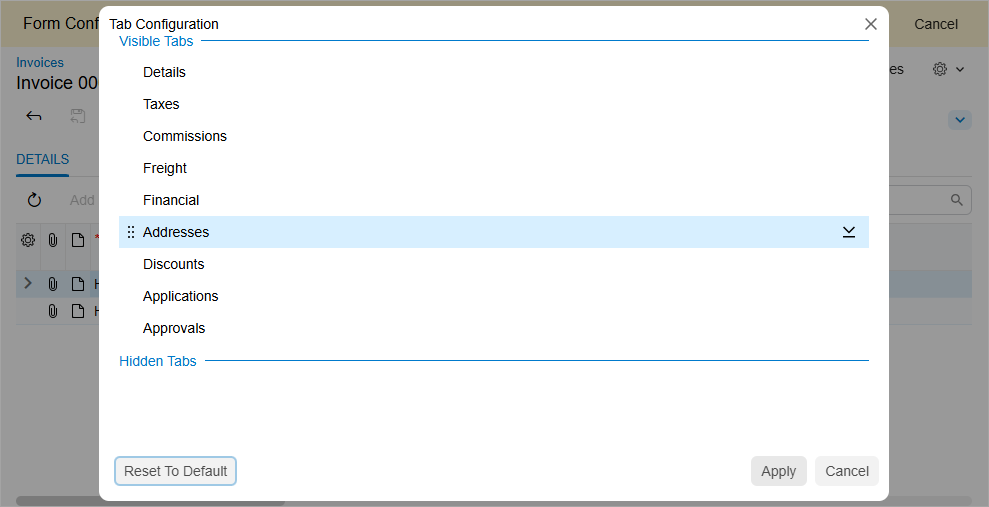
In the Tab Configuration dialog box, you can do the following:
- To hide a tab, drag it from the Visible Tabs section to the Hidden Tabs section, or click the arrow button next to the tab name.
- To display a tab, drag it from the Hidden Tabs section back to the Visible Tabs section, or click the arrow button next to the tab name.
- To modify the order of the tabs, drag the tab name to the desired position in the list.
- To apply the tab configuration, click Apply.
- To cancel the customization of the tab, click Cancel.
- To reset the customization and restore the default layout of the tab control, press Reset to Default.
Customizing Tables
In Form Configuration mode, you can add or remove visible columns, reorder columns, and change a column's width. Any changes you make to the table will be applied to the layout that all users share.
In the Modern UI the Settings button is displayed in the upper-left corner of the table control. By clicking this button, you can open the Column Configuration dialog box, as shown in the following screenshot.
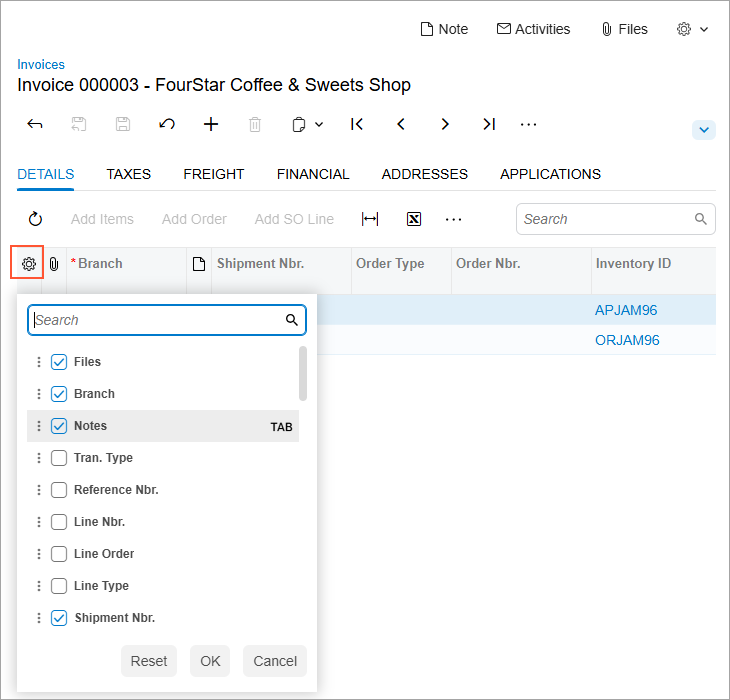
In the Column Configuration dialog box, you can do any of the following:
- To hide or display a column, clear or select the check box next to the column name.
- To modify the order of the columns, drag the column name to the desired position in the list.
- To change whether the column should receive focus when you press Tab, hover over the column name and click Tab to change its state (which will cause the word to be crossed out or appear normal).
- To apply the column configuration, click OK.
- To cancel the column customization, click Cancel.
- To reset the customization and restore the default layout of the table, click Reset.
Customizing Fieldsets
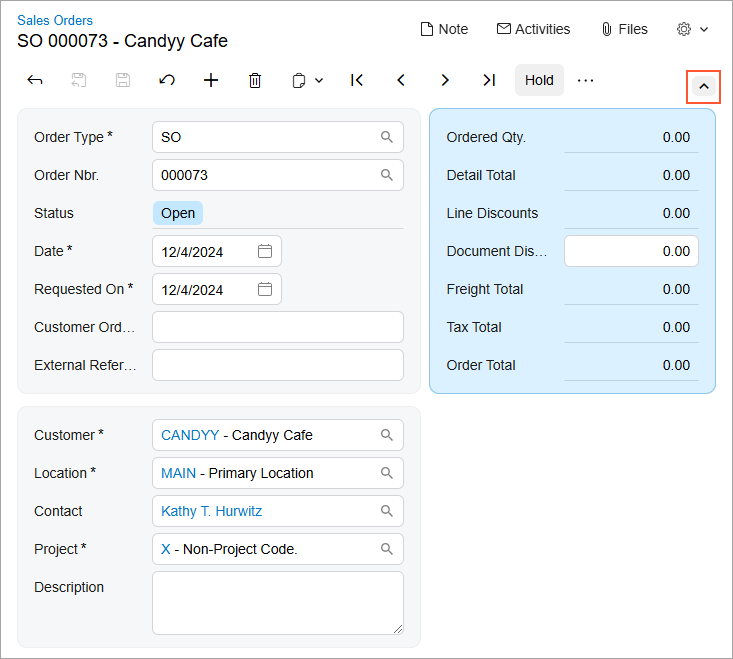
In Form Configuration mode, you can expand and collapse certain controls to display fewer or more data fields. The collapsed or expanded state of the controls would be applied to form layout shared between all users.
To expand or collapse a set of data fields, click the arrow icon in the form toolbar, as shown in the screenshots below.
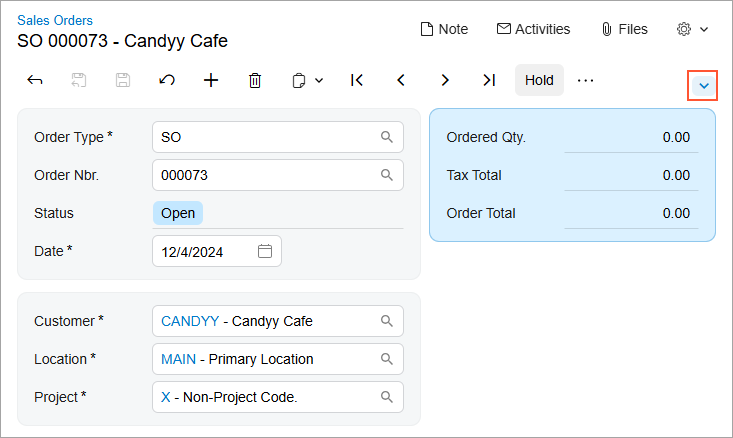
Additionally, when Form Configuration mode is active, the Settings buttons appear in the upper-right corner of the fieldsets. If you click one of these buttons, the Section Configuration dialog box opens, as shown in the screenshot below.
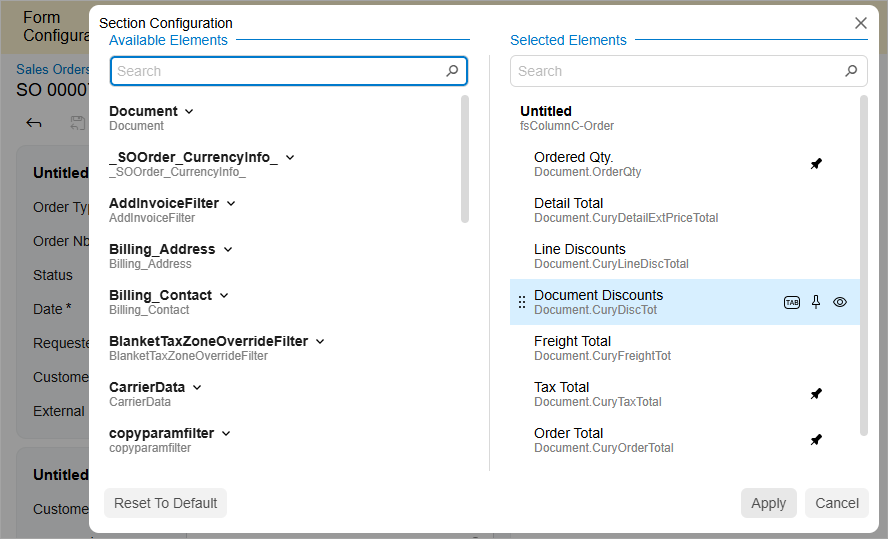
In the Section Configuration dialog box, you can perform the following actions:
- To rename the fieldset, hover over the group title in the Selected Elements pane, click the Edit button, and specify the new name of the fieldset.
- To add a UI element to the fieldset, locate the desired element in the Available Elements pane and drag it to the Selected Elements pane.
- To remove a UI element from the fieldset, hover over the element name in the
Selected Elements pane and click the
Delete button. Tip:Default UI elements cannot be removed; only personalized elements can be.
- To change whether the UI element should receive focus when a user presses Tab, hover over the element name in the Selected Elements pane and click Tab to change its state (which will cause the word to be crossed out or appear normal).
- To change whether the UI element should be displayed when the fieldset is collapsed, hover over the element name in the Selected Elements pane and click Pin.
- To hide the UI element, hover over the element name in the Selected Elements pane and click the Visible button. If all elements in a fieldset are hidden, the entire fieldset becomes hidden.
- To modify the order of UI elements, drag the element name to the desired position in the Selected Elements pane.
- To apply the fieldset configuration, click Apply.
- To cancel fieldset customization, click Cancel.
- To reset the customization and restore the default layout, click Reset to Default.