Diagram View: To Add Dialog Boxes
The following activity will walk you through the process of adding dialog boxes for the workflow. No matter whether you are editing a workflow on the Workflow (Diagram View) page or the Workflow (Tree View) page, you add the dialog boxes on the Dialog Boxes page.
Story
In the HardwareViewpoint company, a salesperson should add additional information when they perform the following actions with an opportunity on the Opportunities (CR304000) form of MYOB Acumatica:
- While accepting the opportunity, specify the reason and the stage of the opportunity
- While rejecting the opportunity, select the reason and provide additional details for it
- While assigning the opportunity, select the owner of the opportunity
Acting as the technical specialist, you need to add dialog boxes that prompt users
for this information when they click the corresponding commands or buttons to invoke
the Accept, Reject, and Assign
actions.
Process Overview
By using the Dialog Boxes page, you will create the
dialog box for the Accept action of the
OpportunitiesAssigned workflow. As self-guided exercises, you will also
create the dialog boxes for the Reject and Assign
actions of the workflow.
System Preparation
Before you begin adding a new state, do the following:
- Launch the MYOB Acumatica website with the U100 dataset preloaded, and sign in as system
administrator by using the gibbs username and the 123
password.Tip:The gibbs user is assigned the Administrator role, which has sufficient access rights to customize workflows.
- Make sure you have learned how to add dialog boxes, as described in Workflow Elements: General Information.
- Make sure you have completed the Diagram View: To Specify Combo Box Values for States activity.
Step 1: Creating a Dialog Box for the Accept Action
In this step, you will create a dialog box that will be displayed when a user clicks the Accept button or the corresponding command on the Opportunities (CR304000) form. Do the following in the Customization Project Editor for the Opportunities customization project:
- In the navigation pane, click .
- On the Dialog Boxes pane of the CR304000 (Opportunities) Dialog Boxes page, which opens, click the plus button. The system opens a dialog box, New Dialog Box, so that you can specify the name of the dialog box.
- In the Dialog Box Name box of the dialog box, type FormAccept, and click OK.
- On the Dialog Boxes pane, click the name of the added dialog box.
- In the Title box on the right pane, enter Details.
- Save your changes.
Step 2: Adding Fields to the Dialog Box for the Accept Action
In this step, you will add the Reason and
Stage boxes to the dialog box for the
Accept action. While you are still on the CR304000
(Opportunities) Dialog Boxes page with the FormAccept dialog box selected, do
the following:
- In the Dialog Box Fields table, click Add
Row on the table toolbar, and specify the following settings in
the added row:
- Schema Field:
PX.Objects.CR.CROpportunity.Resolution
This is the name of the field that corresponds to the Reason box on the Opportunities (CR304000) form.
- Field Name: Reason
- Title: Reason (specified automatically)
- From Schema: Selected
- Default Value: In Process
- Required: True
- Column Span: 1
- Schema Field:
PX.Objects.CR.CROpportunity.Resolution
- Save your changes.
- Specify the combo box values for the field as follows:
- On the table toolbar, click Combo Box Values.
- In the Combo Box Values dialog box, which opens, select Specify Explicitly in the Source of Values box.
- In the table, which appears in the dialog box, select the check boxes in the Active column for the IP (In Process) and SV (Service) values.
- Click OK to close the dialog box.
- Save your changes.
- In the Dialog Box Fields table, click Add
Row on the table toolbar again, and specify the following
settings in the added row:
- Schema Field:
PX.Objects.CR.CROpportunity.StageID
This is the name of the field that will correspond to the Stage box in the UI.
- Field Name: Stage
- Title: Stage (specified automatically)
- From Schema: Cleared
- Default Value: Cleared
- Required: Cleared
- Column Span: 1
- Schema Field:
PX.Objects.CR.CROpportunity.StageID
- Save your changes.
- On the page toolbar, click Preview Dialog Box.
The dialog box should look as shown in the following screenshot.
Figure 1. The Details dialog box for the Accept action 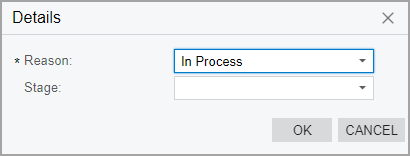
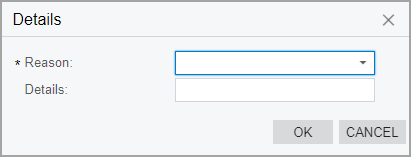
Step 3: Creating a Dialog Box for the Reject Action—Self-Guided Exercise
In this self-guided exercise, you will add a dialog box for the
Reject action with the FormReject name
and the Details title.
You need to add to the dialog box the following fields:
- ReasonThe field has the following settings in the Dialog Box Fields table:
- Schema Field: PX.Objects.CR.CROpportunity.Resolution
- Field Name: Reason
- Title: Reason (specified automatically)
- From Schema: Selected
- Default Value: Cleared
- Required: True
- Column Span: 1
- Details
The field has the following settings in the Dialog Box Fields table:
- Schema Field: PX.Objects.CR.CROpportunity.Details
- Field Name: Details
- Title: Details (specified automatically)
- From Schema: Cleared
- Default Value: Cleared
- Required: Cleared
- Column Span: 1
The dialog box should look as shown in the following screenshot.
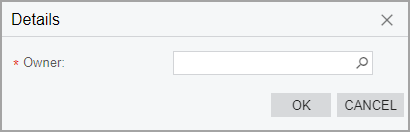
Step 4: Creating a Dialog Box for the Assign Action—Self-Guided Exercise
In this self-guided exercise, you will add a dialog box for the
Assign action with the FormAssign name
and the Details title.
You need to add to the dialog box the Owner field of the
PX.Objects.CR.CROpportunity.OwnerID schema field, which is
required in the dialog box. That is, when a user clicks the button or command
corresponding to the Assign action, the user will need to select
the owner of the opportunity in this dialog box.
The dialog box should look as shown in the following screenshot.