Parts of a Map
An MYOB Advanced form with a map consists of several basic parts. The following screenshot shows a typical MYOB Advanced form with the parts of a map on it.
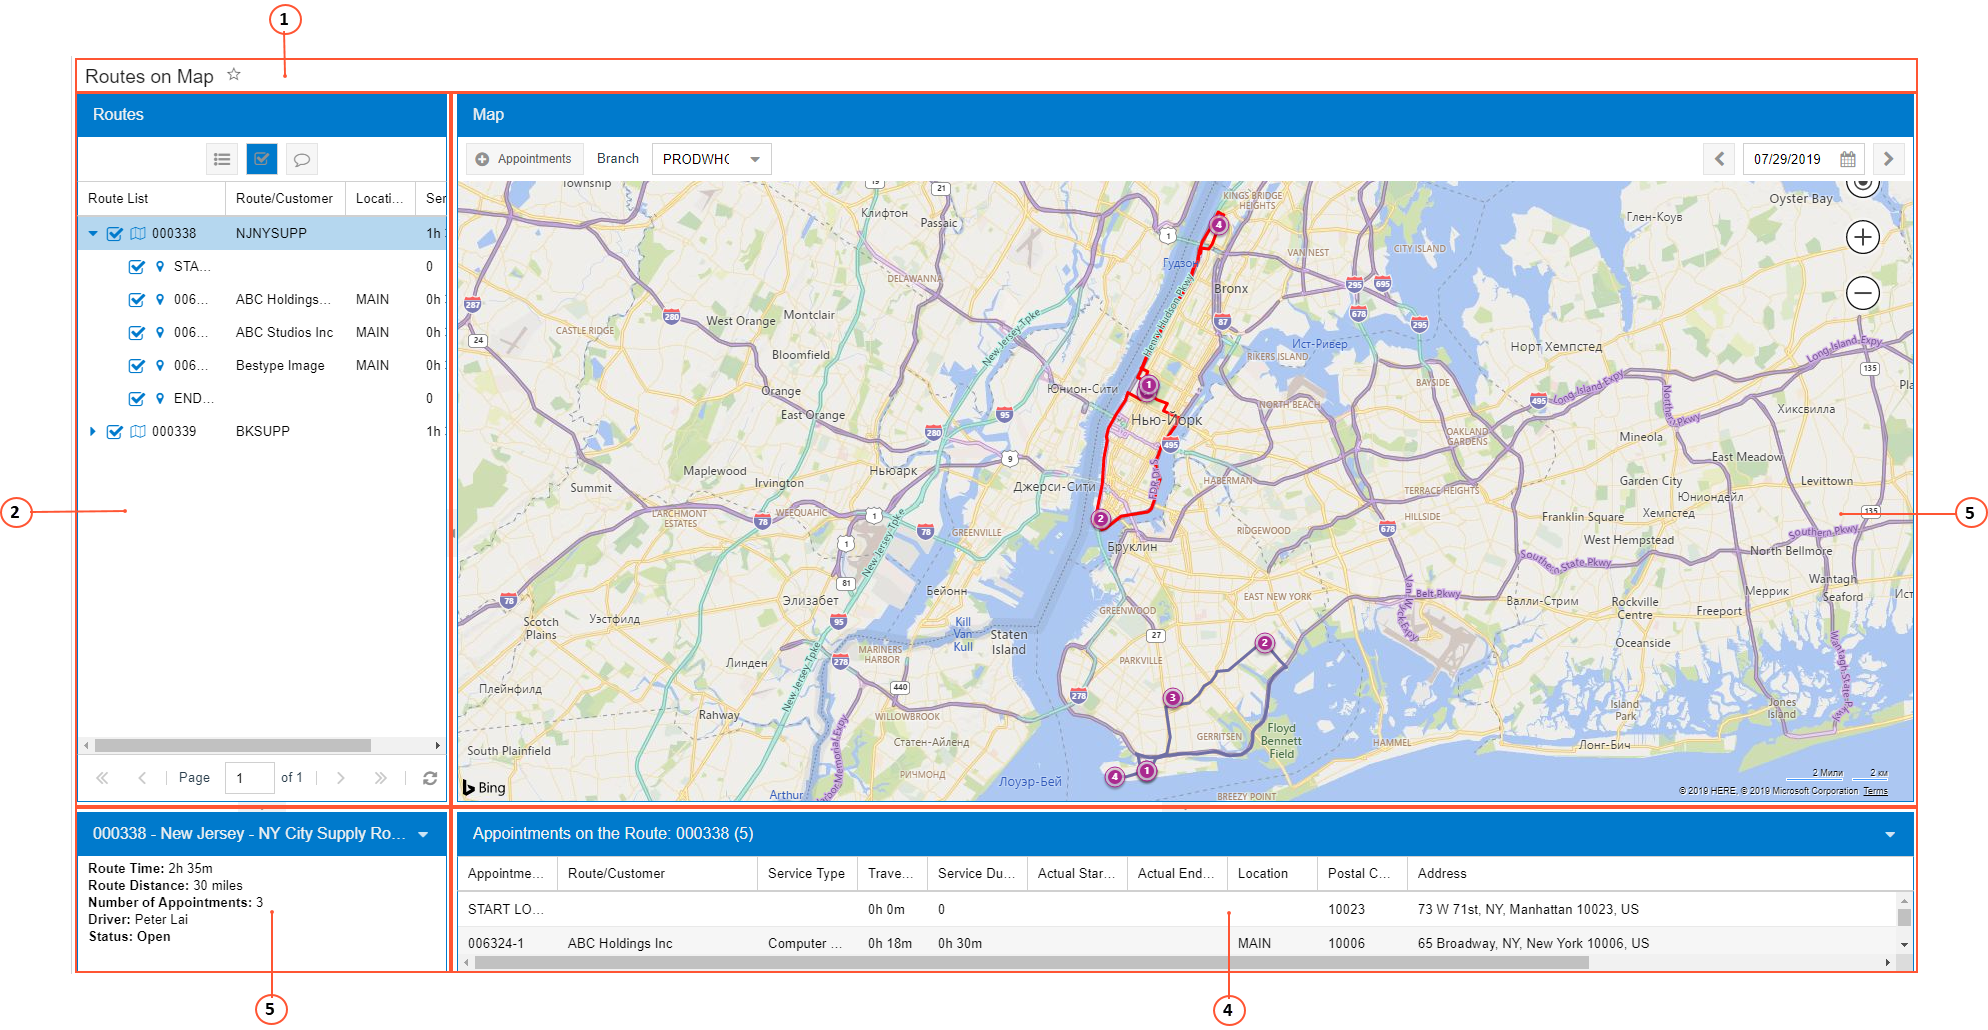
- Form title bar
- Pane with appointments (Routes or Staff)
- Map pane
- Route Information pane
- Appointment Information pane
Form Title Bar
This bar includes the title of the map.
Pane with Appointments
This pane displays the list of appointments for a particular branch and a particular day, grouped by the staff member assigned to them or grouped by the route execution they are related to.
You can hide this pane by clicking on the arrow right of the pane. For details, see Hide Button.
Map Pane
The map pane contains the map area and the map toolbar. The map area displays the appointments of the selected day on a Bing map, filtered by the staff member or the route execution selected on the Staff or Routes tab.
The map toolbar can contain standard and form-specific elements. If a map toolbar includes specific elements, they are described in the relevant form reference topic. The following table describes the standard map buttons that may be found on a particular map toolbar.
| Button | Icon | Description |
|---|---|---|
| Appointments |
Opens the Appointments (FS300200) form, where you can create a new appointment. To create an appointment by using this button, a default service order type has to be specified on the User Profile form or on the Service Management Preferences (FS100100) form. |
|
| Previous Day or Date Range |
|
Shows the map the day before the date indicated on the Day button (if you are viewing a day), a week before the date range indicated on the Date Range button (if you are viewing a week), or a month before the date range indicated on the Date Range button (if you are viewing a month). |
| Date or Date Range |
Displays the map for a particular date on the calendar. To manually change the date, click this button and change the date in the Calendar dialog box. For details, see Calendar Dialog Box. |
|
| Next Day or Date Range |
|
Shows the map the day after the date indicated on the Day button (if you are viewing a day), a week after the date range indicated on the Date Range button (if you are viewing a week), or a month after the date range indicated on the Date Range button (if you are viewing a month). |
Route Information Pane
You can hide this pane by clicking on the arrow right of the pane. For details, see Hide Button.