The following activity will walk you through the process of adding a new box to a
form.
Story
Suppose that management has determined that MYOB Acumatica would better fit the needs of your company if employees could specify the type of
a customer’s address on the Customers (AR303000)
form. The field that contains the address type is already available in the system.
You need to add the corresponding box to the form.
Process Overview
You will do the following to add a box for the customer's address type to the Customers (AR303000) form:
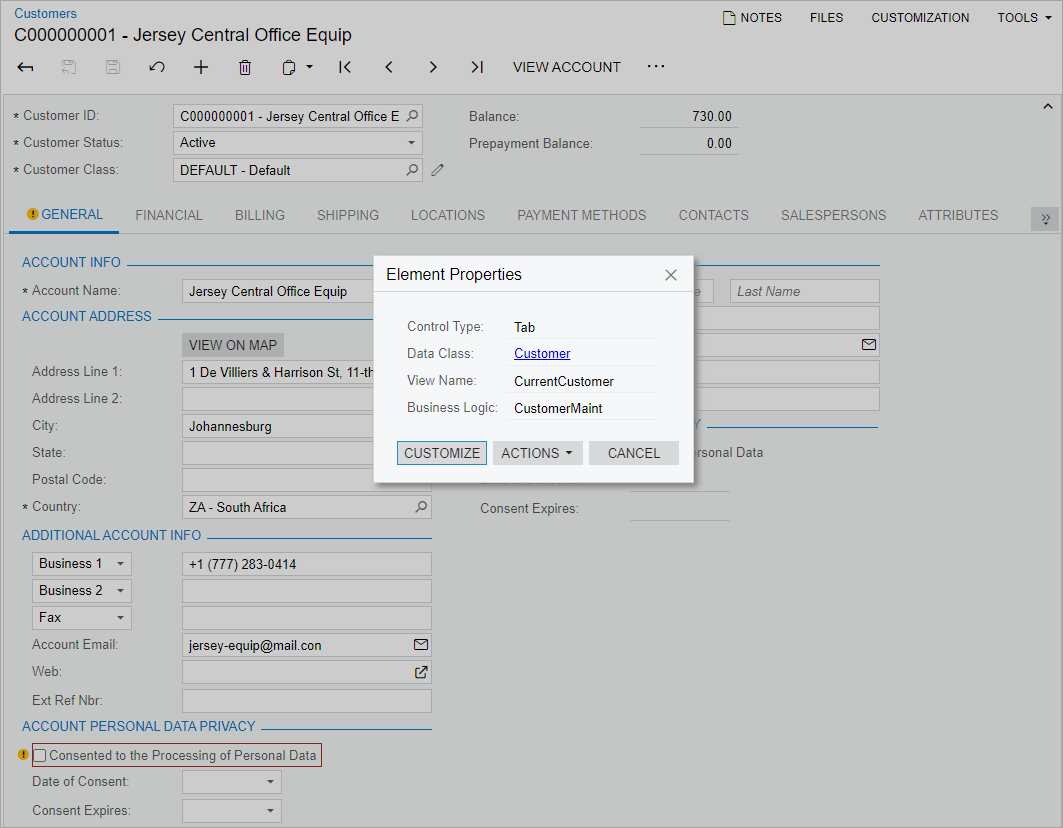
By using the form as a starting point, use the Element Inspector dialog box to open the Screen Editor page for the form.
Add the field to the form on the Screen Editor
page.
Configure the added field's properties on the Screen Editor page, and then publish the
customization project.
Before you begin performing the steps of this activity, do the following:
Prepare an MYOB Acumatica instance by performing the Customization Projects: To Deploy an Instance
prerequisite
[1]Tatiana.DavydovaThis activity includes signing-in, change of password, and branch selection2023/09/2014:32:06+03:00activity.
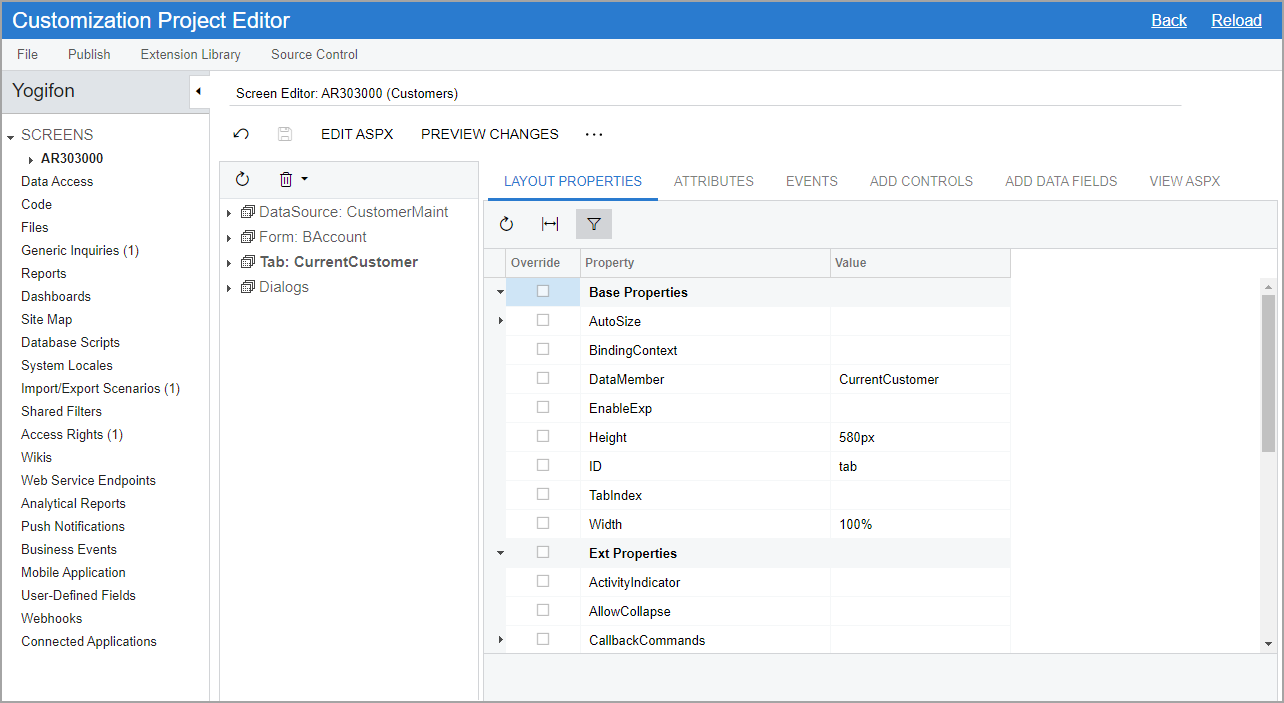
Figure 2. The Screen Editor page for the Customers form [2]Tatiana.Davydovaupdate: new pages2025/04/0122:10:21+02:00
Notice that in the name that appears on the page, Screen Editor: (AR303000)
Customers, Screen Editor: is followed by the ID of the form being
customized and then the form name in parentheses.
Also notice that the Screens node on the navigation pane can
be expanded. To open the Screen Editor page for any
form that has been added to the customization project, you expand the
Screens node and then click the form ID beneath it.
In this step, you will add the box containing the address type to the
Account Address section of the
General tab of the Customers (AR303000) form. Do the following:
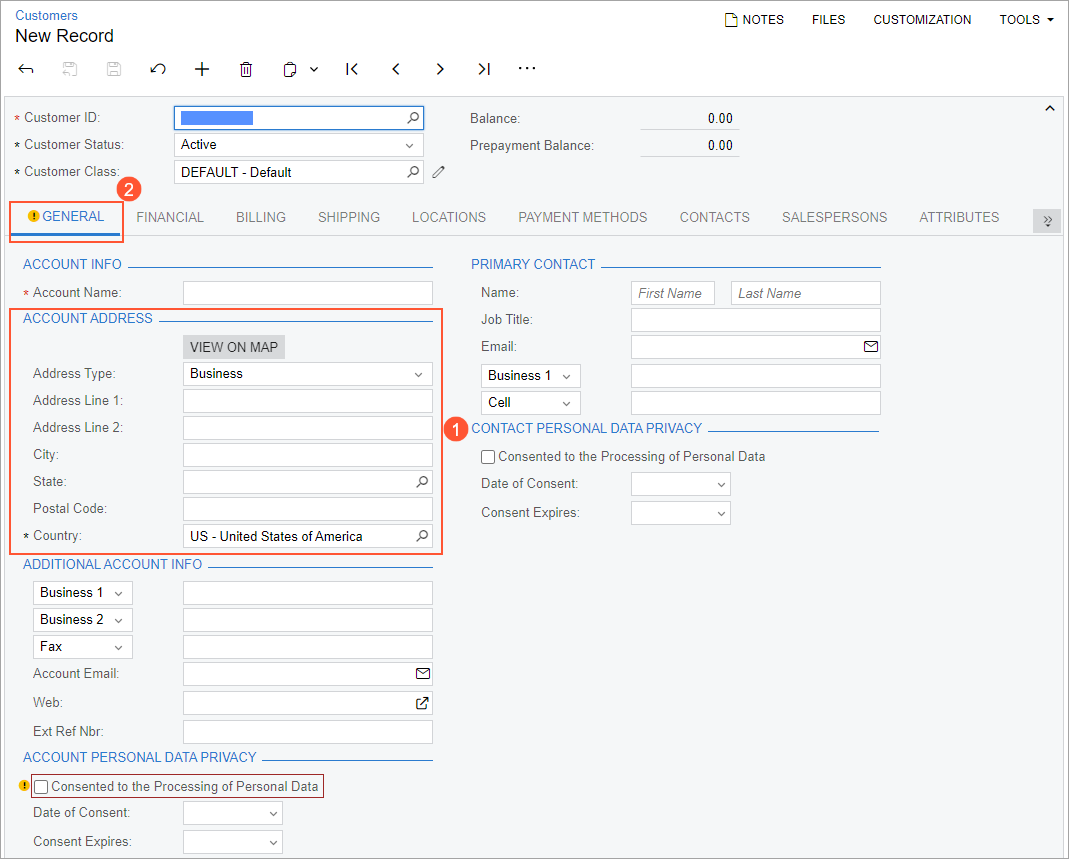
On the Customers form, locate the
Account Address section (see Item 1 in the following
screenshot).
It is located in the first column of the
General tab (Item 2). Locating the section on the
tab will help you to find it in the control tree of the Screen Editor page.
Figure 3. The location of the Account Address section [3]Tatiana.DavydovaThe "Consented to ..." check box is highlighted in the system (until the user selects this check box).2023/10/0615:00:34+03:00
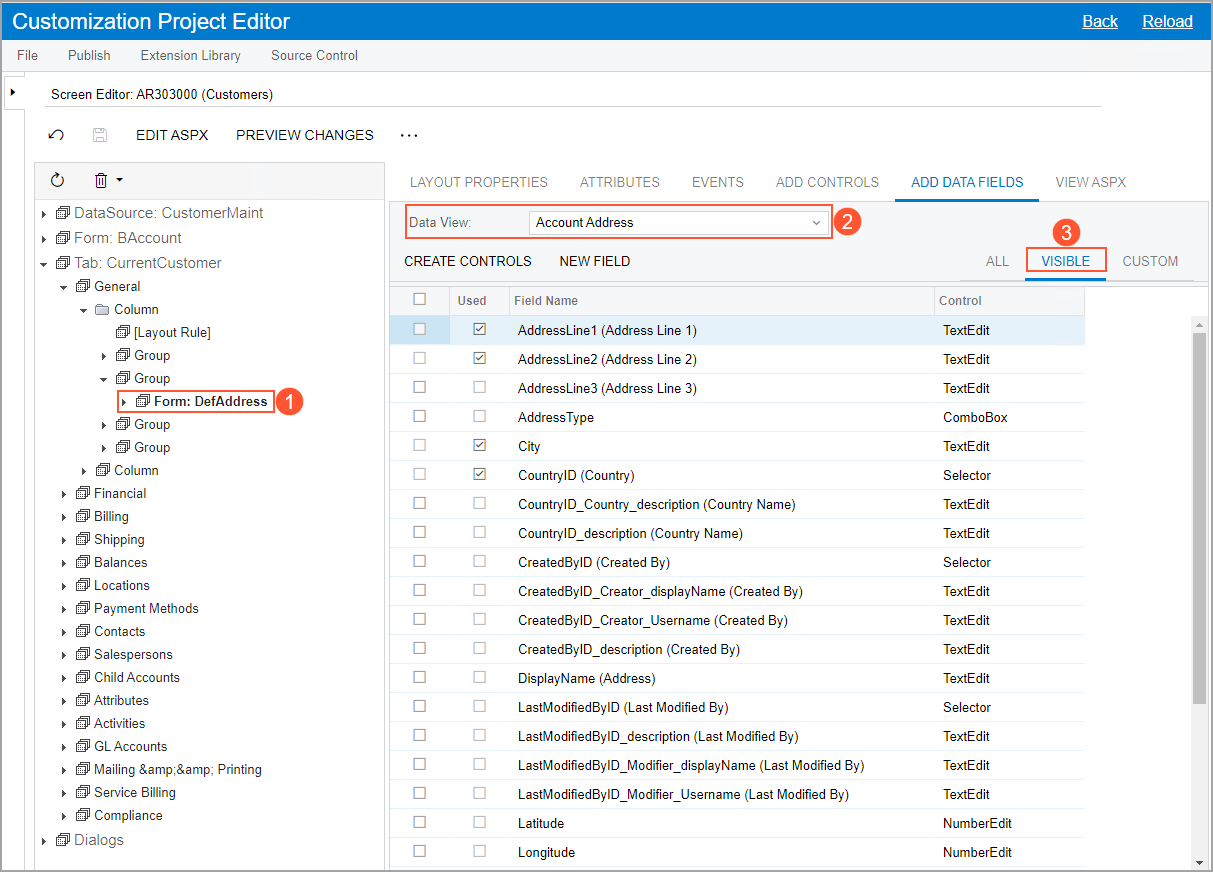
In the navigation pane of the Customization Project Editor, click Screens > AR303000.
In the control tree of the page, click the node corresponding to the
Main Address section as follows: Tab: CurrentCustomer > General > Column (first) > Group (second) > Form: DefAddress (see Item 1 in the screenshot below).
Tip: If needed,
you can use the Element Inspector to open the Account
Address section in the Screen Editor.
Go to the Add Data Fields tab.
Make sure that the
Account Address data view is selected (Item 2) and that you are
viewing the Visible filter tab (Item 3).
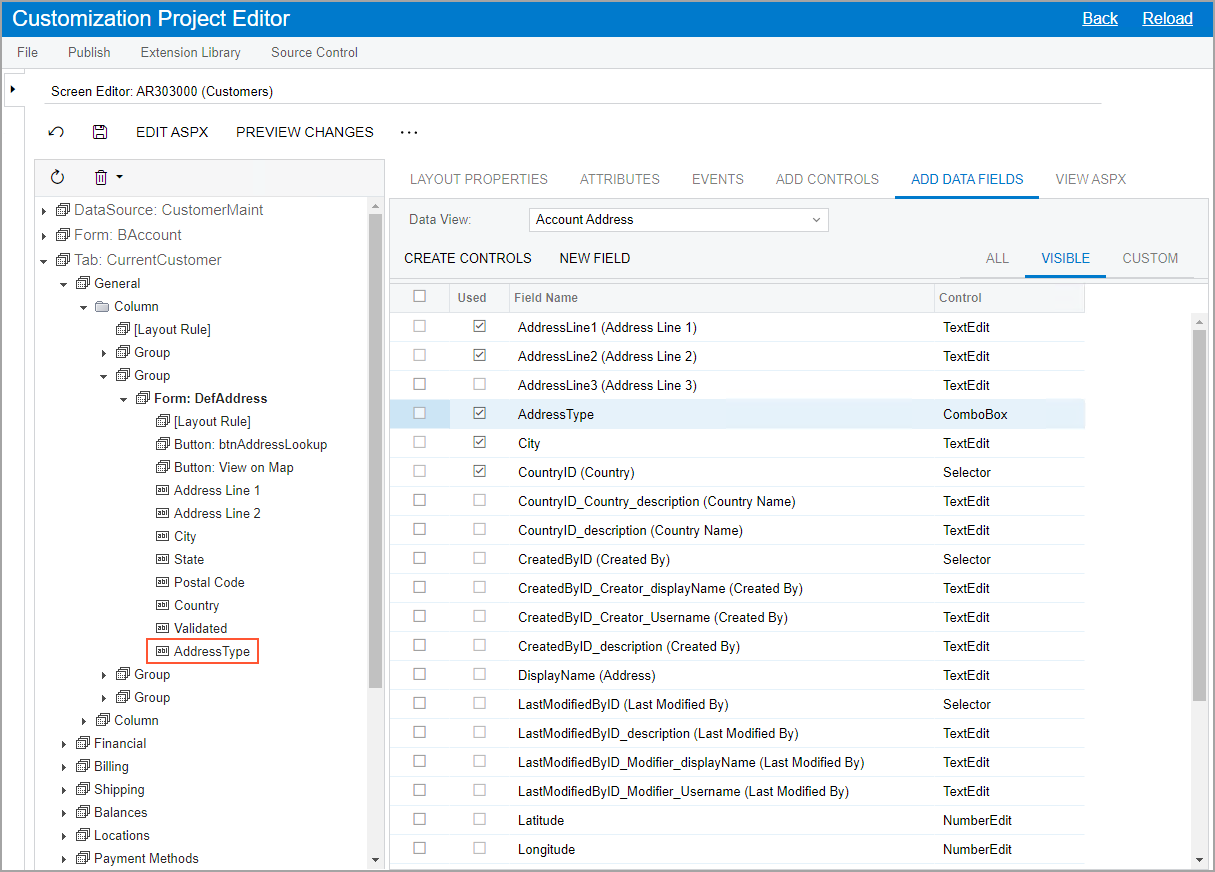
Figure 4. The Add Data Fields tab
The table on this tab shows all UI elements that are available for the
selected control—in this case, the Account
Address section of the Customers form. These UI elements are
determined by the Account Address data view. For details on data
views, see Data View.
In the table, select the unlabeled check box in the row with the
AddressType field (which represents the Address
Type box on the form).
On the table toolbar, click Create Controls.
The
AddressType node appears in the control tree, as
shown in the following screenshot. Notice that it is listed below the other
nodes at its level.
Figure 5. Addition of the AddressType field
On the page toolbar, click
Save.
Step 3: Adjusting the Properties of the New Box
In this step, you will specify the position and name of the Address
Type box. Do the following:
While you are still on the Screen Editor page, in
the control tree, click the AddressType node.
Adjust the position of the node by dragging it: Place the node before the
Address Line 1 node, as shown in the following
screenshot.Figure 6. Placement of the new element in the control tree
With this placement, the Address Type box will
be shown above the Address Line 1 box on the
form.
Save your changes.
Now you can specify the name for the added field.
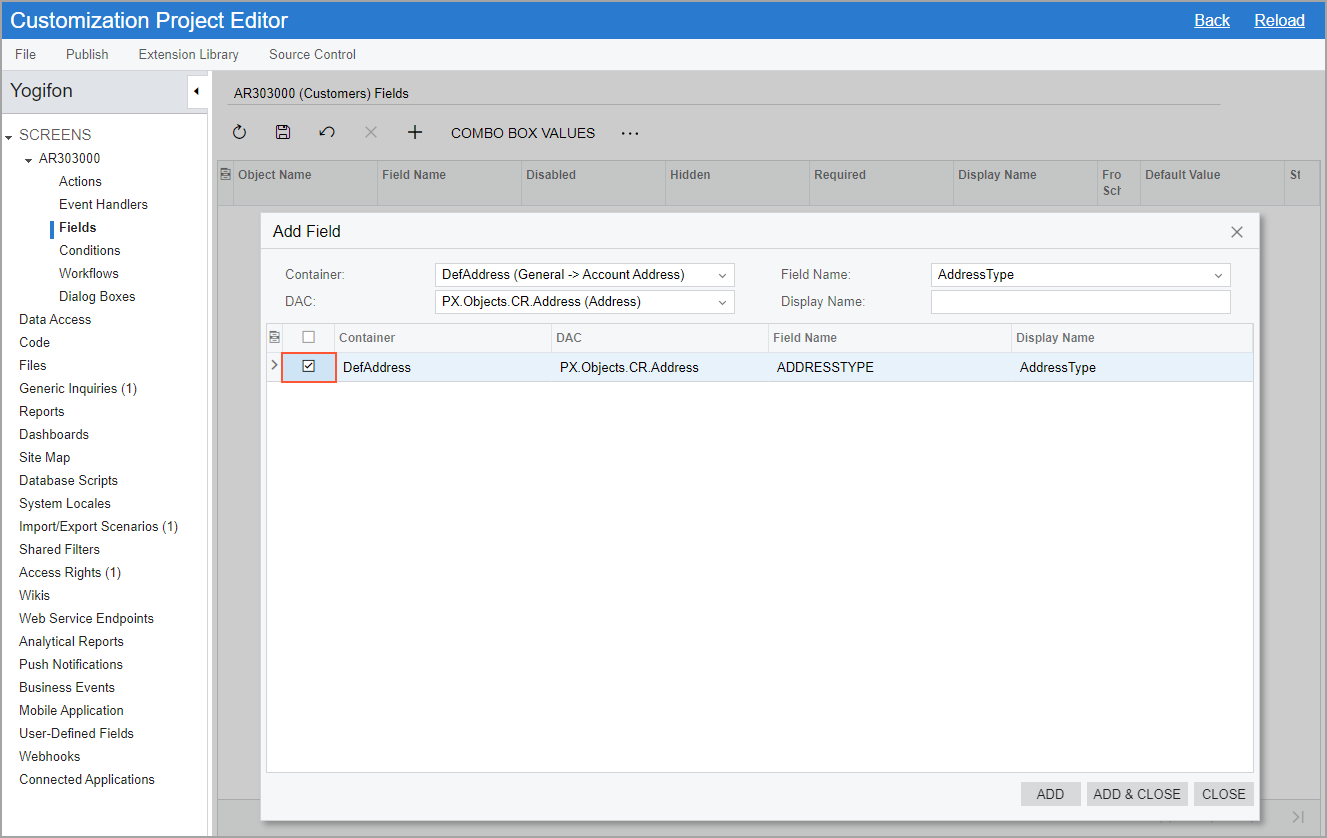
In the navigation pane, click Screens > AR303000 > Fields.
Select the unlabeled check box in the row with the added field.
The settings
should look as shown in the following screenshot.
Figure 7. Add Field dialog box [4]TanyaCan enter Display Name here but it does not appear in the table; need to enter it manually in the table2021/03/0211:54:00+03:00
Click Add & Close to apply your changes.
The dialog
box is closed, and a row for the added field appears in the table on the
page.
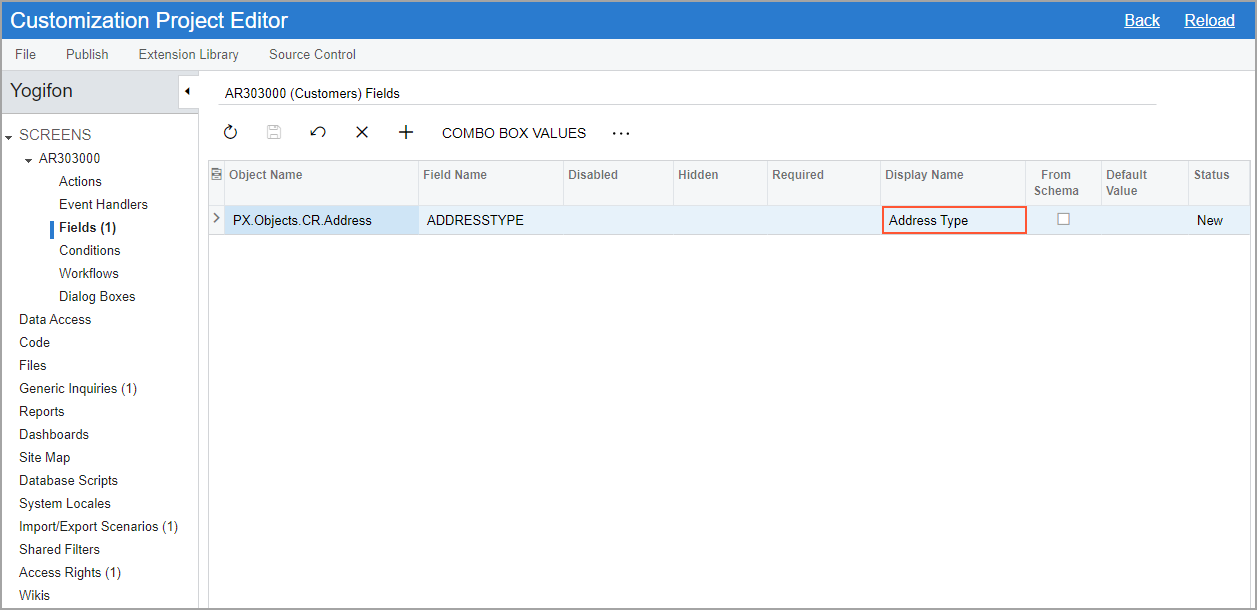
In the Display Name column of the row for the field,
enter Address Type, as shown in the following
screenshot.
This name will be displayed on the Customers (AR303000) form for the box that
corresponds to the added field.
Figure 8. Fields page of the screen
On the page toolbar, click
Save.
To apply the changes to the instance, on the main menu of the Customization
Project Editor, click Publish > Publish Current Project.
Wait until the Website updated row appears in the
Compilation pane, and click Close
Compilation Pane.
Step 4: Testing the New Element
To test the box added to the Customers (AR303000)
form in MYOB Acumatica, do the following:
On the Customers form of MYOB Acumatica, open the record with the C000000001 customer ID.
Important: If the record is already open, refresh the
page.
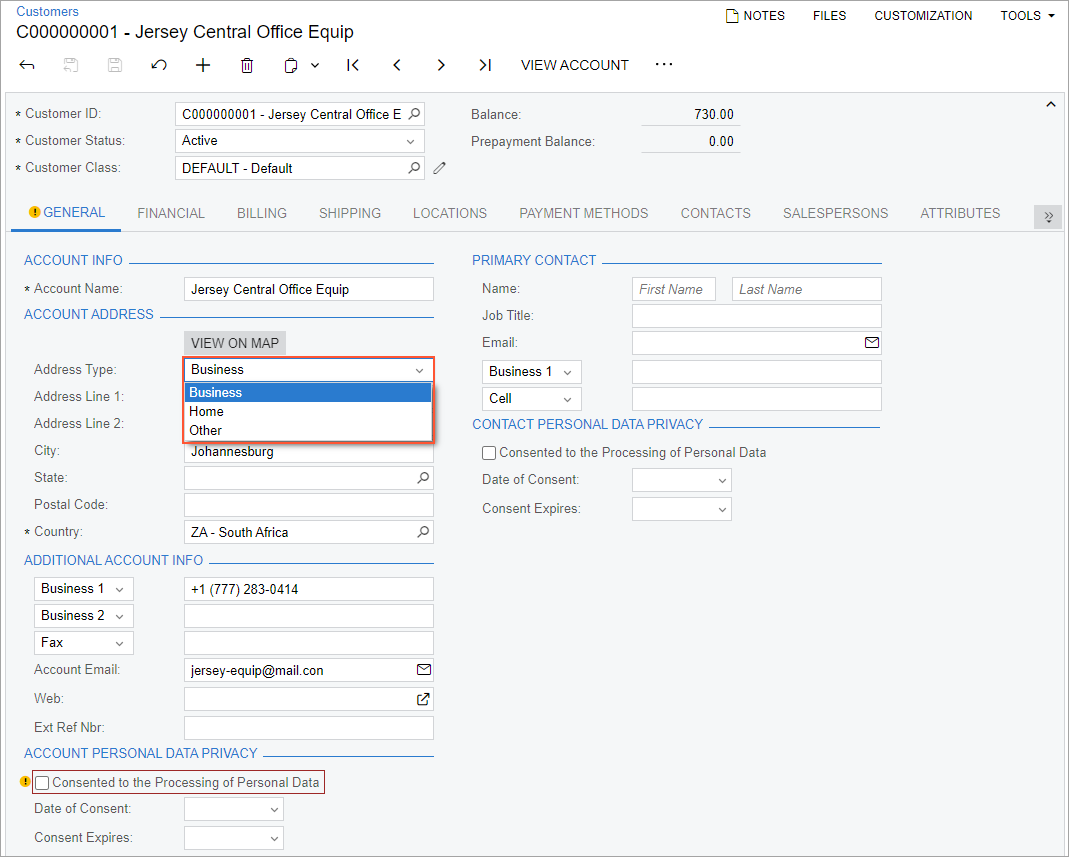
In the Account Address section of the
General tab, make sure the Address
Type box is displayed above the Address Line
1 box, and view the list of options (see the following
screenshot).Figure 9. The Address Type box on the Customers form [5]Tatiana.Davydovaremove or move to General Info?2023/06/1515:42:15+03:00
Tip:The list of options available in a box is defined by the
[AddressTypes.List()] attribute and the
AddressTypes class. The default value is determined by
the PXDefault attribute. You can see the list of
attributes of a field by exploring the Attributes tab
of the Screen Editor page for the
AddressType element. For details, see Working with Attributes or
refer to the T200 Development: Maintenance Forms training
course[6]Tatiana.Davydova"Enabled" indicates whether the element can be edited (not hidden or visible).
'Validated' is not visible on the form because the 'Address Validation Integration' feature is disabled on the Enable/Disable Features form.2023/06/1321:26:09+03:00.