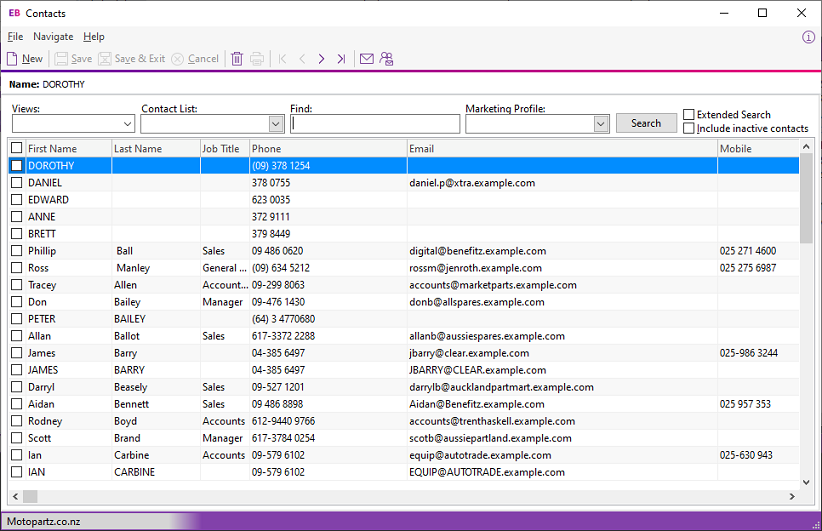
Contacts Master
You can view all account Contacts in the Contacts Master window. Open the window by selecting Contacts from the Account menu.
Note: To view the Contacts associated with an account, click the Contacts tab.

The Contacts master window displays these details for all Contacts:
|
Field |
Description |
|
First and Last Name |
The contact's first and last names. |
|
Job Title |
The contact's job title. |
|
Phone |
The contact's primary landline phone number. |
|
|
The contact's email address. |
|
Mobile |
The contact's primary mobile phone number. |
|
Company Name |
The company name for the Contact. This defaults to the company (Debtor, Creditor or Non Account) selected when you created the Contact. |
-
Search for a Contact by entering search terms in the Search Key field and clicking the Search button.
-
You can filter the list of Contacts by Contact List. You can select multiple classes.
-
You can filter the list of Contacts by Marketing Class. You can select multiple classes.
-
Double click on a Contact to edit it, or click the New button to create a Contact.
-
Click the
 button to send an email to the selected Contact(s).
 -
Click the
 button to create and
send a Clarity merge letter to the selected Contact(s).
Right click on a Contact to:
-
Send Email - Send an email to the Contact. This option is not available if the contact doesn't have an email address.
-
New Opportunity - Create an Opportunity for the Contact.
-
New Activity - Create an Activity for the Contact.
-
Selected Items > Export to Outlook - Export the details of all selected Contacts to Microsoft Outlook. This option is only available if Exo Business CRM is licensed.
-
Selected Items > Merge Letter with List - Create a merge letter to send to the selected Contacts.
-
Selected Items > Add to Contact List - Select a Contact List to which to add the Contact . This option is only available if Exo Business CRM is licensed.
