- Contents
- Index
- Search

Show results that include all search words
Creditors Payment Processor Setup
Account > Creditor Payment Processor
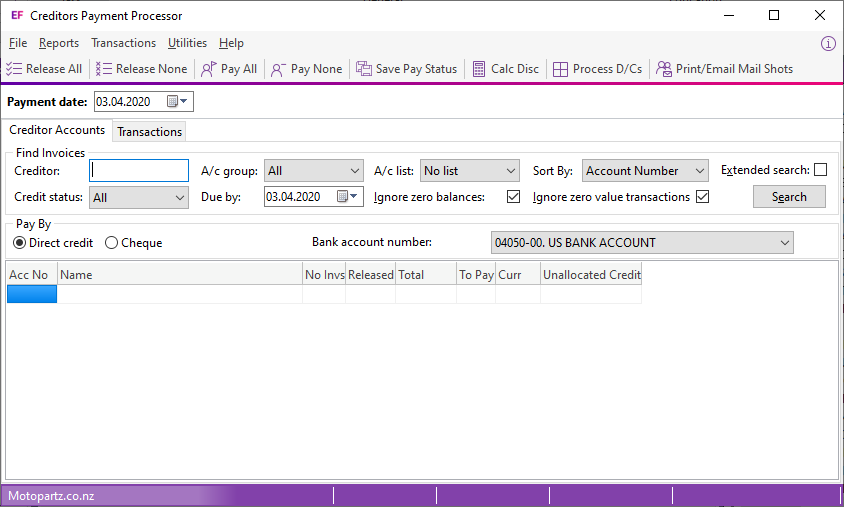
This screen displays when you start the Creditor Payment Processor:
You must set up general information before you can use the application. Select Utilities > General Setup. This window displays:
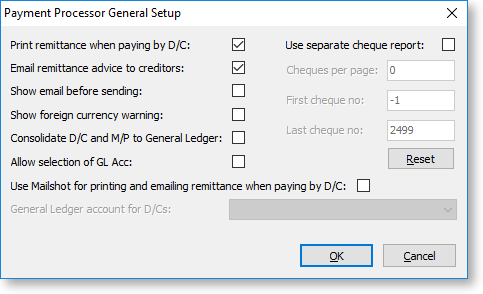
Configure these options:
|
Field |
Description |
|
Print Remittance when paying by D/C |
Select this option to enable the printing of remittance advice notes which you can mail to creditors. |
|
Email Remittance advice to Creditors |
Select this option to enable emailing of remittance advice notes to creditors. Emailing remittance advice requires an external email account set up on the computer that runs the Payment Processor. You must also set up the email address in the Creditors Account Details window. |
|
Show email before sending |
Select this option to display the email on the screen before sending it to the creditor. |
|
Show foreign currency warning |
Select this option to highlight foreign currency creditor payments in red and to display a warning that the current selection contains foreign currency creditors. |
|
Consolidate D/C to General Ledger |
If you batch process direct credits to creditors, select this option to make one entry into the General Ledger for that list of payments. The General Ledger account is the bank account that is updated with the consolidated entry. This consolidation is posted to the current period in the General Ledger. |
|
Allow selection of GL Acc |
Select this option to specify the Direct Credits GL account. |
|
Use Mailshot for printing and emailing remittance when paying by D/C |
Select this option to launch the Mailshot window after processing Direct Credits.
|
|
General ledger account for D/Cs |
Enter the account to use for Direct Credits. This option is enabled if the Allow selection of GL Acc option is selected. |
|
Use Separate Cheque Report |
Select this option to print cheques on one sheet and remittance advices separate forms. Note: If the Use Separate Cheque Report option is selected, the FinPPSeqChqRep.CLF Clarity form is used as well as the standard FinChqWr.CLF. |
|
Cheques per Page |
Select this option to print cheques separately from the remittance. It determines how many cheques you can print at the same time. For example, an A4 sheet of paper may contain three cheques. To use this option, you must enable the Use separate check report option. |
|
First cheque number |
This is only available when you click the Reset button. Enter the start of the range for the cheques to use. |
|
Last cheque number |
This is only available when you click the Reset button. Enter the end of the range for the cheques to use. |
|
Reset |
Click the Reset button to enter of the range of the cheques to use. If a cheque inside that range exists in the creditor’s database, the range is rejected. |